# Contexts and Dependency Injection (CDI)
[Jakarta Contexts and Dependency Injection](https://jakarta.ee/specifications/cdi/) (CDI) is a specification for declarative dependency injection and supporting services.
Procedure: Enable the Jakarta EE: Contexts and Dependency Injection (CDI) plugin
This functionality relies on the [Jakarta EE: Contexts and Dependency Injection (CDI)](https://plugins.jetbrains.com/plugin/20204) plugin, which is bundled and enabled in IntelliJ IDEA by default. If the relevant features are not available, make sure that you did not disable the plugin.
> **Note:**
> The Jakarta EE: Contexts and Dependency Injection (CDI) plugin is not available in IntelliJ IDEA without the Ultimate subscription.
1. Press `Ctrl+Alt+S` (Windows), `⌘ Comma` (macOS), `⌘ Comma` (IntelliJ IDEA Classic (macOS)), `⌘ Comma` (macOS System Shortcuts), `Ctrl+Alt+S` (XWin), `Ctrl+Alt+S` (GNOME), `Ctrl+Alt+S` (KDE), `Ctrl+Alt+S` (Emacs), `Ctrl+Alt+S` (Sublime Text), `⌘ Comma` (Sublime Text (macOS)), `Ctrl+Alt+S` (NetBeans), `Ctrl+Alt+S` (Visual Studio), `⌘ Comma` (Visual Studio (macOS)), `Ctrl+Alt+S` (Eclipse), `⌘ Comma` (Eclipse (macOS)) to open settings and then select `Plugins`.
2. Open the Installed tab, find the Jakarta EE: Contexts and Dependency Injection (CDI) plugin, and select the checkbox next to the plugin name.
You can enable CDI support when creating a new project or module, or add CDI support to an existing module.
Procedure: Create a new Jakarta EE project with CDI
1. Open the New Project wizard:
* If you are on the Welcome screen, click New Project.
* If you are in the IDE, go to `File | New | Project`.
2. From the Generators list, select Jakarta EE.
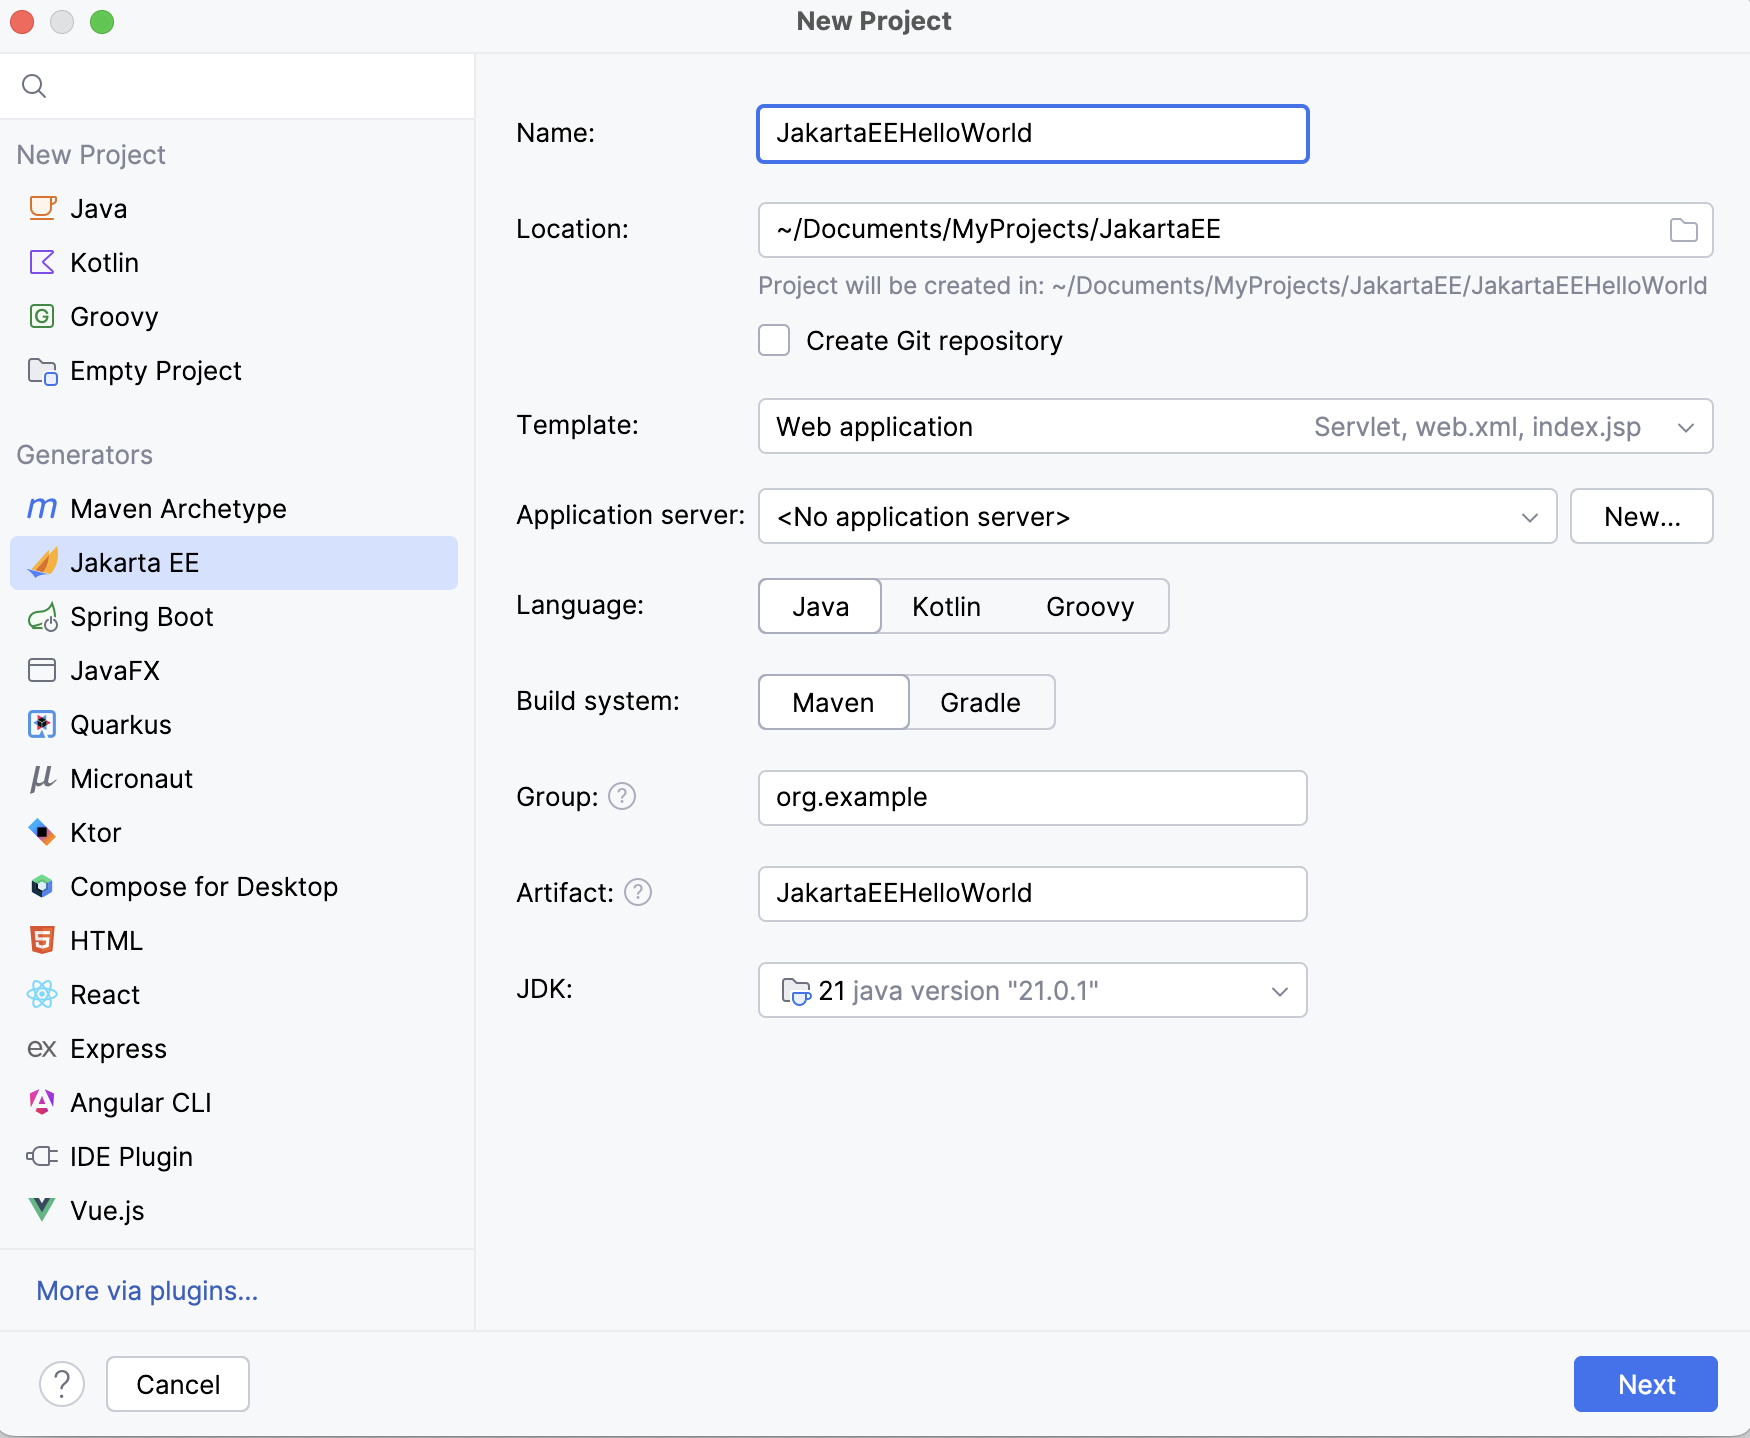
3. Set up the [Jakarta EE project settings](new-project-wizard.html#java-ee).
4. Go to the next step of the wizard. In the upper-left corner, select the Jakarta EE version you want to use.
5. From the Specifications list, select Contexts and Dependency Injection (CDI).
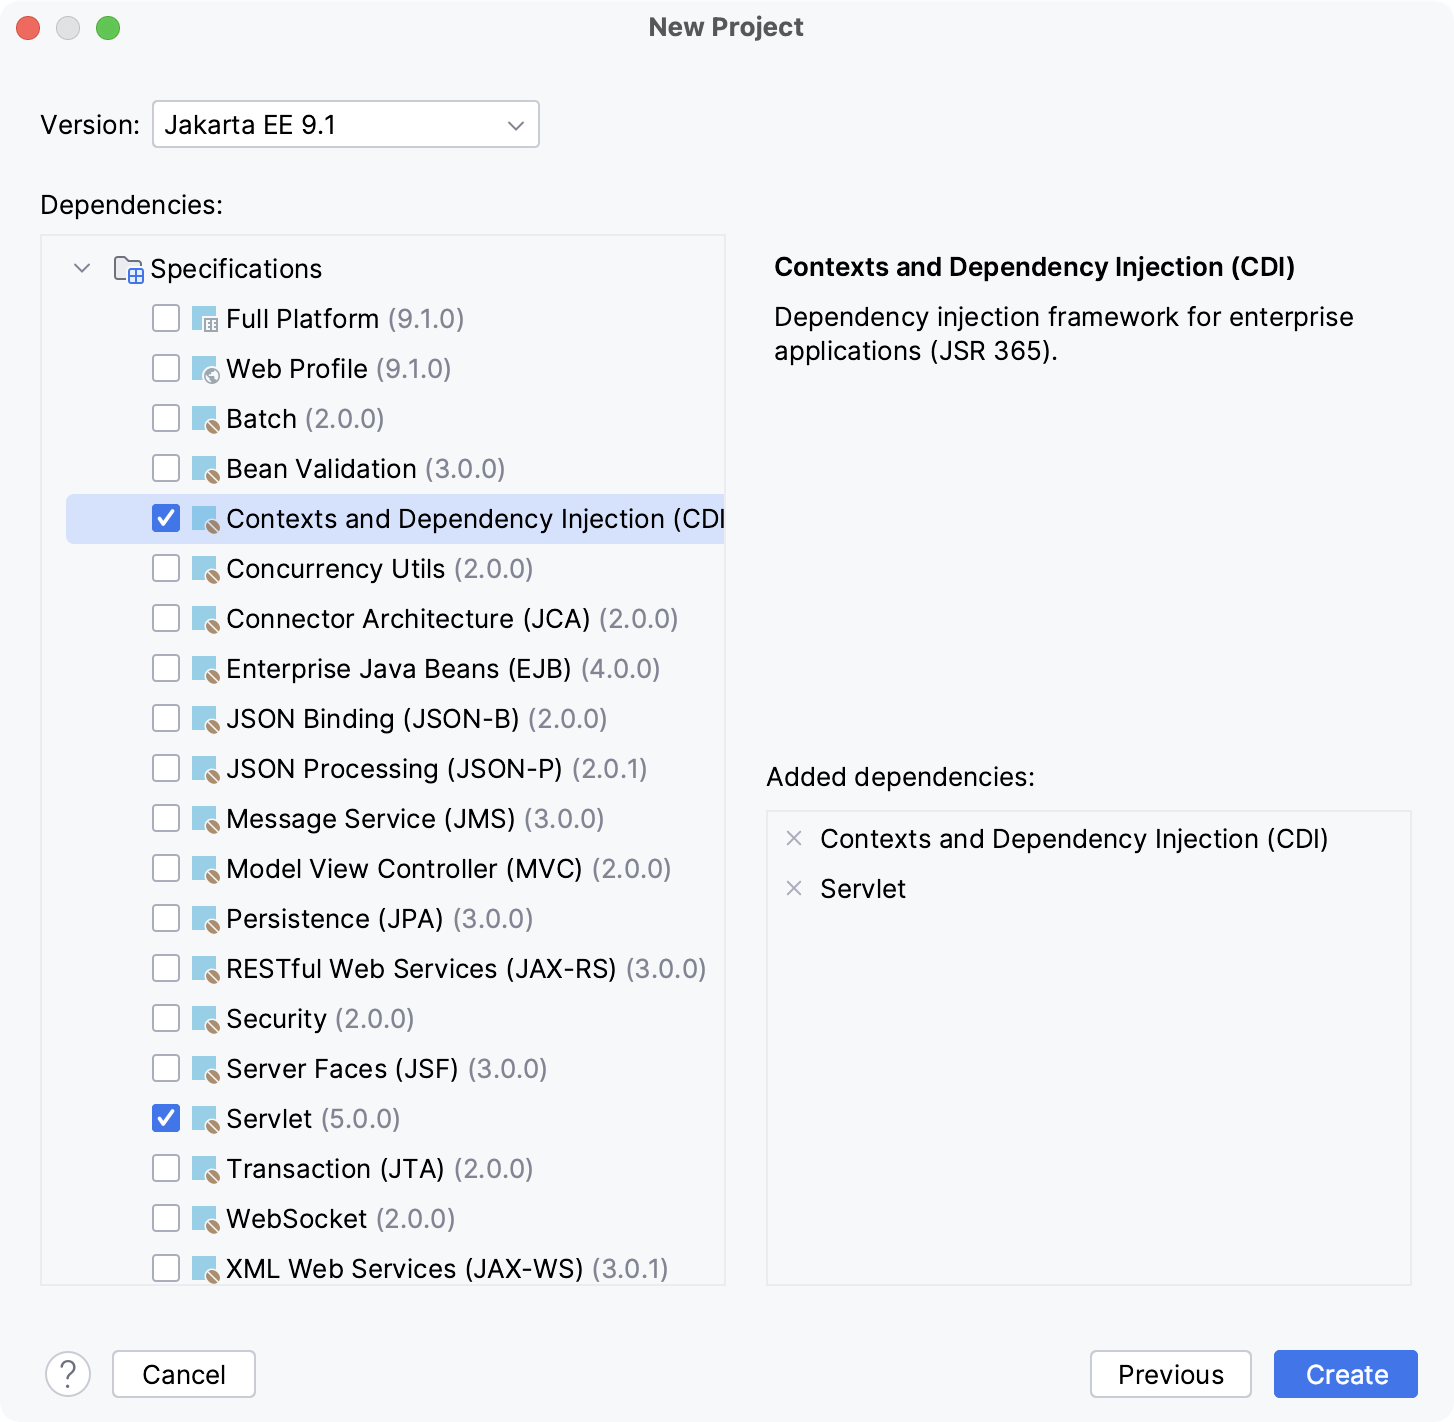
6. Click Create.
For more information about creating Jakarta EE projects, such as how to set up an application server, refer to [Tutorial: Your first Jakarta EE application](creating-and-running-your-first-jakarta-ee-application.html).
Procedure: Add CDI to an existing project
1. Open the build file in the editor (`pom.xml` or `build.gradle` depending on the [build tool](build-tools.html) used in your project).
2. Add the CDI library, and make sure its version matches the rest of your project:
Maven:
Jakarta EE
: ```XML
:
: jakarta.enterprise
: jakarta.enterprise.cdi-api
: 4.1.0
:
: ```
Java EE
: ```XML
:
: javax.enterprise
: cdi-api
: 2.0.SP1
:
: ```
Gradle (Groovy):
Jakarta EE
: ```GROOVY
: implementation 'jakarta.enterprise:jakarta.enterprise.cdi-api:4.1.0'
: ```
Java EE
: ```GROOVY
: implementation 'javax.enterprise:cdi-api:2.0.SP1'
: ```
Gradle (Kotlin):
Jakarta EE
: ```KOTLIN
: implementation("jakarta.enterprise:jakarta.enterprise.cdi-api:4.1.0")
: ```
Java EE
: ```KOTLIN
: implementation("javax.enterprise:cdi-api:2.0.SP1")
: ```
3. Press `Ctrl+Shift+O` (Windows), `Ctrl+Shift+O` (macOS), `Ctrl+Shift+O` (IntelliJ IDEA Classic (macOS)), `Ctrl+Shift+O` (macOS System Shortcuts), `Ctrl+Shift+O` (XWin), `Ctrl+Shift+O` (GNOME), `Ctrl+Shift+O` (KDE), `Ctrl+Shift+O` (Emacs), `Ctrl+Shift+O` (Sublime Text), `Ctrl+Shift+O` (Sublime Text (macOS)), `Ctrl+Shift+O` (NetBeans), `Ctrl+Shift+O` (Visual Studio), `Ctrl+Shift+O` (Visual Studio (macOS)), `Ctrl+Shift+O` (Eclipse), `Ctrl+Shift+O` (Eclipse (macOS)) to import the changes.
For more information about working with build tools, refer to [Maven](maven-support.html) or [Gradle](gradle.html).
## See also
### Reference
[Beans tool window](beans-tool-window.html)
### Procedures
[Maven](maven-support.html) [Gradle](gradle.html) [Tutorial: Your first Jakarta EE application](creating-and-running-your-first-jakarta-ee-application.html)