Modules
In IntelliJ IDEA, a module is an essential part of any project – it is created automatically together with a project. Projects can contain multiple modules – you can add new modules, group them, and unload the modules you do not need at the moment.
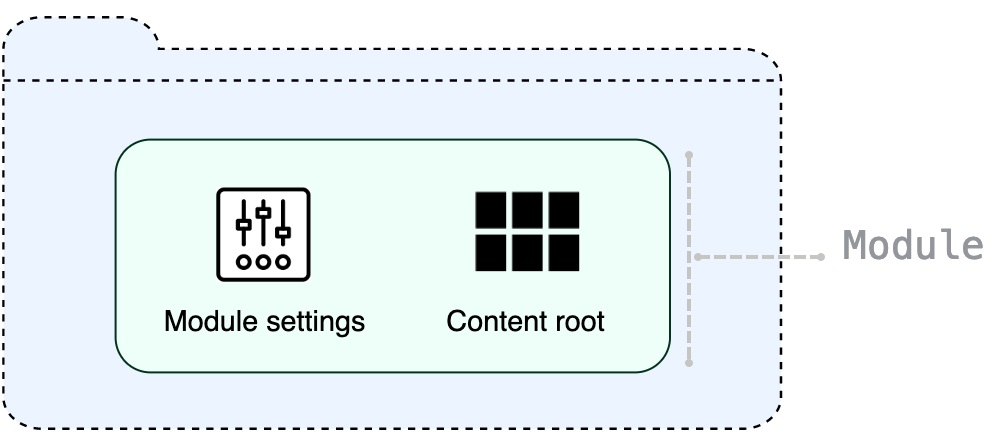
Generally, modules consist of one or several content roots and a module file, however, modules can exist without content roots. A content root is a folder where you store your code. Usually, it contains subfolders for source code, unit tests, resource files, and so on. A module file (the .iml file) is used for keeping module configuration.
Modules allow you to combine several technologies and frameworks in one application. In IntelliJ IDEA, you can create several modules for a project, and each of them can be responsible for its own framework. For more information, refer to Add frameworks (facets).

IntelliJ IDEA modules vs Java modules
In version 9, Java introduced the Java Platform Module System. IntelliJ IDEA had already had a concept of modules: every IntelliJ IDEA module built its own classpath. With the introduction of the new Java platform module system, there appeared two systems of modularity: the IntelliJ IDEA modules, and the new Java 9 modules that are configured using module-info.java. This documentation section describes IntelliJ IDEA modules.
For more information about Java 9 support, refer to the Support for Java 9 Modules in IntelliJ IDEA 2017.1 and Java 9 and IntelliJ IDEA blog posts.
Projects with multiple modules
IntelliJ IDEA allows you to have many modules in one project, and they do not all have to be Java. You can have one module for a Java application and another module for a Ruby on Rails application or for any other supported technology.
An application that consists of a client side and a server side is a good example of a two-module project.
Add a new module to your project
Select the top-level directory in the Project tool window. Click
on the toolbar or press Alt+Insert. Then select Module.
The New Module wizard opens.
From the list on the left, select the language that you want to use in your application.
If you want to use a language that is not available in IntelliJ IDEA out of the box (for example, Python or PHP), click More via plugins and select the necessary option.
The IDE will open a dialog in which you can select and install the necessary language plugin. After that, you can close the dialog and keep configuring the new project.
Name the new module.
Select the build system that you want to use in your project: the native IntelliJ builder, Maven, or Gradle.
For Gradle, you will also need to select a language for the build script: Groovy or Kotlin.
Select a JDK that you want to use from the JDK list. You can use the project SDK or specify a new one.
Click Create.
Import an existing module
You can import a module to your project by adding the .iml file from another project:
In the main menu, go to .
In the dialog that opens, specify the path the .iml file of the module that you want to import, and click Open.
By doing so, you are attaching another module to the project without physically moving any files. If you don't need the modules to be located in one folder, the module import is finished, and you can start working with the project normally.
Import a module from existing sources
Use these steps to import a project as a module if the project comes from an external model or if you want to create a module from the existing source code that is not necessarily an exported project.
In the main menu, go to .
Select the directory in which your sources, libraries, and other assets are located and click Open.
In the dialog that opens, select Create module from existing sources if you want to create a new module from the existing source code.
Otherwise, select Import project from external model, select the external model that the project uses, and follow the steps of the wizard.
Group modules
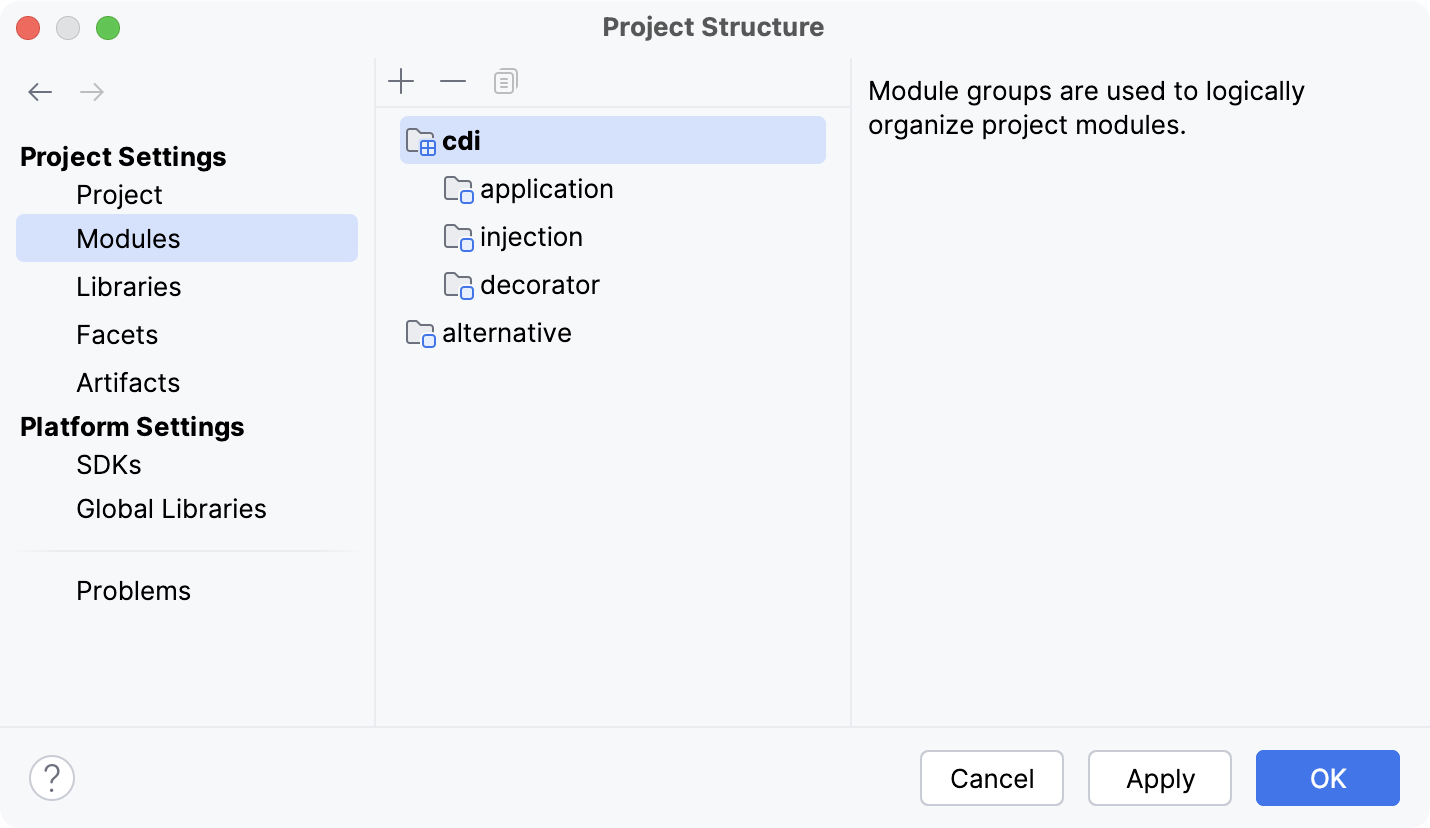
In IntelliJ IDEA, you can logically group modules. If you have a large project with multiple modules, grouping will make it easier to navigate through your project. Module groups can be nested: a group can contain other subgroups.
Create a new module group (deprecated)
In earlier versions (2017.2 and earlier), IntelliJ IDEA used explicit groups for joining modules together. If you've configured manual module groups, you will be able to continue working with them in later versions of the IDE. Alternatively, you can convert module groups and use qualified names instead.
In the Project tool window (Alt+1), select the modules that you want to group.
You can also do so on the Modules page of the Project Structure dialog (Ctrl+Alt+Shift+S).
From the context menu, select .
Name the new group and click OK.
The new group is now created and is marked with the
icon.
Select Outside Any Group to exclude the selected module from the group, To This Group to add the module to the group, or To New Subgroup to create a new group in another group.
Convert module groups to qualified names (deprecated)
In the main menu, go to .
In the next dialog, review the new module names and adjust them if necessary.
Apply the changes and close the dialog.
Group modules by fully qualified names
IntelliJ IDEA 2017.3 and later uses fully qualified names to group modules. For example, if you want to group all CDI modules, add the cdi prefix to their names.
Open the Project Structure dialog Ctrl+Alt+Shift+S and click Modules.
Select the modules you want to group, open the context menu, and click Change Module Names.
Specify a prefix and apply the changes.
If you are manually editing module names instead of using the dedicated Change Module Names action, ensure that you use a dot (
.) as a separator between the prefix and the module name. For instance renaming a module fromapplicationtocdi.applicationwill correctly group it under thecdicategory.To view all modules on the same level in the Project Structure dialog, use the Flatten Modules context menu option.
