# Deploy a Java web application inside an application server container
You can use Docker to run an application server (Tomcat, Wildfly, and so on) and deploy your Java web applications in it. This tutorial describes how to create a simple Java web application, build a deployable web application resource (WAR) file, and then deploy it inside application server running as a Docker container.
> **Note:**
> Before you begin, make sure to [install and run
> Docker](docker.html#install_docker), [enable the Docker plugin](docker.html#enable_docker_plugin), and [connect to the
> Docker daemon in
> IntelliJ IDEA](docker.html#connect_to_docker).
Procedure: Create a Java web application
1. In the main menu, go to `File | New | Project`.
2. In the New Project dialog, select Jakarta EE and do the following:
* Enter a name for your project: `DockerJavaWebApp`
* Select the Web application template
* Select a recent JDK for the project (OpenJDK 17 is a good choice)
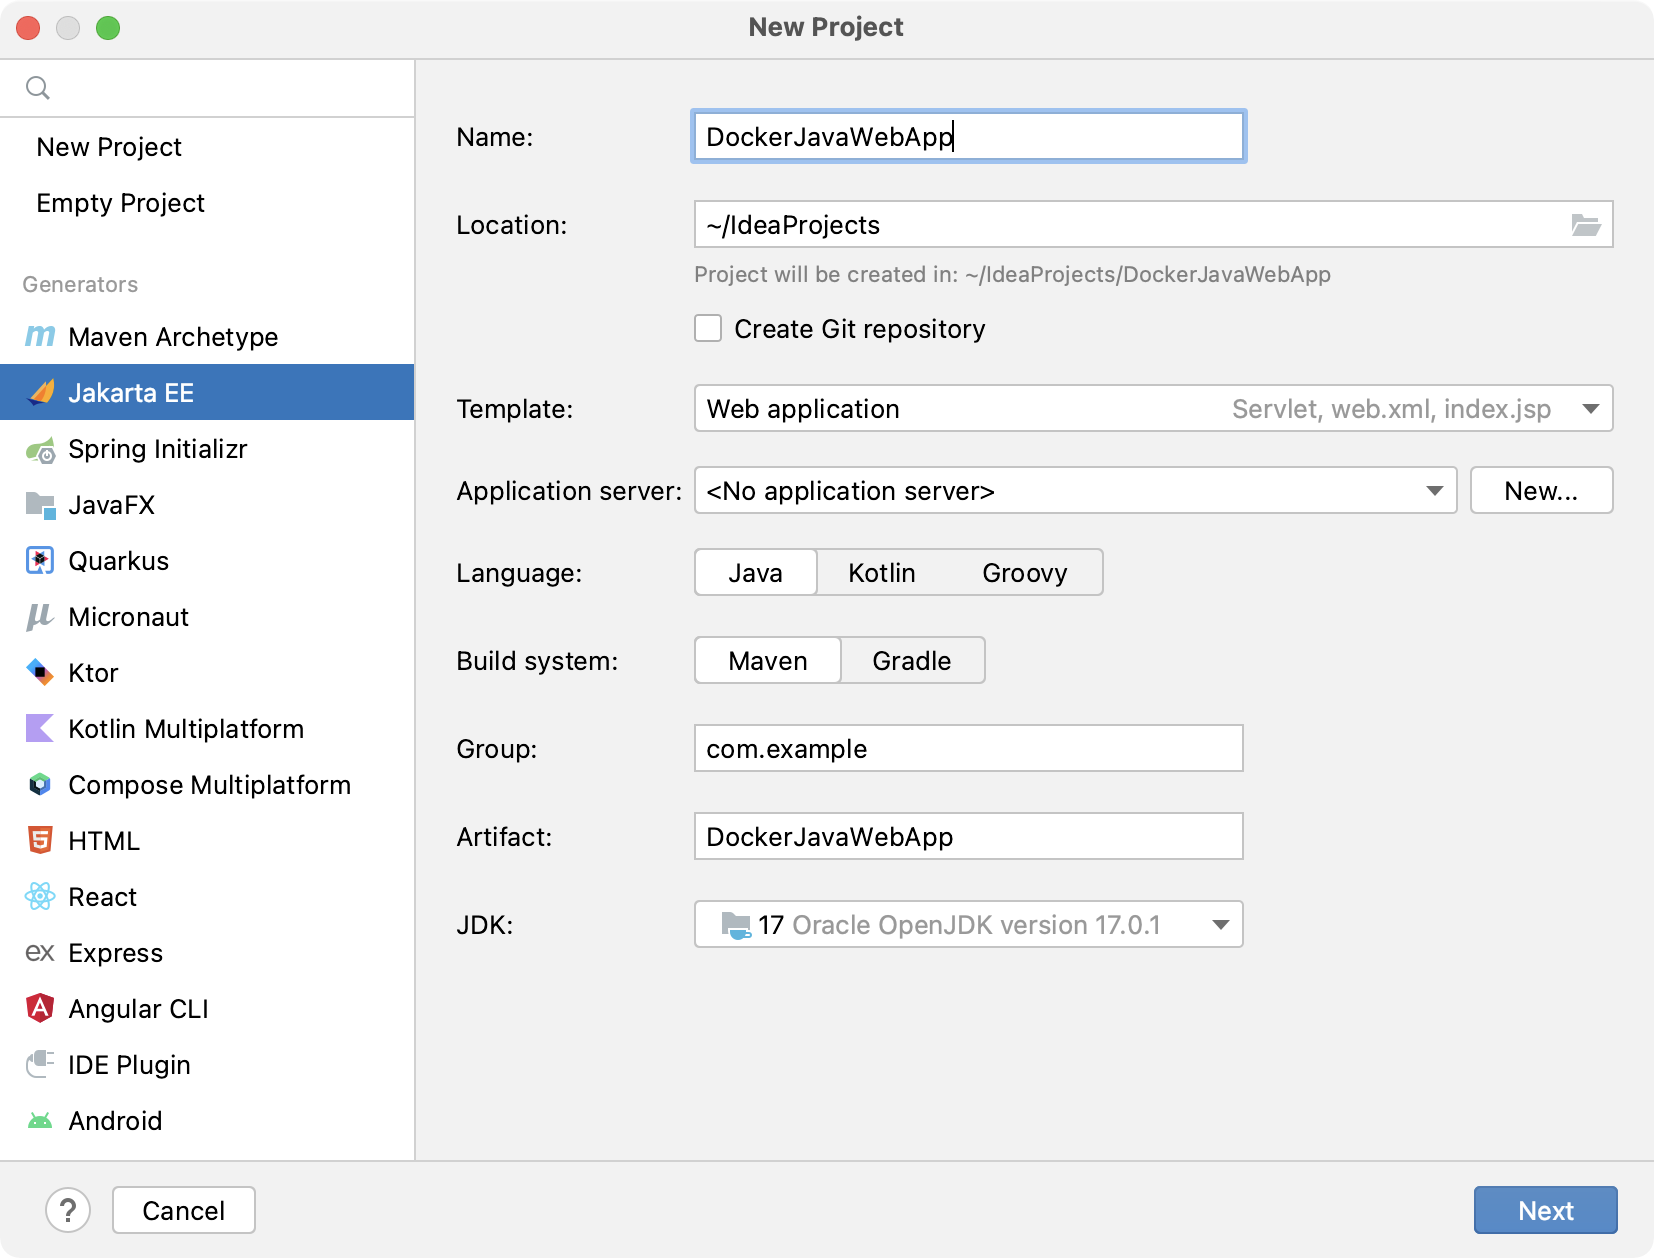
Click Next to continue.
3. On the next step of the wizard, select Jakarta EE 9 the Web Profile specification.
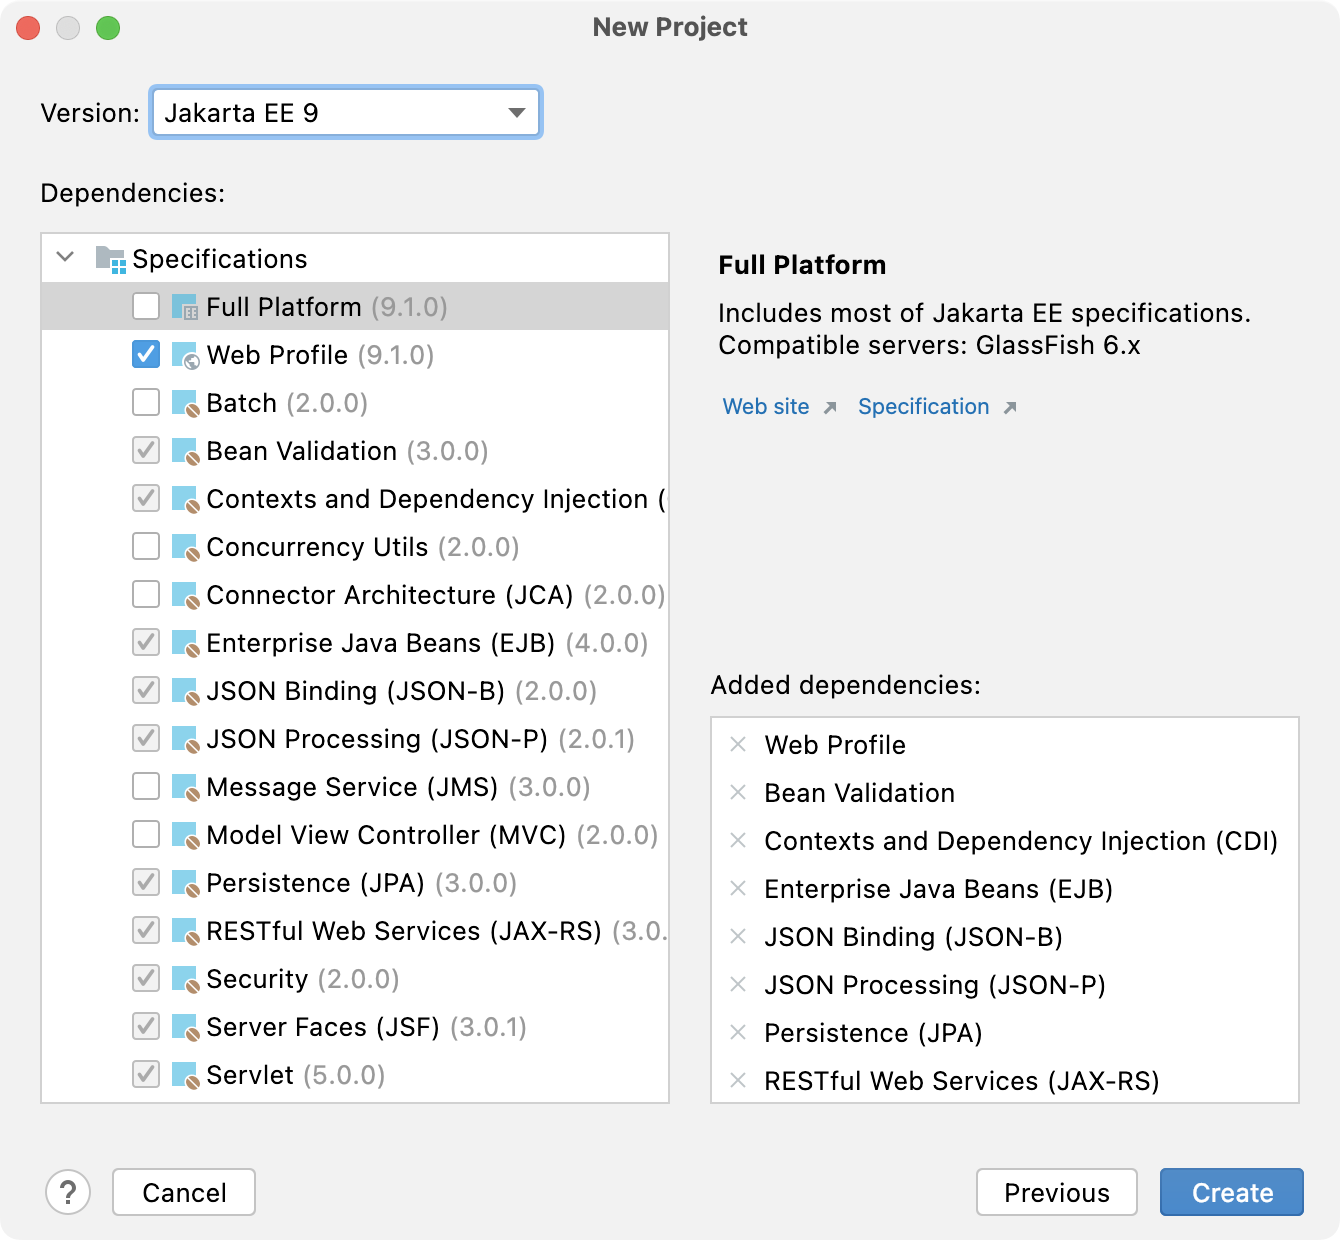
Click Create.
IntelliJ IDEA generates a default project with a Java web application that has the `index.jsp` home page and the `HelloServlet.java` class that responds to requests at `/hello-servlet`.
Procedure: Build a WAR artifact
After IntelliJ IDEA creates the new project, build a WAR artifact to deploy to the application server.
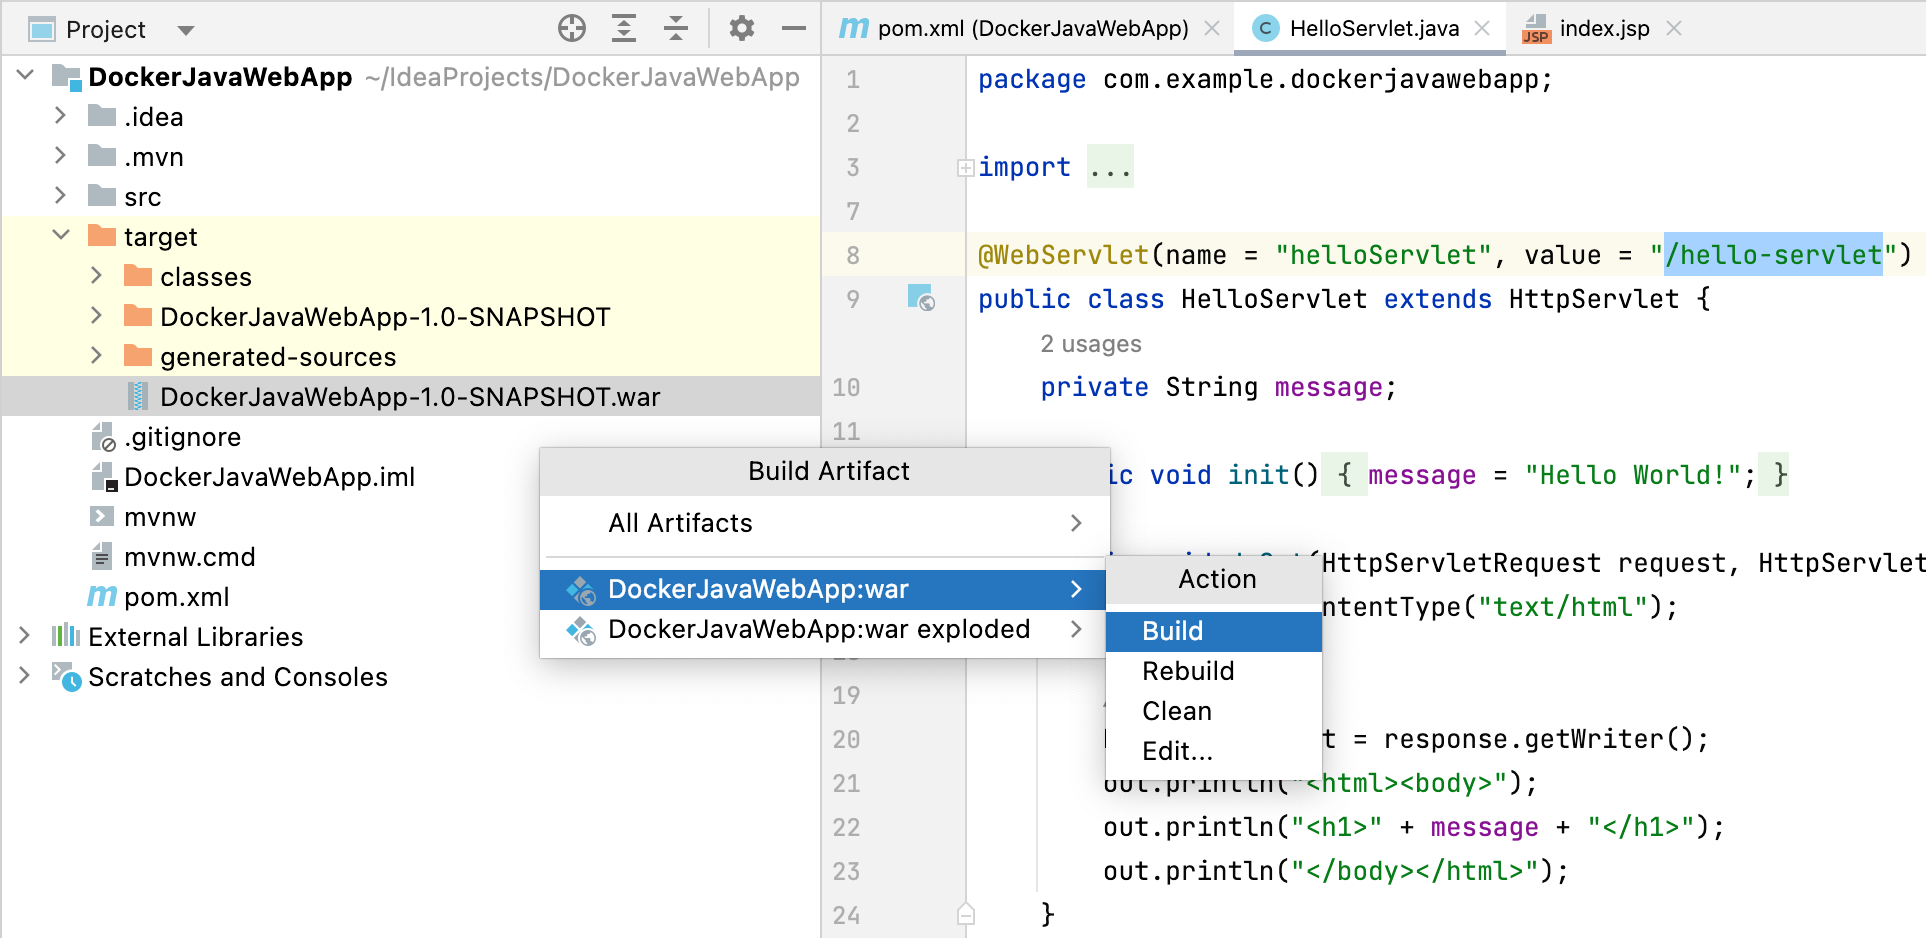
1. In the main menu, go to `Build | Build Artifacts`.
2. In the Build Artifact dialog, select to build the DockerJavaWebApp:war artifact.
You should see the artifact `target/DockerJavaWebApp-1.0-SNAPSHOT.war`.
Procedure: Pull the application server Docker image
1. Open the [Services](services-tool-window.html) tool window: `View | Tool Windows | Services` or `Alt+8` (Windows), `⌘ 8` (macOS), `⌘ 8` (IntelliJ IDEA Classic (macOS)), `⌘ 8` (macOS System Shortcuts), `Alt+8` (XWin), `Alt+8` (GNOME), `Alt+8` (KDE), `Alt+8` (Emacs), `Alt+8` (Sublime Text), `⌘ 8` (Sublime Text (macOS)), `Alt+8` (NetBeans), `Alt+8` (Visual Studio), `Alt+8` (Visual Studio (macOS)), `Alt+8` (Eclipse), `⌘ 8` (Eclipse (macOS)).
2. In the Services tool window, select the Images node, and then specify to pull the TomcatWildfly server image: `tomcat``jboss/wildfly`. Click Pull or press `Ctrl+Enter` (Windows), `Ctrl+Enter` (macOS), `Ctrl+Enter` (IntelliJ IDEA Classic (macOS)), `Ctrl+Enter` (macOS System Shortcuts), `Ctrl+Enter` (XWin), `Ctrl+Enter` (GNOME), `Ctrl+Enter` (KDE), `Ctrl+Enter` (Emacs), `Ctrl+Enter` (Sublime Text), `Ctrl+Enter` (Sublime Text (macOS)), `Ctrl+Enter` (NetBeans), `Ctrl+Enter` (Visual Studio), `Ctrl+Enter` (Visual Studio (macOS)), `Ctrl+Enter` (Eclipse), `Ctrl+Enter` (Eclipse (macOS)).
You should see the `tomcat:latest``jboss/wildfly:latest` image in the list of images in the Services tool window.
Procedure: Run a Docker container application server and deploy your application to it
1. In the Services tool window, right-click the `tomcat:latest``jboss/wildfly:latest` image and then click Create Container.
2. In the Create Docker Configuration dialog, do the following:
* Specify the name of the configuration: `TomcatConfig``WildflyConfig`
* Specify the name of the container: `TomcatContainer``WildflyContainer`
* Bind the container port 8080 to the host IP 127.0.0.1 and port 8080
* Map the WAR artifact output directory `[PROJECT_PATH]/target` to the TomcatWildfly server deployment directory: `/usr/local/tomcat/webapps``/opt/jboss/wildfly/standalone/deployments`.
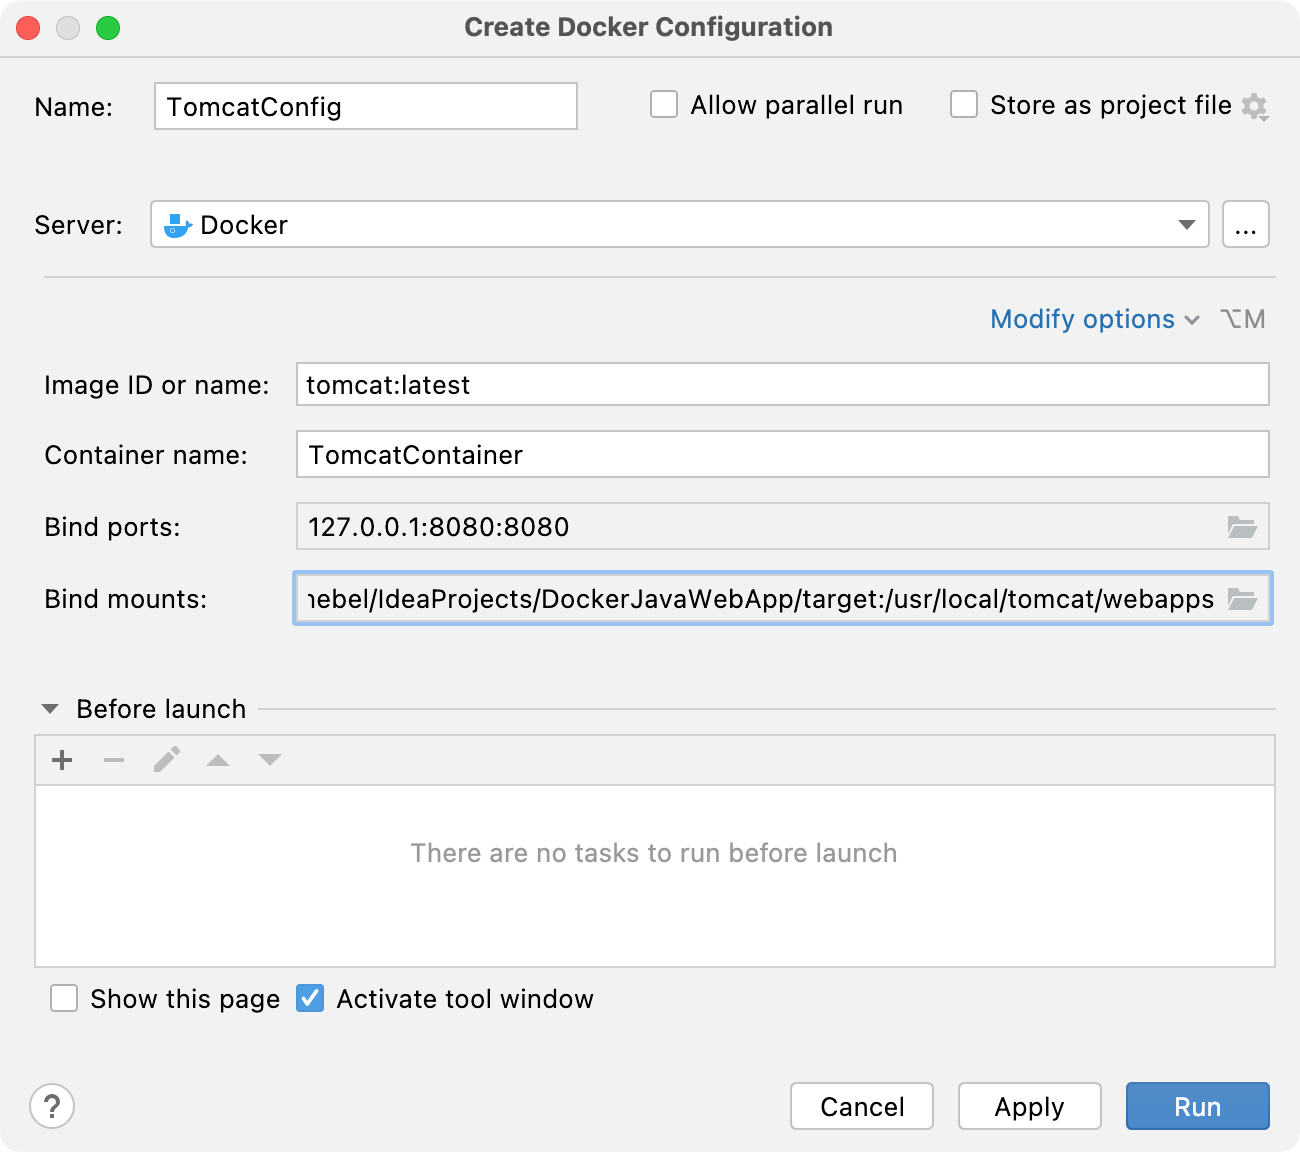
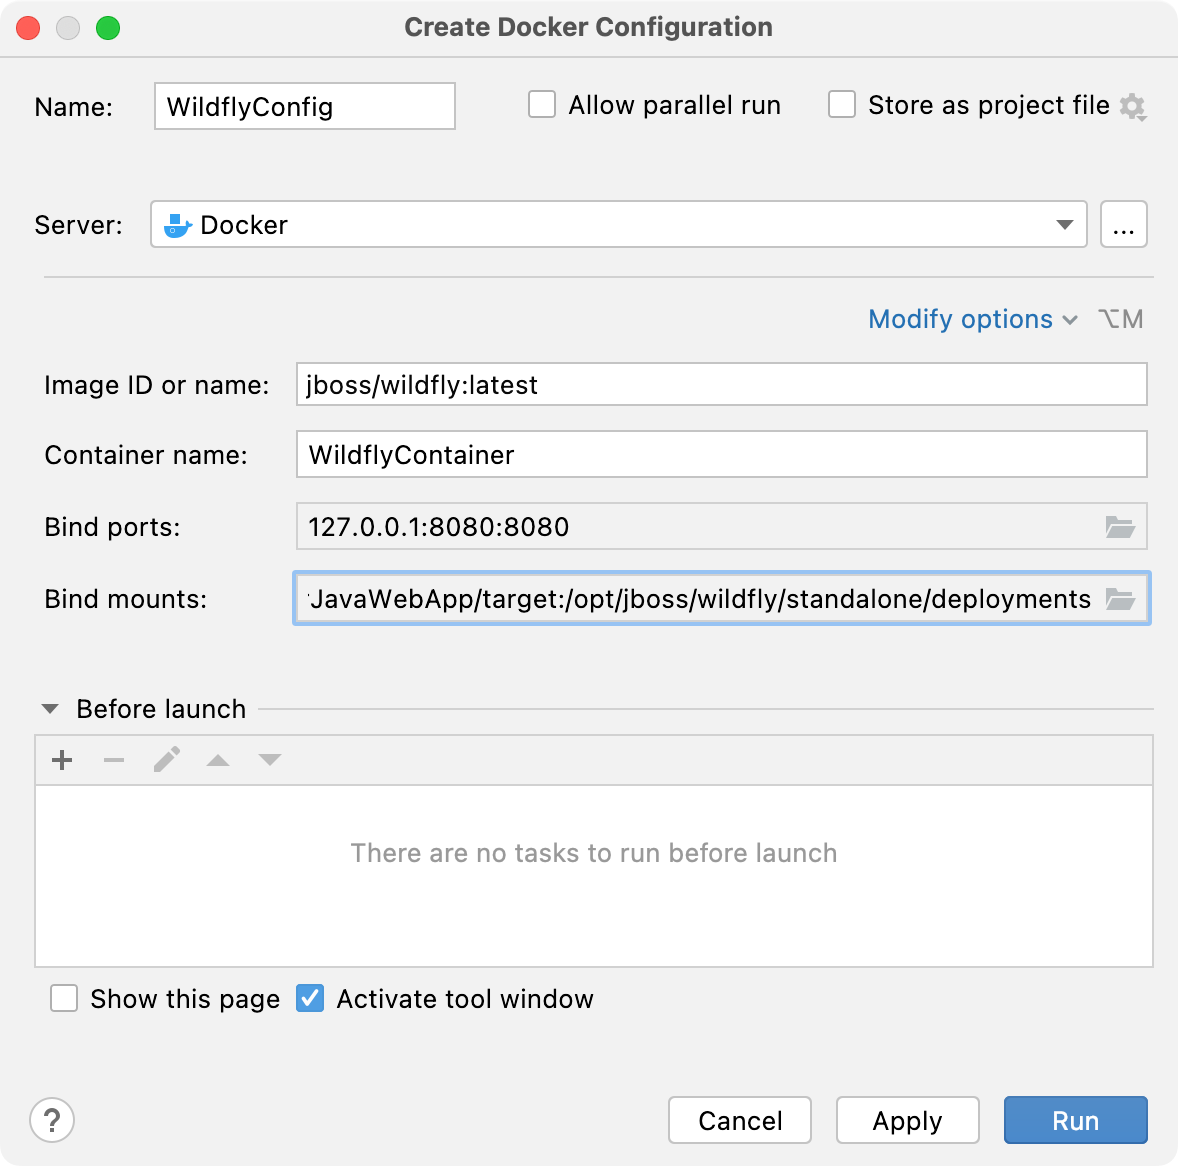
Click Run to start the container.
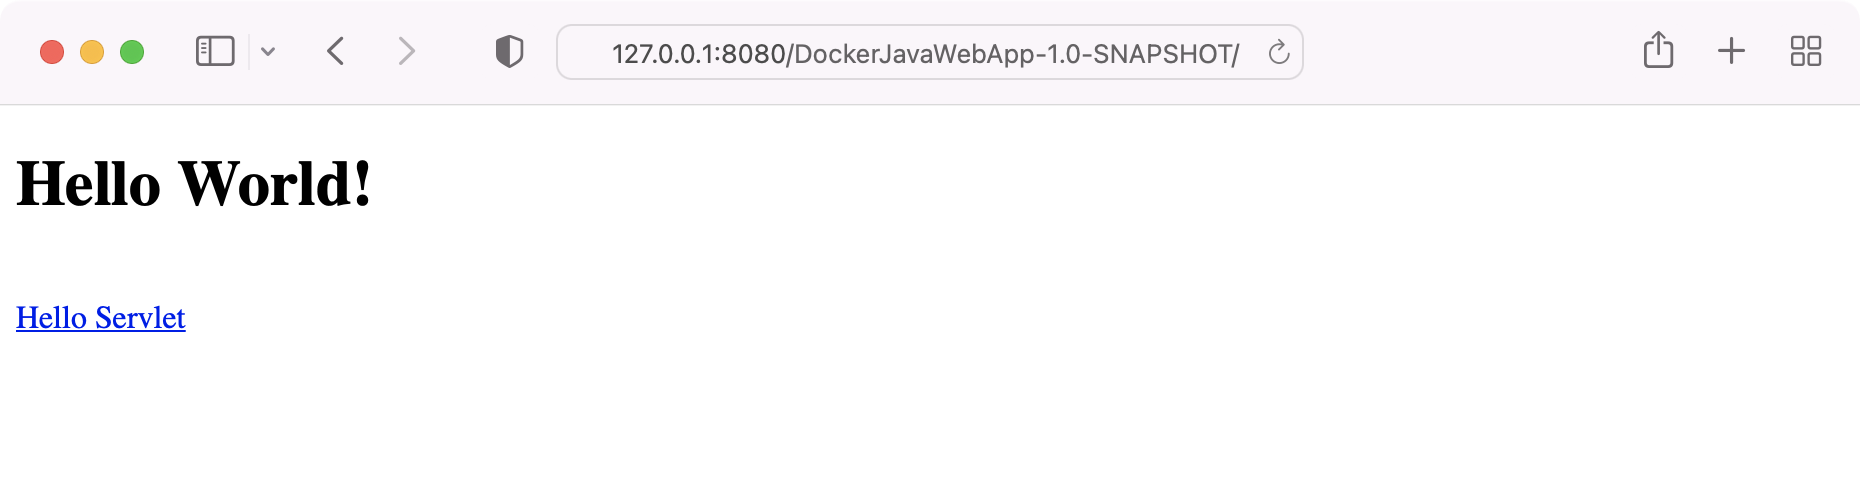
3. When the container starts, open the following address in your web browser: [http://127.0.0.1:8080/DockerJavaWebApp-1.0-SNAPSHOT/](http://127.0.0.1:8080/DockerJavaWebApp-1.0-SNAPSHOT/)
You should see the following page: