# Tutorial: Build UI using Swing
The UI Designer plugin in IntelliJ IDEA enables you to create graphical user interfaces (GUI) for your applications using the Swing library components. Using UI Designer, you can quickly create dialogs and groups of controls to be used in top-level containers, such as JFrame. These elements can coexist with the components that you define directly in your Java code.
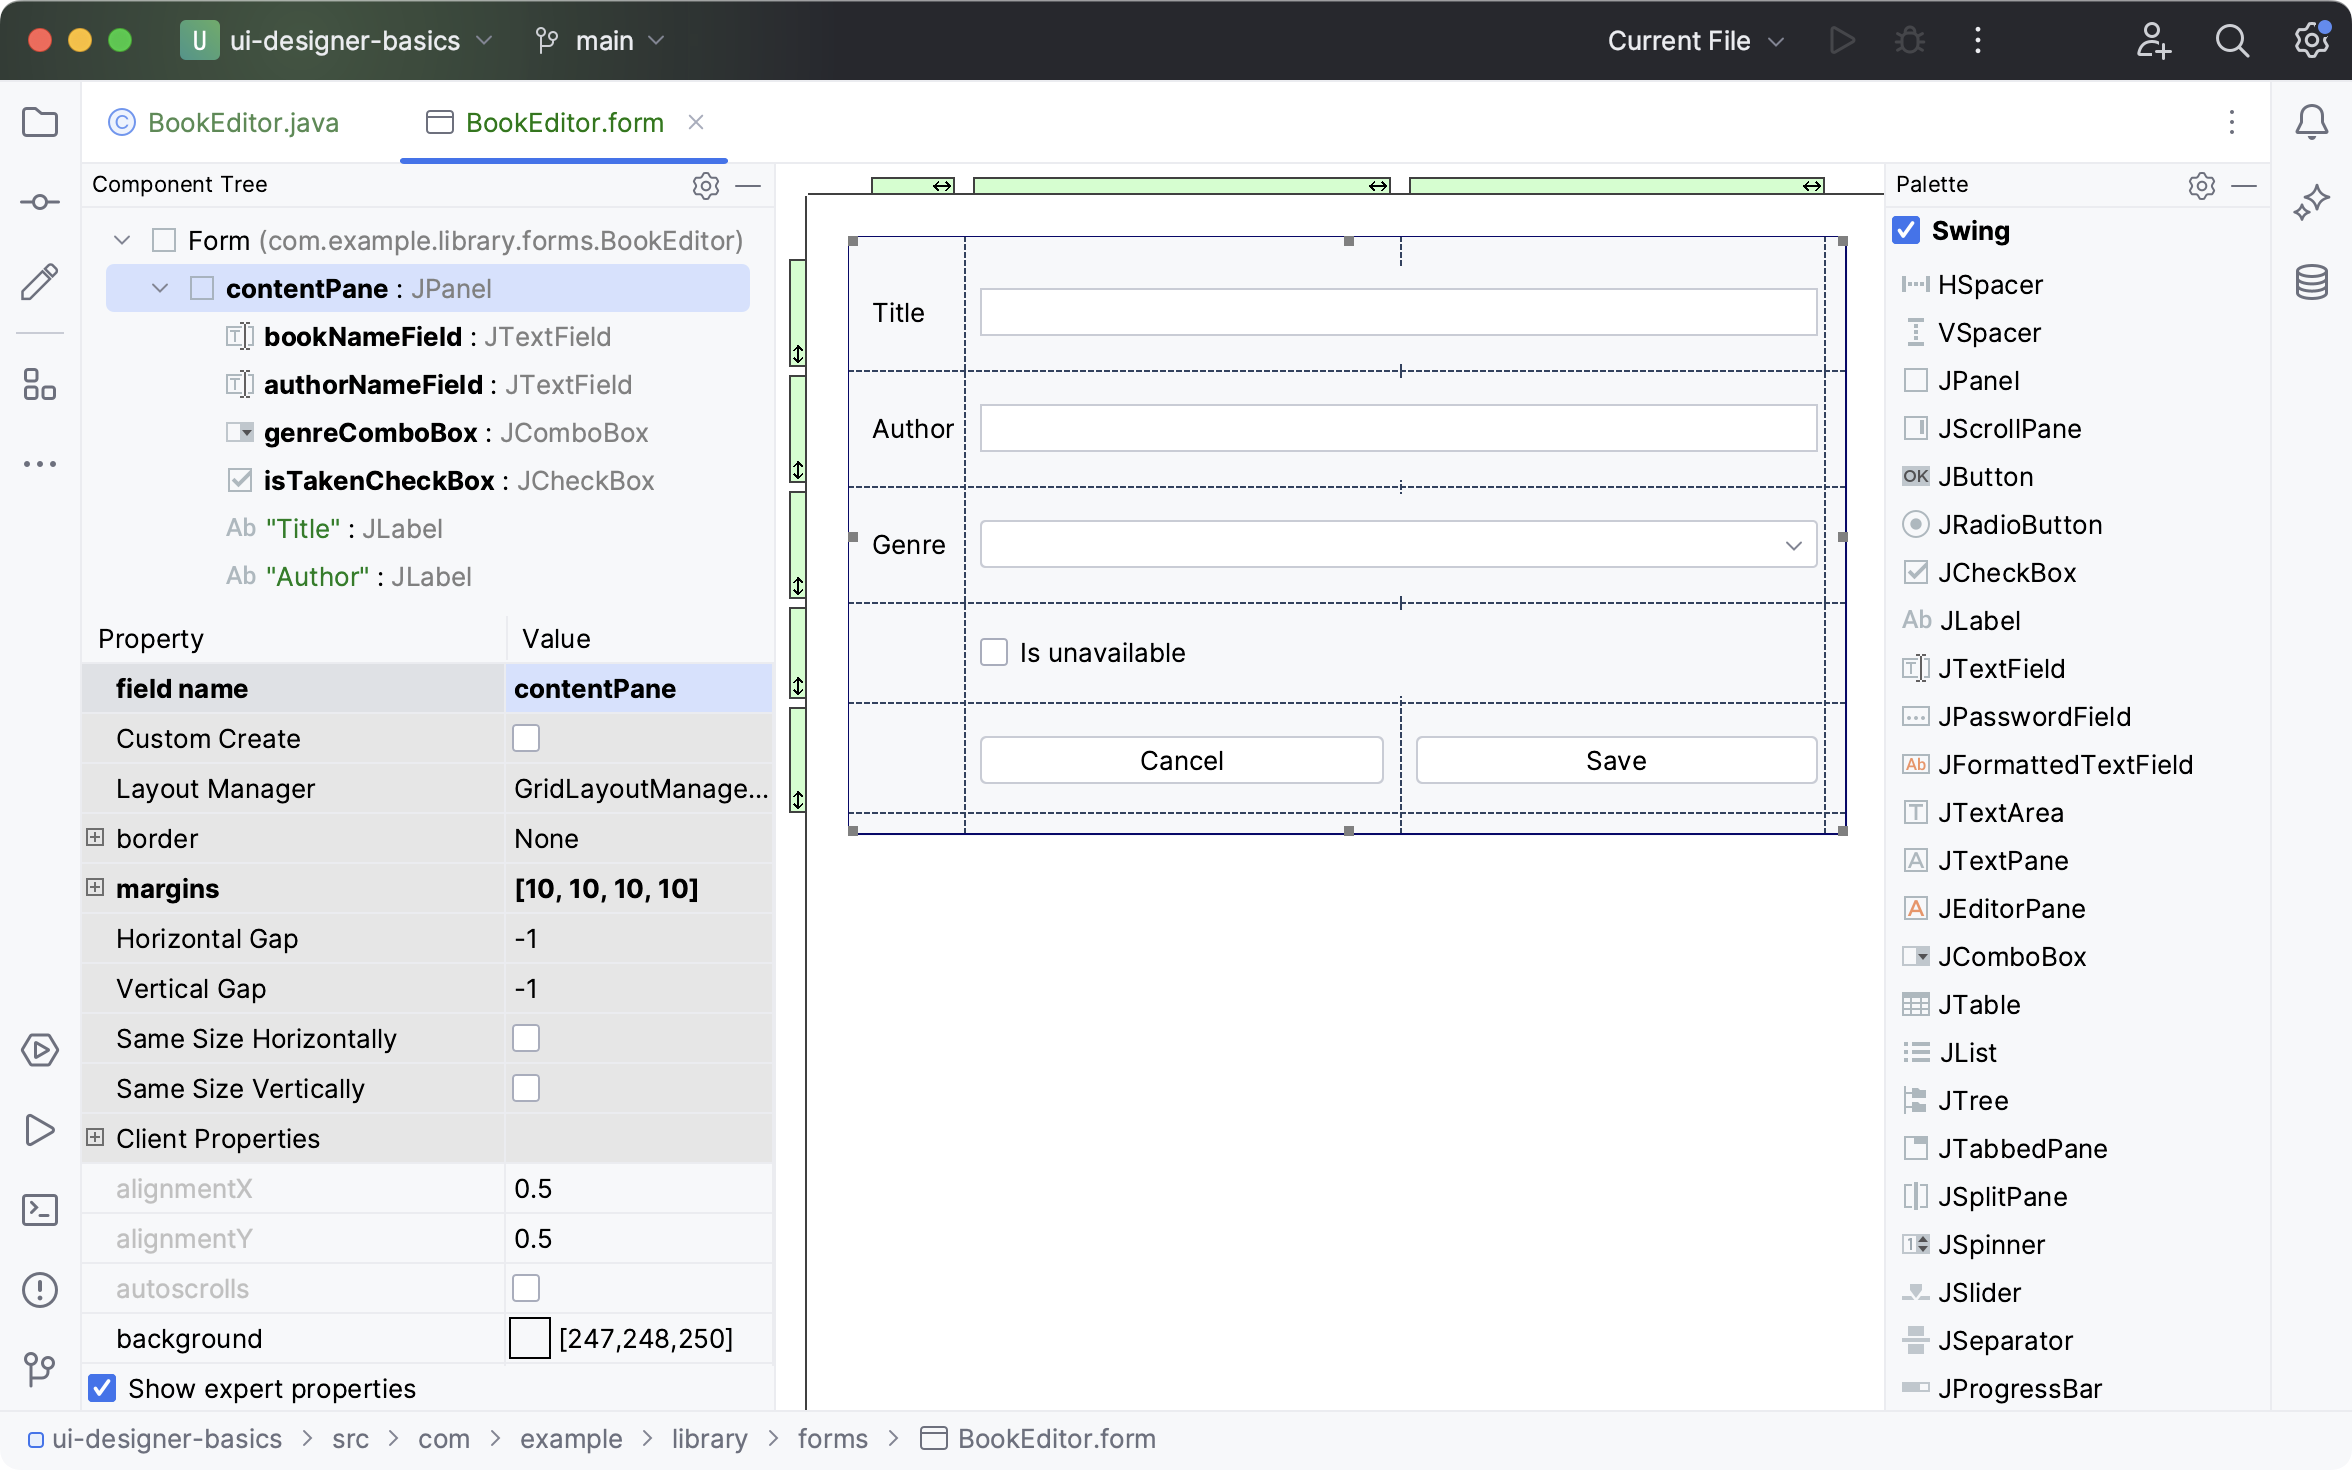
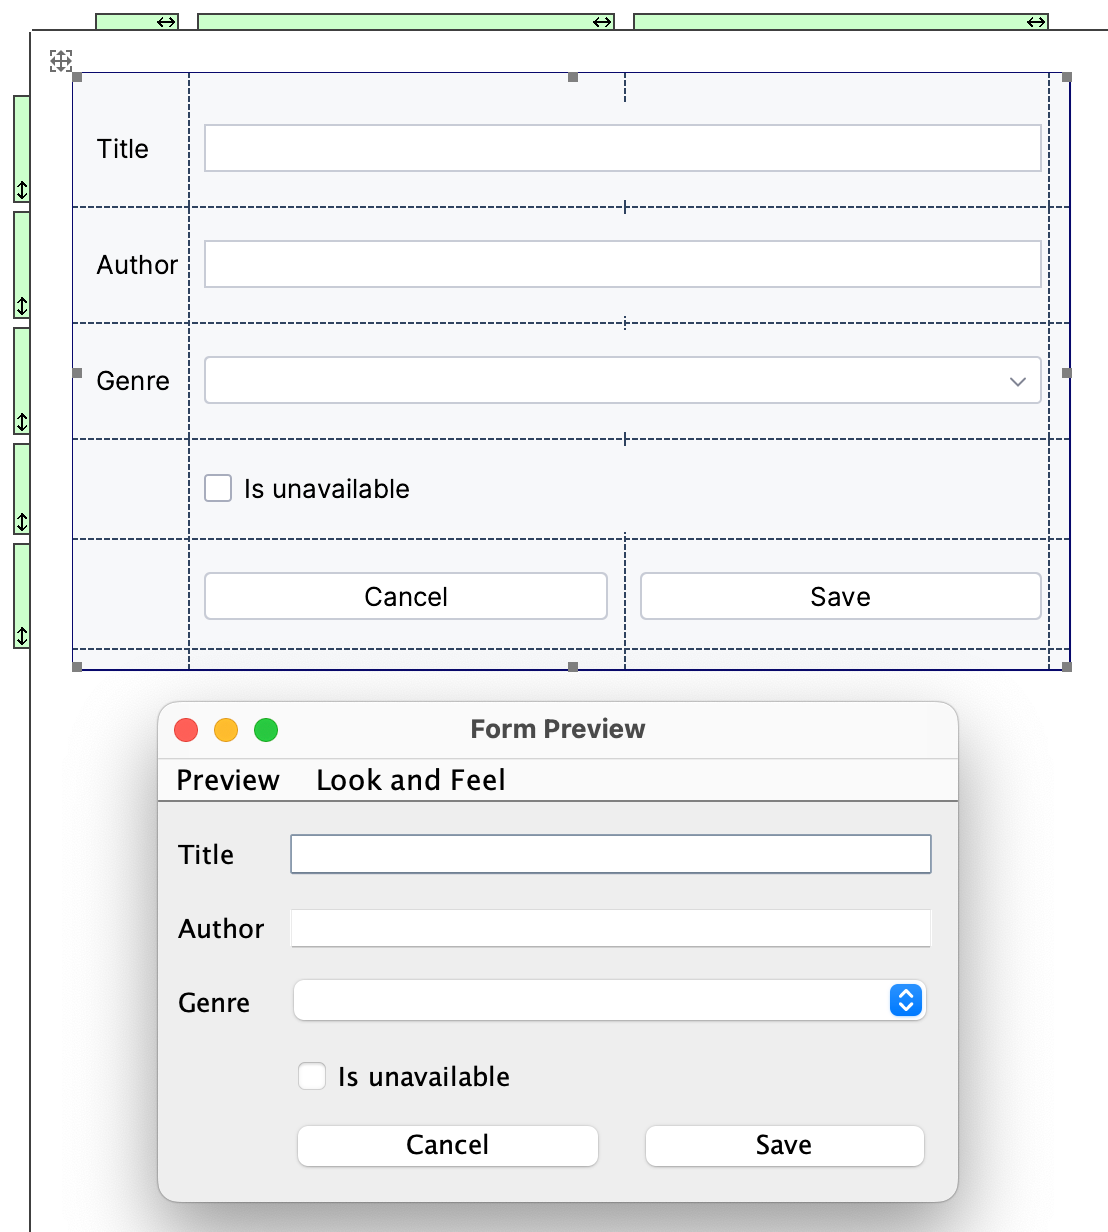
In this tutorial, you will learn the basics of working with UI Designer and try creating your own GUI form for a sample application. As an exercise, we will build a GUI form for editing the information about a book, such as its title, author, genre, and availability status.
At the end of the tutorial, your form will look similar to the following example:
Procedure: Install the Swing UI Designer plugin
This functionality relies on the Swing UI Designer plugin, which you need to install and enable.
1. Press `Ctrl+Alt+S` (Windows), `⌘ Comma` (macOS), `⌘ Comma` (IntelliJ IDEA Classic (macOS)), `⌘ Comma` (macOS System Shortcuts), `Ctrl+Alt+S` (XWin), `Ctrl+Alt+S` (GNOME), `Ctrl+Alt+S` (KDE), `Ctrl+Alt+S` (Emacs), `Ctrl+Alt+S` (Sublime Text), `⌘ Comma` (Sublime Text (macOS)), `Ctrl+Alt+S` (NetBeans), `Ctrl+Alt+S` (Visual Studio), `⌘ Comma` (Visual Studio (macOS)), `Ctrl+Alt+S` (Eclipse), `⌘ Comma` (Eclipse (macOS)) to open settings and then select `Plugins`.
2. Open the Marketplace tab, find the Swing UI Designer plugin, and click Install (restart the IDE if prompted).
Procedure: Clone the sample project
The source code of the application is hosted on GitHub at [Build UI using Swing Sample Project](https://github.com/JetBrains/build-UI-using-Swing-sample-project) .
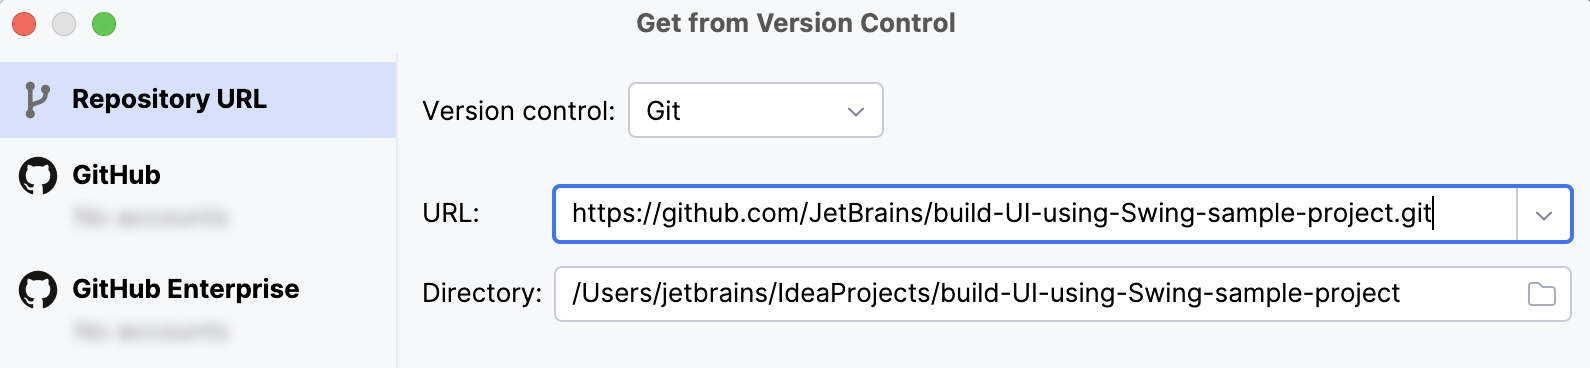
1. In the main menu, go to `File | New | Project from Version Control…`.
2. Specify the URL of the repository and click Clone.
3. If necessary, agree to open the cloned project in a new window.
IntelliJ IDEA stores the information about GUI forms that you create in `.form` files. A form can be associated with a Java source file and put under [version control](adding-files-to-version-control.html).
As a first step, we will create a new GUI form and an associated Java class for it.
Procedure: Create a new GUI form
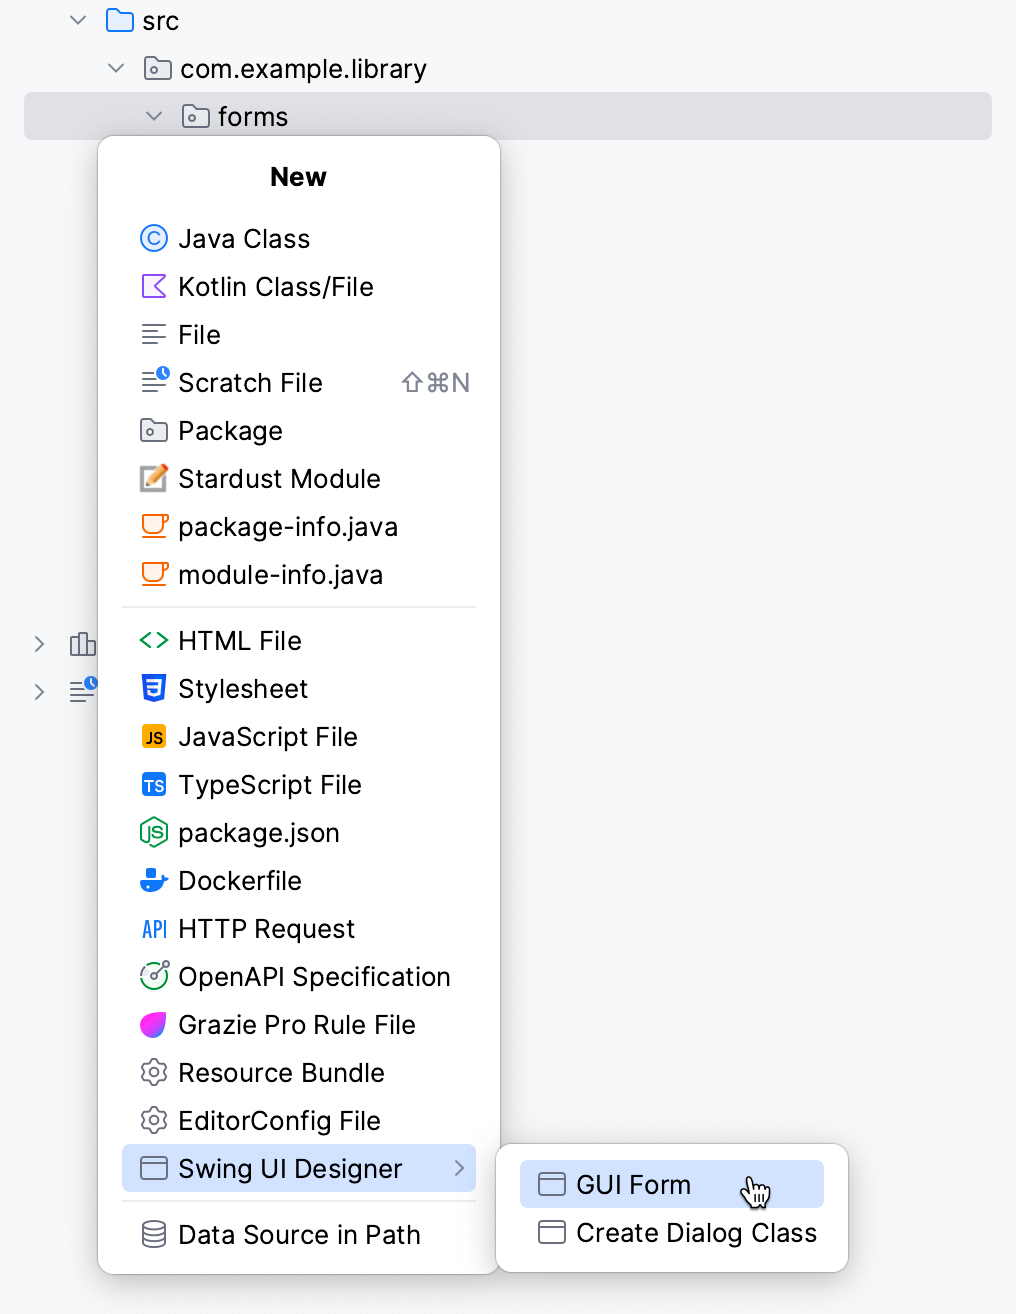
1. In the Project tool window `Alt+1` (Windows), `⌘ 1` (macOS), `⌘ 1` (IntelliJ IDEA Classic (macOS)), `⌘ 1` (macOS System Shortcuts), `Alt+1` (XWin), `Alt+1` (GNOME), `Alt+1` (KDE), `Alt+1` (Emacs), `Alt+1` (Sublime Text), `⌘ 1` (Sublime Text (macOS)), `Ctrl+1` (NetBeans), `Ctrl+Alt+L` (Visual Studio), `⌘ ⌥ L` (Visual Studio (macOS)), `Alt+1` (Eclipse), `Alt+1` (Eclipse (macOS)), select the `src.com.example.library.forms` package, press `Alt+Insert` (Windows), `⌘ N` (macOS), `⌃ N` (IntelliJ IDEA Classic (macOS)), `⌘ N` (macOS System Shortcuts), `Alt+Insert` (XWin), `Alt+Insert` (GNOME), `Alt+Insert` (KDE), `Alt+Insert` (Emacs), `Ctrl+N` (Sublime Text), `⌘ N` (Sublime Text (macOS)), `Alt+Insert` (NetBeans), `Ctrl+N` (Visual Studio), `⌘ N` (Visual Studio (macOS)), `Alt+Insert` (Eclipse), `⌘ N` (Eclipse (macOS)), and choose `Swing UI Designer | GUI Form`.
2. In the New GUI Form dialog that opens, specify the following details:
* Form name: specify `BookEditor` as a name for the new GUI form.
* Base layout manager: select the `GridLayoutManager (IntelliJ)` [layout manager](https://docs.oracle.com/javase/tutorial/uiswing/layout/visual.html) from the dropdown.
* Create bound class: select the option to create an associated Java class together with the form. IntelliJ IDEA will automatically create and bind a Java class to the GUI form. The bound class serves as the underlying code representation for a GUI form. It allows you to link components to corresponding fields in the class and facilitates the implementation of behavior and functionality for the form.
* Class name: leave the default name for the Java class associated with the form.
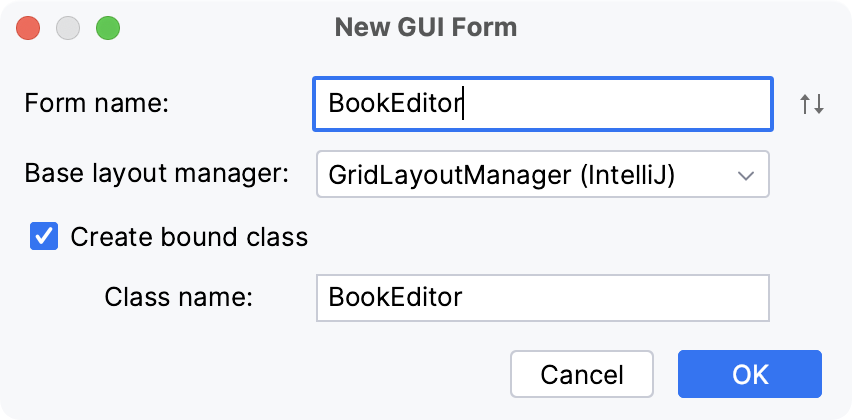
3. Click OK.
Our project now has a `BookEditor.form` file and `BookEditor.java` file. The `BookEditor.form` file is where we will arrange the GUI components and set their properties. The `BookEditor.java` file will contain the code that will make our form functional.
## Sections of a form
Before we proceed, let us take a quick look at `BookEditor.form`. When you select a `.form` file, you will have a view of the UI Designer which consists of four main sections.
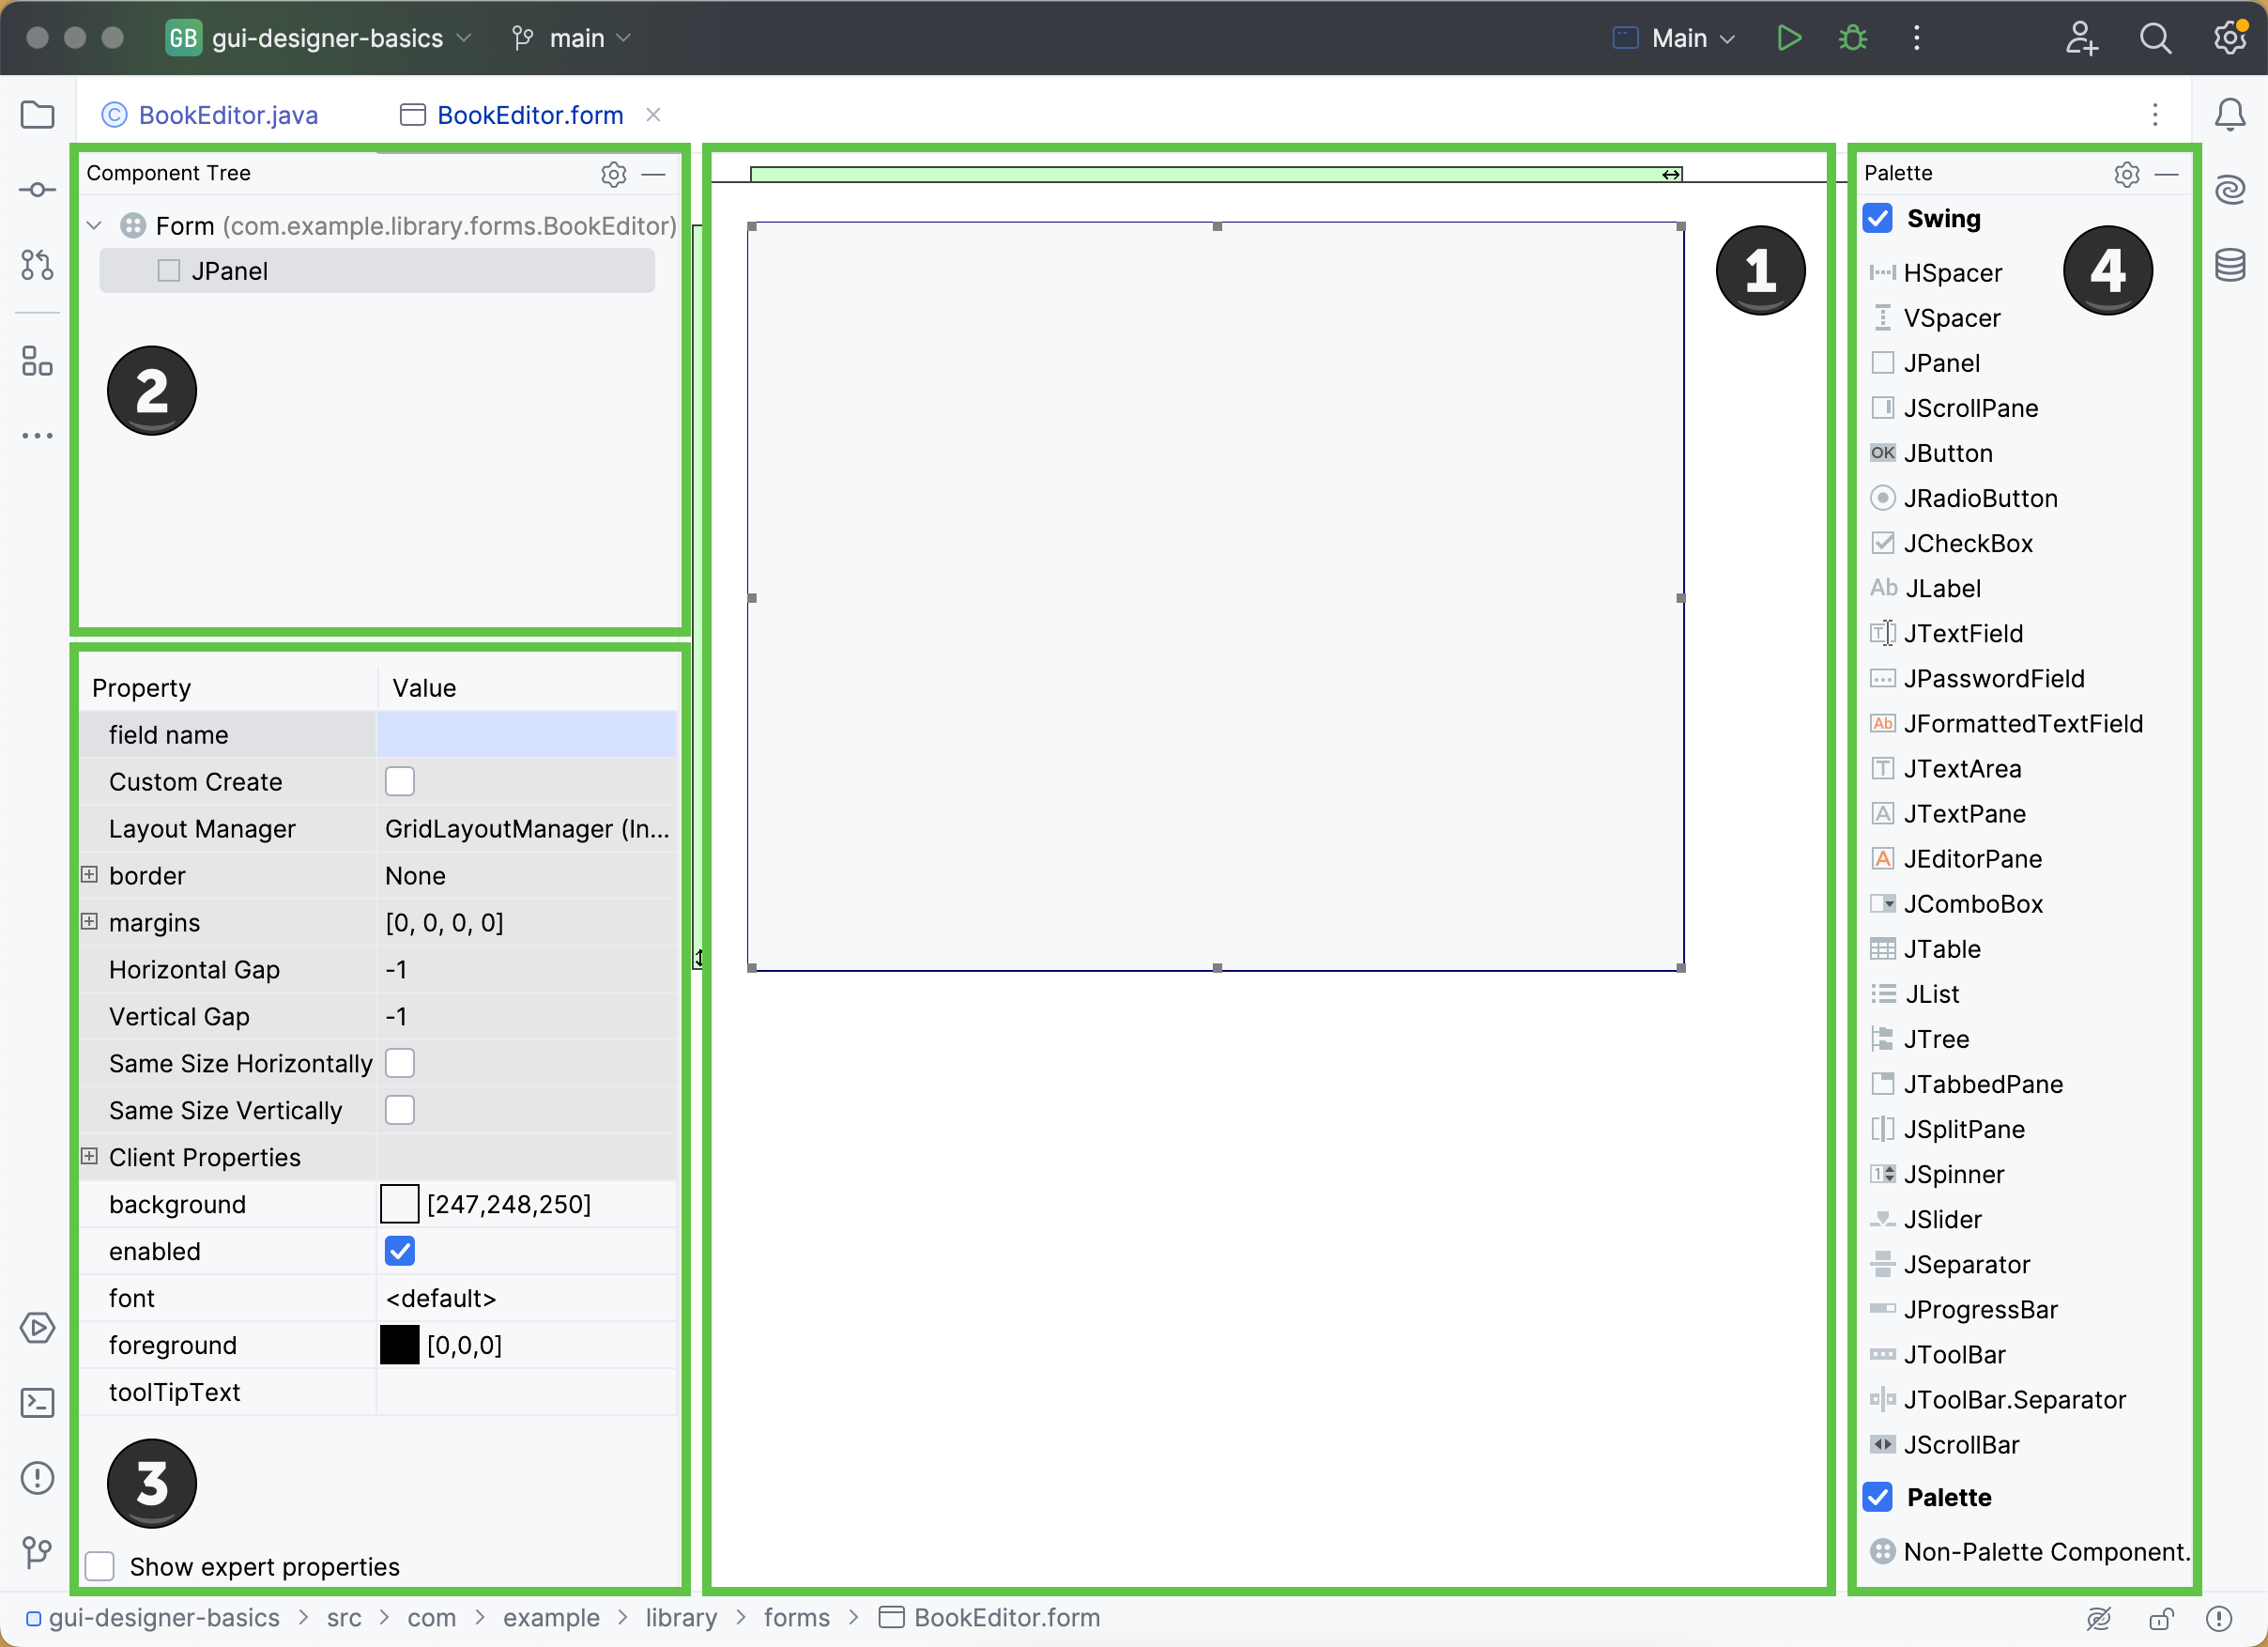
1. [Form workspace](form-workspace.html): shows a visual representation of the components in your form. The top-level JPanel component is added by default when you create a new GUI form in IntelliJ IDEA, and you can add more components to build out your form.
2. [Component Tree](components-treeview.html): shows the components contained in the design form and enables you to navigate and select one or more components. Our form currently only has one component, JPanel, however we will soon add more components.
3. [Property inspector](inspector.html): shows properties for the component currently selected in the form workspace or the Component Tree.
4. [Palette](palette.html): contains a list of UI components you can place in a form.
Next, let us continue by building out our form and incorporating the required fields, checkboxes, and controls into our Book editor.
First, we can work on the JPanel component which acts as a container to store the GUI you want to build.
Procedure: Set up the JPanel container
1. Open `BookEditor.java` and paste the following code at the top of the file under the package declaration:
```JAVA
import javax.swing.*;
```
2. In `BookEditor.java` also paste the following code inside the `BookEditor` class:
```JAVA
private JPanel contentPane;
```
3. Open the `BookEditor.form` file.
> **Warning:**
> IntelliJ IDEA does not provide the means to open the XML-based source of `.form` files in the editor. Do not modify these files manually as text.
In the Component Tree section, select JPanel to see the properties available for the component.
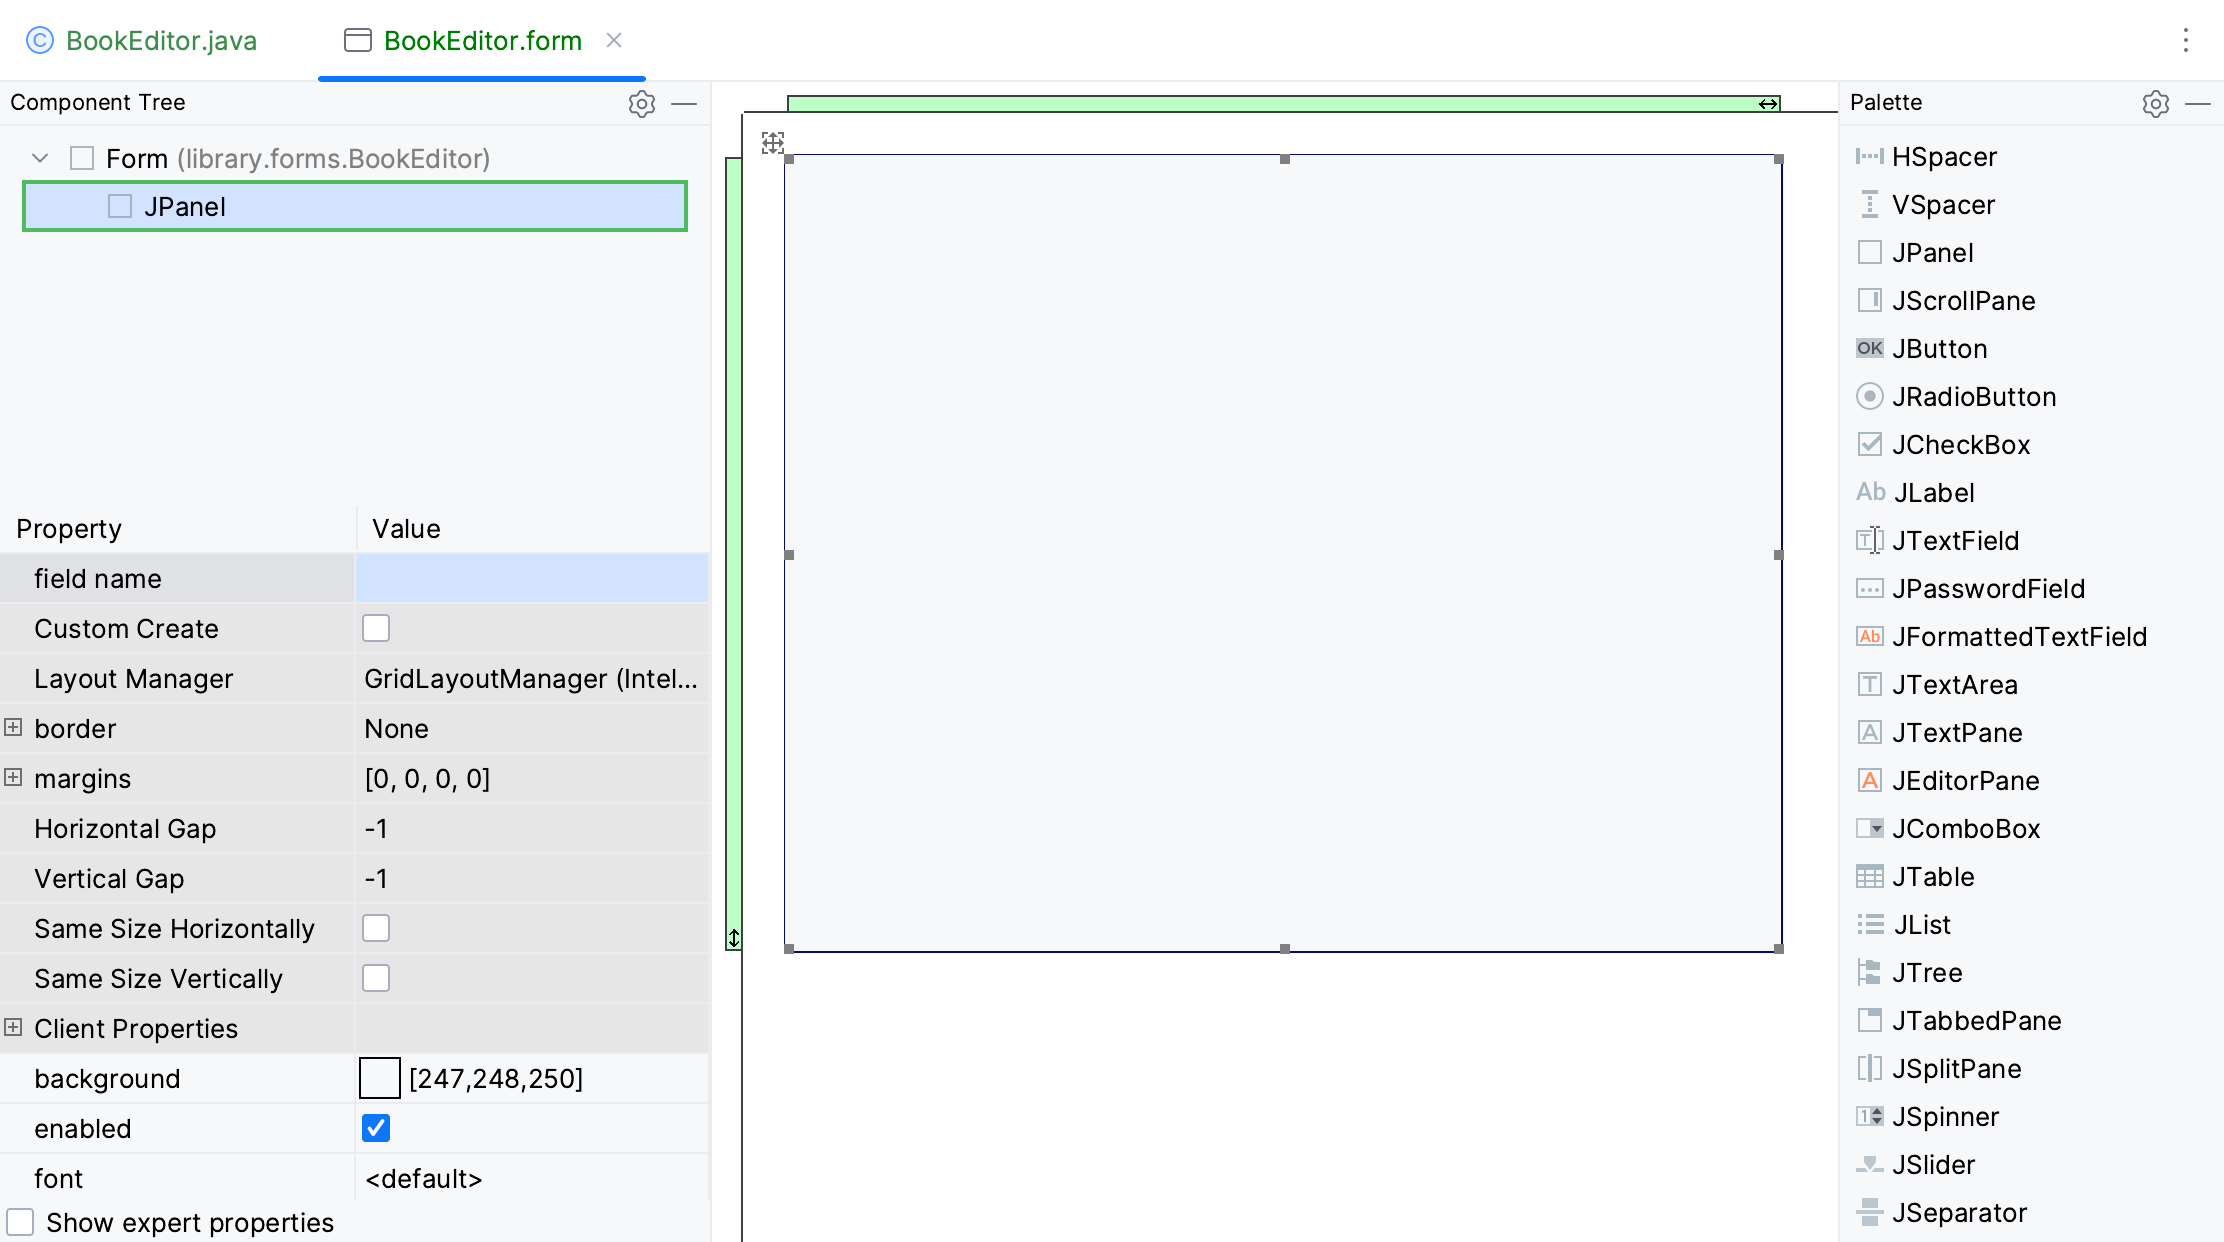
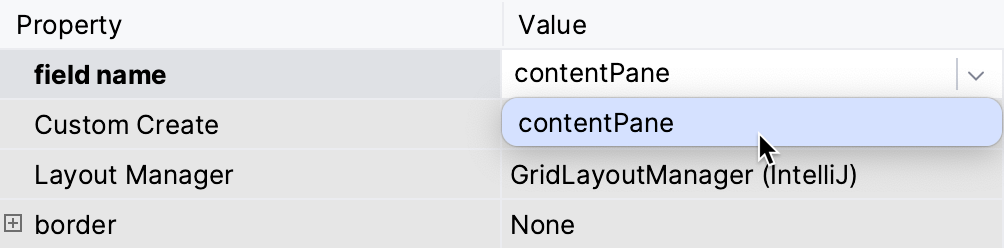
4. In the property inspector, set the value of the field name property to contentPane.
Procedure: Place GUI components on the form
1. Open the `BookEditor.form` file.
2. In the Palette section, select JTextField and click the top section of the form to place the component.
Repeat the action and add one more JTextField, one JComboBox, and one JCheckBox component in this order from top to bottom.
[Video](https://resources.jetbrains.com/help/img/idea/2026.2/ui_designer_drag_components.mp4)
IntelliJ IDEA displays the added components in the Component Tree and adds corresponding declarations to `BookEditor.java`.
3. Open `BookEditor.java`. Replace the `BookEditor` class with the content below in which we have renamed the field names and extedned the `BookEditor` class:
```JAVA
public class BookEditor extends JFrame {
private JPanel contentPane;
private JTextField bookNameField;
private JTextField authorNameField;
private JComboBox genreComboBox;
private JCheckBox isTakenCheckBox;
}
```
4. Switch back to `BookEditor.form`. You will see that after changing the field names in `BookEditor.java`, IntelliJ IDEA displays errors in the Component Tree. To resolve these issues, set the updated component names as values of the field name property in the property inspector.
> **Tip:**
> Recall that, textField1 was renamed to `bookNameField` and textField2 was renamed to `authorNameField`.
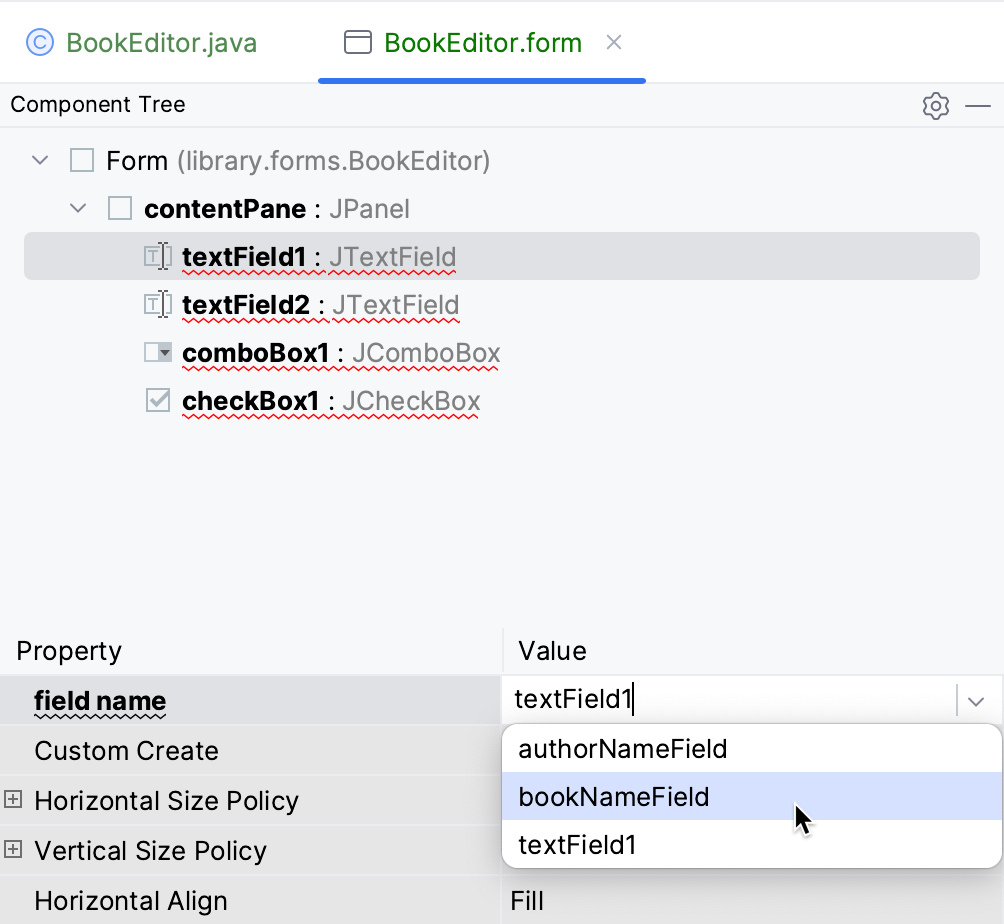
Our field names currently do not have any labels and are unrecognizable to end users. The Swing library provides a specific component, JLabel, that you can use to add any text labels to your GUI form.
For the checkbox, adding a label is not required, since you can configure the text directly in the JCheckBox component properties.
Procedure: Add text labels
1. Add the JLabel component to the right of each JTextField and JComboBox.
[Video](https://resources.jetbrains.com/help/img/idea/2026.2/ui_designer_add_labels.mp4)
2. Select the first JLabel in Component Tree. In the property inspector, change the value of the text property to `Title`.
[Video](https://resources.jetbrains.com/help/img/idea/2026.2/ui_designer_change_label.mp4)
> **Tip:**
> When creating labels, you can either type strings or use key-value pairs from the `.properties` files.
3. Change the names of the other two labels to `Author` and `Genre` in a similar manner.
4. Select the JCheckBox component in the Component Tree. Then, specify `Is unavailable` as a value of the text property.
We want our Book editor to be able to save and discard the changes made by the end user. For this purpose, let us add the Save and Cancel buttons.
Procedure: Add buttons
1. Add the VSpacer component below the cell with the JCheckBox. This will create an area for the buttons and divide it equally in two halves.
[Video](https://resources.jetbrains.com/help/img/idea/2026.2/ui_designer_vspacer.mp4)
2. Add two JButton components to each side of the vertical spacer.
3. In the text property of each button, specify their names accordingly – `Cancel` and `Save`.
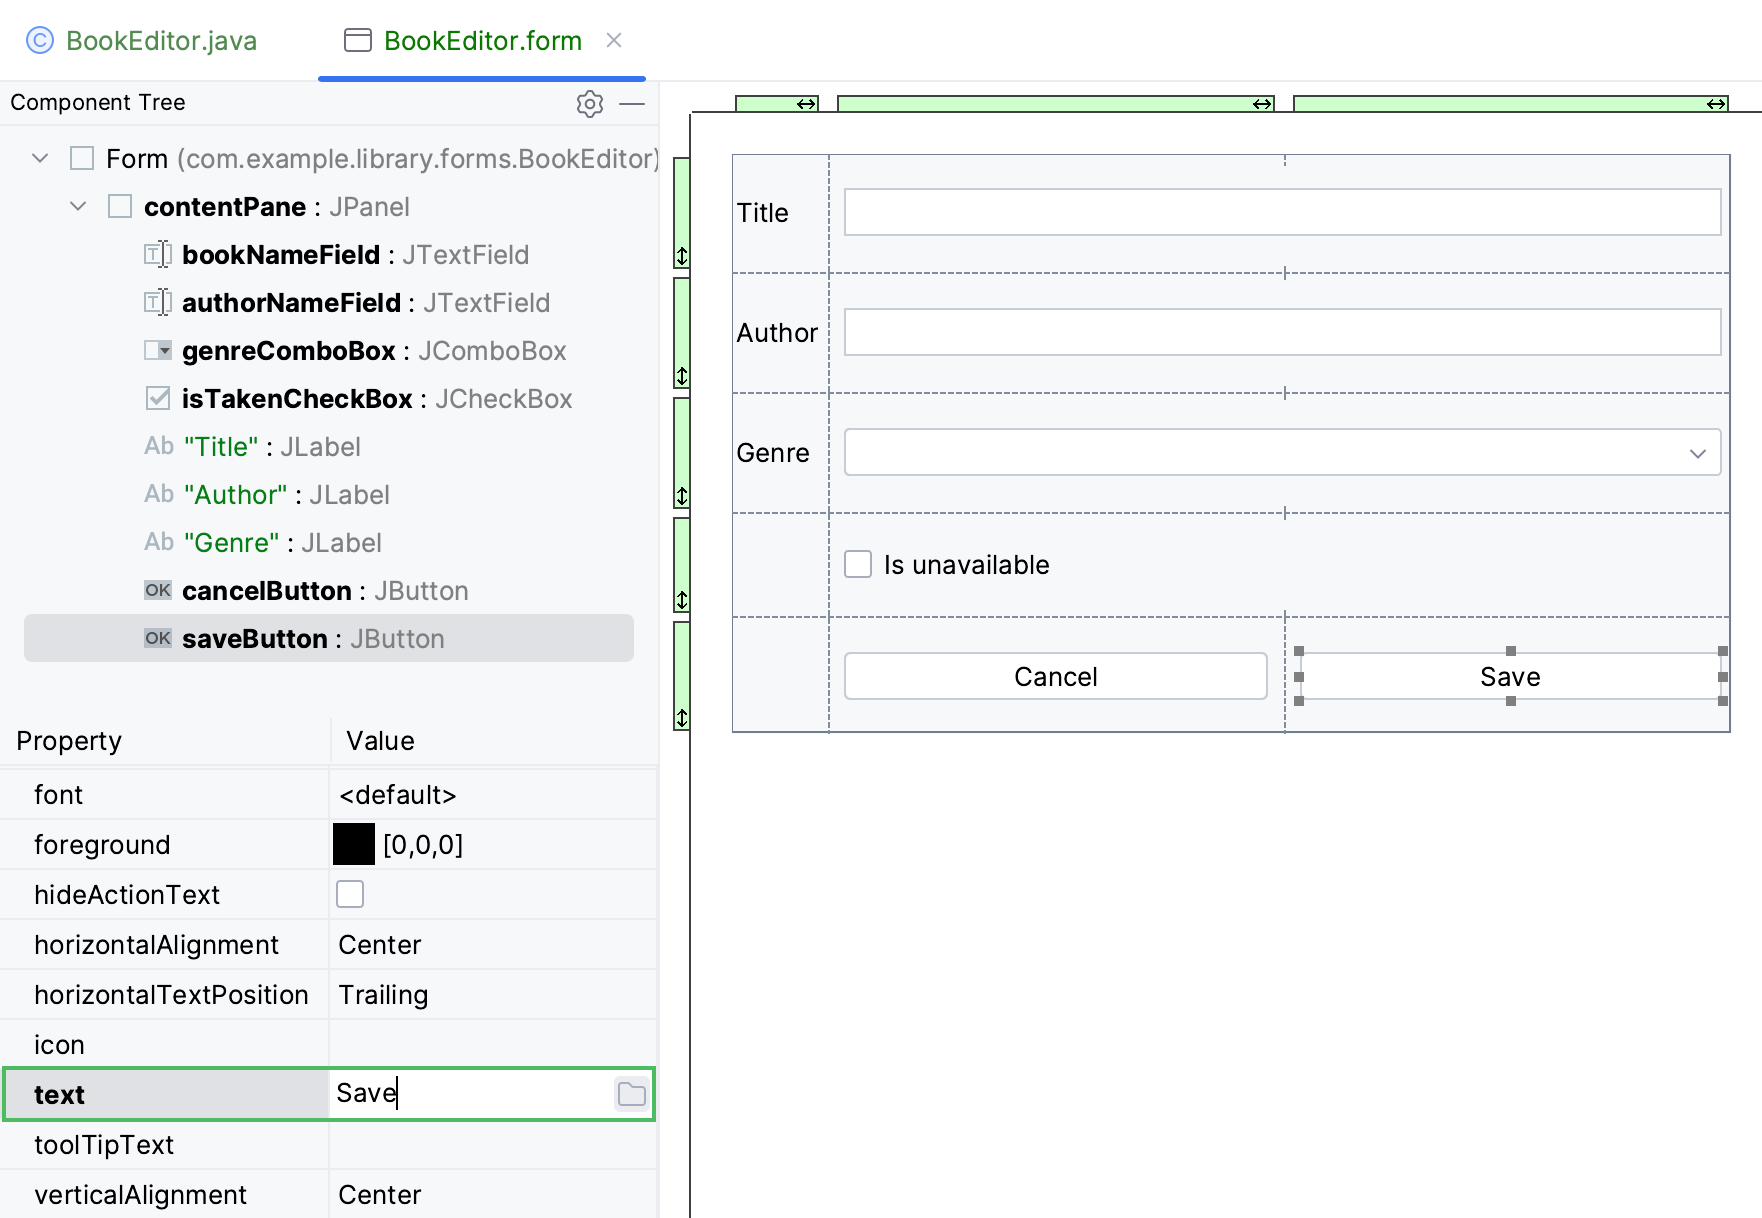
Now that we have all the necessary Swing components placed to the GUI form, let us check the intermediate results and learn how the form will look at runtime.
Procedure: Preview the GUI form
* Right-click your GUI form and select Preview from the context menu.
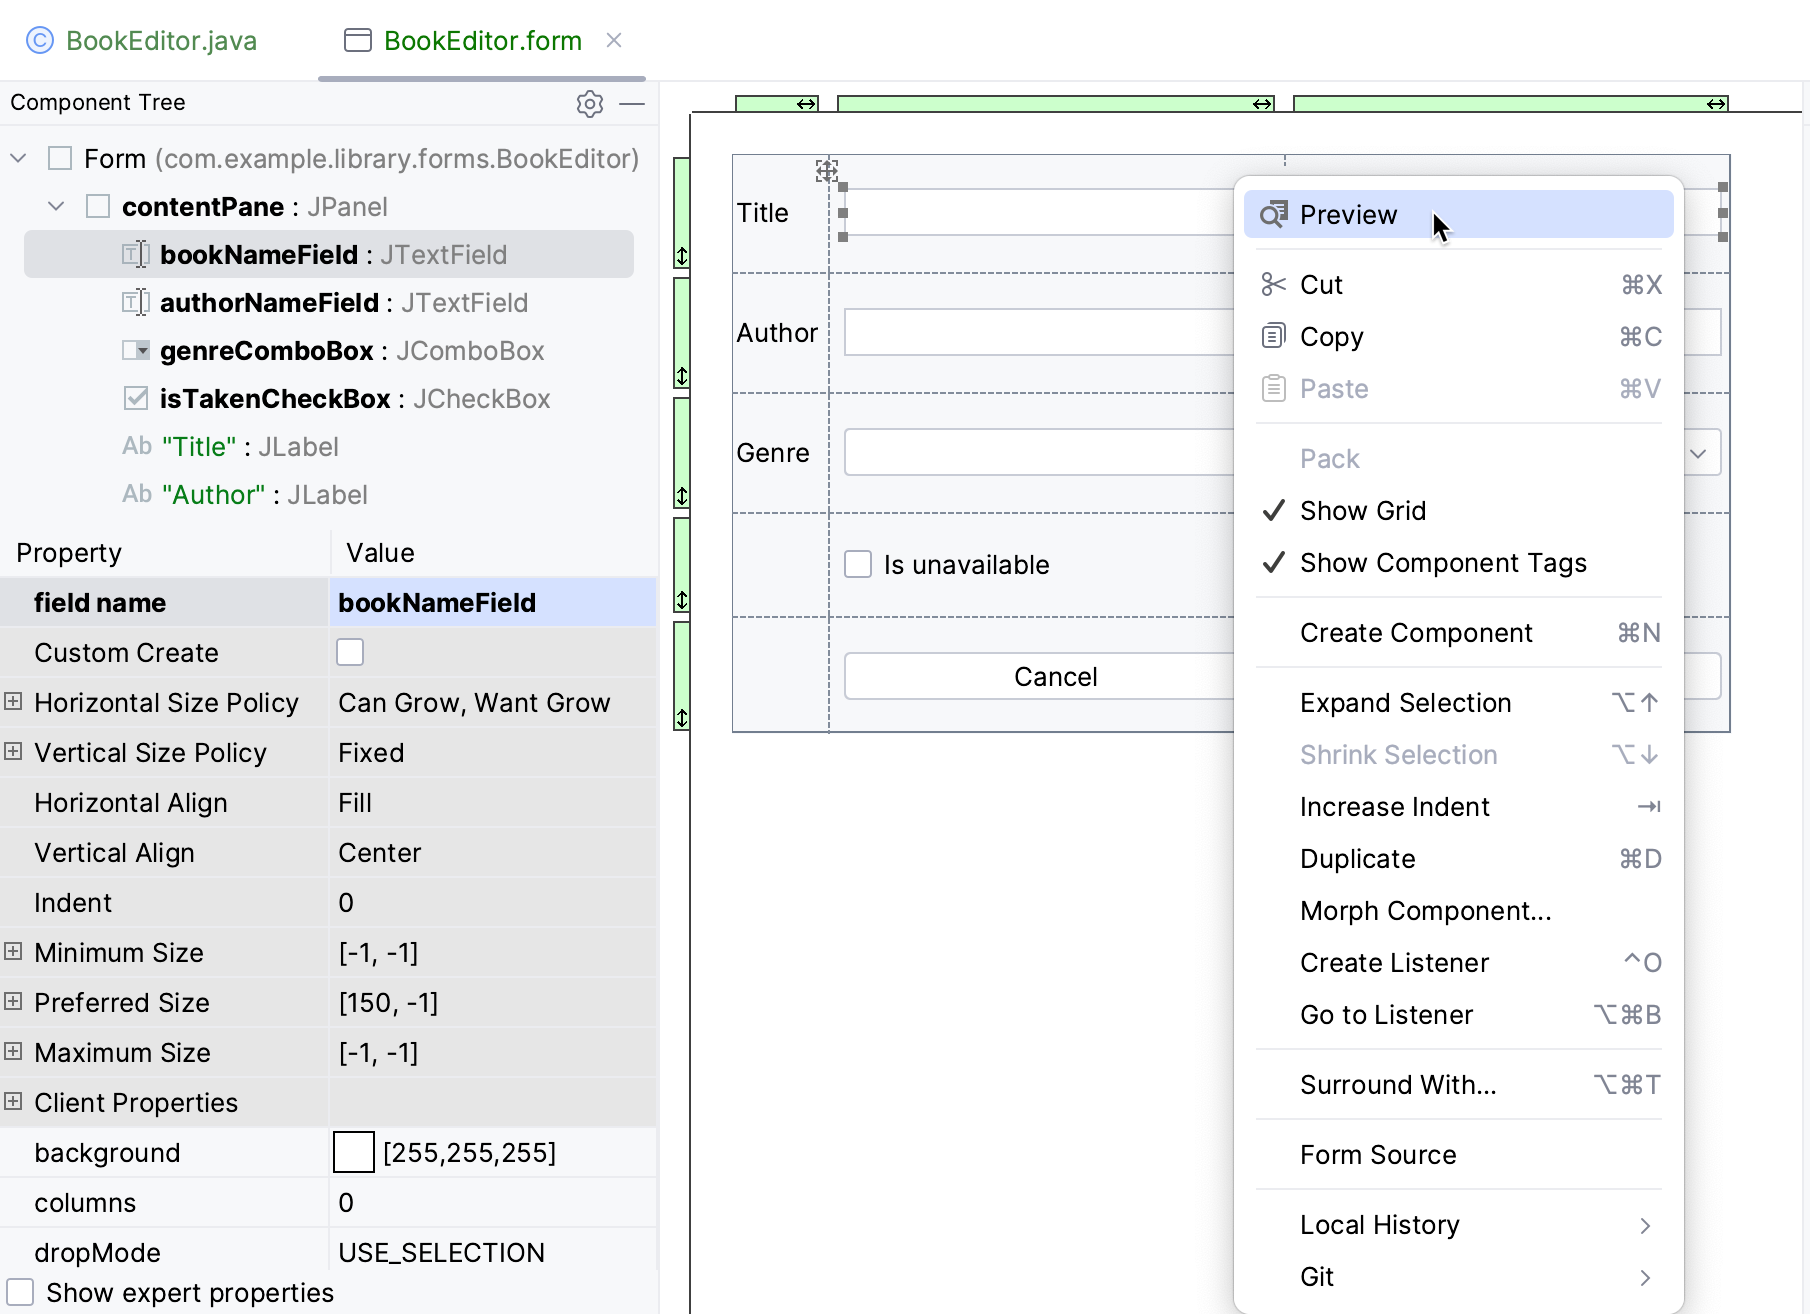
IntelliJ IDEA will display the Form Preview dialog. While in Preview mode, you can click buttons, select checkboxes, enter text, and so on, just like you do at runtime.
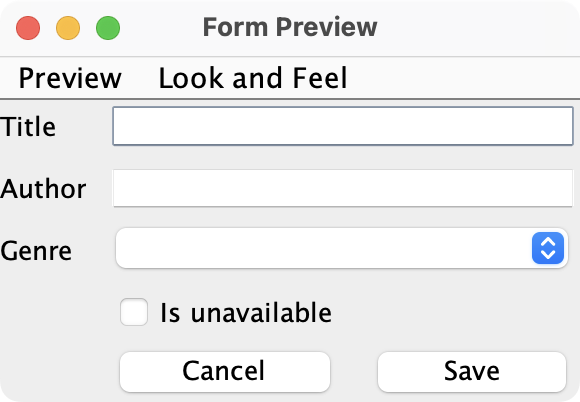
At this stage, our GUI form is a little raw. Let us improve the look and feel of it by adjusting the margins and setting up the preferred window size.
Procedure: Adjust the look and feel of the GUI form
1. Select the JPanel container in the Component Tree.
2. Use the margins group of properties to configure top, bottom, left, and right margins of the container. Set the value of each margin to `10`.
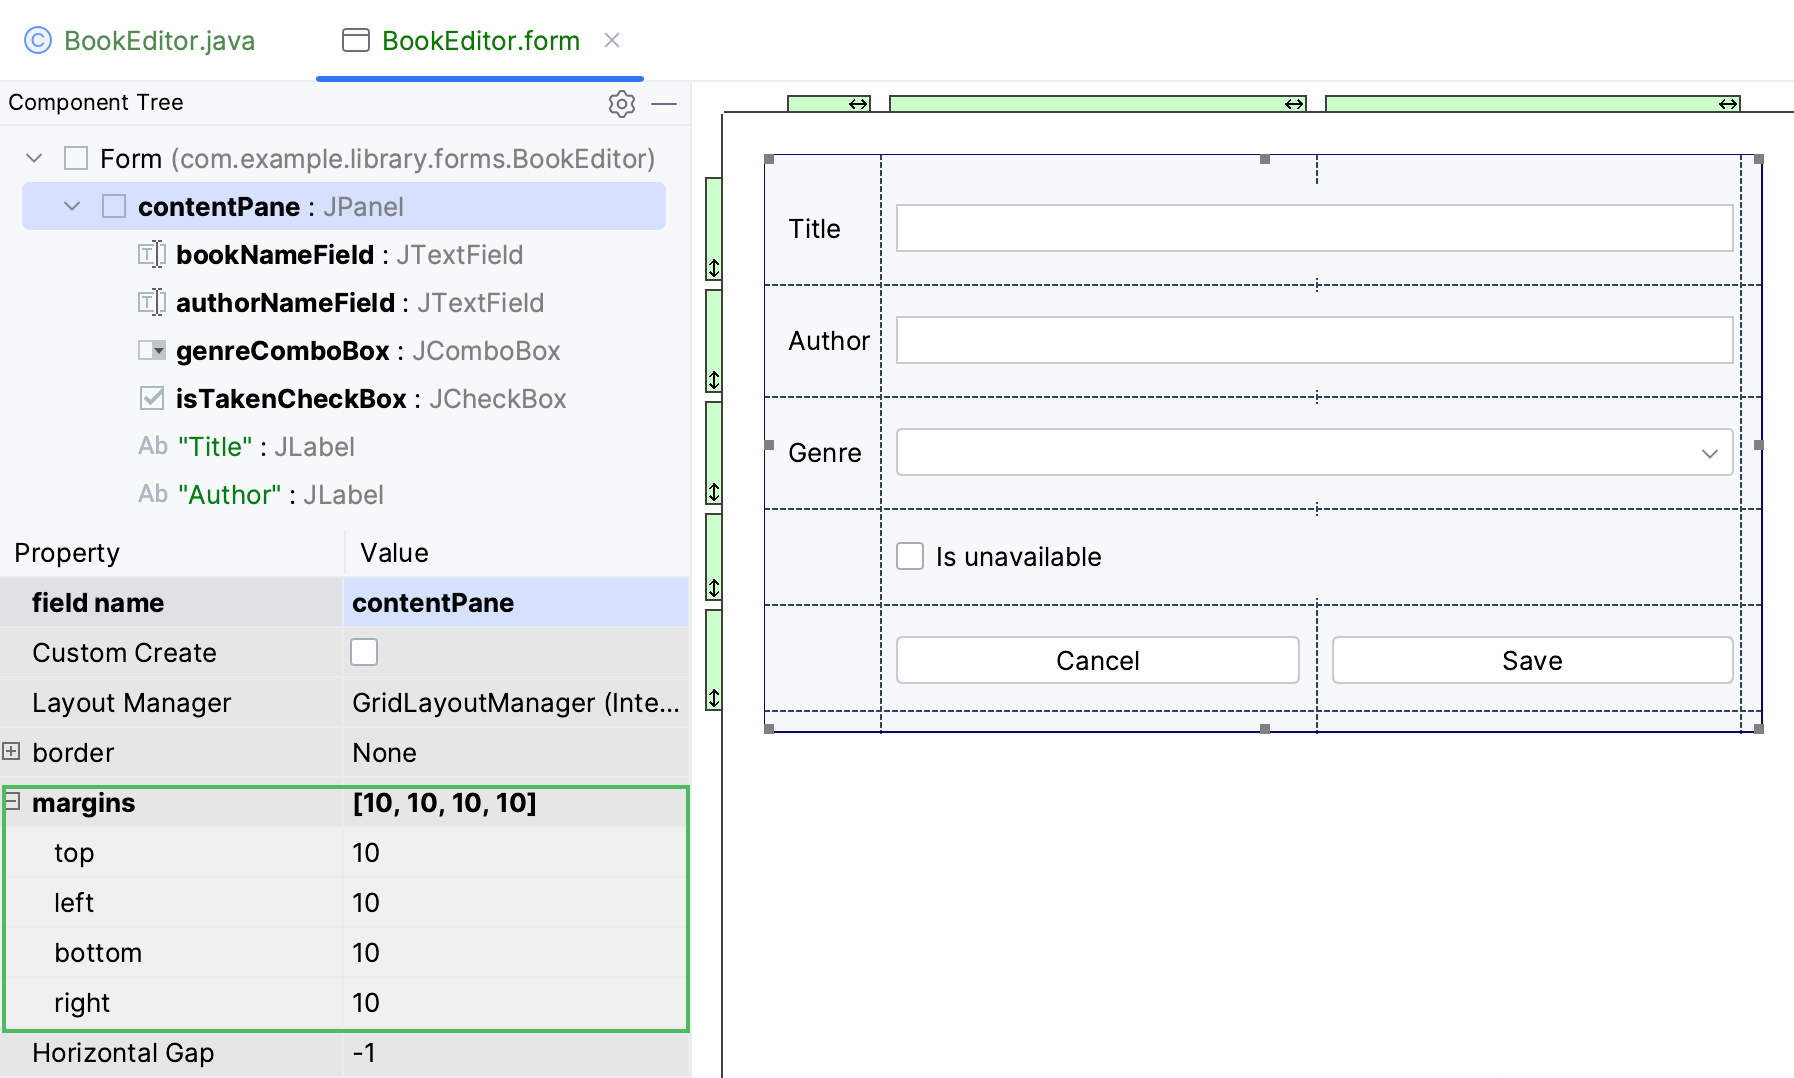
3. To configure the preferred size of the form, select the Show expert properties checkbox, and then find and unfold the preferredSize group of properties. Set the value of the width property to `400`, and height to `200`.
4. Run preview one more time to check the results.
Procedure: Add functionality to the form
Now that the GUI form is ready, you can make it functional by editing the content in `BookEditor.java`. Functionality for the form in this tutorial has been prepared and is available in `BookEditorExample.java` which can be found under `src/com/example/library/forms/BookEditorExample`.
1. Replace all the contents of `BookEditor.java` with the contents from `BookEditorExample.java`.
2. In `BookEditor.java`, rename the two instances of `BookEditorExample` to `BookEditor` in the class declaration and the public method declaration.
3. Open `Main.java` and [run the application](running-applications.html).
The details of a book that you enter in the form will be printed out in the terminal.
In `BookEditor.java`, the `BookEditor` constructor registers an `ActionListener` for the `Save` button:
```JAVA
saveButton.addActionListener(new ActionListener() {
@Override
public void actionPerformed(ActionEvent e) {
saveChanges();
}
});
```
When the user clicks `Save`, Swing invokes the `actionPerformed()` method. The handler delegates the work to `saveChanges()`, which collects the values entered in the form and creates a `Book` object.
The constructor also registers an `ActionListener` for the `Cancel` button:
```JAVA
cancelButton.addActionListener(new ActionListener() {
@Override
public void actionPerformed(ActionEvent e) {
cancelChanges();
}
});
```
When the user clicks `Cancel`, the handler calls `cancelChanges()`, which clears the form without saving the changes.
## Troubleshoot
* Problem: when building projects with GUI Designer forms using an external build system (Maven/Gradle), the forms are not compiled and the code does not work, failing with `NullPointerException` when trying to access a component. Refer to the [How to configure GUI forms compilation when using Gradle or Maven](https://youtrack.jetbrains.com/articles/SUPPORT-A-486/How-to-configure-GUI-forms-compilation-when-using-Gradle-or-Maven) support article for possible solutions.