# Enable web service client development support
To develop a web service client in IntelliJ IDEA, configure the corresponding module and supply all required libraries. The instructions on this page are applicable for developing a web service client of the following types:
* GlassFish/JAXWS2.X RI/Netro 1.X/JWSDP2.0
* Apache Axis
* RESTful Web Service
Procedure: Install the Jakarta EE: Web Services (JAX-WS) plugin
This functionality relies on the plugin, which you need to install and enable.
> **Note:**
> The Jakarta EE: Web Services (JAX-WS) plugin is not available in IntelliJ IDEA without the Ultimate subscription.
1. Press `Ctrl+Alt+S` (Windows), `⌘ Comma` (macOS), `⌘ Comma` (IntelliJ IDEA Classic (macOS)), `⌘ Comma` (macOS System Shortcuts), `Ctrl+Alt+S` (XWin), `Ctrl+Alt+S` (GNOME), `Ctrl+Alt+S` (KDE), `Ctrl+Alt+S` (Emacs), `Ctrl+Alt+S` (Sublime Text), `⌘ Comma` (Sublime Text (macOS)), `Ctrl+Alt+S` (NetBeans), `Ctrl+Alt+S` (Visual Studio), `⌘ Comma` (Visual Studio (macOS)), `Ctrl+Alt+S` (Eclipse), `⌘ Comma` (Eclipse (macOS)) to open settings and then select `Plugins`.
2. Open the Marketplace tab, find the Jakarta EE: Web Services (JAX-WS) plugin, and click Install (restart the IDE if prompted).
Procedure: Create a project for a web service client application
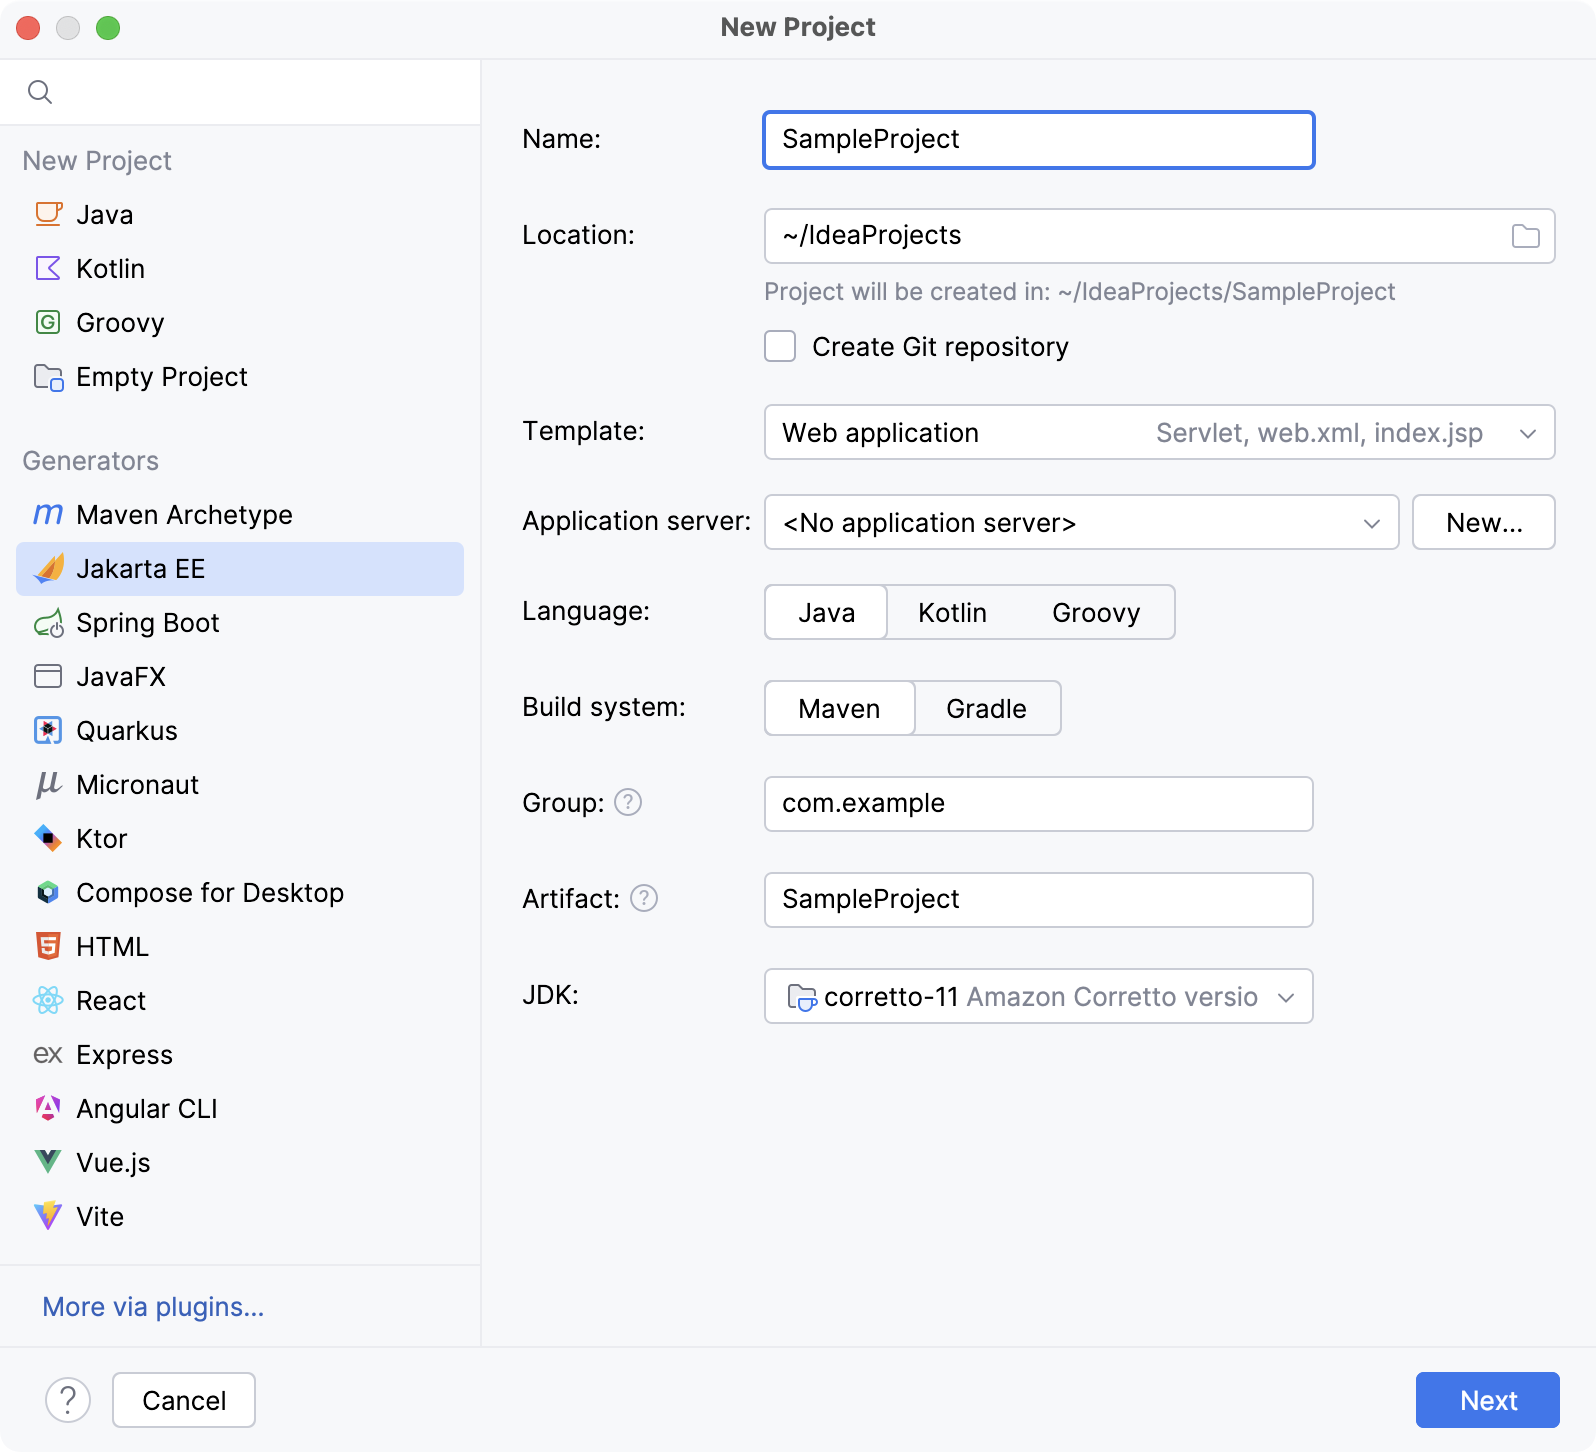
1. Click New Project on the Welcome screen or select `File | New | Project`.
2. From the Generators list, select Jakarta EE.
3. Name the new project, select a build tool, a language you want to use, and select the Web application project template.
4. Select the Create Git repository option to place the new project under version control.
5. From the JDK list, select the [JDK](sdk.html#jdk) that you want to use in your project.
* If the JDK is installed on your computer, but not defined in the IDE, select  Add JDK from Disk… and specify the path to the JDK home directory.
* If you don't have the necessary JDK on your computer, select  Download JDK .
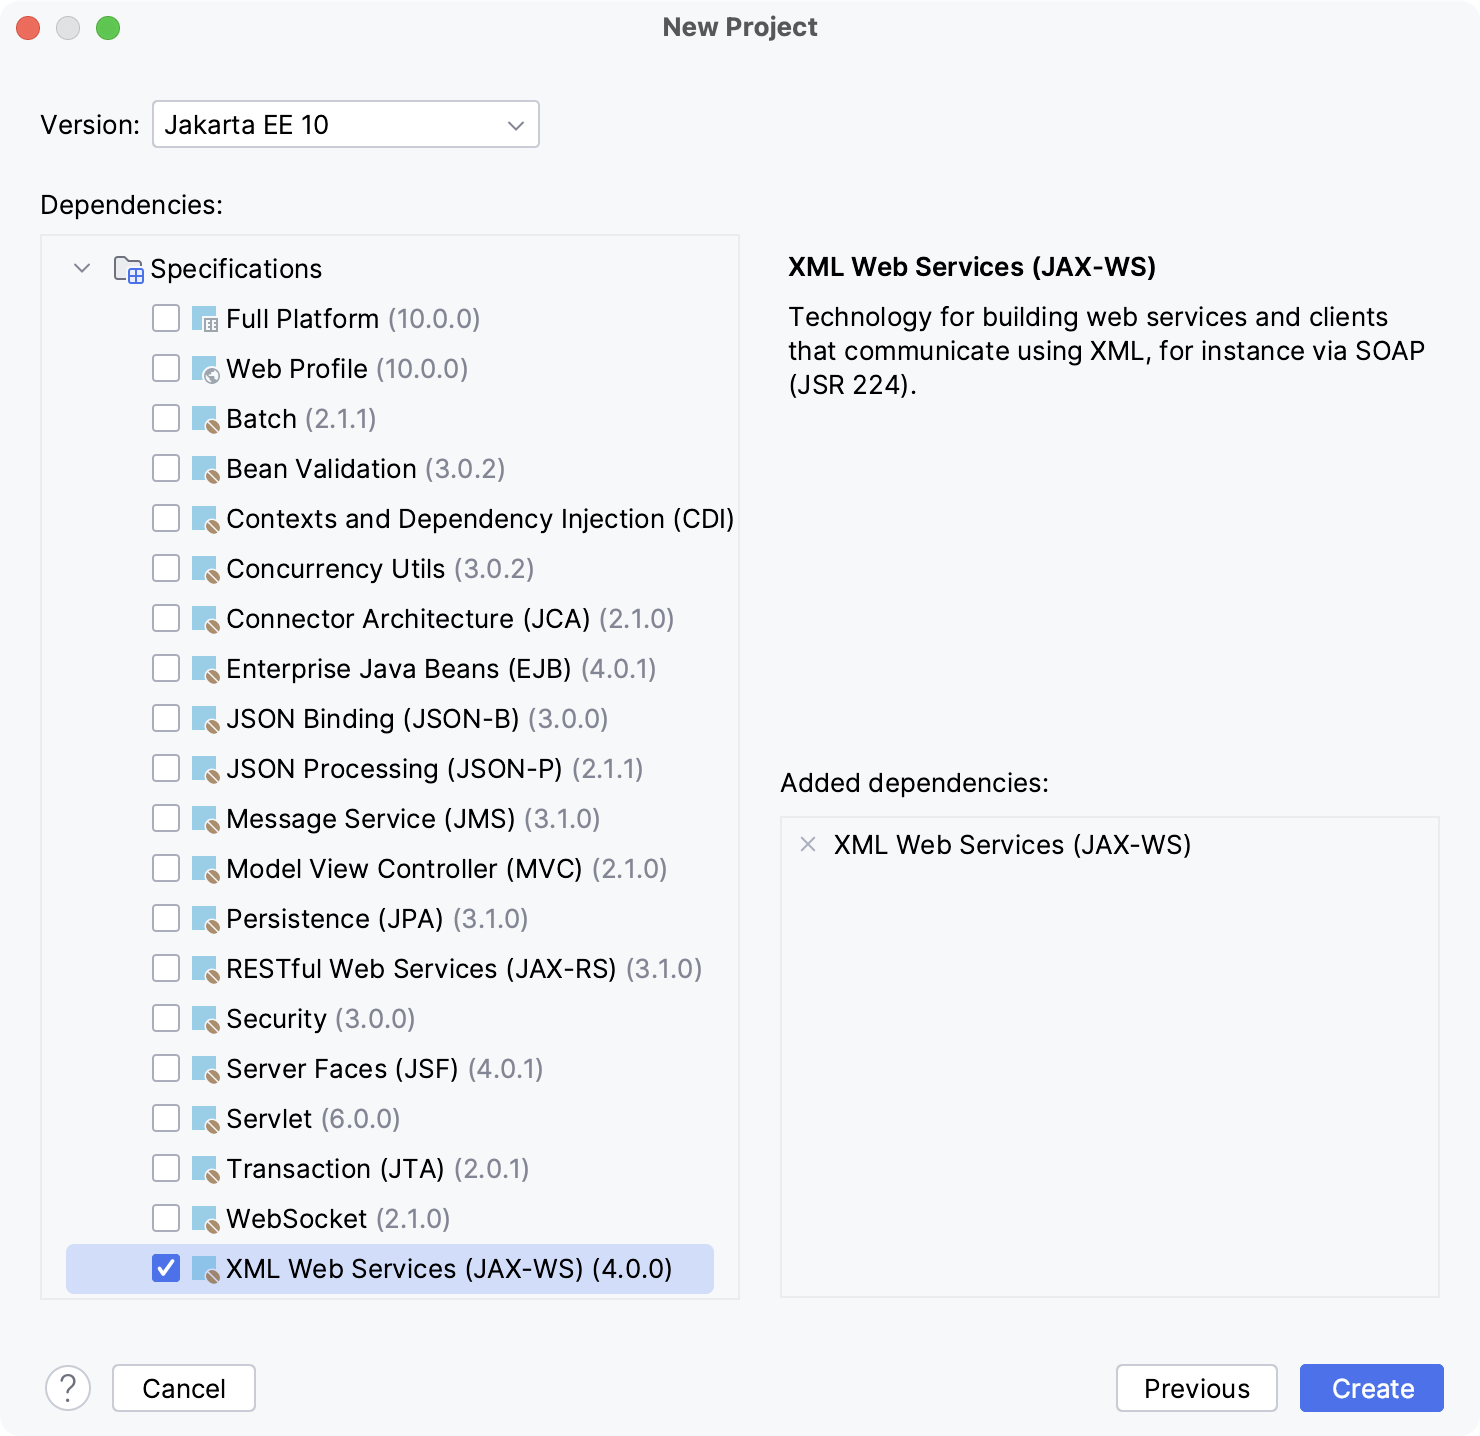
6. On the next step of the wizard, select the Jakarta EE version to be supported.
From the Dependencies list, select XML Web Services.
7. Click Create.
Procedure: Add JAX-WS to an existing project
1. Open the build file in the editor (`pom.xml` or `build.gradle` depending on the [build tool](build-tools.html) used in your project).
2. Add the JAX-WS library, and make sure its version matches the rest of your project:
Maven:
Jakarta EE
: ```XML
:
: jakarta.xml.ws
: jakarta.xml.ws-api
: 4.0.2
:
: ```
Java EE
: ```XML
:
: javax.xml.ws
: jaxws-api
: 2.3.1
:
:
: javax.jws
: javax.jws-api
: 1.1
:
: ```
Gradle (Groovy):
Jakarta EE
: ```GROOVY
: implementation 'jakarta.xml.ws:jakarta.xml.ws-api:4.0.2'
: ```
Java EE
: ```GROOVY
: implementation 'javax.xml.ws:jaxws-api:2.3.1'
: implementation 'javax.jws:javax.jws-api:1.1'
: ```
Gradle (Kotlin):
Jakarta EE
: ```KOTLIN
: implementation("jakarta.xml.ws:jakarta.xml.ws-api:4.0.2")
: ```
Java EE
: ```KOTLIN
: implementation("javax.xml.ws:jaxws-api:2.3.1")
: implementation("javax.jws:javax.jws-api:1.1")
: ```
3. Press `Ctrl+Shift+O` (Windows), `Ctrl+Shift+O` (macOS), `Ctrl+Shift+O` (IntelliJ IDEA Classic (macOS)), `Ctrl+Shift+O` (macOS System Shortcuts), `Ctrl+Shift+O` (XWin), `Ctrl+Shift+O` (GNOME), `Ctrl+Shift+O` (KDE), `Ctrl+Shift+O` (Emacs), `Ctrl+Shift+O` (Sublime Text), `Ctrl+Shift+O` (Sublime Text (macOS)), `Ctrl+Shift+O` (NetBeans), `Ctrl+Shift+O` (Visual Studio), `Ctrl+Shift+O` (Visual Studio (macOS)), `Ctrl+Shift+O` (Eclipse), `Ctrl+Shift+O` (Eclipse (macOS)) to import the changes.
For more information about working with build tools, refer to [Maven](maven-support.html) or [Gradle](gradle.html).
Procedure: Enable support for any web service engine
IntelliJ IDEA uses facets to enable support for the most common web service engines. However, you can enable any web service engine or implementation version, even if it is not supported by IntelliJ IDEA facets.
1. Download the desired web service engine implementation.
2. Press `Ctrl+Alt+S` (Windows), `⌘ Comma` (macOS), `⌘ Comma` (IntelliJ IDEA Classic (macOS)), `⌘ Comma` (macOS System Shortcuts), `Ctrl+Alt+S` (XWin), `Ctrl+Alt+S` (GNOME), `Ctrl+Alt+S` (KDE), `Ctrl+Alt+S` (Emacs), `Ctrl+Alt+S` (Sublime Text), `⌘ Comma` (Sublime Text (macOS)), `Ctrl+Alt+S` (NetBeans), `Ctrl+Alt+S` (Visual Studio), `⌘ Comma` (Visual Studio (macOS)), `Ctrl+Alt+S` (Eclipse), `⌘ Comma` (Eclipse (macOS)) to open settings and then select `Tools | Web Services`. Specify the path to the external web service engine, desired server name and port, and other options For more information, refer to [Web Services](web-services-settings.html).
## See also
### Concepts
[Web services](web-services.html) [Web service clients](web-service-clients.html)
### Procedures
[Web service clients](web-service-clients.html) [Web services](web-services.html)
### Reference
[Web Services Reference](web-services-reference.html)