Search for usages
When you write or edit code, you might come across a code element that you want to change or delete. Before you make the changes, it is a good practice to see where the code element is used and how it affects the application. With the Find Usages actions you can search for the references of your code element throughout the whole codebase.
You can manage the search process and search only in a single file, extend your search to the whole project, or create a certain search scope. Moreover, you can configure the color of the usages highlighting or disable the automatic highlighting of usages altogether.
Search for usages in a file
In the editor, select a symbol you want to find, IntelliJ IDEA automatically highlights all found usages in the file. If the highlighting of usages is disabled, press Ctrl+Shift+F7 to highlight all usages in the file.

Go to Ctrl+F7. IntelliJ IDEA selects the first usage occurrence in the file.
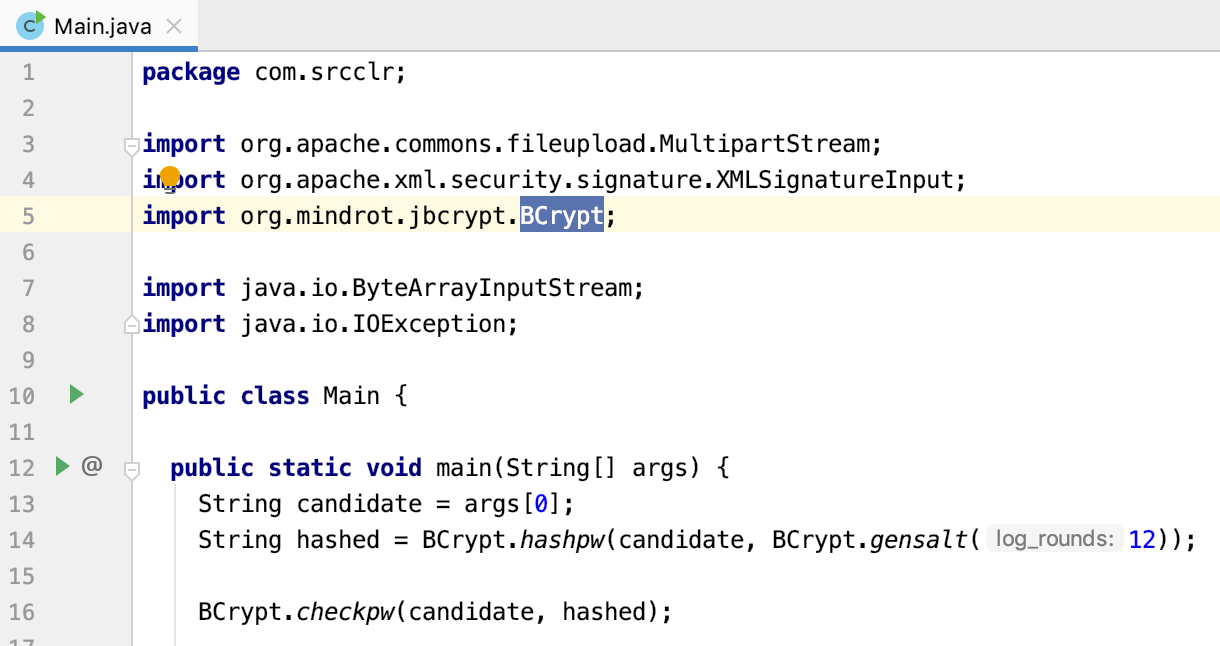
With Ctrl+F7 you can also highlight the exception name and places where the exception is thrown.
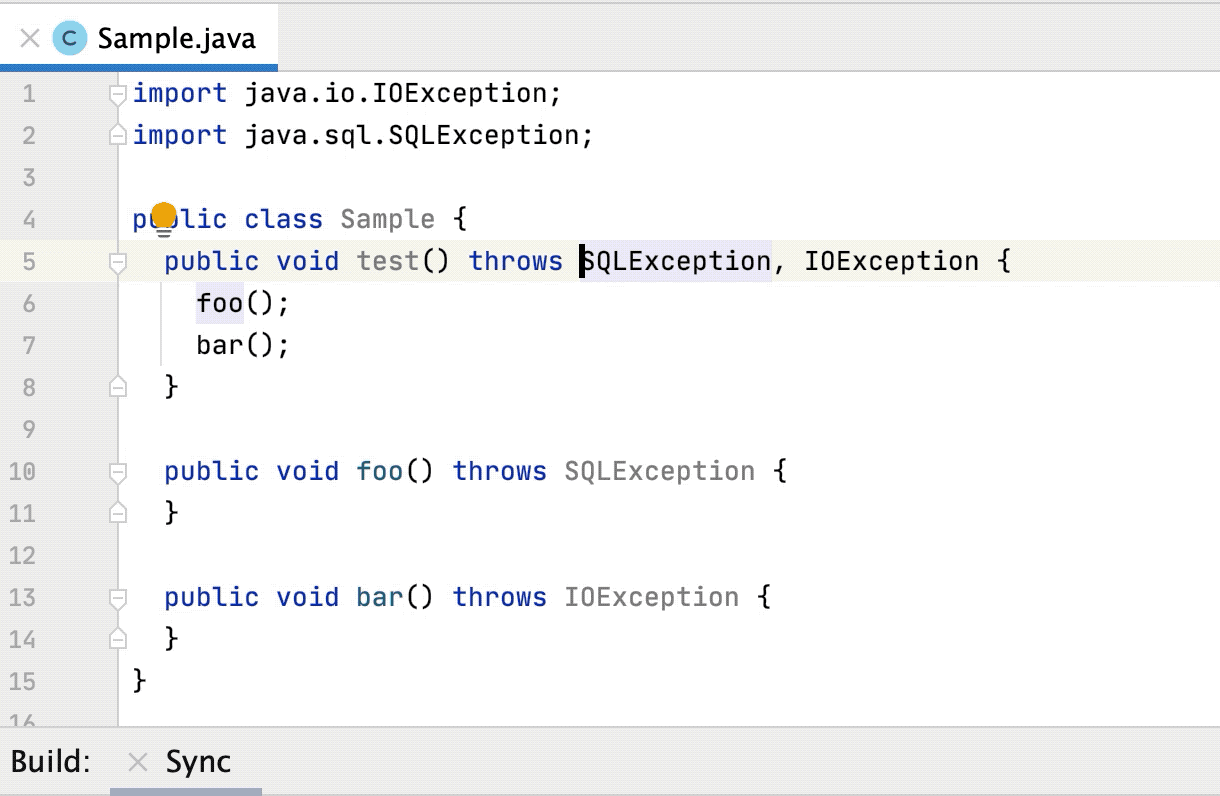
Use the F3 and Shift+F3 shortcuts to navigate between highlighted symbols.
Search for usages in a project
Select a symbol for which you want to find usages, right-click the symbol, and select from its context menu or press Alt+F7.
Check the results in the Find tool window.
If you need, you can group (
) the results by files, packages, directories, and so on.
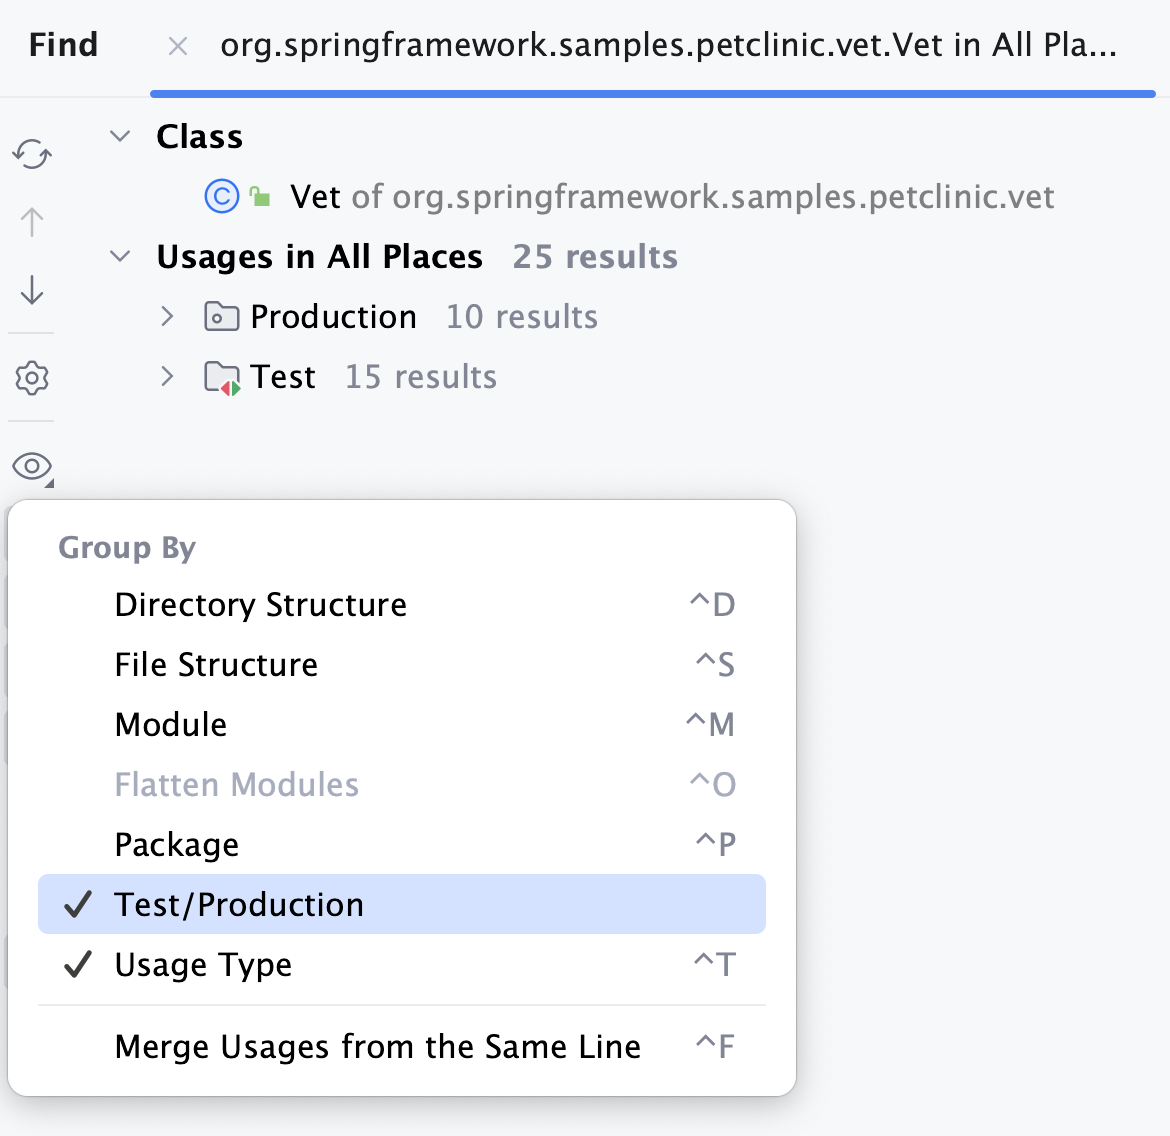
To open the Find Usages dialog, click
on the toolbar in the Find tool window or press Ctrl+Alt+Shift+F7.
IntelliJ IDEA analyzes search results, detects the most common usage patterns, and categorizes all found usages into groups based on their structural similarity. These usage clusters appear in the Preview tab.
You can select any group node from the list and click Show similar usages to look through the results.
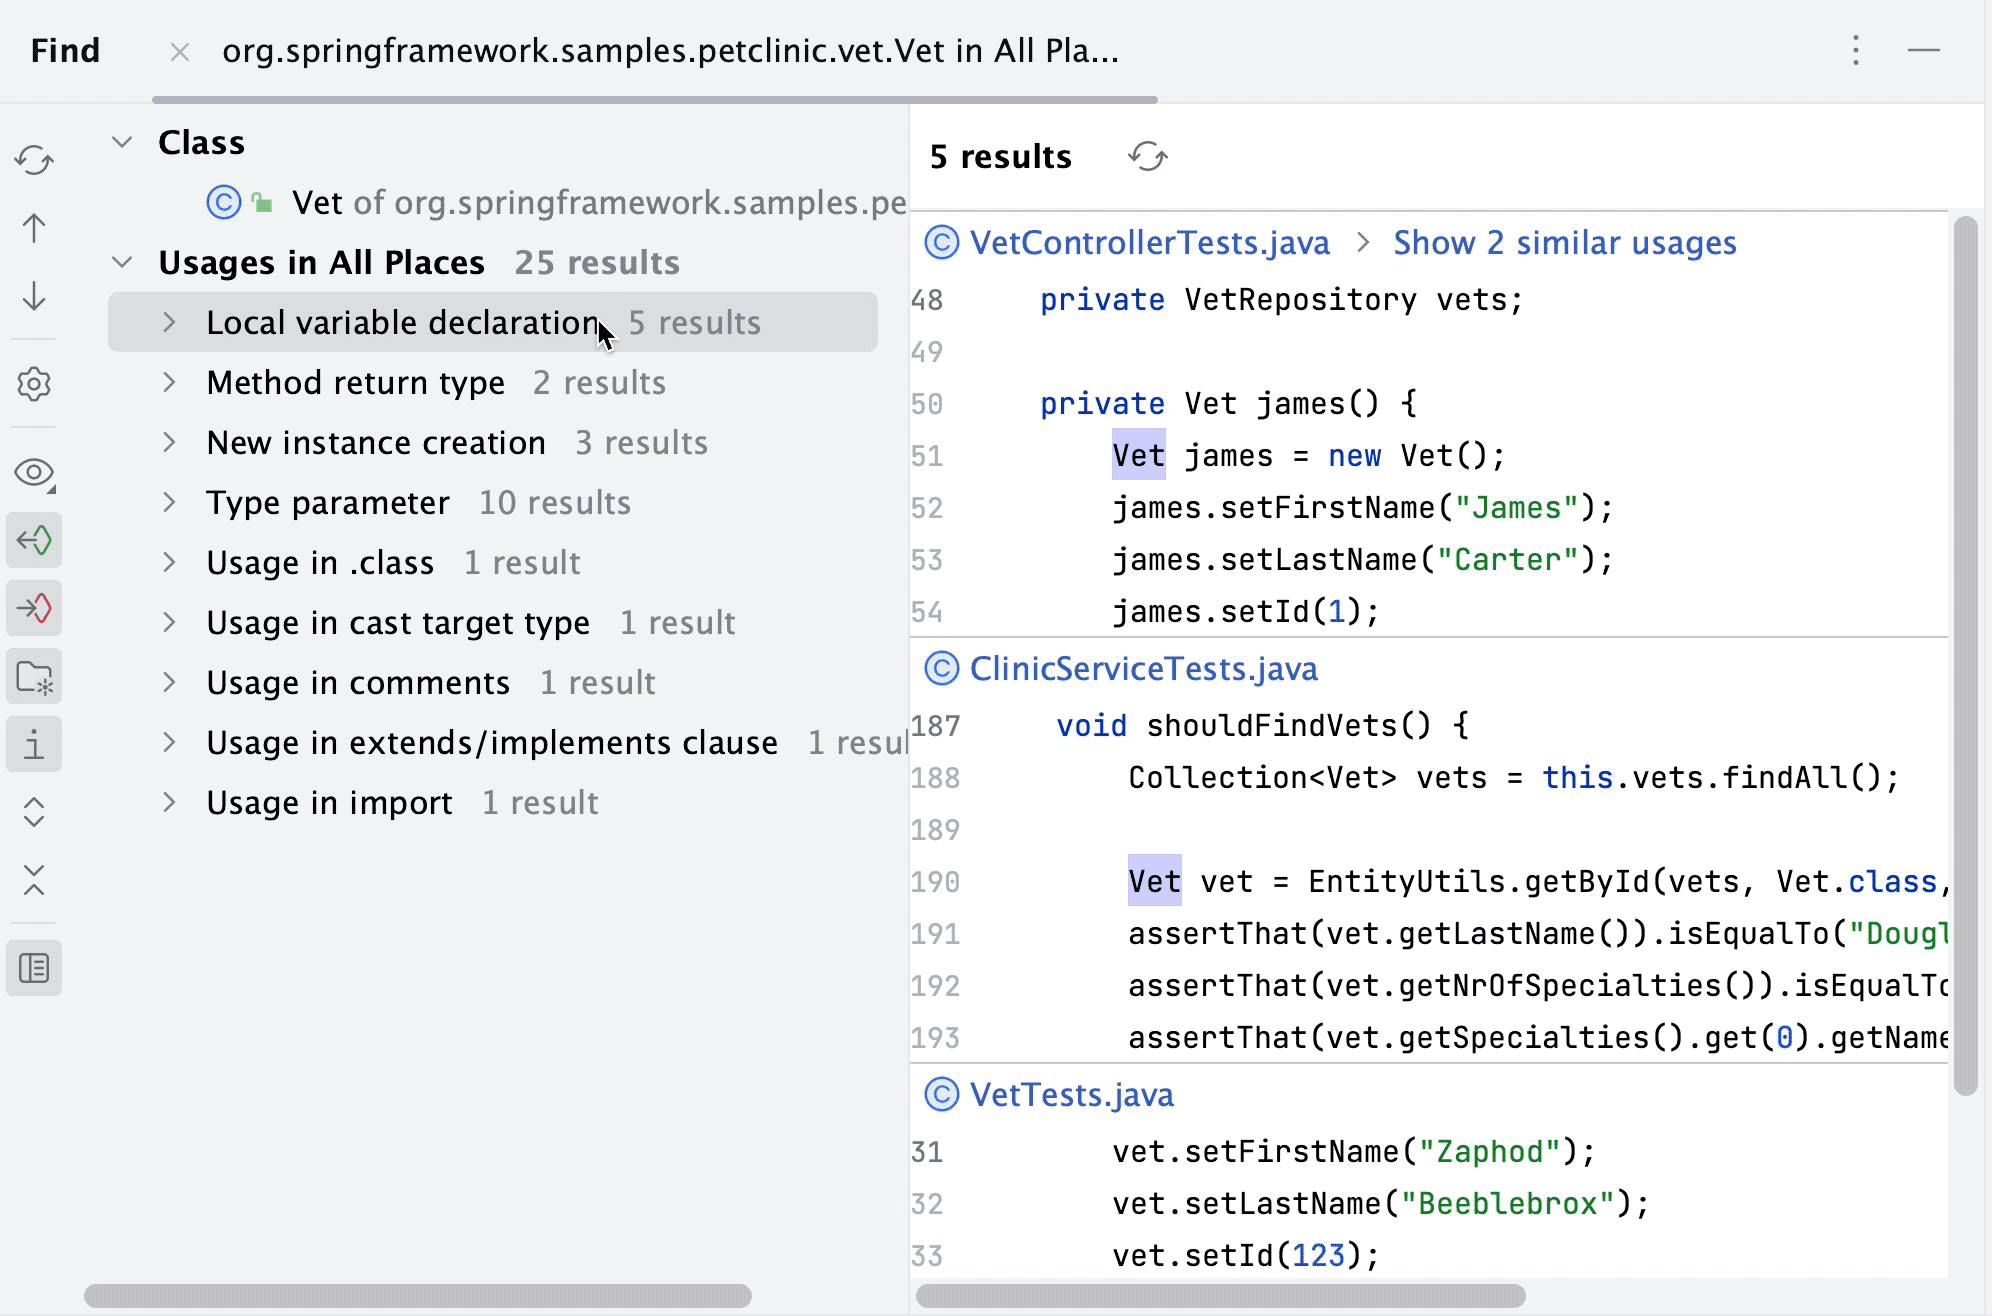
To disable this functionality, clear the Enable similar usages clustering in Find Usages view checkbox in the advanced settings.
While in the Find tool window, you can also use the Preview area to check the places where the usages were found, to see a call hierarchy for methods, data flow for fields, and so on.
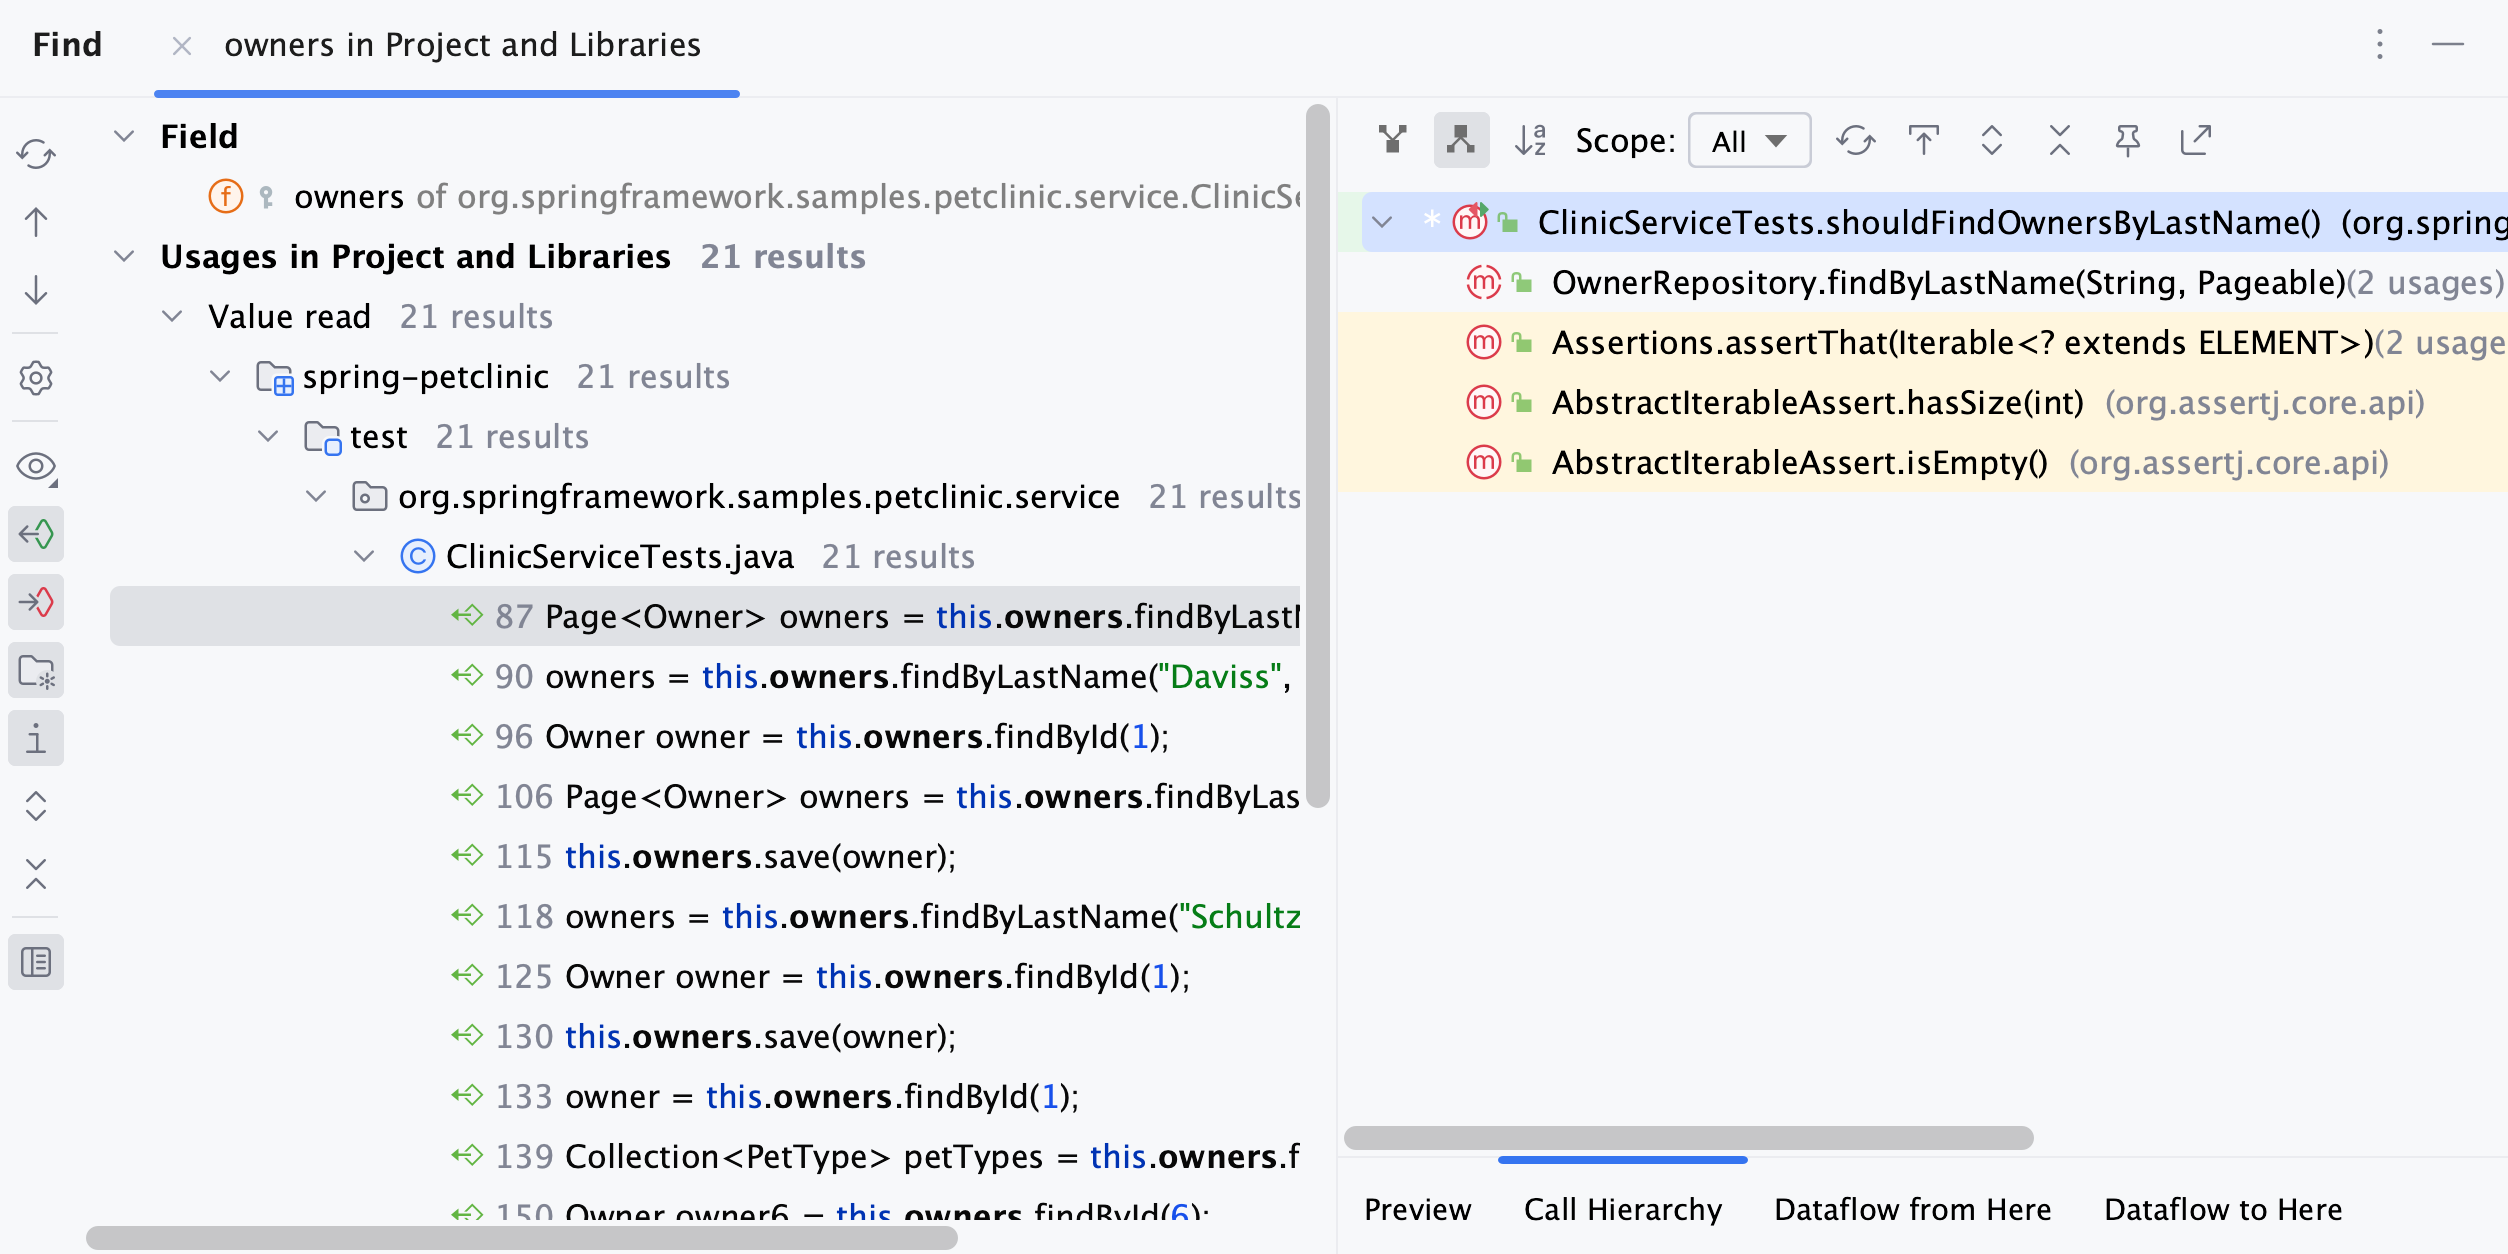
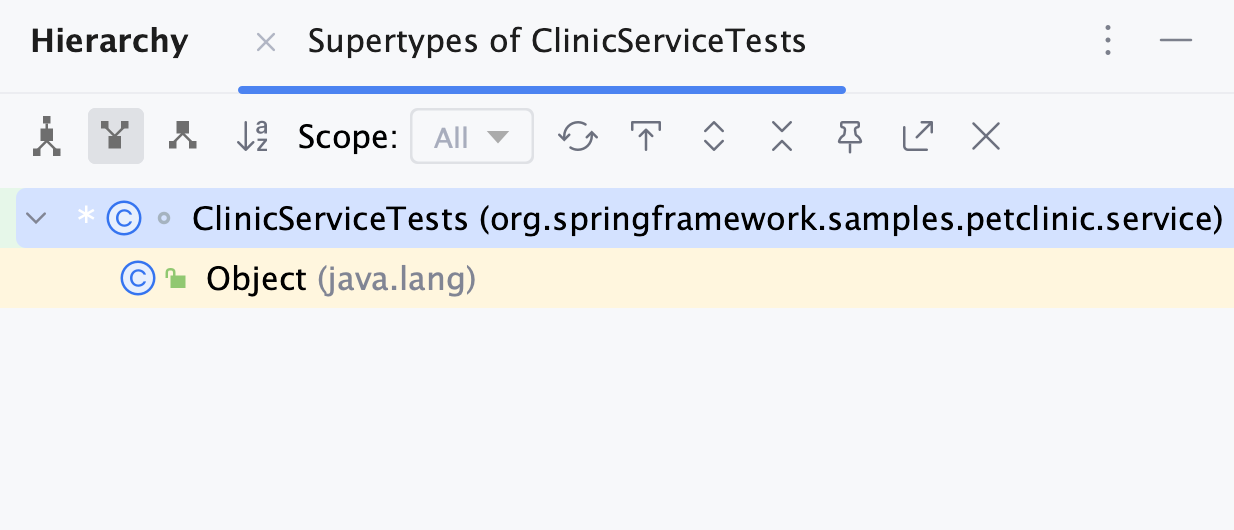
You can use the Find Usages action as an alternative to Call Hierarchy actions (Ctrl+Alt+H).
Preview source code for found usages
You have several options to see the source code for the usages found.
Select a symbol for which you want to find usages, right-click the symbol, and select from its context menu or press Alt+F7.
In the Find tool window, click the
Preview Source icon.
As an alternative, you can select Jump to Source if you invoke the context menu on a usage found or Show in Split. In this case, the file with the result usage is opened in the editor.
Show usages in a separate window
You can view usages of the selected symbol in a separate window that you can move to different parts of your screen and use for quick navigation.
In the editor, select a symbol for which you want to see the usages.
Go to Ctrl+Alt+F7.

The usages window shows the current scope and total count of usages. If you want to quickly switch to the default scope, press Ctrl+Alt+F7.
If the search results have too many entries, then IntelliJ IDEA shows the first hundred usages found and the more usages option on the bottom of the window which you can click to display another hundred usages, and so on until the search is finished.
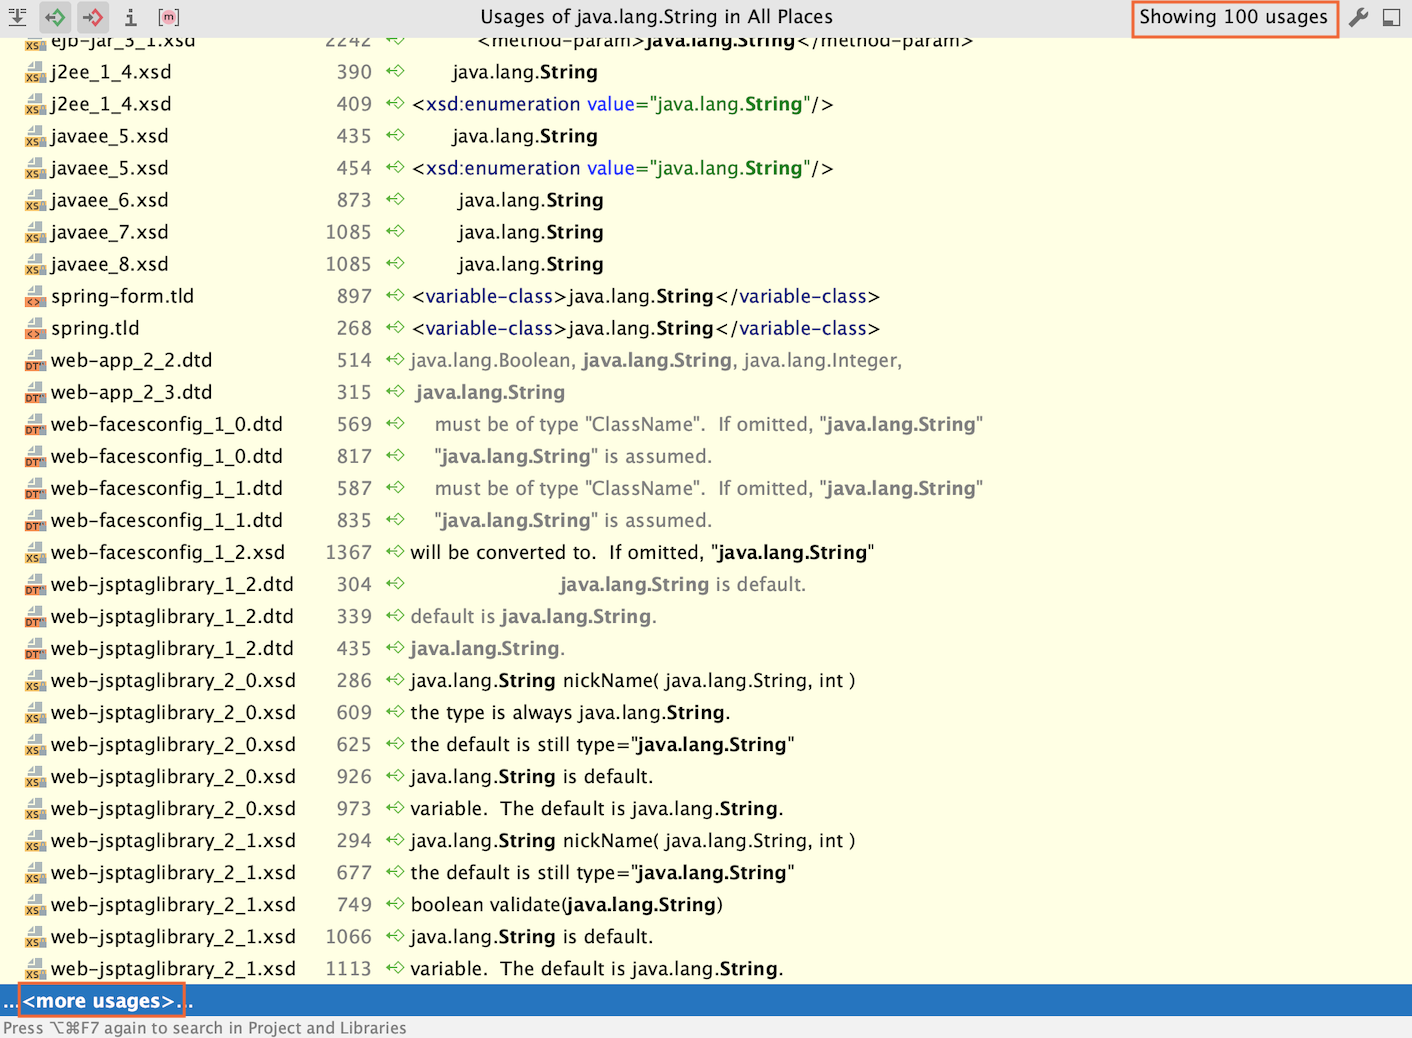
Use filters on the top of the window to show or hide the certain search entries.

You can configure IntelliJ IDEA to show usages of Java code symbols in the editor. Code vision lets you focus on your code, enriched with contextual information and navigation.
Show inlay hints for usages
In the Settings dialog (Ctrl+Alt+S) , go to .
Expand the Code Vision section and select the Usages checkbox.
Click OK to save the changes.
When you return to your code in the editor, IntelliJ IDEA will show you the usages of Java symbols. You can click the displayed hint to see and navigate to the needed usage in a separate window.

You can click
to access the Find Usages settings.
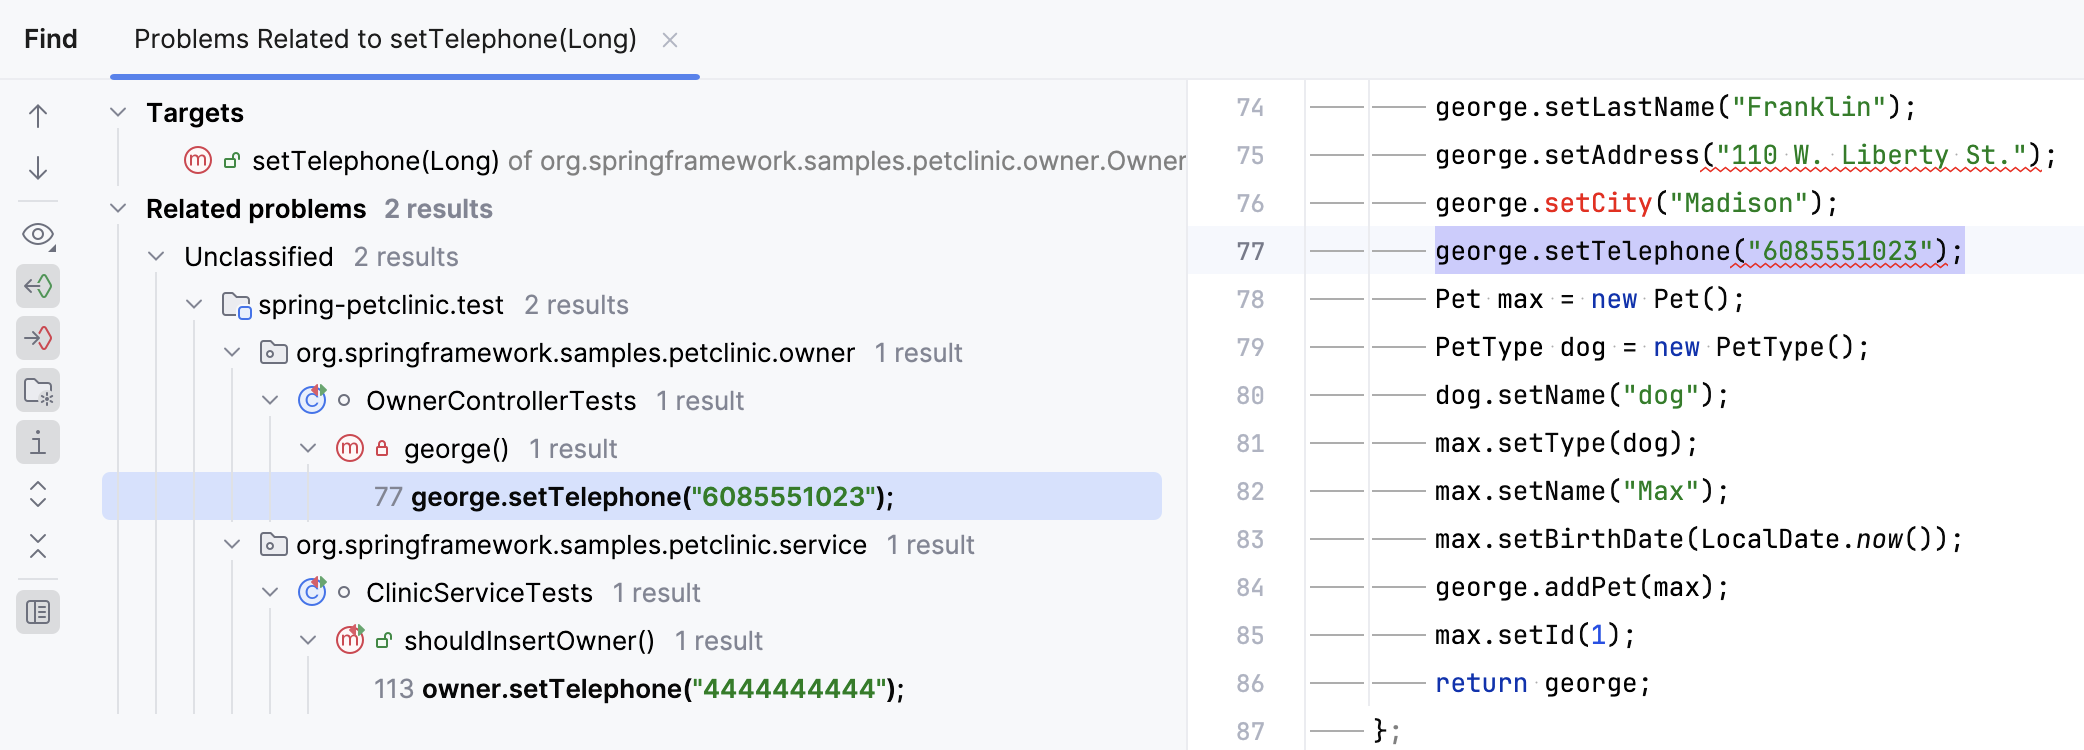
If you select the Related problems option in , IntelliJ IDEA will warn you with an inlay hint about problems in your code that are related to the signature change of a class or a method that has external usages. This feature works for fields as well.

You can click the related problems inlay hint and check found problems in the Find tool window.
View recent usages search results
IntelliJ IDEA remembers your Find Usages results, so you don't need to run the action again.
In the main menu, go to and then select the usage query.
Manage the scope of Find Usages
Sometimes, you might want to find usages only in certain files or libraries of your project.
Press Ctrl+Alt+Shift+F7 to open the Find Usages dialog.
In the Find Usages dialog, in the Scope field, select a scope for your search. For example, you can search for usages only in Open Files or only Project Test Files.

You can also set a custom scope by clicking
. For example, you can create a custom scope to exclude certain files from the search for usages, such as test files. When you are done setting a new scope, click Find.
If IntelliJ IDEA doesn't return any results, it will display a message suggesting that you opt for more options.

You can follow the link or press Ctrl+Alt+Shift+F7 to open the Find Usages dialog again and set a new scope for your search.
Disable automatic highlighting of usages
When you place the caret at a symbol, the IDE highlights all usages of this symbol in the current file.
If necessary, you can disable the automatic highlighting.
Press Ctrl+Alt+S to open settings and then select .
Clear the Usages of element at caret checkbox in the Highlight on Caret Movement section.
When automatic highlighting is disabled, and you want to highlight usages of a symbol in the current file, select this symbol and press Ctrl+Shift+F7. This will highlight all usages of the symbol in the current file.
Change the background color of the highlighted usages
In the Settings dialog (Ctrl+Alt+S) , go to .
From the options on the right, open the node and select Identifier under caret.
In the Background field, specify the color you need and save the changes.