# Get started with Scala
This section describes the Scala plugin in IntelliJ IDEA. You will find here information that should help you with your Scala development: an overview of the most important features, solutions to common issues, and tips to improve productivity. For more information about the plugin, take a look at the [Scala landing page](https://jetbrains.com/scala) and the [Scala blog](https://blog.jetbrains.com/scala).
[Video](https://www.youtube.com/v/cj3HFctzYm8)
You can also watch videos from the [IntelliJ IDEA x Scala playlist](https://youtube.com/playlist?list=PLPZy-hmwOdEVDwhWoNSyT7OejCBxgjfsL) on the official IntelliJ IDEA YouTube channel.
## Install the Scala plugin
If you already installed IntelliJ IDEA, and now you want to add Scala support to it, you need to download and enable the Scala plugin. If you run IntelliJ IDEA for the first time, you can install the Scala plugin when IntelliJ IDEA suggests downloading featured plugins. Otherwise, you can download the plugin manually.
Procedure: Install the Scala plugin
This functionality relies on the [Scala](https://plugins.jetbrains.com/plugin/1347-scala) plugin, which you need to install and enable.
1. Press `Ctrl+Alt+S` (Windows), `⌘ Comma` (macOS), `⌘ Comma` (IntelliJ IDEA Classic (macOS)), `⌘ Comma` (macOS System Shortcuts), `Ctrl+Alt+S` (XWin), `Ctrl+Alt+S` (GNOME), `Ctrl+Alt+S` (KDE), `Ctrl+Alt+S` (Emacs), `Ctrl+Alt+S` (Sublime Text), `⌘ Comma` (Sublime Text (macOS)), `Ctrl+Alt+S` (NetBeans), `Ctrl+Alt+S` (Visual Studio), `⌘ Comma` (Visual Studio (macOS)), `Ctrl+Alt+S` (Eclipse), `⌘ Comma` (Eclipse (macOS)) to open settings and then select `Plugins`.
2. Open the Marketplace tab, find the Scala plugin, and click Install (restart the IDE if prompted).
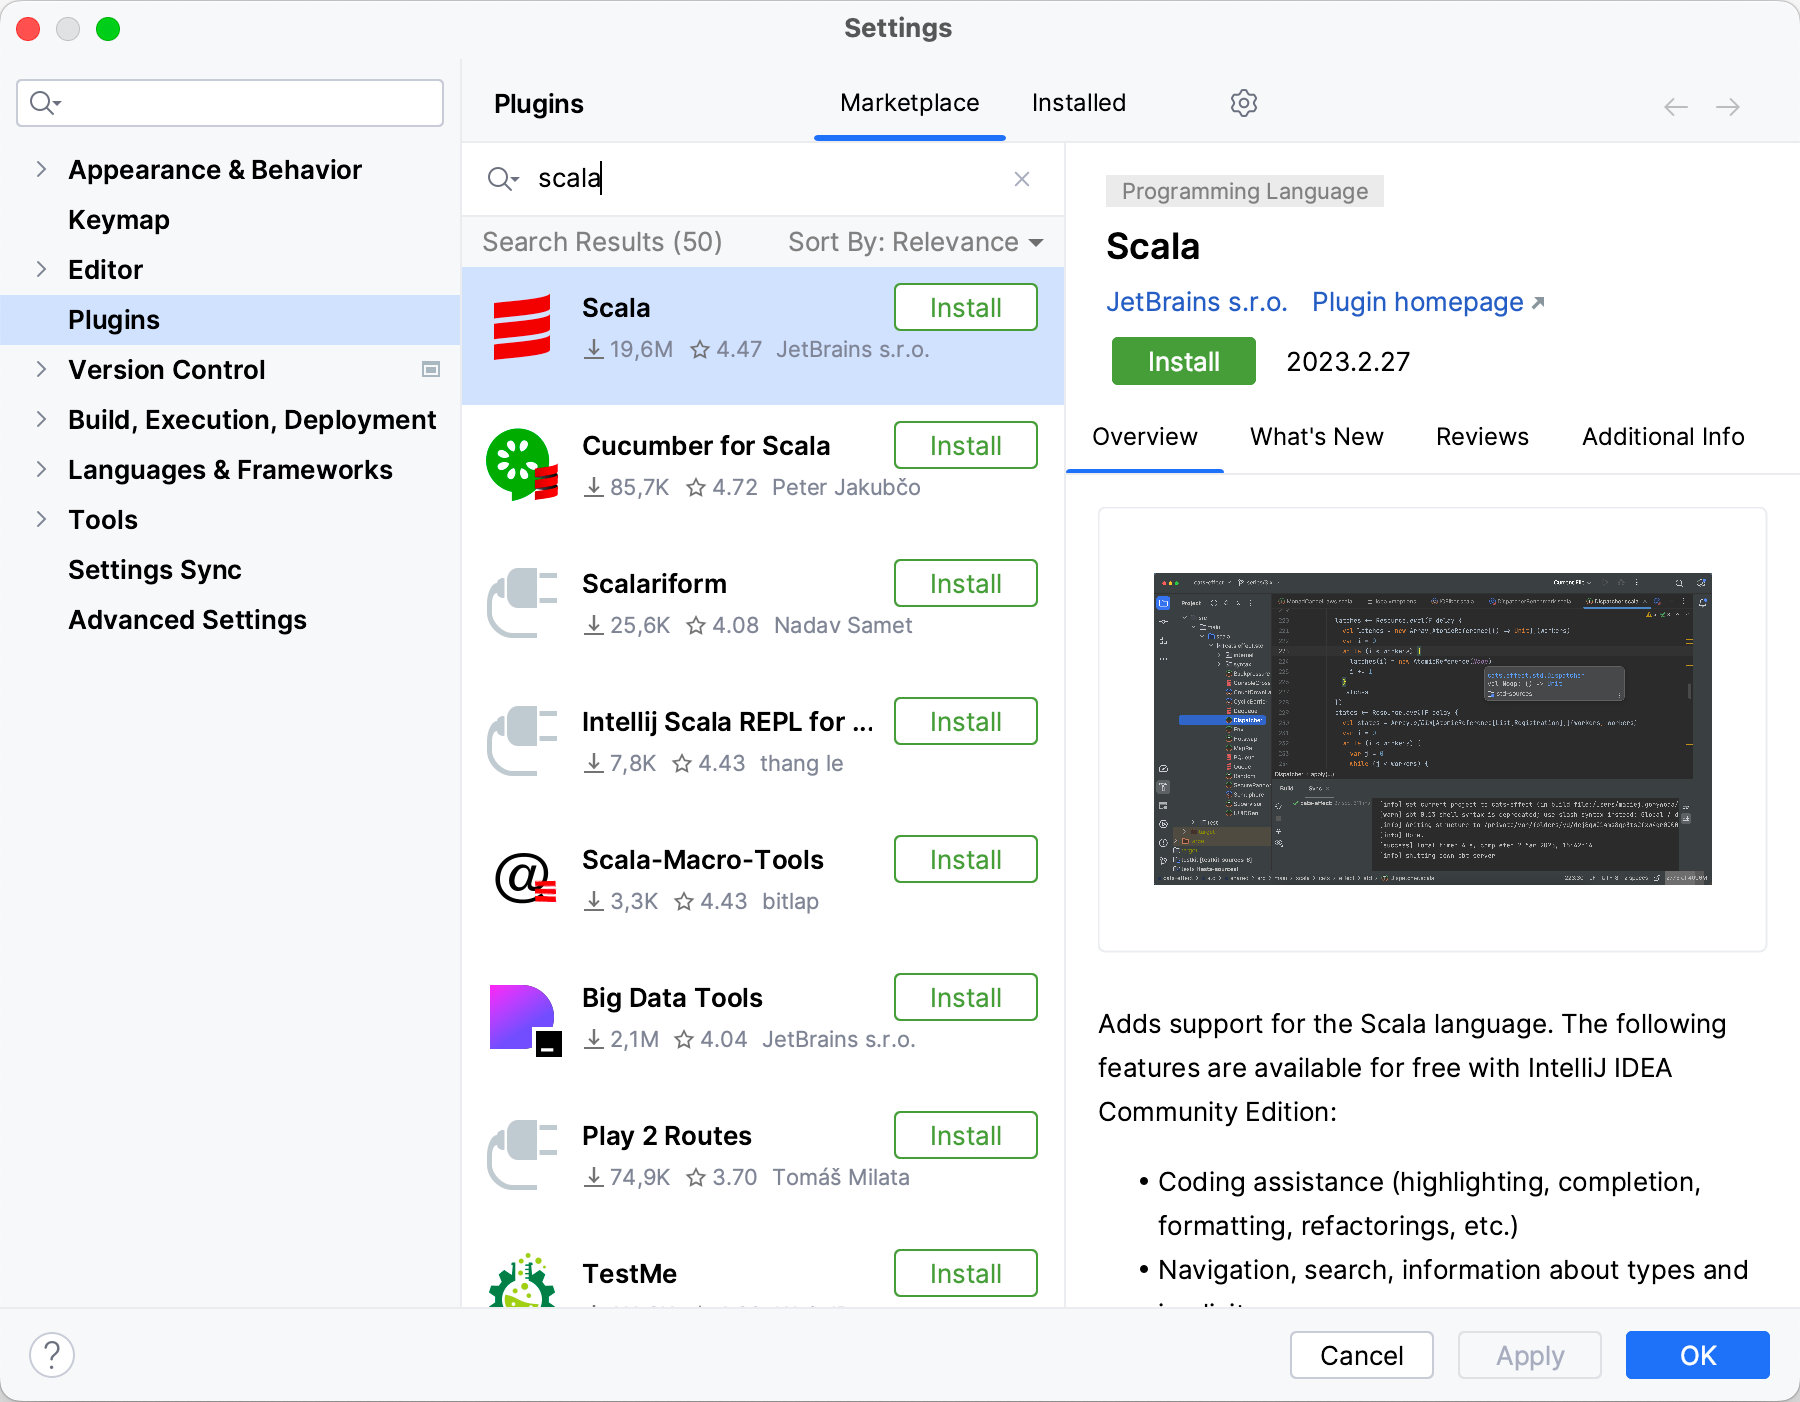
Now you can create a new Scala project, import one from existing sources, or check it out from VCS.
## Create a new Scala project
For a general overview of how to create new projects in IntelliJ IDEA, refer to [Create a new project](new-project-wizard.html).
Procedure:
1. On the Welcome screen, click New Project. Alternatively, in the main menu, go to `File | New | Project`.
2. From the list on the left, select Scala.
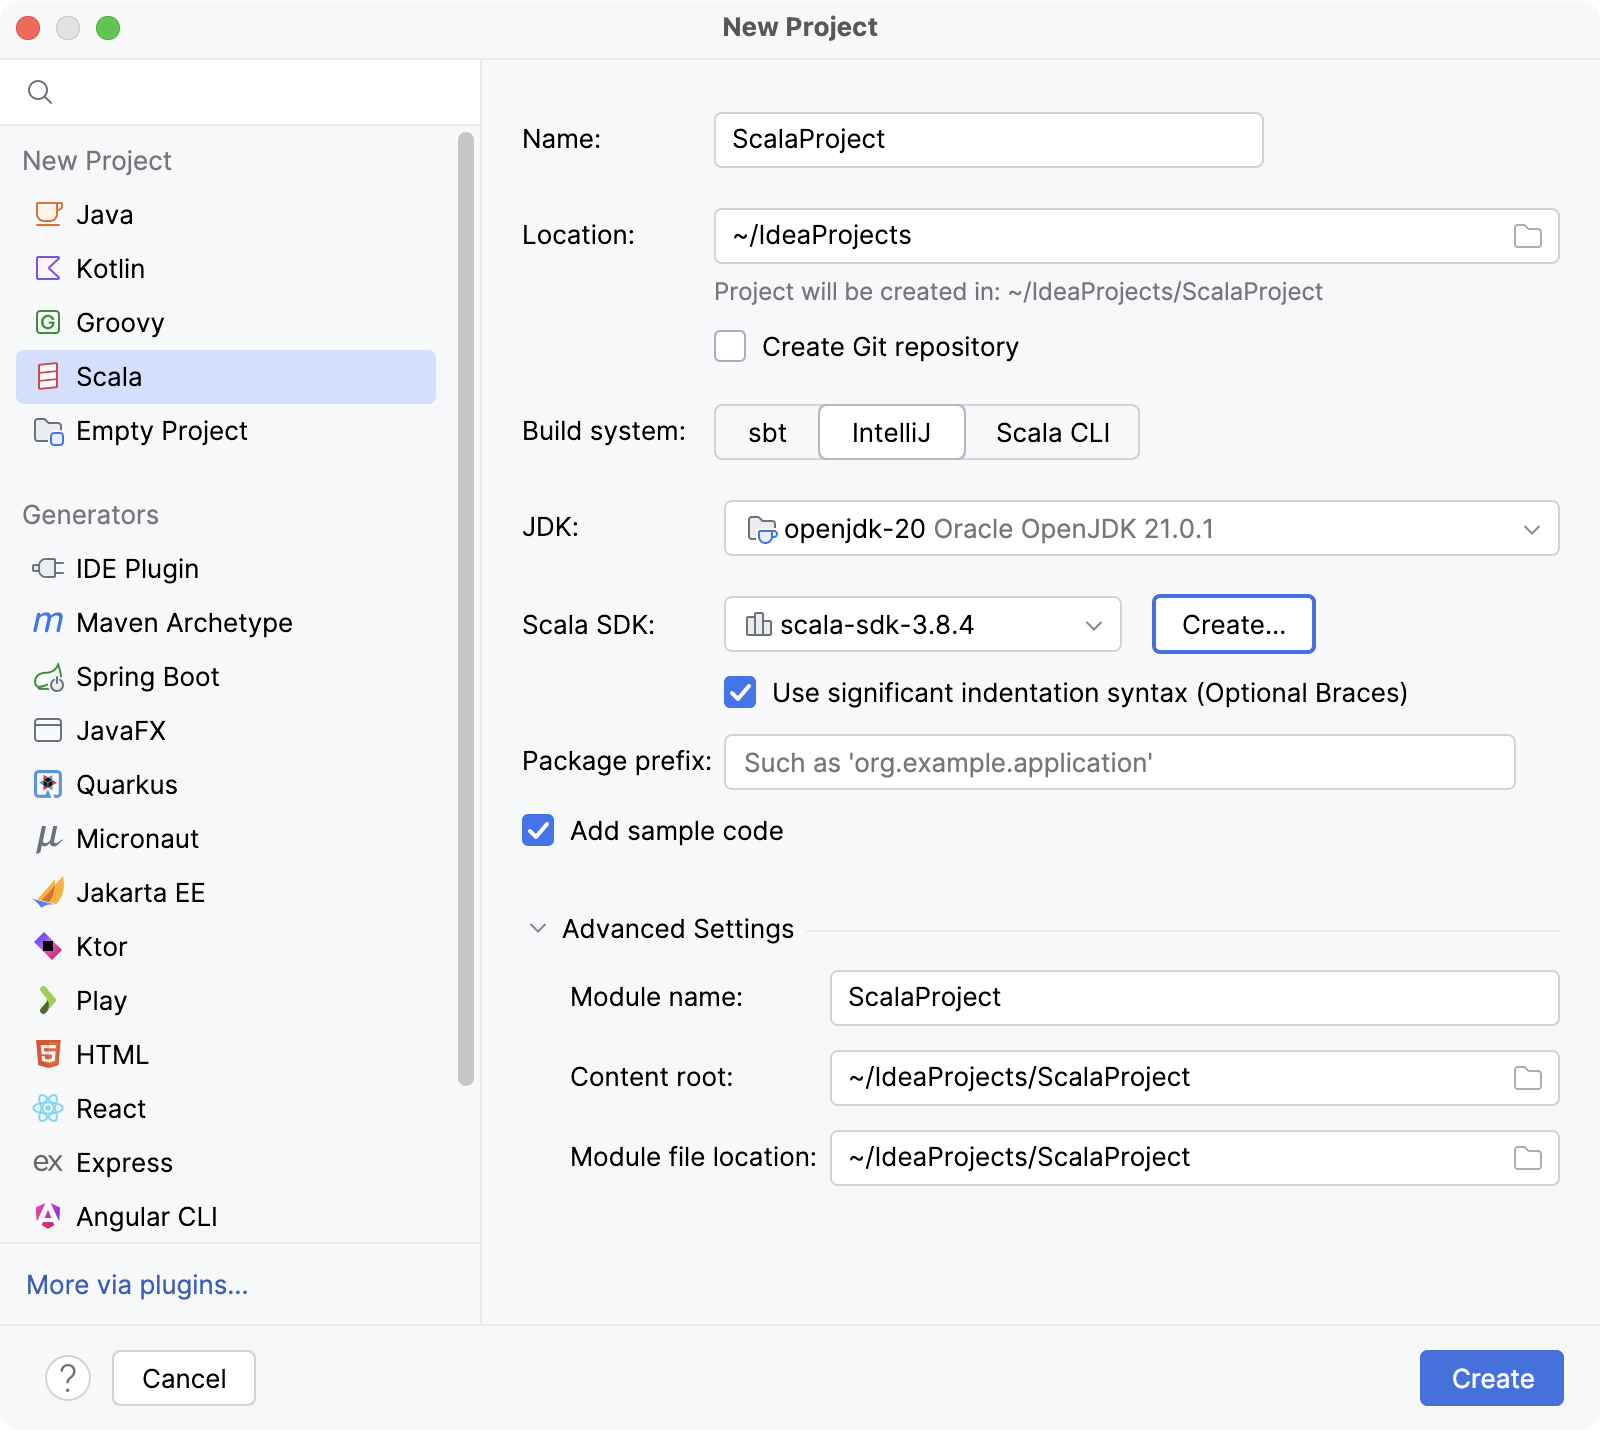
3. Name the new project and change its location if necessary.
4. If you want, select the Create Git repository checkbox to place the new project under version control. If you decide not to, you will be able to do it later at any time.
5. Select the IntelliJ build system. It is a native builder that does not require downloading additional artifacts.
6. From the JDK list, select the [JDK](sdk.html#jdk) that you want to use in your project.
* If the JDK is installed on your computer, but not defined in the IDE, select  Add JDK from Disk… and specify the path to the JDK home directory.
* If you don't have the necessary JDK on your computer, select  Download JDK .
7. Similarly, from the Scala SDK list, select the SDK that you want to use in your project.
If the SDK is not on the list, select Create. A new window will open with a longer list of Scala SDKs found on Ivy, Maven, and Coursier servers. You can choose one of them or select Browse and specify the path to the SDK home directory on your computer.
Another option is to select Download, choose the Scala version you need, and IntelliJ IDEA will download it.
8. If, in the previous step, you select Scala 3.x, you will see a checkbox Use significant indentation syntax (Optional Braces). If you mark it, IntelliJ IDEA will work in the mode where the new syntax is supported. You can later change your decision in `Settings | Editor | Code Style | Scala` on the Other tab.
9. If you want, enable the Add sample code option to create a file with a sample `Hello World!` application.
10. Click Create.
## Create a new Scala project with sbt
Most steps in this procedure are the same as for creating a new Scala project with IntelliJ. The difference lies in choosing sbt as your build system.
If you want to learn more about how IntelliJ IDEA supports sbt, refer to [sbt](sbt-support.html) and [sbt settings](sbt.html).
Procedure:
1. From the list on the left, select Scala.
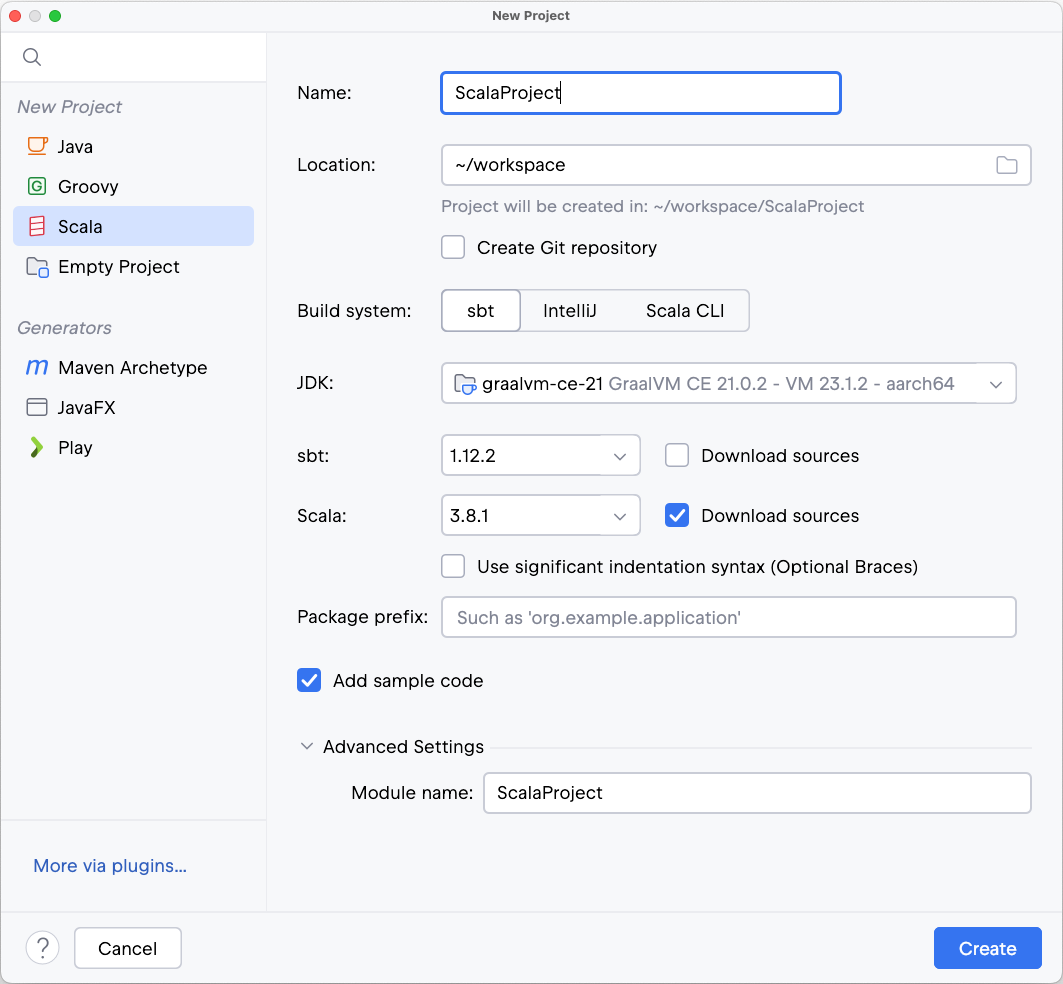
2. Name the new project and change its location if necessary.
3. If you want, select the Create Git repository checkbox to place the new project under version control. If you decide not to, you will be able to do it later at any time.
4. From the JDK list, select the [JDK](sdk.html#jdk) that you want to use in your project.
* If the JDK is installed on your computer, but not defined in the IDE, select  Add JDK from Disk… and specify the path to the JDK home directory.
* If you don't have the necessary JDK on your computer, select  Download JDK .
5. Select the sbt build system.
6. Choose an sbt version from the drop-down list. If needed, you can also download its source code.
7. Choose a Scala version from the drop-down list. As with sbt, you can also download its source code.
8. Again, if in the previous step, you select Scala 3.x, you will see a checkbox Use significant indentation syntax (Optional Braces). If you mark it, IntelliJ IDEA will work in the mode where the new syntax is supported. You can later change your decision in `Settings | Editor | Code Style | Scala` on the Other tab.
> **Note:**
> In contrast to a project created with the default IntelliJ IDEA build system, you cannot choose a Scala SDK from your computer. Instead, the version number that you choose will be used in a `build.sbt` script generated by IntelliJ IDEA after you click Create. In this case, sbt will download the right Scala SDK for you.
## Other ways to create a project
* IntelliJ IDEA enables you to import a new project from existing sources. In the main menu, go to `File | New | Project from Existing Sources` and provide the path to the main folder of the project. To learn more, refer to [Import and export projects](import-project-or-module-wizard.html).
* You can also import a project from your version control system. Select `File | New | Project from Version Control` and provide the necessary information. IntelliJ IDEA will download and set up the project for you. To learn more, refer to [Version control](version-control-integration.html).
## Open an existing project
You can open an existing Scala project in IntelliJ IDEA using one of the following ways:
* Select `File | Open...` in the main menu.
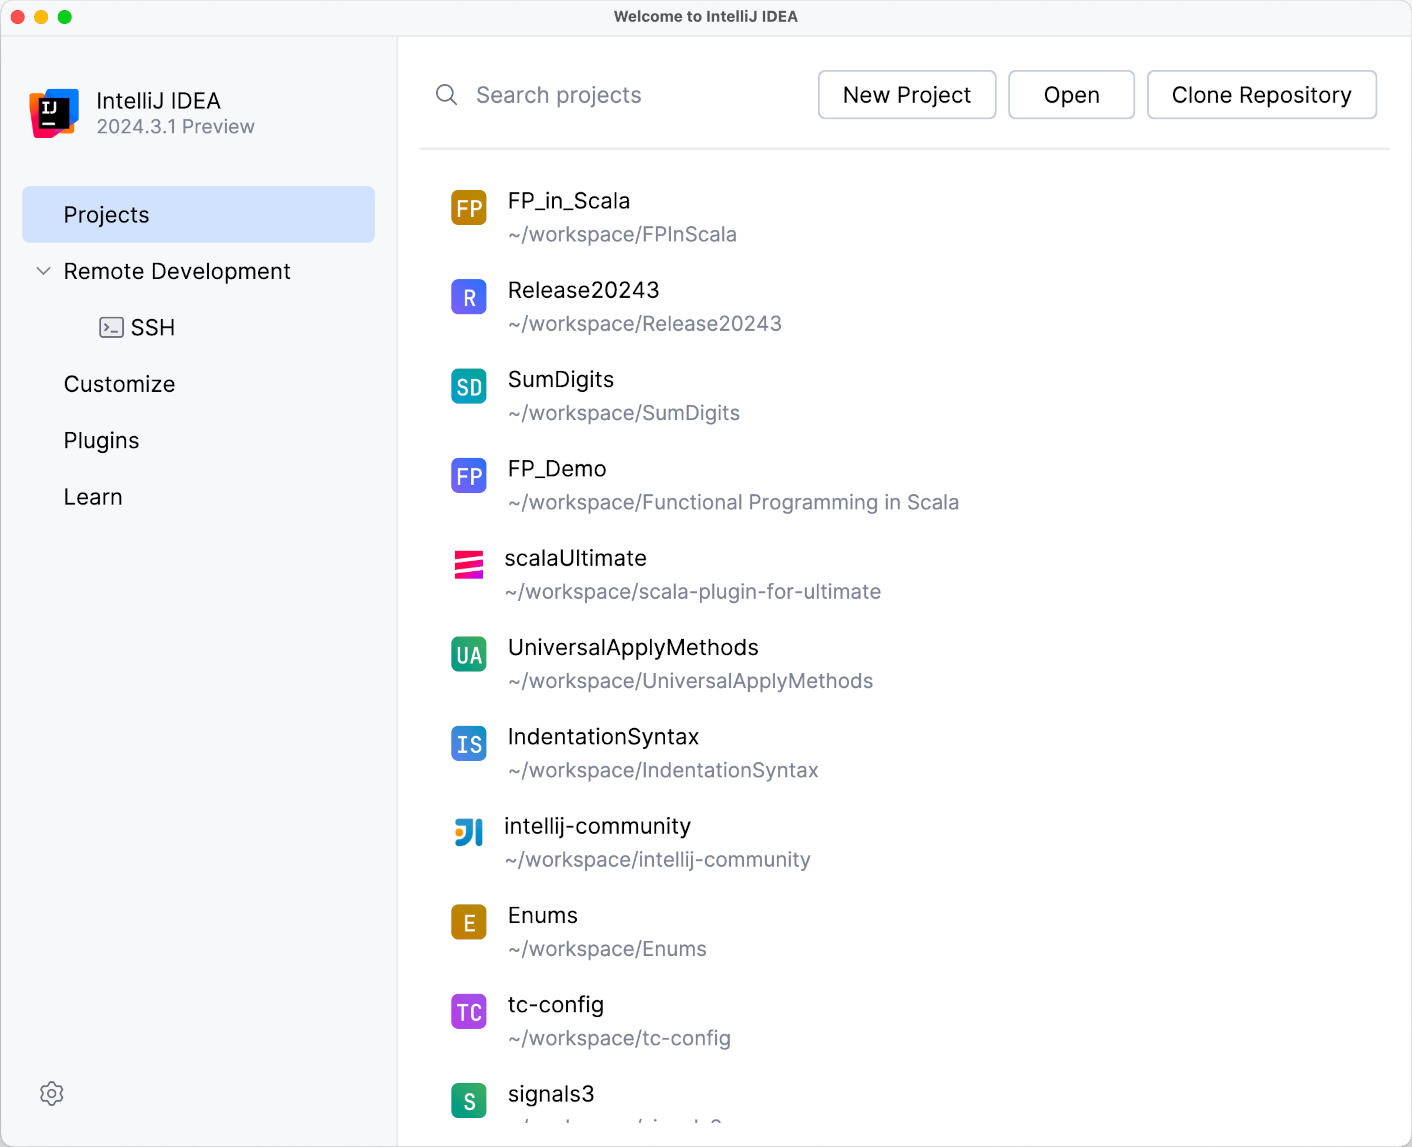
* On the Welcome screen, select the project from the list of recent projects, or click Open and navigate to the project folder in your file system.
## Plugin update channel
If you want early access to new plugin builds with the latest improvements, you can change the plugin update channel.
Procedure: Change the Scala plugin update channel
1. Press `Ctrl+Alt+S` (Windows), `⌘ Comma` (macOS), `⌘ Comma` (IntelliJ IDEA Classic (macOS)), `⌘ Comma` (macOS System Shortcuts), `Ctrl+Alt+S` (XWin), `Ctrl+Alt+S` (GNOME), `Ctrl+Alt+S` (KDE), `Ctrl+Alt+S` (Emacs), `Ctrl+Alt+S` (Sublime Text), `⌘ Comma` (Sublime Text (macOS)), `Ctrl+Alt+S` (NetBeans), `Ctrl+Alt+S` (Visual Studio), `⌘ Comma` (Visual Studio (macOS)), `Ctrl+Alt+S` (Eclipse), `⌘ Comma` (Eclipse (macOS)) to open settings and then select `Languages & Frameworks | Scala`.
2. Open the Updates tab and select one of the three Update channel options:
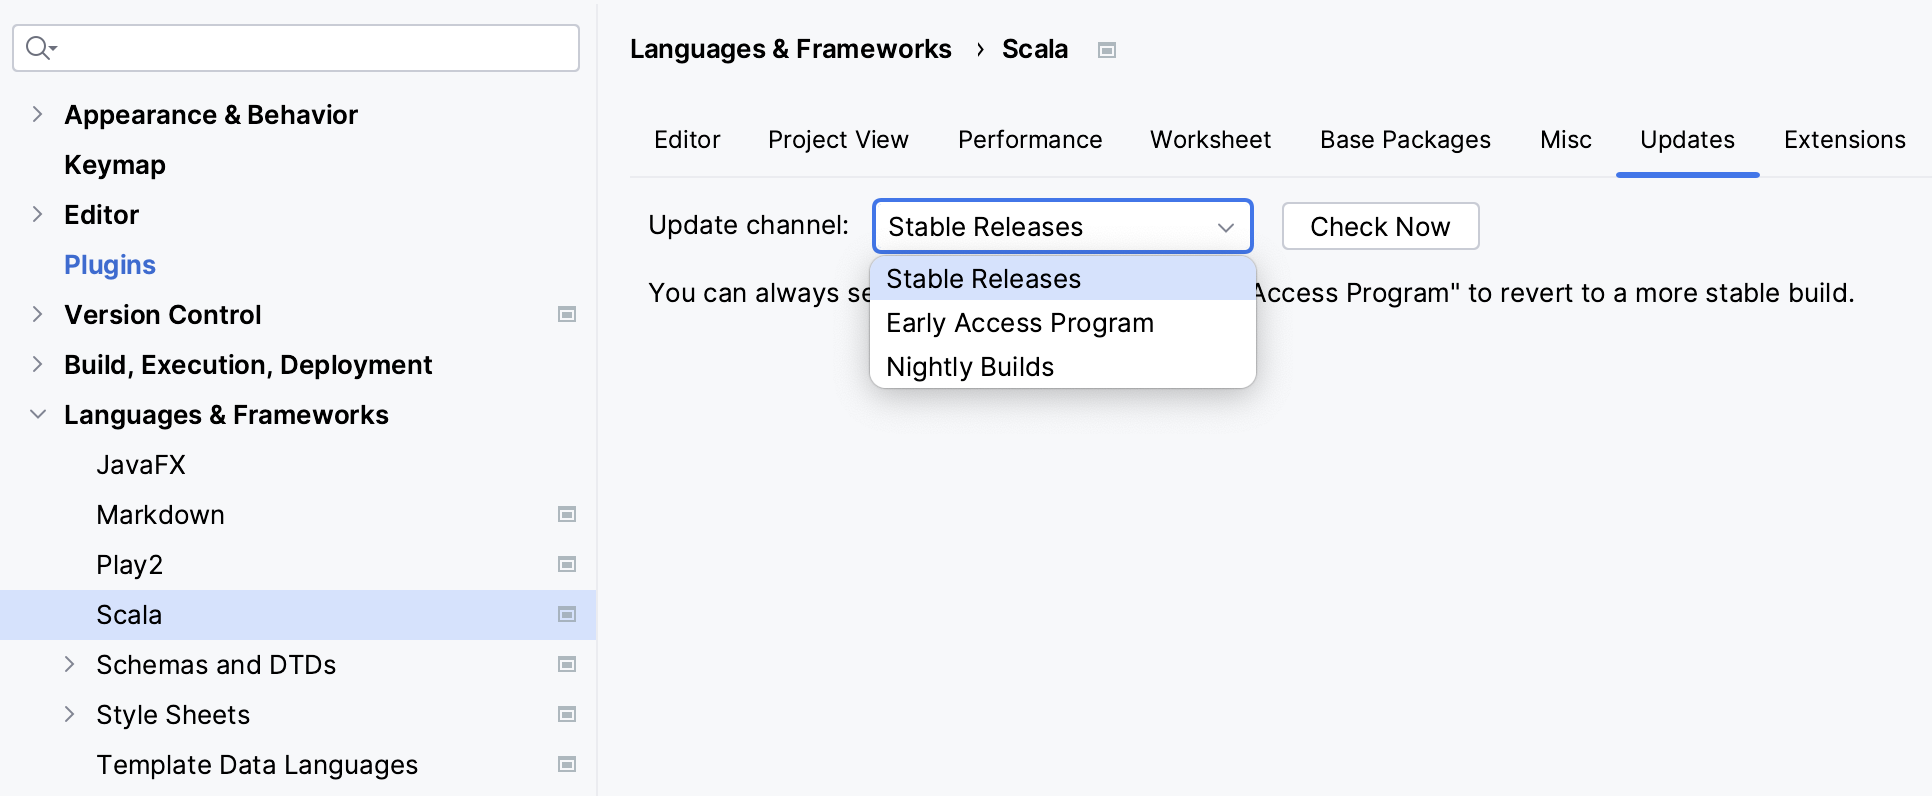
* Stable Releases (default)
* Early Access Program The first version is available ~2–3 months before the IntelliJ IDEA stable release. After IntelliJ IDEA is released, it will be updated multiple times between minor plugin bugfix releases.
* Nightly Builds Plugin builds are uploaded every night with the latest improvements. The first version is available ~2–3 months before the major IntelliJ IDEA release. Nightly builds may contain changes that are not properly tested.
> **Note:**
> After you select Early Access Program / Nightly Builds, you can revert to Stable Releases builds at any time.
> **Note:**
> To use Early Access Program / Nightly Builds channels before IntelliJ IDEA is released, you need [to install the IntelliJ IDEA
> EAP](https://www.jetbrains.com/idea/nextversion/).