Local History
Local History helps you constantly track all changes made to a project independently of version control.
Unlike version control systems, which only keep track of the differences made between commits, Local History offers much more. It automatically records your project's state as you edit code, run tests, deploy applications, and so on, and maintains revisions for all meaningful changes made both from the IDE and externally.
Acting as your personal version control system, Local History lets you restore deleted files, bring back separate changes, or roll back to any state of a file even if no version control is enabled for your project yet, or if an unwanted change was made after your last commit. It may also serve as a recovery source if your computer restarts unexpectedly before you can take any action.
Restore changes in a file
Let's imagine you made a series of changes to a file since your last commit before you realized you've deleted a meaningful chunk of code. The Undo action can't help you here because that change is too far away, and you'll be forced to discard other changes if you use it.
With IntelliJ IDEA you can restore that change in a couple of clicks.
Right-click anywhere in the editor and choose Local History | Show History from the context menu.
In the dialog that opens, the left-hand pane shows a list of all saved revisions of the current file with timestamps. The right-hand pane shows a diff viewer, which displays the differences between each revision and the current state of the file.
Do one of the following:
To revert the whole file to the state of this revision, right-click it and choose Revert Selected and Later Changes from the context menu or click
 on the toolbar.
To restore a specific code fragment, select the revision that contains that fragment. In the diff view on the right locate the piece of code you want to restore and click the chevron button
 to copy it from the left pane.
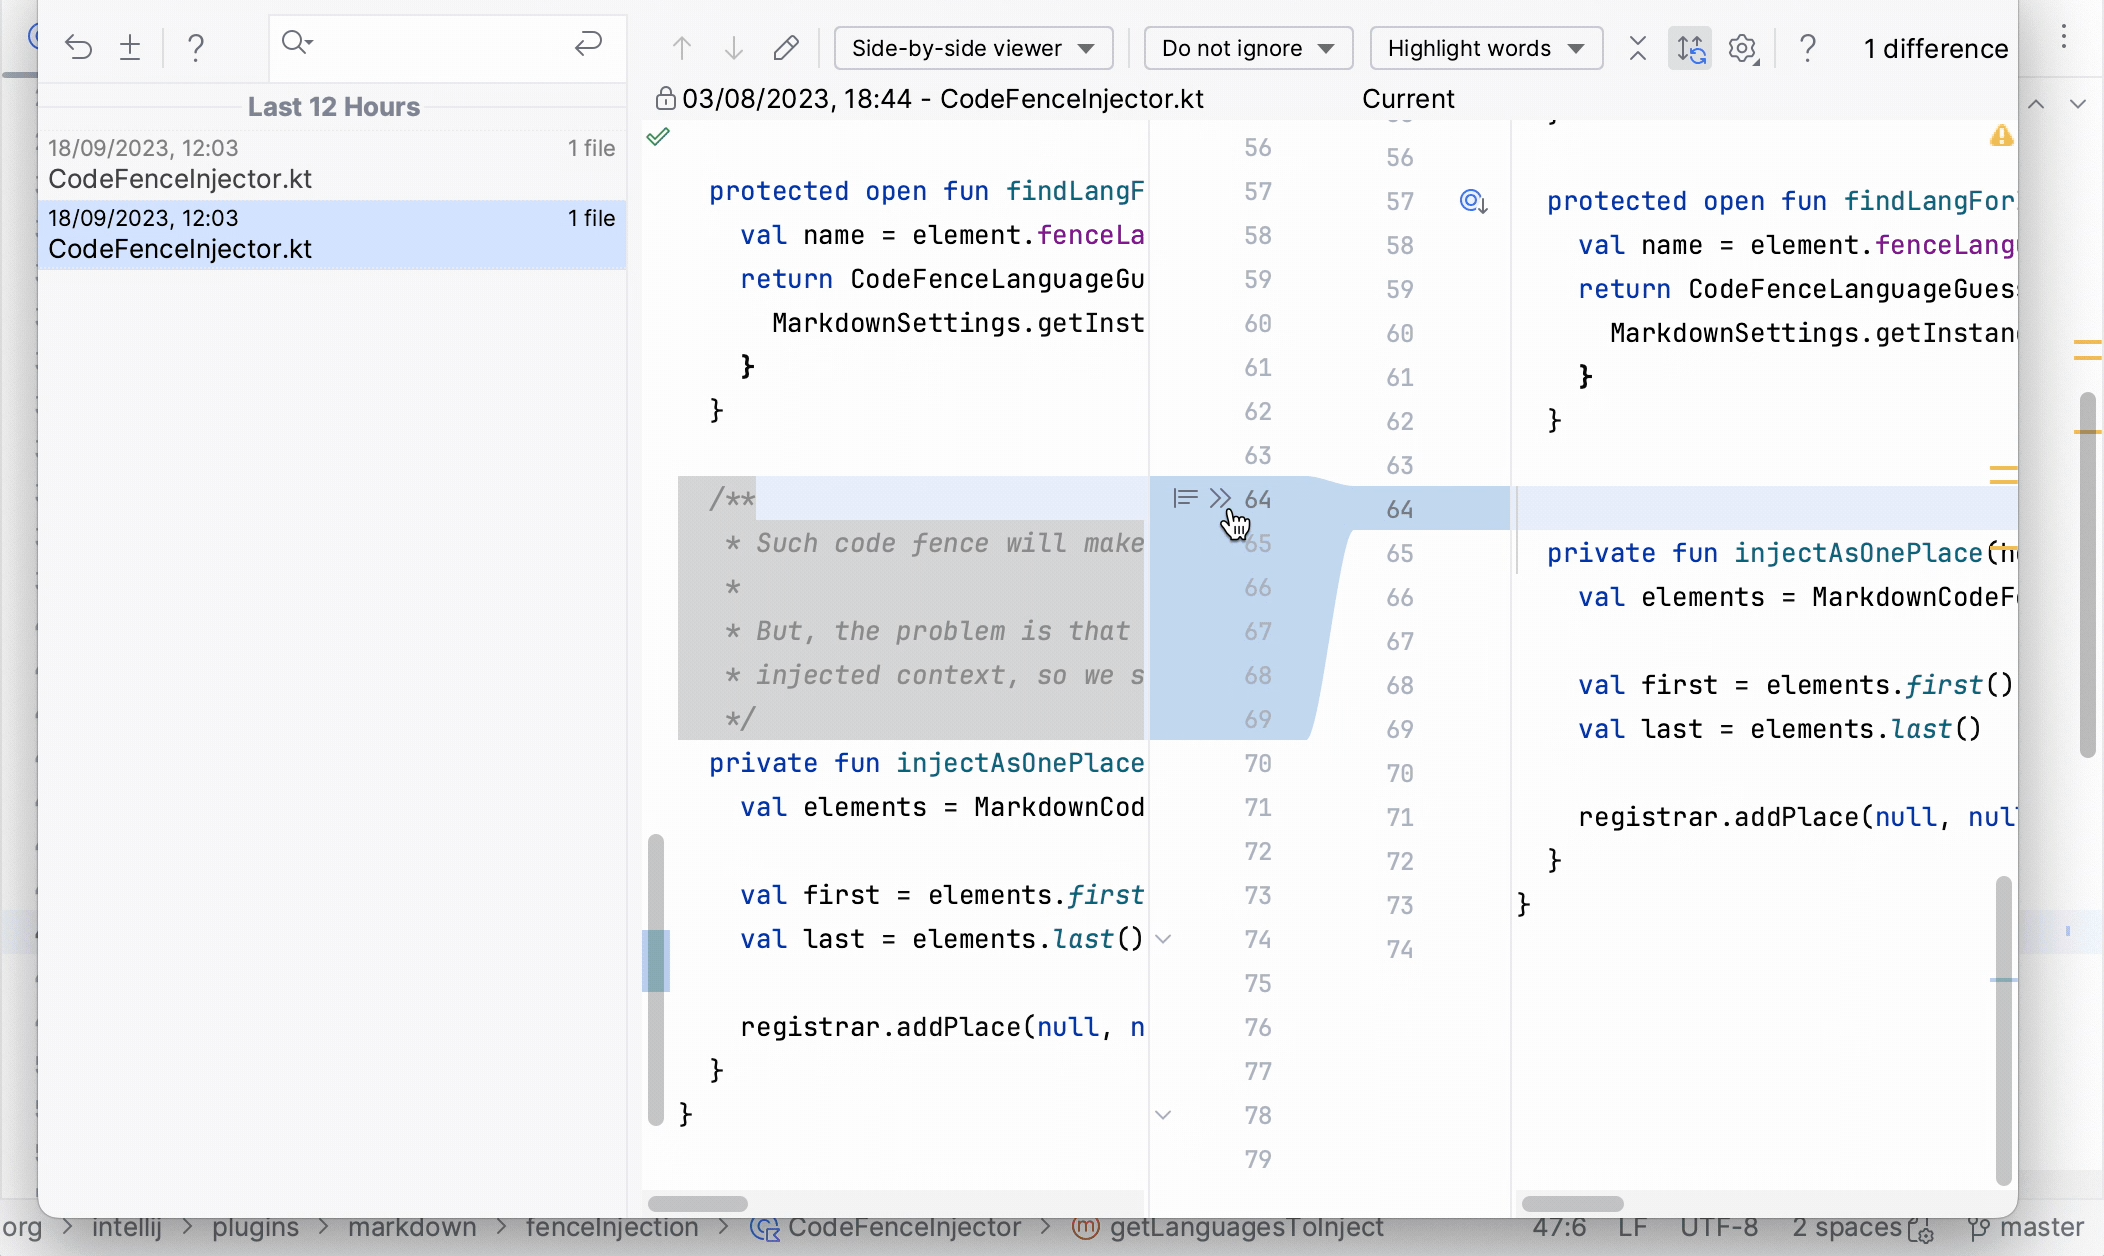
Restore changes in multiple files
Similarly to viewing Local History for one file, you can view it for an entire folder, project, or multiple individual files.
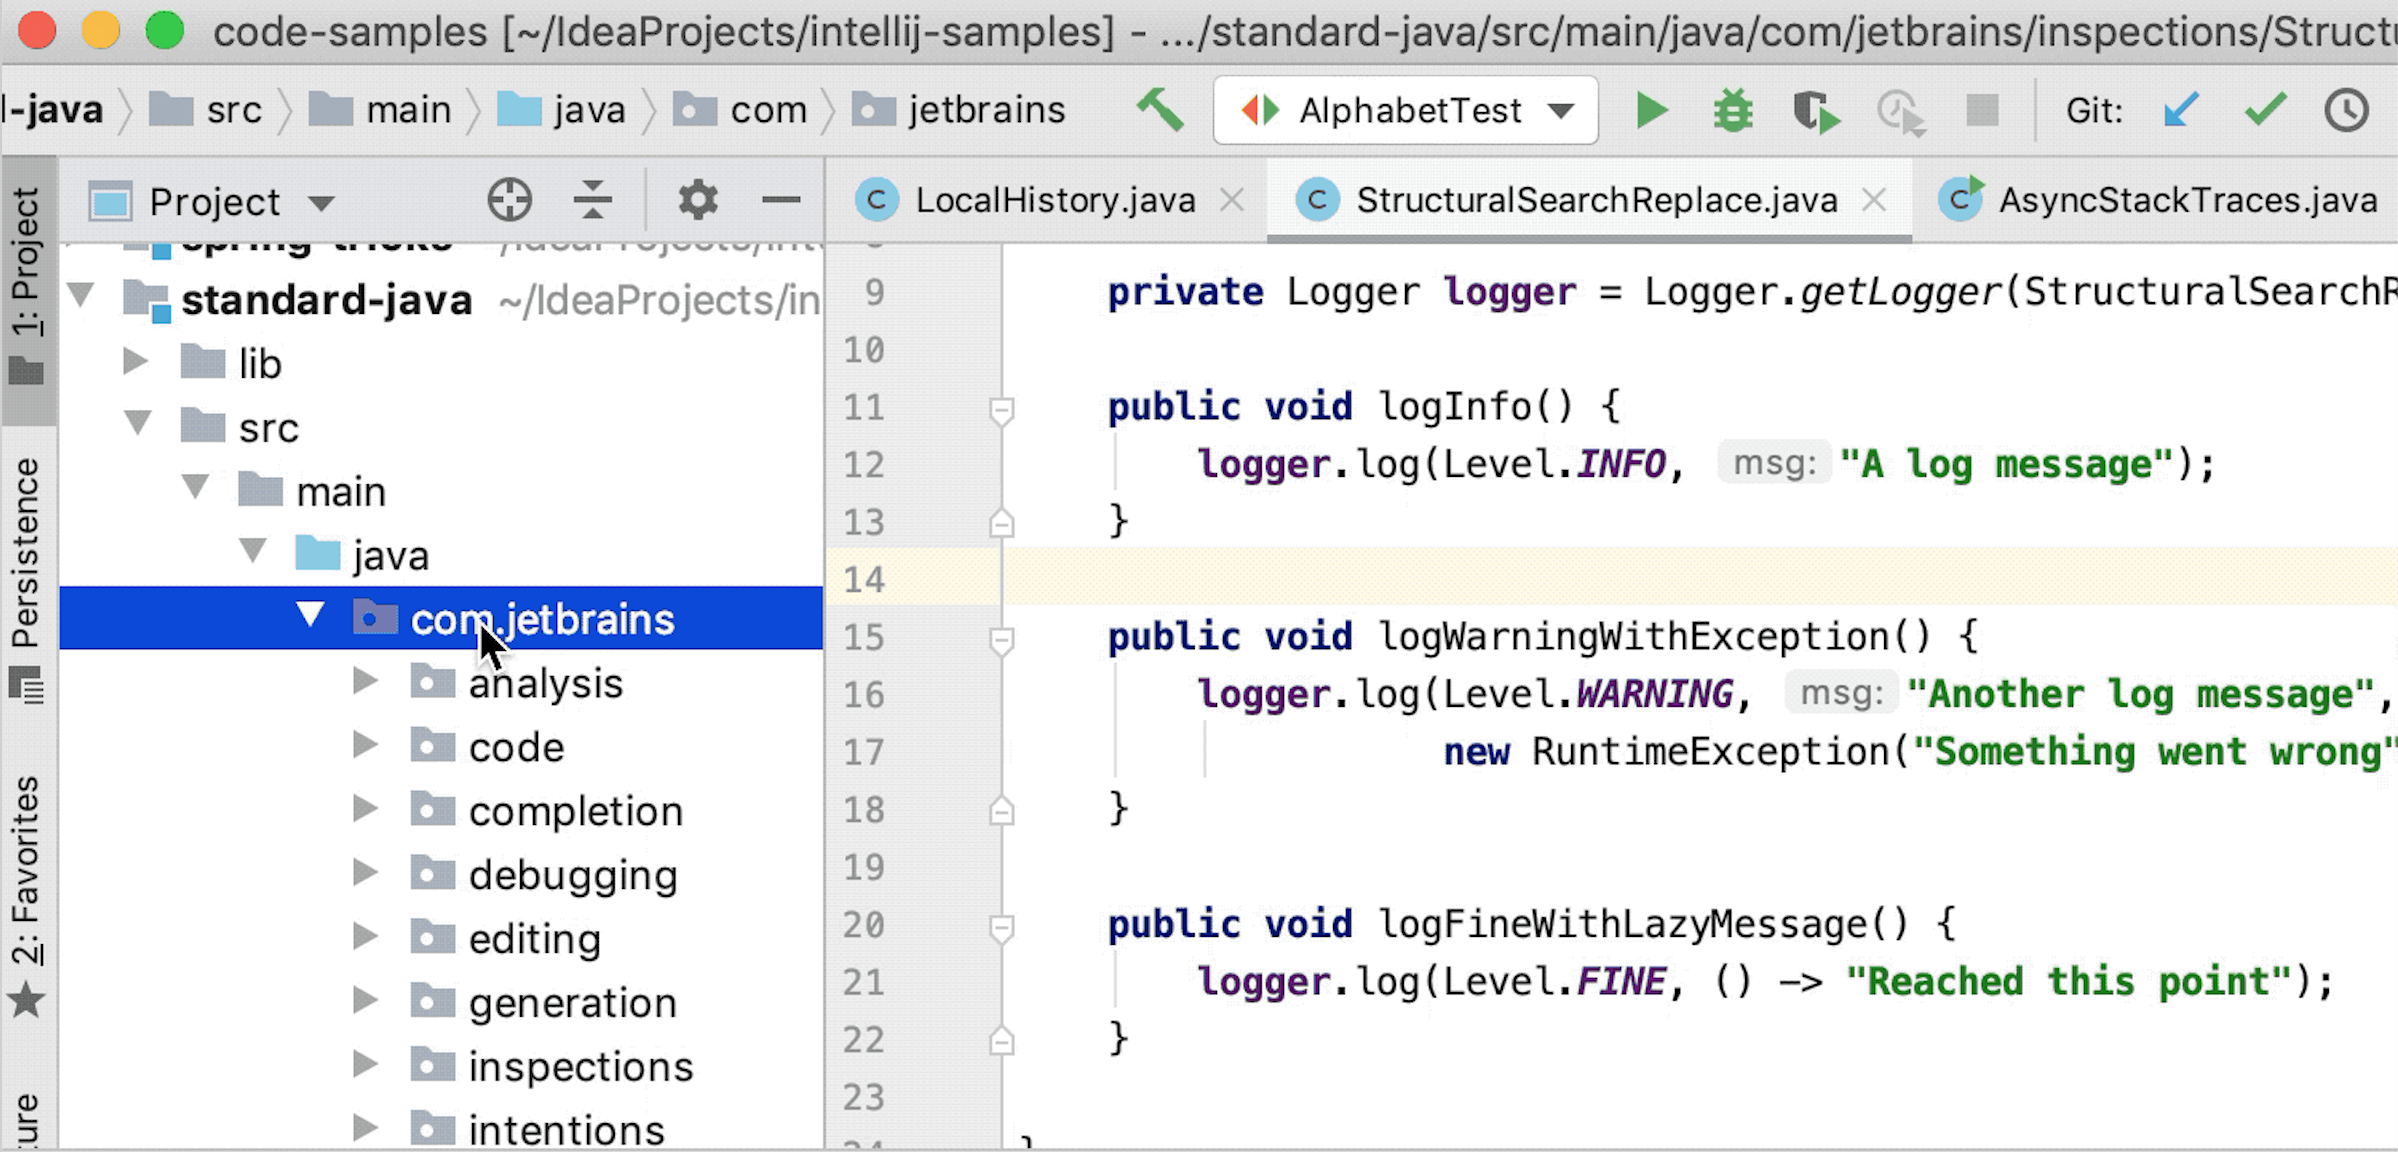
In the Project tool window (Alt+1) , right-click the node or select and right-click the files for which you want to see the history and select .
Find the change that you want to revert and click
on the toolbar.Click
 on the toolbar to view the changes in the diff viewer. There, use the chevron button to revert the required changes.
Restore deleted files
If you've accidentally deleted a file that was not under version control, you can restore it with Local History.
Select the node that contained the file you deleted in the Project tool window (Alt+1) , right-click it and choose from the context menu.
On the left, select the revision that contains the file you want to restore, right-click that file, and select Revert Selection.
Add labels to specific states
Local History revisions are normally marked with timestamps, which are not easy to navigate. Some revisions are automatically marked with labels based on predefined events: running tests, deploying apps, committing changes, and so on. You can always add a new label to mark the current state of the Local History, for example, right before you start a massive refactoring.
Select from the main menu.
In the dialog that opens, type any meaningful name for the label and click OK.
Share Local History
Local History does not support shared access, it is stored locally and intended only for personal use. However, you can create a patch file with changes relative to a specific revision, which you can share with others.
Select a revision in the Local History dialog and click Create Patch
 on the toolbar.
In the dialog that opens, specify how you want to create the new patch.
Change Local History retention period
By default, Local History is configured to store revisions for the last 5 working days (that is, days when the file was modified).
In the Settings dialog (Ctrl+Alt+S) , go to .
In the IDE section, provide the desired retention period value in the Duration of storing changes in Local History field.
Alternatively, you can pass the localHistory.daysToKeep parameter as a Java property by configuring JVM options. For example, to set retention to 30 days, add the following line to the JVM options file:
Location of Local History files
Local History is stored as binary files under the LocalHistory subdirectory in the IntelliJ IDEA system directory:
- Syntax
%LOCALAPPDATA%\JetBrains\<product><version>
- Example
C:\Users\JohnS\AppData\Local\JetBrains\IntelliJIdea2026.2
- Syntax
~/Library/Caches/JetBrains/<product><version>
- Example
~/Library/Caches/JetBrains/IntelliJIdea2026.2
- Syntax
~/.cache/JetBrains/<product><version>
- Example
~/.cache/JetBrains/IntelliJIdea2026.2
You can change the location of the system directory using the idea.system.path property.
Watch this video for a live demonstration of Local History features: