# Thymeleaf
> **TL;DR**
> Required plugin: Thymeleaf (bundled)
[Thymeleaf](http://www.thymeleaf.org/) is a server-side Java template engine for both web and standalone environments. Its main goal is to bring natural templates to your development workflow — HTML that can be correctly displayed in browsers and also work as static prototypes.
Basic syntax highlighting is available in IntelliJ IDEA without the Ultimate subscription.
Procedure: Make sure the Thymeleaf plugin is enabled
1. In the Settings dialog (`Ctrl+Alt+S` (Windows), `⌘ Comma` (macOS), `⌘ Comma` (IntelliJ IDEA Classic (macOS)), `⌘ Comma` (macOS System Shortcuts), `Ctrl+Alt+S` (XWin), `Ctrl+Alt+S` (GNOME), `Ctrl+Alt+S` (KDE), `Ctrl+Alt+S` (Emacs), `Ctrl+Alt+S` (Sublime Text), `⌘ Comma` (Sublime Text (macOS)), `Ctrl+Alt+S` (NetBeans), `Ctrl+Alt+S` (Visual Studio), `⌘ Comma` (Visual Studio (macOS)), `Ctrl+Alt+S` (Eclipse), `⌘ Comma` (Eclipse (macOS))) select Plugins | Installed.
2. Make sure that the checkbox next to the Thymeleaf plugin is selected.
Otherwise, select the checkbox to enable the plugin.
3. Apply the changes and close the dialog. Restart the IDE if prompted.
For more information, refer to [Plugins](managing-plugins.html).
## Add Thymeleaf support
You can add Thymeleaf support when creating a project or module, or for an existing project or module. IntelliJ IDEA downloads the selected Thymeleaf library files and adds them to the dependencies of the corresponding module.
You can also create a Thymeleaf project by opening an appropriate `pom.xml` file. In this case, Maven will manage the dependencies in your project. For more information, refer to [Maven](maven-support.html).
Procedure: New Java Enterprise project or module with Thymeleaf
1. In the main menu, go to `File | New | Project` or `File | New | Module`.
2. In the dialog that opens, select Jakarta EE from the list on the left and click Next.
3. In the Dependencies list, under Implementations, select Thymeleaf, and click Next.
4. Enter a name for your project or module and click Finish.
For more information about Java Enterprise projects, refer to [Tutorial: Your first Jakarta EE application](creating-and-running-your-first-jakarta-ee-application.html).
Procedure: New Spring project or module with Thymeleaf
1. Go to `File | New | Project` or `File | New | Module`.
2. In the dialog that opens, select Spring Initializr from the list on the left and click Next.
3. From the Dependencies list, click Template Engines and select the Thymeleaf option.
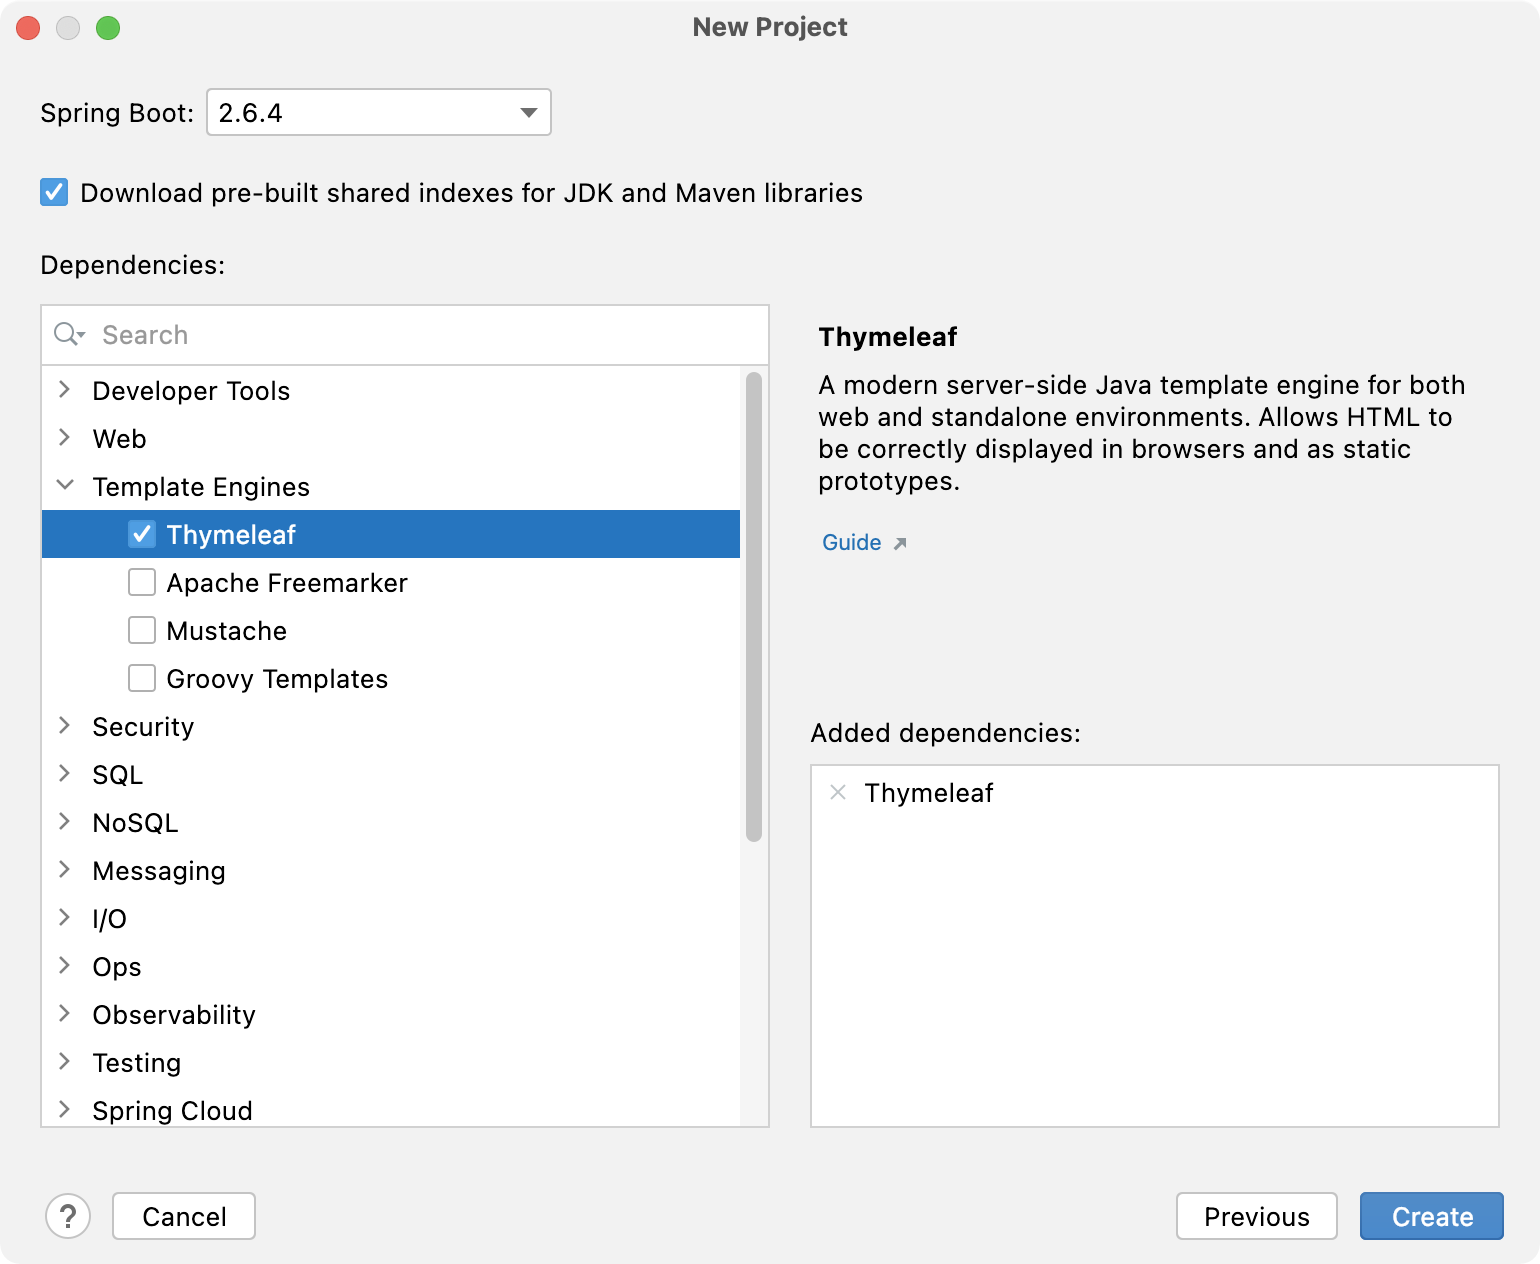
4. Click Create.
For more information about Spring projects, refer to [Tutorial: Create your first Spring application](your-first-spring-application.html).
Procedure: Add Thymeleaf to an existing project
1. Open the build file in the editor (`pom.xml` or `build.gradle` depending on the [build tool](build-tools.html) used in your project).
2. Add the Thymeleaf dependency, and make sure the version matches the rest of your project:
Maven:
```XML
org.thymeleafthymeleaf3.1.3.RELEASE
```
Gradle (Groovy):
```GROOVY
implementation 'org.thymeleaf:thymeleaf:3.1.3.RELEASE'
```
Gradle (Kotlin):
```KOTLIN
implementation("org.thymeleaf:thymeleaf:3.1.3.RELEASE")
```
3. Press `Ctrl+Shift+O` (Windows), `Ctrl+Shift+O` (macOS), `Ctrl+Shift+O` (IntelliJ IDEA Classic (macOS)), `Ctrl+Shift+O` (macOS System Shortcuts), `Ctrl+Shift+O` (XWin), `Ctrl+Shift+O` (GNOME), `Ctrl+Shift+O` (KDE), `Ctrl+Shift+O` (Emacs), `Ctrl+Shift+O` (Sublime Text), `Ctrl+Shift+O` (Sublime Text (macOS)), `Ctrl+Shift+O` (NetBeans), `Ctrl+Shift+O` (Visual Studio), `Ctrl+Shift+O` (Visual Studio (macOS)), `Ctrl+Shift+O` (Eclipse), `Ctrl+Shift+O` (Eclipse (macOS)) to import the changes.
For more information about working with build tools, refer to [Maven](maven-support.html) or [Gradle](gradle.html).
### Thymeleaf support features
Support for [Thymeleaf](https://www.thymeleaf.org/) in IntelliJ IDEA includes the following:
Code completion
: [Code completion](auto-completing-code.html) for expressions and `th:*` attributes.
Navigation from a reference
: Navigation from a reference in a template to the corresponding getter method, message in a `.properties` file, or another appropriate code fragment. Go to `Navigate | Declaration or Usages` or press `Ctrl+B` (Windows), `⌘ B` (macOS), `⌘ B` (IntelliJ IDEA Classic (macOS)), `⌘ B` (macOS System Shortcuts), `Ctrl+B` (XWin), `Ctrl+B` (GNOME), `Ctrl+B` (KDE), `Ctrl+Alt+G` (Emacs), `F12` (Sublime Text), `F12` (Sublime Text (macOS)), `Ctrl+B` (NetBeans), `F12` (Visual Studio), `F12` (Visual Studio (macOS)), `F3` (Eclipse), `F3` (Eclipse (macOS)).
Navigation to type definitions
: Go to `Navigate | Type Declaration` or press `Ctrl+Shift+B` (Windows), `⌘ ⇧ B` (macOS), `⌃ ⇧ B` (IntelliJ IDEA Classic (macOS)), `⌘ ⇧ B` (macOS System Shortcuts), `Ctrl+Shift+B` (XWin), `Ctrl+Shift+B` (GNOME), `Ctrl+Shift+B` (KDE), `Ctrl+Shift+B` (Emacs), `Ctrl+Shift+B` (Sublime Text), `Ctrl+Shift+B` (Sublime Text (macOS)), `Ctrl+Shift+B` (NetBeans), `Ctrl+Shift+F11` (Visual Studio), `⌘ ⇧ F11` (Visual Studio (macOS)), `Ctrl+Shift+B` (Eclipse), `Ctrl+Shift+B` (Eclipse (macOS)).
Refactorings
: The Rename refactoring for referenced properties, getter methods, iteration and status variables, and so on. Go to `Refactor | Rename` or press `Shift+F6` (Windows), `⇧ F6` (macOS), `⇧ F6` (IntelliJ IDEA Classic (macOS)), `⌘ ⌥ R` (macOS System Shortcuts), `Shift+F6` (XWin), `Shift+F6` (GNOME), `Shift+F6` (KDE), `Shift+F6` (Emacs), `Shift+F6` (Sublime Text), `⇧ F6` (Sublime Text (macOS)), `Ctrl+R` (NetBeans), `Ctrl+R, R` (Visual Studio), `⌘ R, R` (Visual Studio (macOS)), `Alt+Shift+R` (Eclipse), `⇧ F6` (Eclipse (macOS)).
Inspections
: [Code inspections](code-inspection.html) that help you find and fix unresolved references and errors in expression syntax.
Intention actions
: [Intention actions](intention-actions.html), such as Create property for unresolved message references or Import class for adding the `import` statements to `org.thymeleaf.*` classes.
Prototypes preview
: [Preview of your prototypes](#preview-feature-with-thymeleaf) (the static part of your templates) in a web browser from the editor.
## Preview Thymeleaf prototypes in a browser
IntelliJ IDEA allows you to preview the static part of your templates in a web browser or in the built-in preview in the same way do it [with
regular HTML files](editing-html-files.html#ws_html_preview_output).
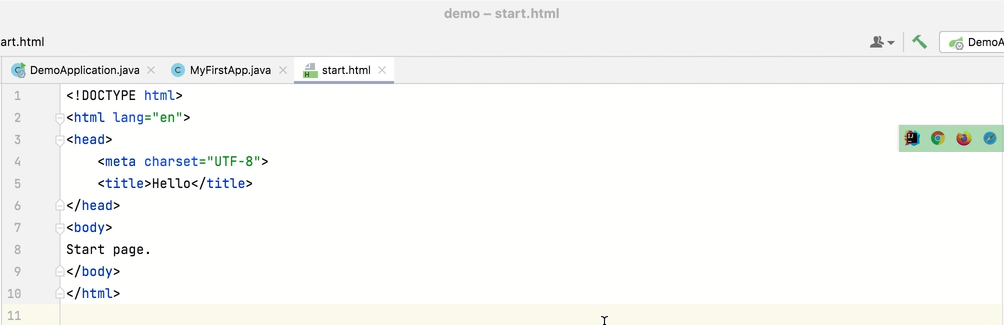
If you want to preview dynamic data in templates, you'll need to run your application. In the example below, we'll create a simple Thymeleaf template and use it as a view in a Spring MVC application.
Procedure: Create Thymeleaf template
1. Create a new Spring Boot project with Thymeleaf as described in [Add Thymeleaf support](#add-thymeleaf) and name it `demo`.
2. In the Project tool window (`Alt+1` (Windows), `⌘ 1` (macOS), `⌘ 1` (IntelliJ IDEA Classic (macOS)), `⌘ 1` (macOS System Shortcuts), `Alt+1` (XWin), `Alt+1` (GNOME), `Alt+1` (KDE), `Alt+1` (Emacs), `Alt+1` (Sublime Text), `⌘ 1` (Sublime Text (macOS)), `Ctrl+1` (NetBeans), `Ctrl+Alt+L` (Visual Studio), `⌘ ⌥ L` (Visual Studio (macOS)), `Alt+1` (Eclipse), `Alt+1` (Eclipse (macOS))), right-click the `demo` package located in `src|main|java` and select `New | Java Class`.
3. Name the class `MyFirstApp`.
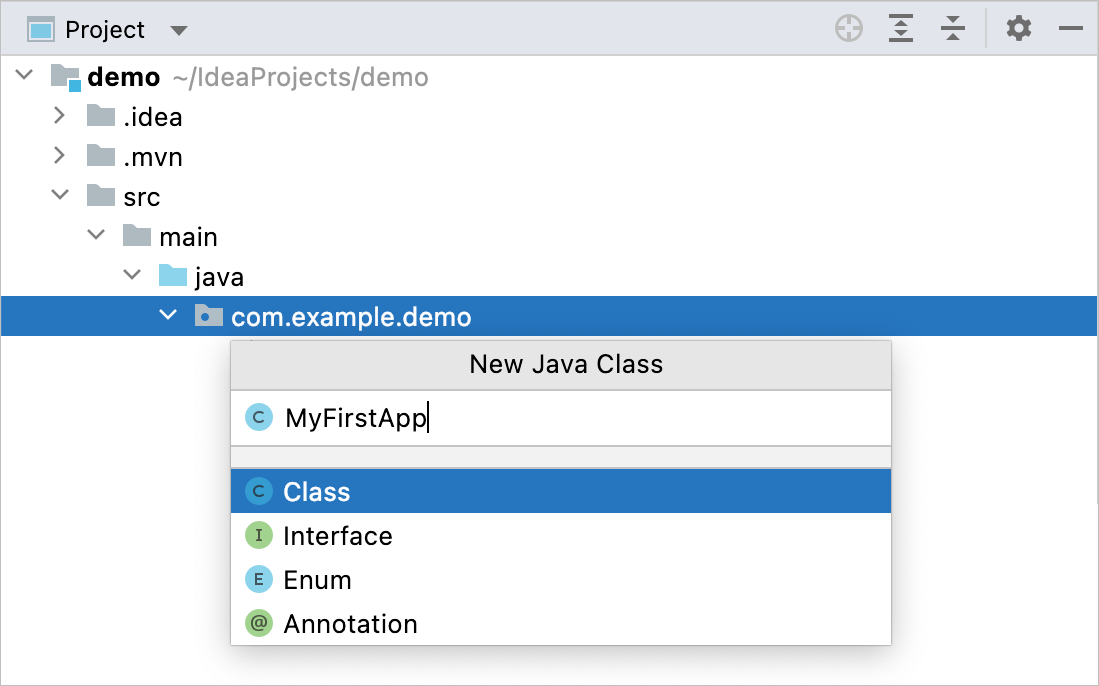
4. Add a controller to the new class, for example:
```JAVA
package org.example.demo;
import org.springframework.ui.Model;
import org.springframework.stereotype.Controller;
import org.springframework.web.bind.annotation.RequestMapping;
import java.util.Arrays;
@Controller
public class MyFirstApp {
@RequestMapping("/home")
public String index(Model model) {
model.addAttribute("message", "Hello Thymeleaf");
model.addAttribute("items", Arrays.asList("Item 1", "Item 2", "Item 3"));
return "start_page";
}
}
```
> **Tip:**
> If `@RequestMapping` is highlighted as unresolved, place the caret at the annotation, press `Alt+Enter` (Windows), `⌥ ⏎` (macOS), `⌥ ⏎` (IntelliJ IDEA Classic (macOS)), `⌥ ⏎` (macOS System Shortcuts), `Alt+Enter` (XWin), `Alt+Enter` (GNOME), `Alt+Enter` (KDE), `Alt+Enter` (Emacs), `Alt+Enter` (Sublime Text), `⌥ ⏎` (Sublime Text (macOS)), `Alt+Enter` (NetBeans), `Alt+Enter` (Visual Studio), `⌥ ⏎` (Visual Studio (macOS)), `Ctrl+1` (Eclipse), `⌘ 1` (Eclipse (macOS)), and select Add 'spring-boot-starter-web' to classpath.
5. Under the resources directory, create a directory named `templates`.
6. In `templates`, create an HTML file named `start_page`.
This template uses the `${message}` and `${items}` variables (passed in a controller we've added earlier) and the `#dates` Thymeleaf object, which is used to handle dates.
```HTML
Hello
Thymeleaf Iteration:
```
IntelliJ IDEA recognizes the template and allows you to navigate from the variables to the controller code where they were declared by pressing `Ctrl+B` (Windows), `⌘ B` (macOS), `⌘ B` (IntelliJ IDEA Classic (macOS)), `⌘ B` (macOS System Shortcuts), `Ctrl+B` (XWin), `Ctrl+B` (GNOME), `Ctrl+B` (KDE), `Ctrl+Alt+G` (Emacs), `F12` (Sublime Text), `F12` (Sublime Text (macOS)), `Ctrl+B` (NetBeans), `F12` (Visual Studio), `F12` (Visual Studio (macOS)), `F3` (Eclipse), `F3` (Eclipse (macOS)).
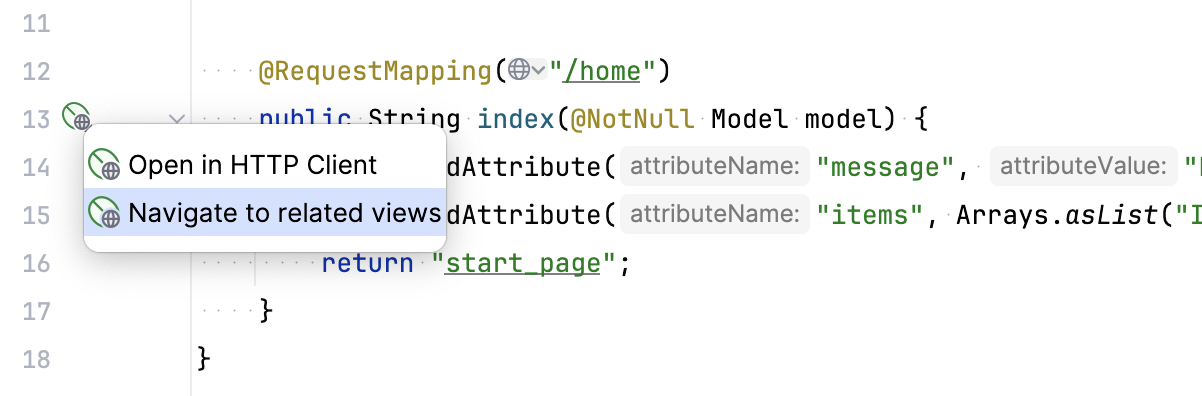
You can also navigate from the controller to the template: In `MyFirstApp.java`, click  in the gutter and select Navigate to related views. Notice that `start_page` is marked as a link with an underline, which means IntelliJ IDEA detects such a template in your project: You can `Ctrl` (Windows), `Ctrl` (macOS), `Ctrl` (IntelliJ IDEA Classic (macOS)), `Ctrl` (macOS System Shortcuts), `Ctrl` (XWin), `Ctrl` (GNOME), `Ctrl` (KDE), `Ctrl` (Emacs), `Ctrl` (Sublime Text), `Ctrl` (Sublime Text (macOS)), `Ctrl` (NetBeans), `Ctrl` (Visual Studio), `Ctrl` (Visual Studio (macOS)), `Ctrl` (Eclipse), `Ctrl` (Eclipse (macOS))-click this link (or press `Ctrl+B` (Windows), `⌘ B` (macOS), `⌘ B` (IntelliJ IDEA Classic (macOS)), `⌘ B` (macOS System Shortcuts), `Ctrl+B` (XWin), `Ctrl+B` (GNOME), `Ctrl+B` (KDE), `Ctrl+Alt+G` (Emacs), `F12` (Sublime Text), `F12` (Sublime Text (macOS)), `Ctrl+B` (NetBeans), `F12` (Visual Studio), `F12` (Visual Studio (macOS)), `F3` (Eclipse), `F3` (Eclipse (macOS)) on it) to navigate to the template.
Procedure: Preview template
1. Run the application: press `Shift+F10` (Windows), `⌃ R` (macOS), `⇧ F10` (IntelliJ IDEA Classic (macOS)), `⌥ ⇧ R` (macOS System Shortcuts), `Shift+F10` (XWin), `Shift+F10` (GNOME), `Shift+F10` (KDE), `Shift+F10` (Emacs), `Shift+F10` (Sublime Text), `Shift+F10` (Sublime Text (macOS)), `F6` (NetBeans), `Ctrl+F5` (Visual Studio), `⌃ F5` (Visual Studio (macOS)), `Alt+Shift+X` (Eclipse), `⌘ ⇧ F11` (Eclipse (macOS)) or make sure the DemoApplication is selected in the Run widget in the window header and click  next to it.
2. Open [localhost:8080/home](http://localhost:8080/home) in your browser.
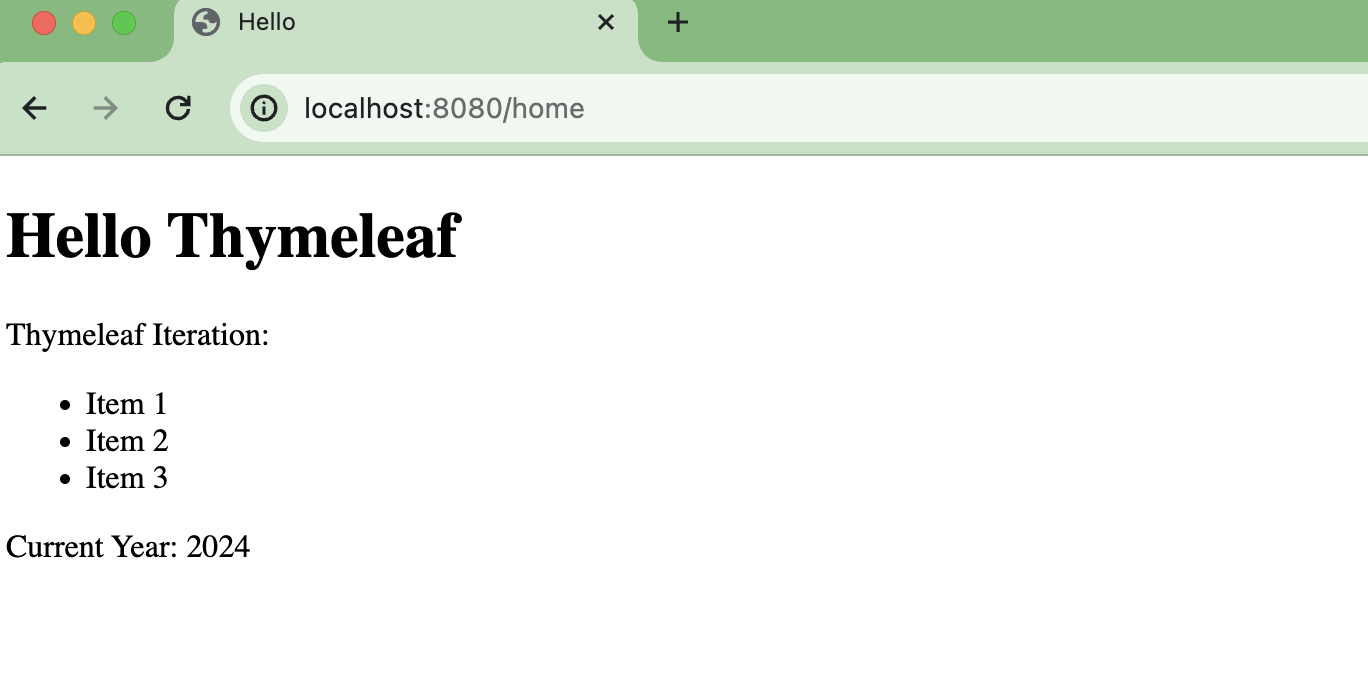
Spring will render the `start_page` template and replace the variables with their values.