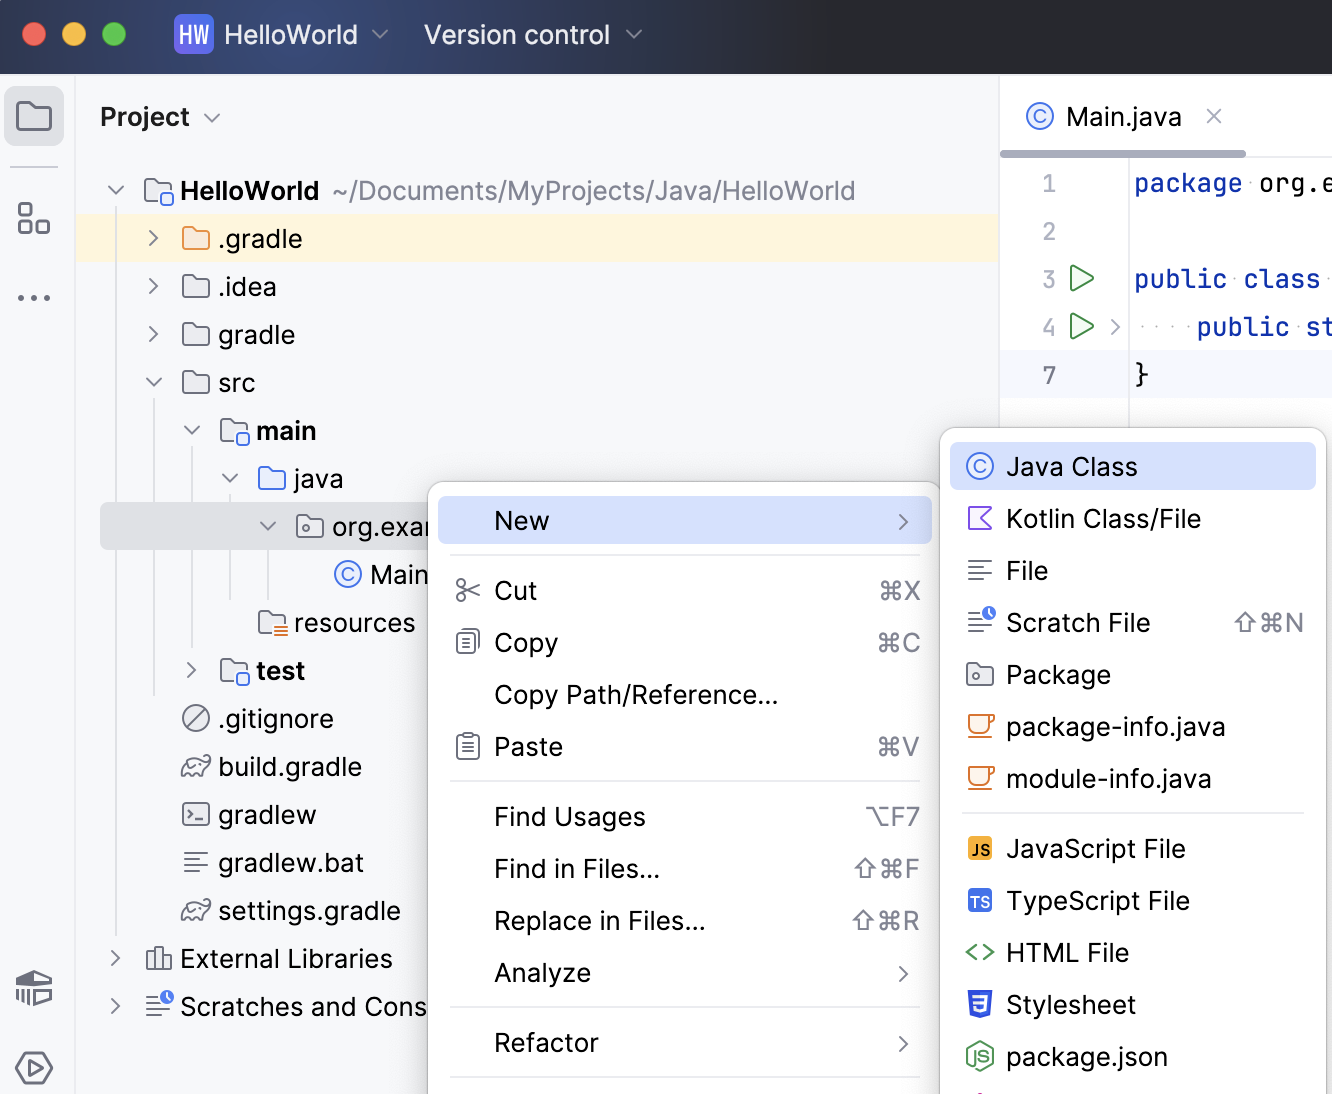
File templates
File templates are specifications of the default contents for new files that you create using the menu or the New section of the context menu in the Project tree.
Depending on the type of file you are creating, templates provide initial code and formatting expected in all files of that type (according to industry or language standards, your corporate policy, or for other reasons). For example, this can be boilerplate code, meta information about the author, and so on.
IntelliJ IDEA provides predefined templates for all supported file types suggested when you create a new file. The set of suggested file types depends on the module and configuration, as well as the properties of your current location in the Project tool window. For example, IntelliJ IDEA will not suggest creating a Java class file outside of the Java source or test directories. For more information, refer to Content roots.
For example, if you right-click a directory in the Project tool window and select New (or press Alt+Insert), you will see a list of files that you can create in this context. These files have corresponding file templates configured in the settings.

Manage and configure file templates
Press Ctrl+Alt+S to open settings and then select .
For more information, refer to File and Code Templates.
By default, the list of templates contains only predefined templates provided by IntelliJ IDEA. Some of them are internal, which means they cannot be deleted or renamed. IntelliJ IDEA shows the names of internal templates in bold. The names of templates that you modified, as well as custom templates that you created manually, are shown in blue.
The following procedures describe how to create file templates. Similar procedures can be used for creating include templates.
Create a new file template
Press Ctrl+Alt+S to open settings and then select .
Using the Scheme list, select the scope to which the file template applies:
Default: file templates created at the IDE level. These templates are available in all projects that you open with the current IDE instance. Use them as your personal templates that you prefer regardless of the specific project. IntelliJ IDEA stores global templates in the IDE configuration directory under fileTemplates.
Project: file templates specific for the current project. These templates are available to everyone who works on this project. IntelliJ IDEA stores them in the project folder under .idea/fileTemplates.
On the Files tab, click
and specify the template name, file extension, name of the resulting file, and body of the template.
Apply the changes and close the dialog.
Copy an existing file template
Press Ctrl+Alt+S to open settings and then select .
On the Files tab, click
and modify the name, file extension, and body of the template as necessary.
Apply the changes and close the dialog.
Save a file as a template
Open a file in the editor.
In the main menu, go to .
In the Save File as Template dialog, specify the new template name, extension, and edit the body if necessary. For more information about the syntax used in file templates, see Syntax
File name: If necessary, specify a name for the file created from this template. By default, IntelliJ IDEA prompts the user to enter a name when adding the file. You can hard-code a specific name to avoid the prompt entirely, or compose a template from available variables. For example, here is how you can use the specified name but put it one directory above the one that was selected during file creation:
../${NAME}Reformat according to style: Reformat the contents generated based on this template according to the code style defined for this file type.
Enable Live Templates: Insert live templates inside the file template. Use the Velocity escape syntax to include live template variables in a file template, for example:
#[[ $MY_VARIABLE$ $END$ ]]#
Apply the changes and close the dialog.
Syntax
File templates use the Velocity Template Language (VTL), which includes the following constructs:
Plain text rendered as is.
Variables that are replaced by their values. For example,
${NAME}inserts the name provided by the user when adding the file.Various directives, including #parse,
#set,#if, and others.
Start typing $ or # to refer to completion suggestions for available variables and directives.
For more information, refer to the VTL reference guide.
The following example shows the default template for creating a Java class in IntelliJ IDEA:
In this template:
The
#ifdirective checks whether the package name is not empty, and if so, adds the name to the package statement passed as the${PACKAGE_NAME}variable.The
#parsedirective inserts the contents of another template namedFile Header.java, which is available in the Includes tab of the Editor | File and Code Templates settings page Ctrl+Alt+S.Then the template declares a public class with the name passed as the
${NAME}variable (name of the new file).
When you create a new Java file, this template generates a file with contents similar to the following: