Review incoming GitHub pull requests
Pull requests are used in open-source projects or in some corporate workflows to manage changes from contributors and to initiate code review before such changes are merged.
You can receive a request to review code changes from your colleague or a fellow contributor. As a pull request reviewer, you can give your feedback directly in IntelliJ IDEA:
Select a pending review request in the Pull Requests tool window.
Manage incoming pull requests
If you are a project maintainer, and you have a GitHub remote configured for your project, you can view and manage incoming pull requests directly from IntelliJ IDEA.
To open the Pull Requests tool window, select in the main menu.
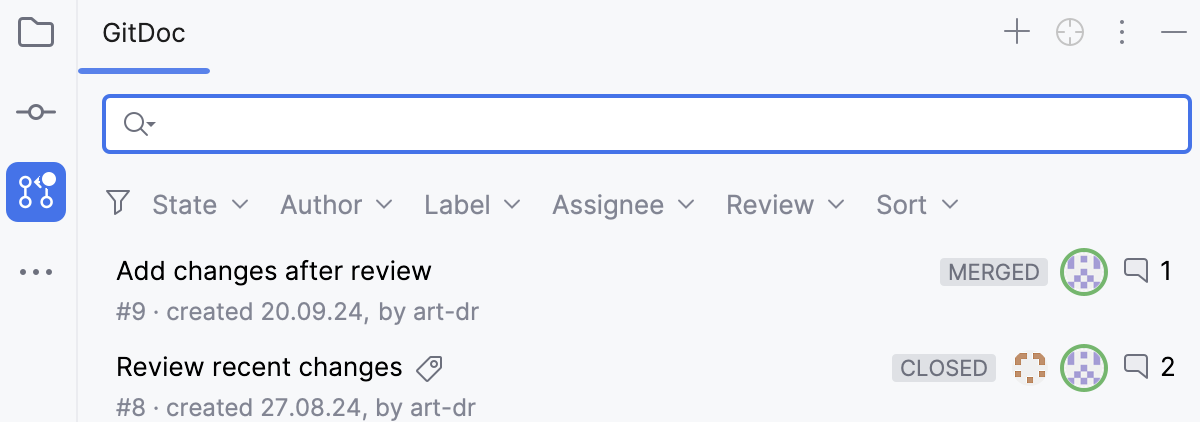
In the Pull Requests tool window, you can:
Filter requests by state, author, label, assignee, and review status.
Sort pull requests by their activity status: newest, oldest, most or least commented, recently or least recently updated.
Jump to a pull request on GitHub: select a pull request and choose Open Pull Request in Browser from the context menu.
When you double-click a pull request from the list, you can see the overview and timeline tabs.
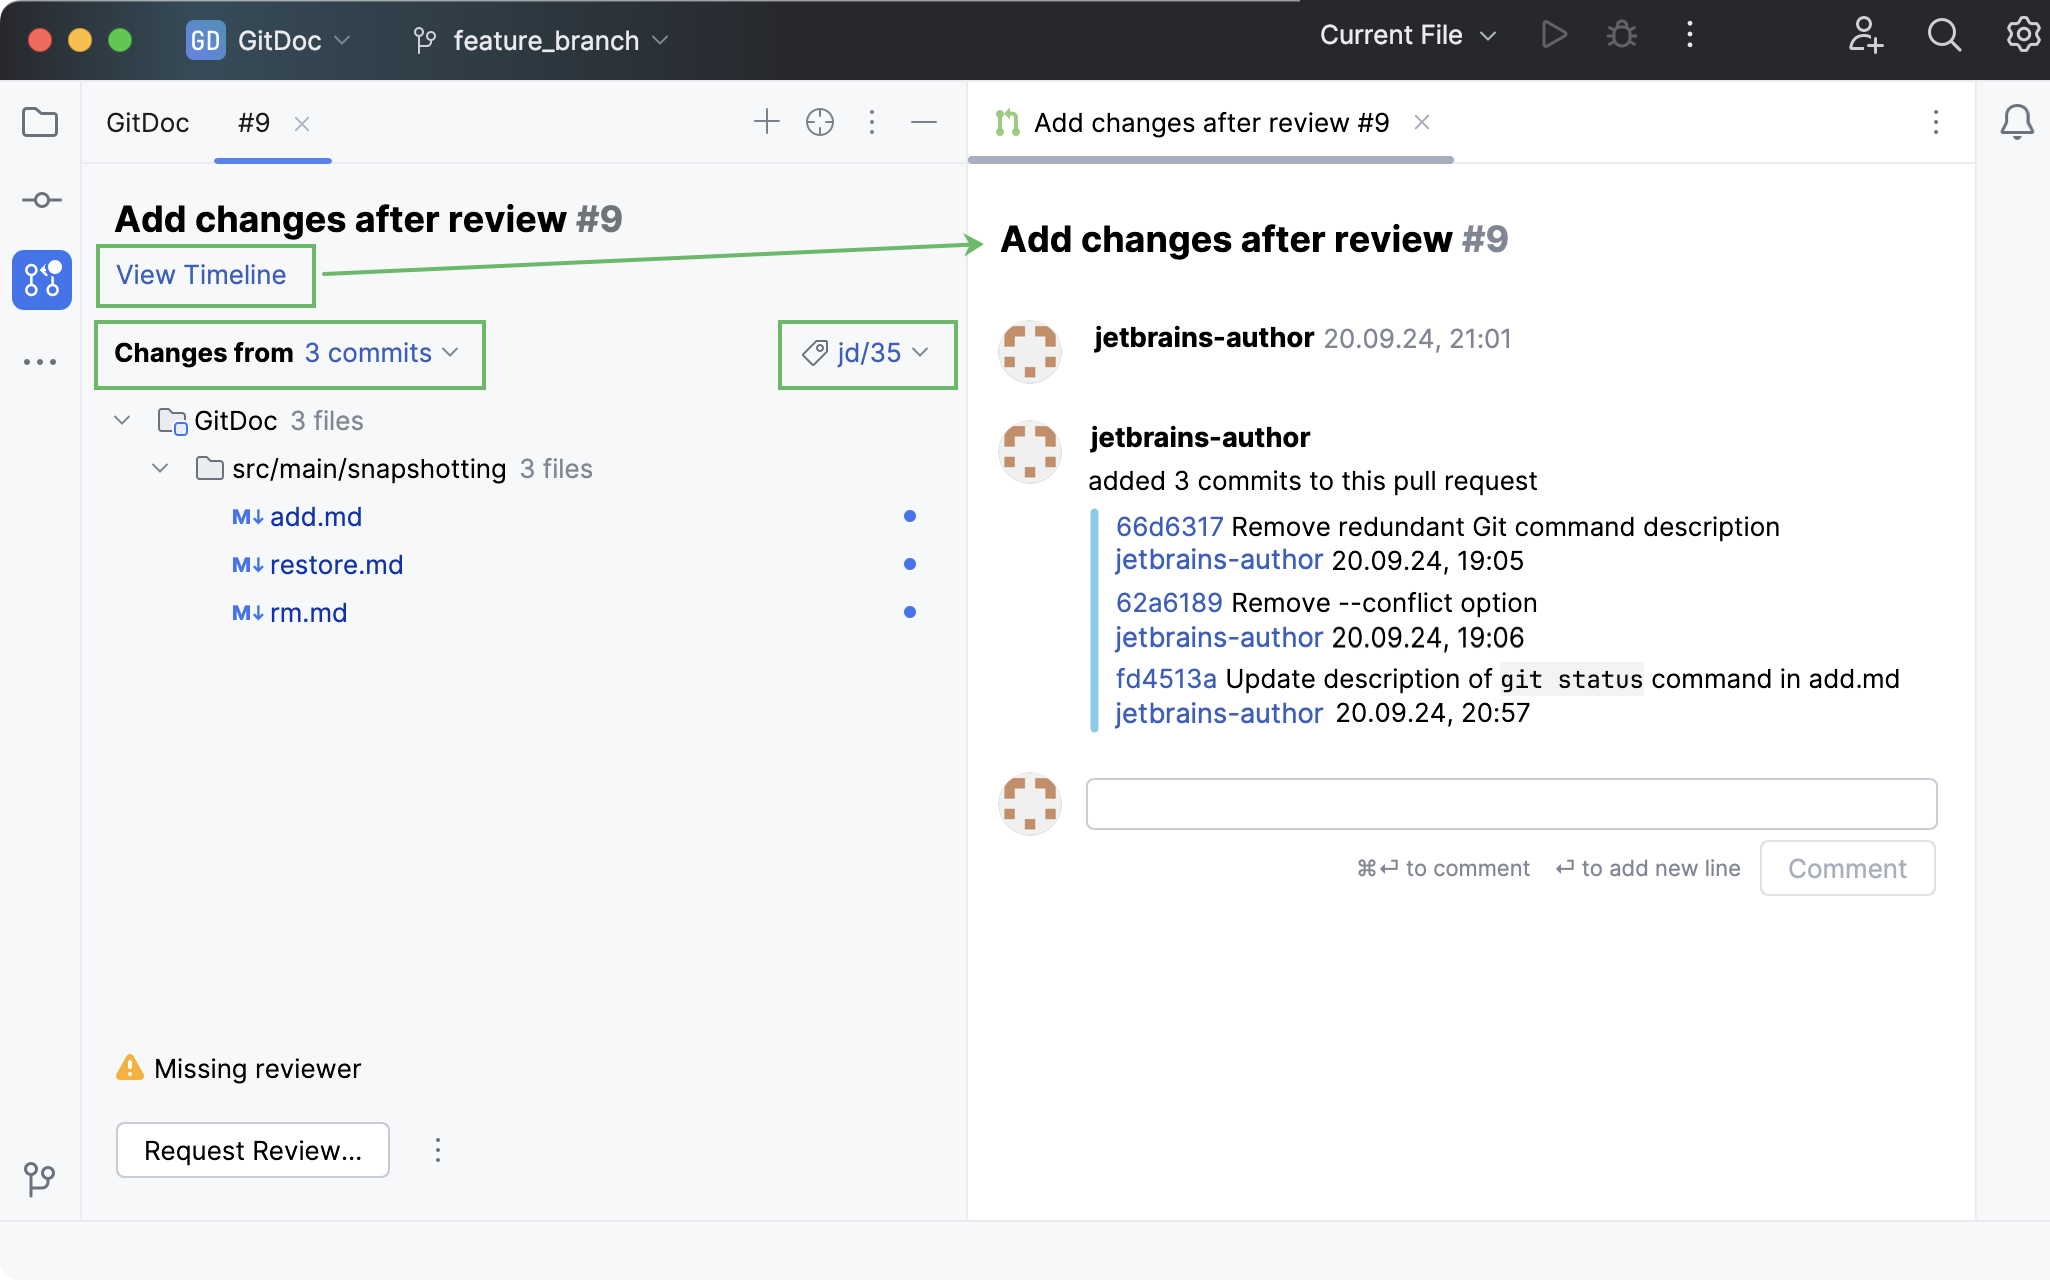
In this view, you can:
View the timeline of a selected pull request to track its progression.
Select a particular commit to filter the list of changes.
Create a local branch based on incoming changes: open a pull request, click the branch with incoming changes, and choose Checkout 'branch name' in the context menu.
To learn about more options, refer to Review a pull request.
Review a pull request
When there are changes that require your attention, a white dot marks the Pull Requests tool window and the unseen pull requests are marked with blue dots.
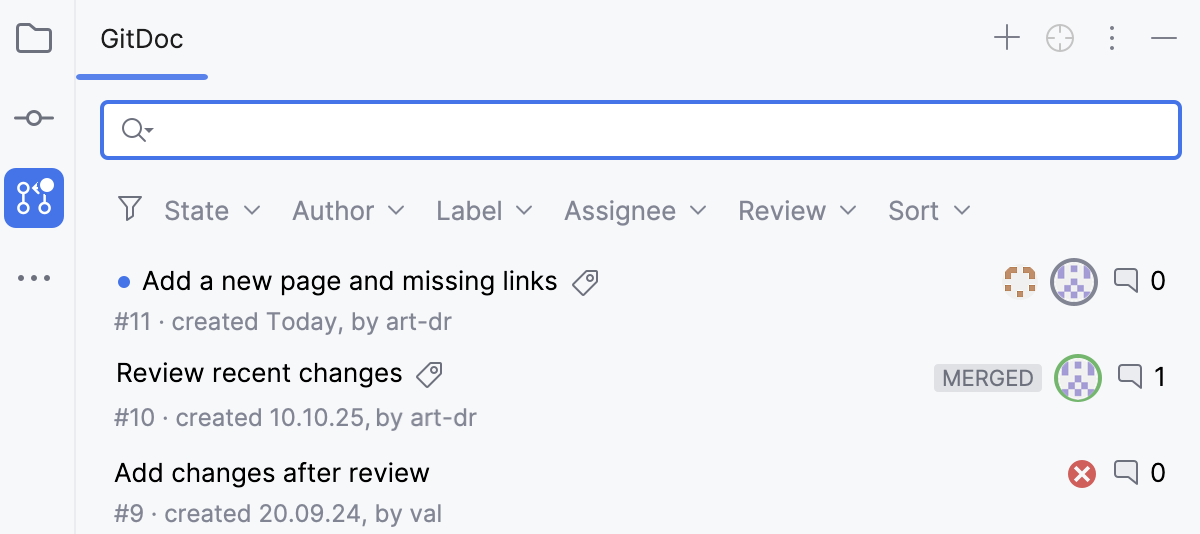
In the main menu, go to .
In the list of pull requests, select the one you want to work with and double-click it.
IntelliJ IDEA opens an overview of the selected pull request.
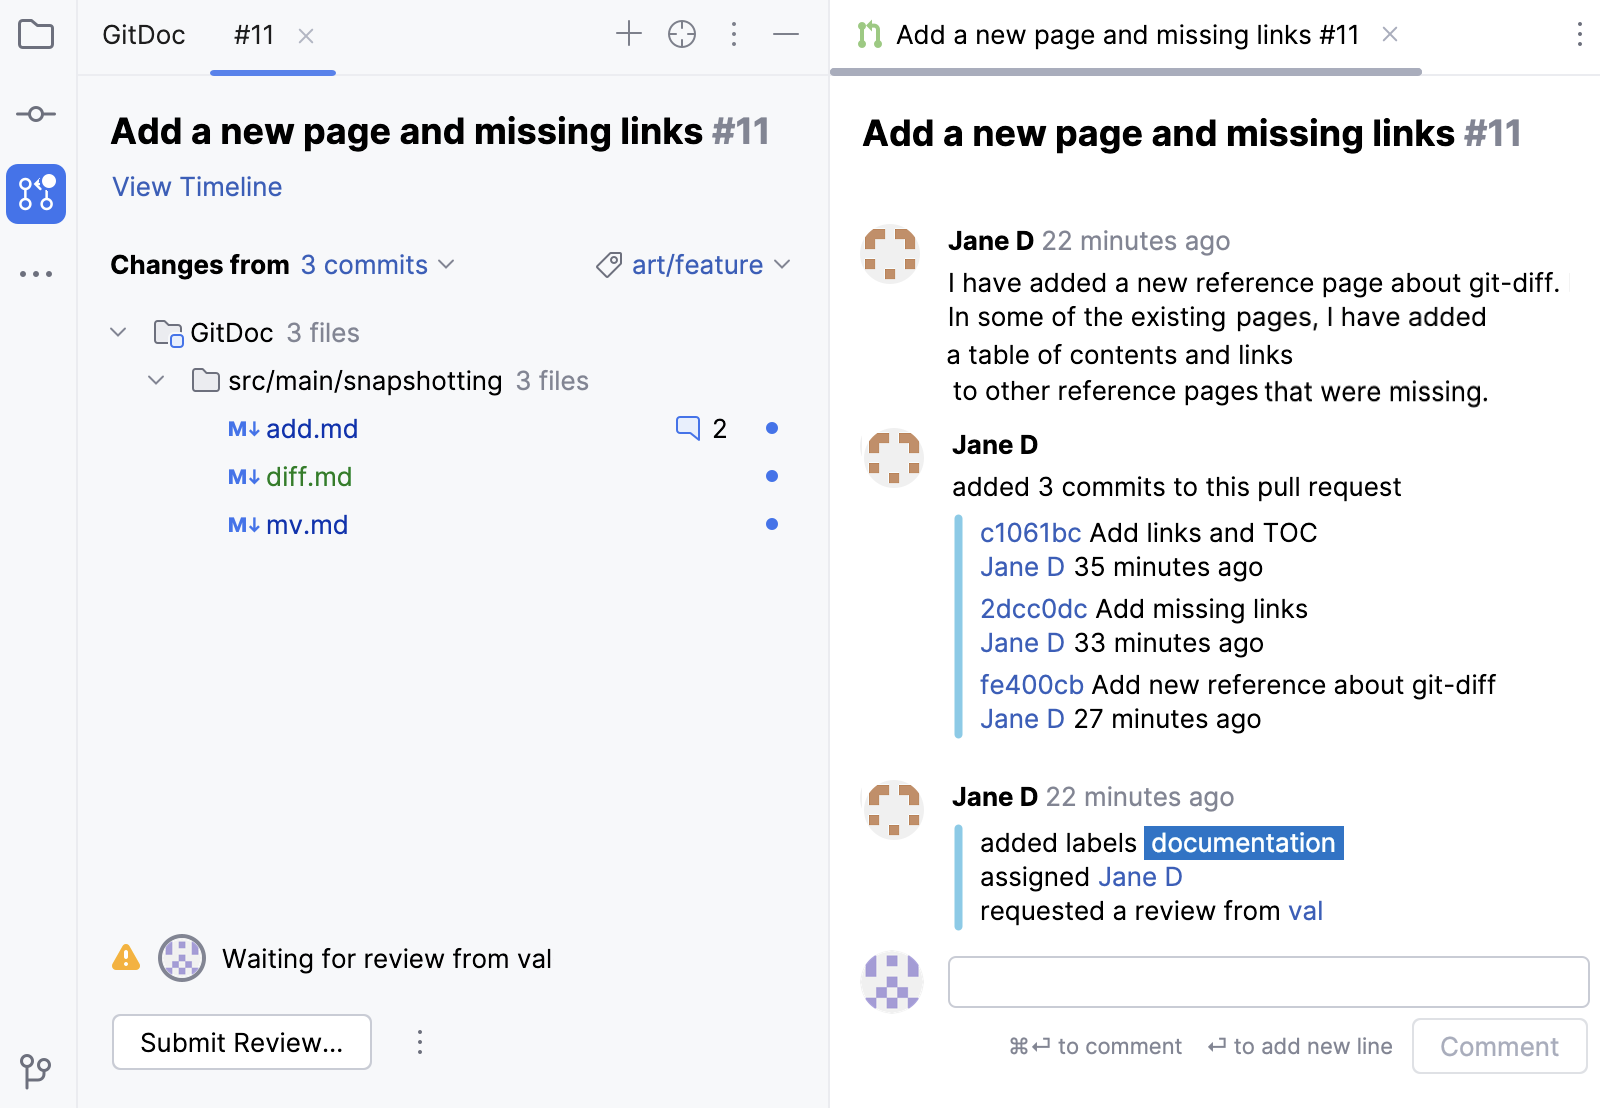
Next to the title, there is the pull request number. Click it if you want to open the pull request on GitHub.
When you click View Timeline, a new tab opens that shows the pull request's progression and high-level comments on a pull request as a whole.
To filter the list of changed files, select the commit you want to investigate in Changes from.
Right-click any file to open the context menu for this file.
In case there are any comments or suggestions, there is a counter with the number of comments in the list of files.
To start your review, click the branch with incoming changes and choose Checkout 'branch name' in the context menu.
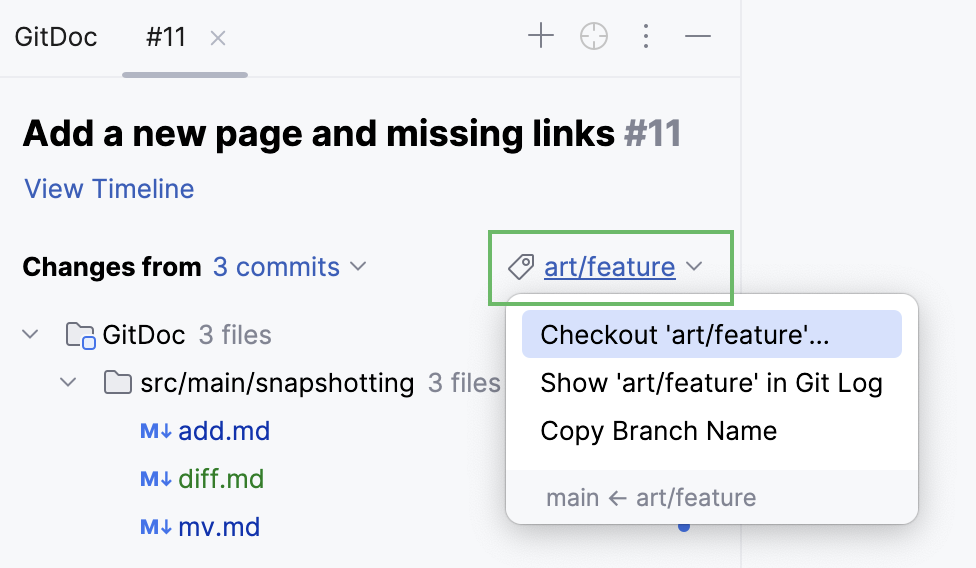
By checking out the branch, you get the full context to test the incoming changes and check how they work.
After the successful checkout, IntelliJ IDEA starts the Review mode. That means you can see the highlighted changes and comments not only in the Diff tab (Ctrl+D), but right in the editor (F4).
Select the file you want to investigate, right-click it and select Jump to Source F4 from the context menu.
In the file that opens, pink markers in the gutter indicate the changes and the comments that are available for review.
Clicking the comment icons in the gutter will hide and open the comments.
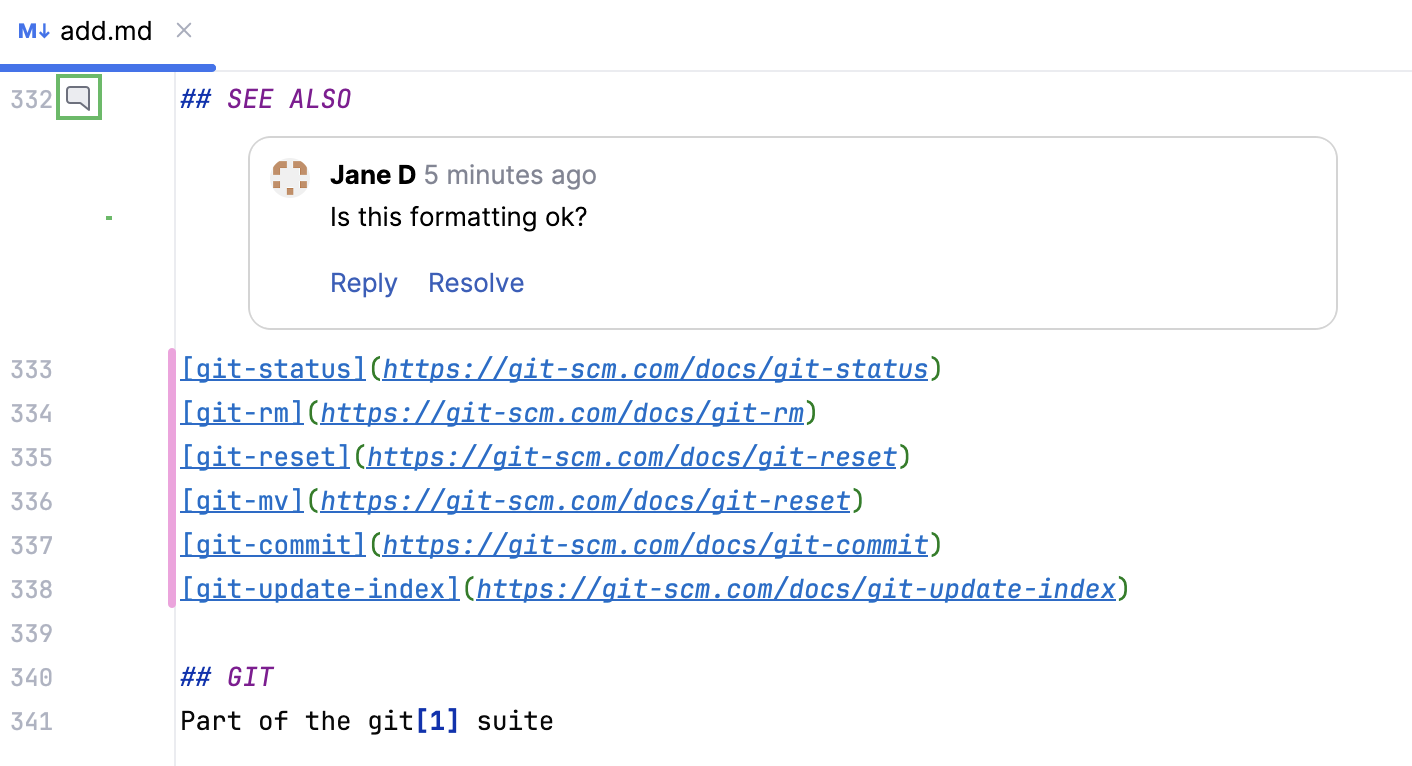
Clicking the pink markers reveals a popup displaying the original code.

Hover over the gutter and click
to leave a comment.

Select Add Single Comment to post a comment immediately and get other reviewers notified.
Select Start Review to add multiple comments.
Before you submit your review, your comments are marked as Pending, and you can edit or delete them.

For suggestions, add your version of the code wrapped in a Markdown code block with the
suggestionspecified as a language.```suggestion Your suggestion for this code line ```Navigate between the comments by using
/
in the upper toolbar or pressing Ctrl+Alt+Up/Ctrl+Alt+Down.
When you are ready to finish the review, click Submit in the pull request overview.
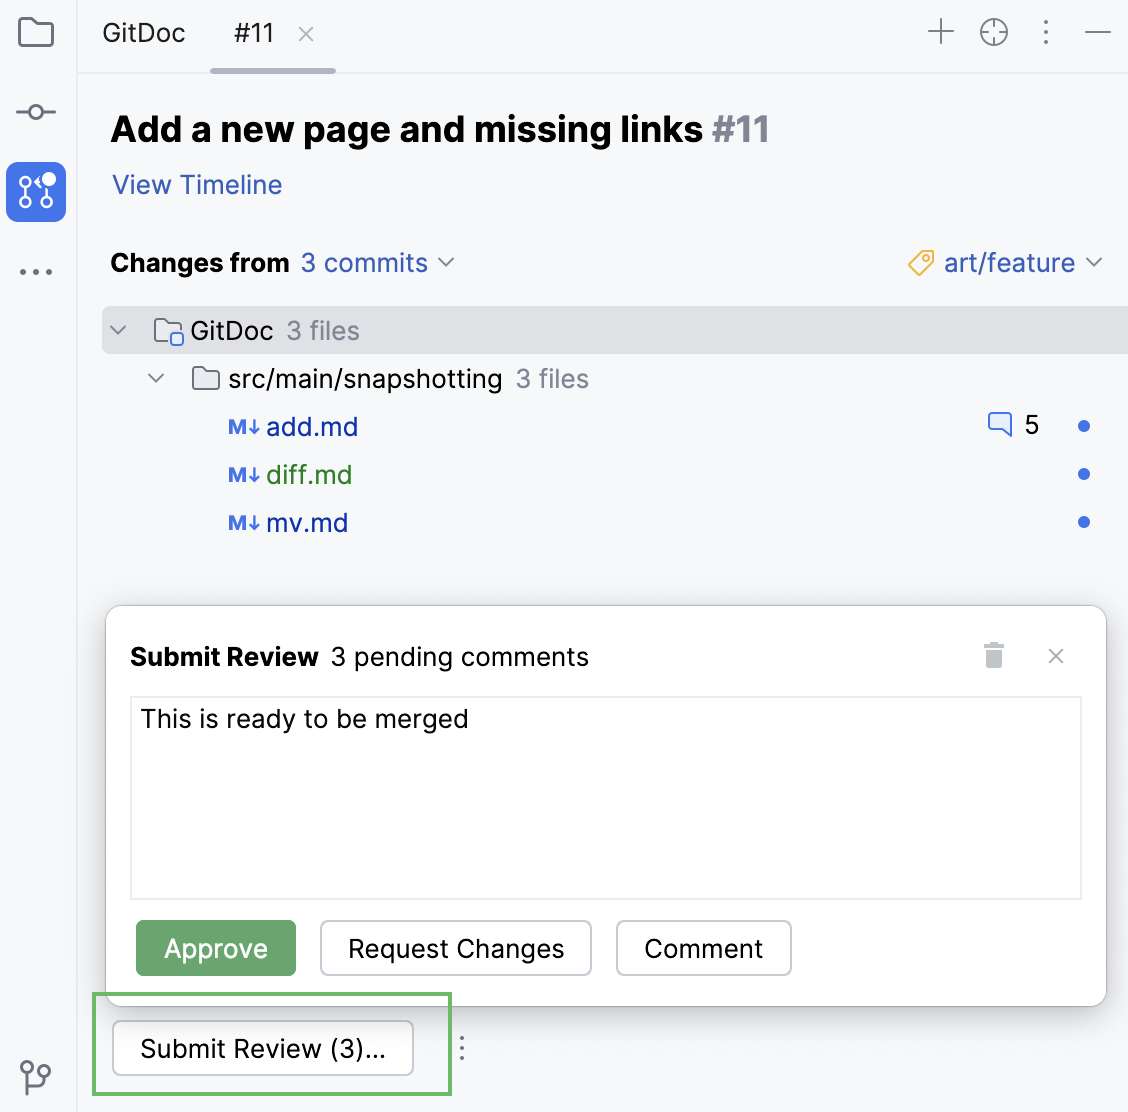
Alternatively, open the branches popup and click Submit Review.
Select one of the possible outcomes:
Approve: to approve merging changes.
Request changes: to submit feedback, a pull request author must apply the suggested changes before merging.
Comment: to submit a comment without an approval.
Merge or close an incoming pull request
If you have push access to the repository, after submitting your review and solving all the issues, you can merge or close the pull request.
In the main menu, go to .
In the list of pull requests, select the one you want to work with and double-click it.
At the bottom of the overview, there is a button with merge options that differ depending on the stage of the review process and your push access rights.
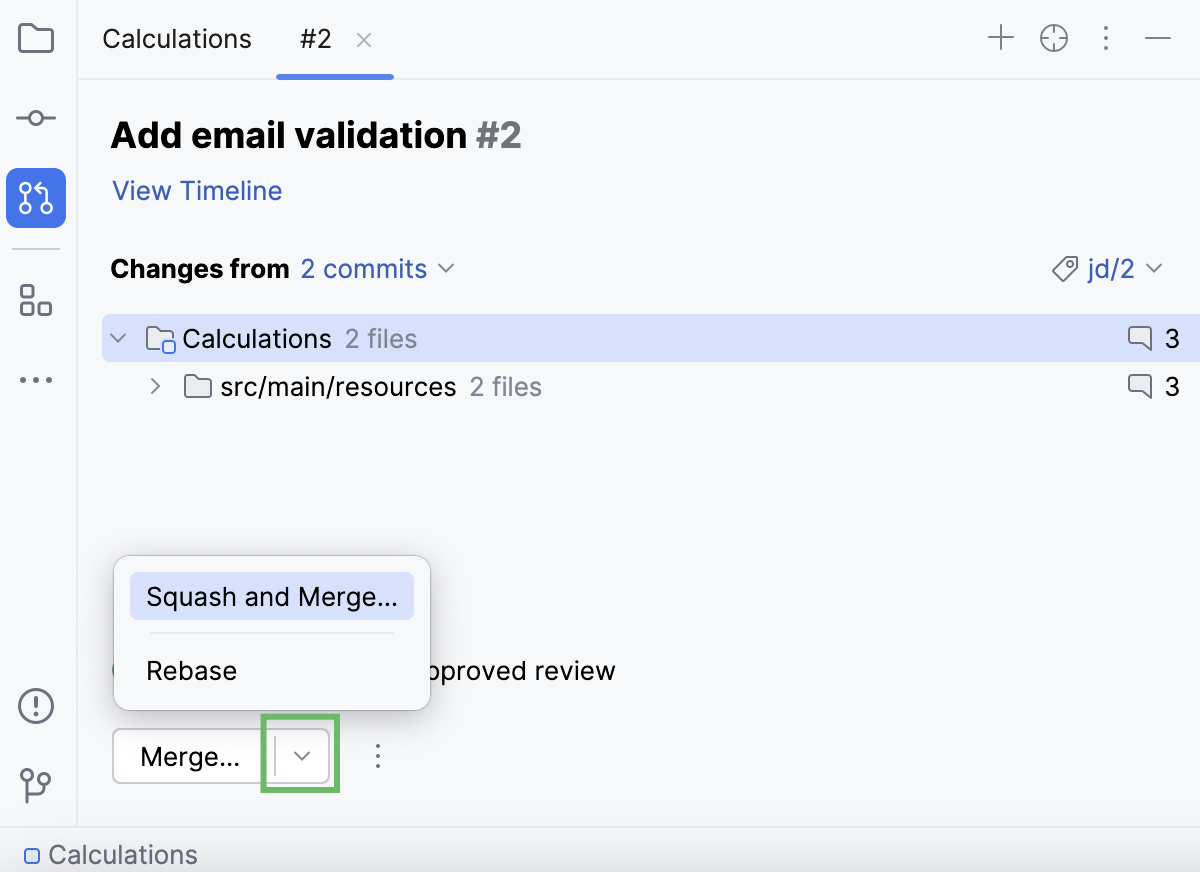
If you have approved the updates after your review, you can merge the pull request by clicking Merge.
For more merge options, click
and select Squash and Merge to squash the commits with your changes into one before merging them or Rebase to rebase the commits from the pull request branch and add them to the base branch.
Click
More and select Request Review if you need another opinion on this pull request or Close Pull Request if you do not want to merge it.
If you are ready to merge the pull request without submitting your review, in the pull request overview, click
and select Merge, Squash and Merge, or Rebase.
