Custom Persistence Cookbook
This document will use the xmlPersistence sample bundled with MPS to teach you how to define, deploy and use your own persistence formats.
What is custom persistence?
MPS normally saves models in its own XML-based format. However, there are cases when you may want to load or save model files in your own format.
Suppose, for example, that we want to leverage MPS to describe one of the existing languages. BaseLanguage, for instance, is a good description of Java. In such a case, the libraries written for that original language should be accessible from within MPS. It is the stubs aspect of a language that helps to create stub models for such libraries. Stub models are then used to reference the code outside of MPS.
Another useful example - if all you need from MPS is to merely edit files of your own DSL using the MPS editor, it would be useful to store the model in text format so that it could be edited in any text editor.
Look around the sample project
If you open the xmlPersistence sample project, you will get three main solutions, each of which fulfills a separate role in the puzzle.
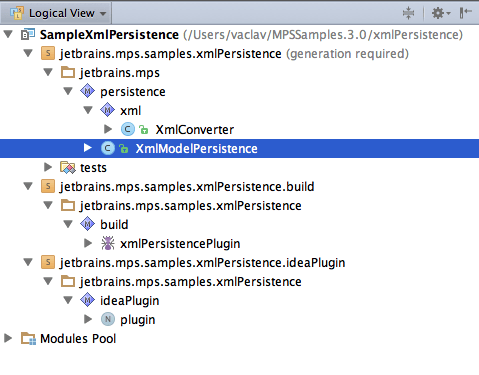
The xmlPersistence module defines the actual persistence logic, xmlPersistence.build contains a build script and xmlPersistence.ideaPlugin contains a customized plugin descriptor. Although the build script would normally provide a reasonable plugin descriptor by itself, this time we need to customize the descriptor, thus we include it in the project explicitly.
Define the persistence format
The xmlPersistence module implements the persistence logic. The persistence type in MPS is set on the per-model level. In our simplified case, the sample can store a model, which is restricted to a single XMLFile root element of the jetbrains.mps.core.xml language, into plain XML documents. The actual XML parsing logic resides in the XmlConverter class, while the XmlModelPersistence class implements the essential interfaces for hooking into the internal workings of MPS.
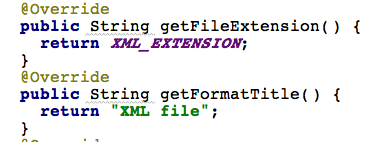
The getFormatTitle() method is worth a special mention here, since the string it returns will be used to represent the storage format to the future users.
Additionally, the getFileExtension() method will register our custom persistence for .xml files.
Plugin ID
Also notice that the module has a Plugin ID set in the Idea Plugin tab of its module properties:
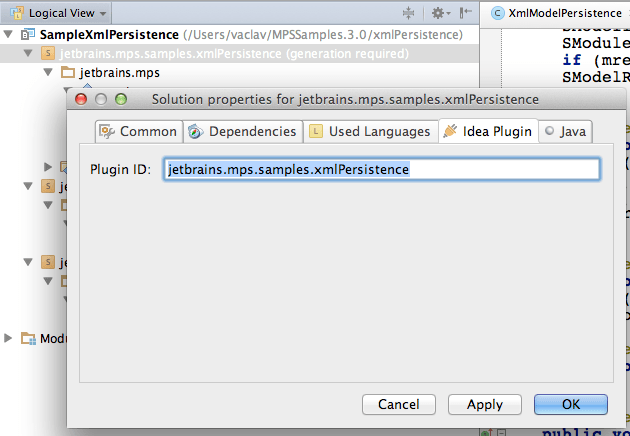
The identifier must match the plugin identifier declared in the plugin (xml) descriptor inside the xmlPersistence.ideaPlugin solution. We add an IDEA plug-in identifier to the properties of the xmlPersistence solution in order to specify that the solution is part of the plugin and thus can reference (or load at runtime) any plugin's classes.
Build the MPS plugin
The xmlPersistencePlugin build script is a standard build script that zips the three modules into an IDEA/MPS plugin.
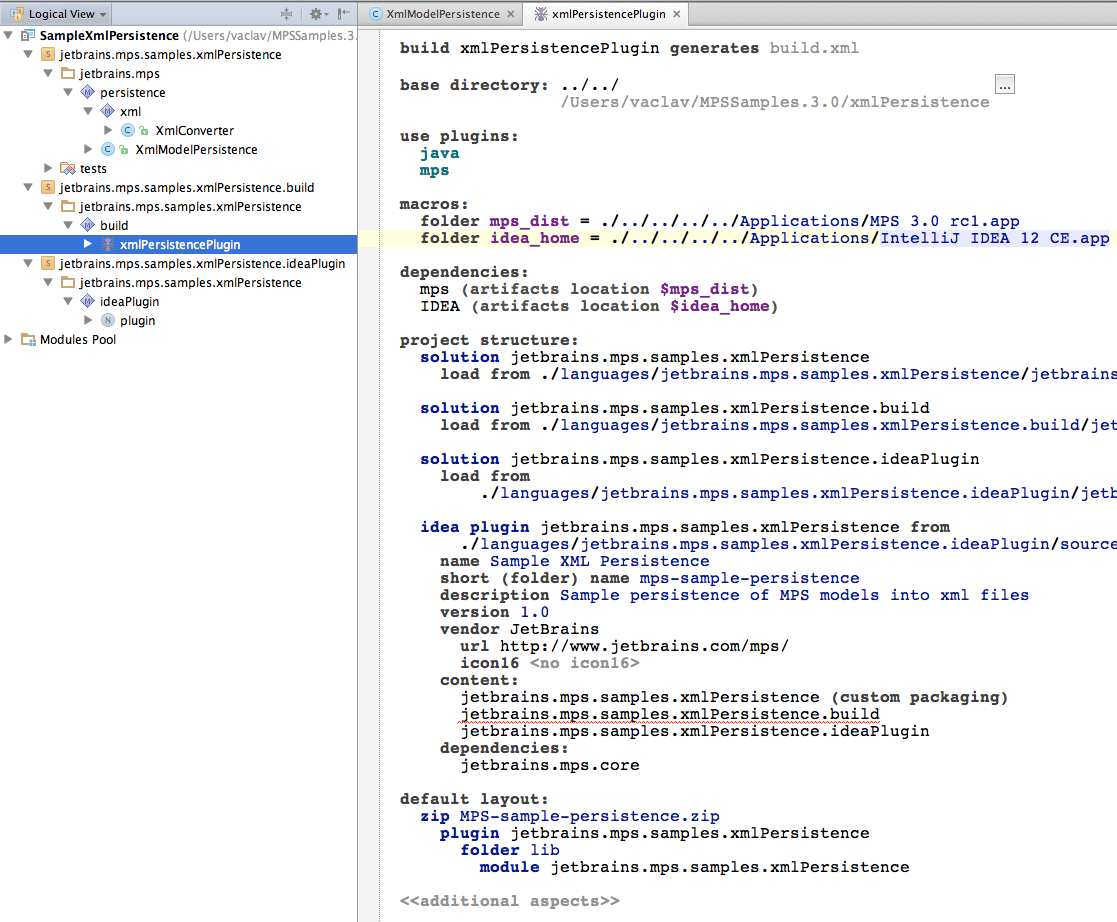
The plugin descriptor provides the standard plugin information plus it registers our jetbrains.mps.persistence.XmlModelPersistence class as mps.ModelFactoryProvider. This is the additional bit that requires us to provide an explicit plugin descriptor.

After rebuild you should be able to run the build script and get the plugin generated:
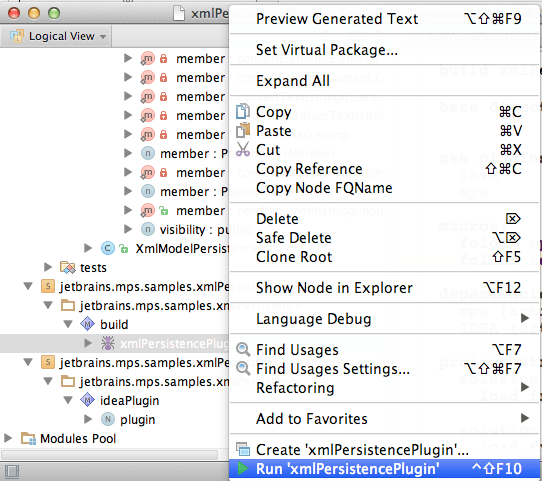
This will create the plugin so we can distribute it to the users.
Build the IntelliJ IDEA plugin
Building an IntelliJ IDEA plugin isn't really that much different from building an MPS plugin. You only need to change the dependency from mps to mpsPlugin in the build script and set the artifacts location to wherever your MPS IDEA plugin has been deployed. 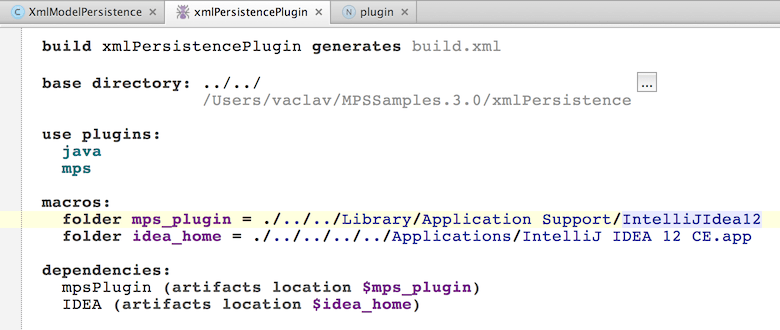
After rebuilding the project and running the build script, you get a plugin to deploy into IDEA.
Using the custom persistence plugin in MPS
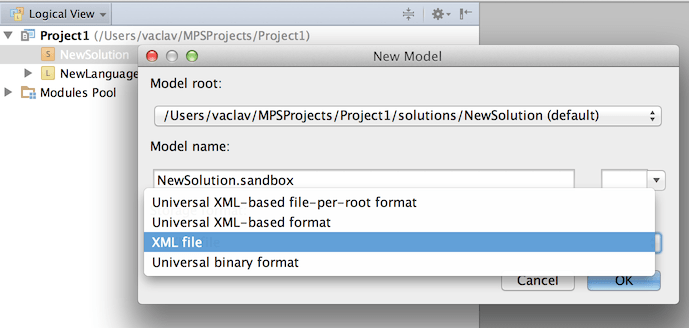
After installing the generated plugin into MPS, when you are creating new models you are able to specify the XML file persistence provider for them:
Just as we specify in the XmlModelPersistence.createEmpty() method, the new model will have the jetbrains.mps.core.xml language added as a used language and an empty Root Node will be added to it:
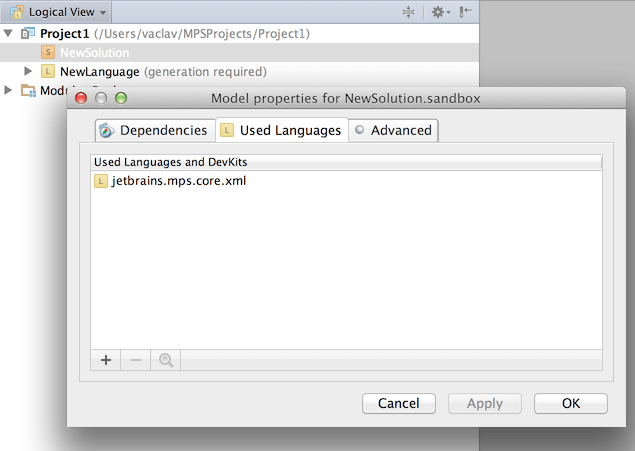
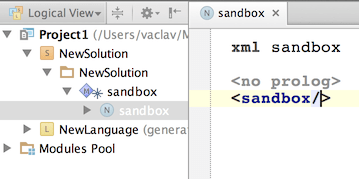
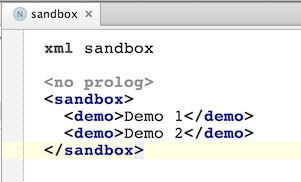
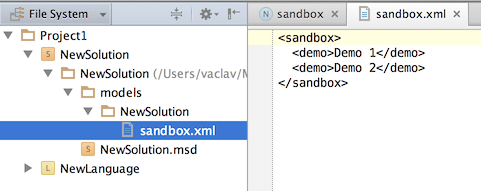
Whatever you type into the root node, will be persisted immediately into a corresponding xml file. Changes to the underlying xml file will be reflected in the model upon opening in the editor.
Using the custom persistence plugin in IntelliJ IDEA
The IDEA plugin also allows for XML documents to be edited with an MPS-based projectional editor and yet persisted into plain xml files. Since .xml files are associated with the XML editor in IDEA, we get the default IDEA's editor open when we click on an XML file. 
However, since the sample.xml file is located under the configured MPS models root, MPS will invoke our custom persistence plugin and have it build a model out of it. When you hit Control + N / Cmd + N to open a class by name, you get the option to open the sample model:

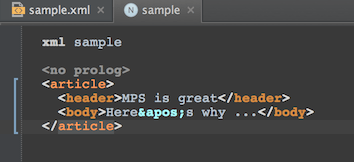
Then you can edit it in a projectional editor and have your changes persisted into the original xml file:
Debugging the plugin
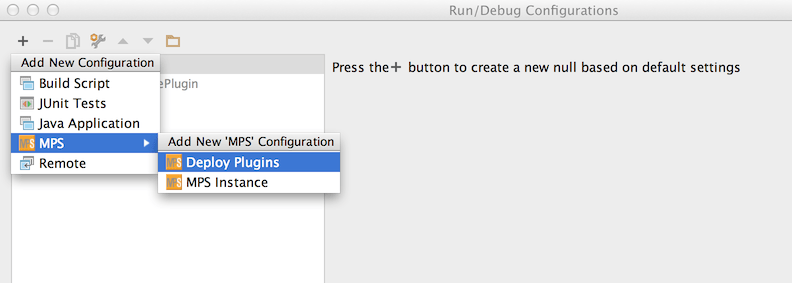
MPS can also give you a hand when you want to test your fresh persistence implementation right away, directly in MPS. You simply create a Run Configuration off the Deploy Plugins template:
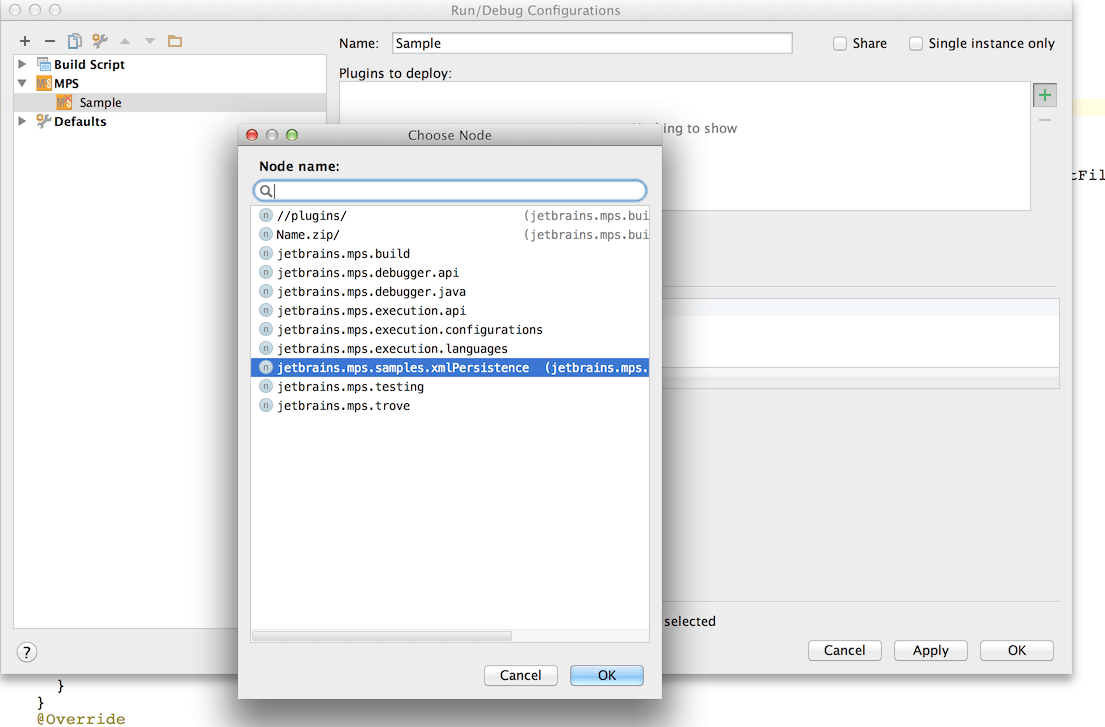
Then you specify your plugin (after rebuilding the project and re-running the build script) to be deployed by the Run Configuration:
Finally you run the configuration to get the plugin installed into MPS (MPS will restart):
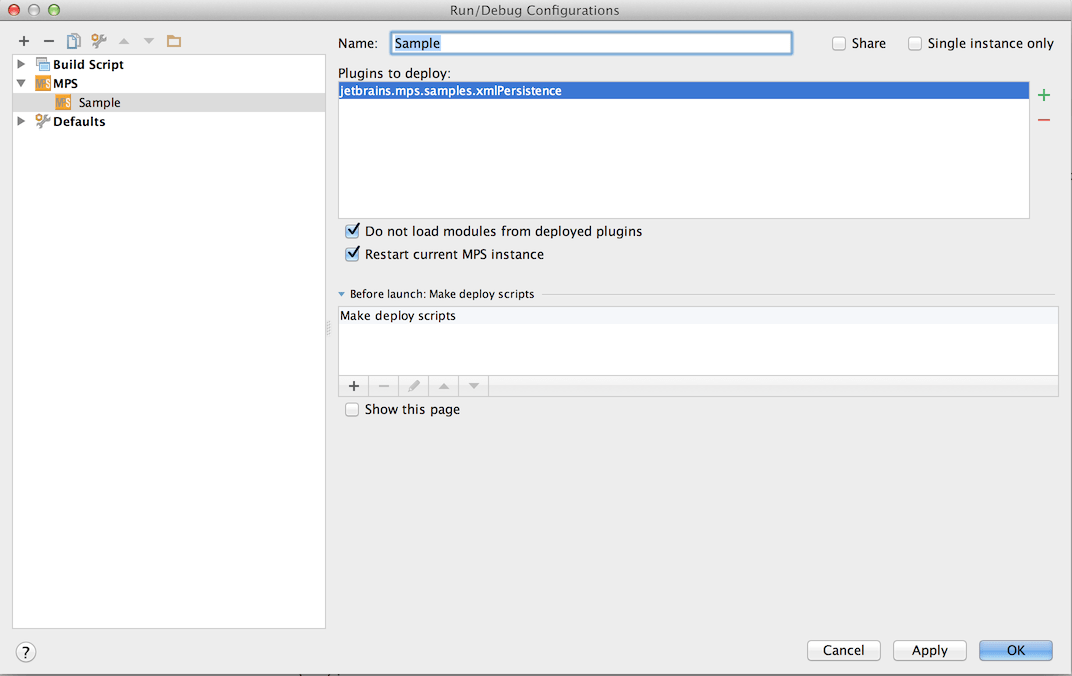
After this step you will be able to use the custom persistence provider for models and test that it behaves as expected.
The plugin will be installed into the .MPS3x sub-directory of your home folder on Windows, or $HOME/Library/Application Support/MPS3x on Mac. You may uninstall or disable the plugin through the Plugin Manager UI or by deleting the plugin manually.