Using MPS inside IntelliJ IDEA
We are going to show how to use MPS languages inside IntelliJ IDEA in this document. You may also like to check out the screen-cast covering this topic.
Note: Make sure you have IntelliJ installed. Both Community and Ultimate Edition would work.
Get the MPS core IntelliJ IDEA plugin
Download the MPS IntelliJ IDEA plugin from the MPS download page or install it directly using IntelliJ IDEA's plugin manager. If installing manually, the downloaded plugin zip file must be unzipped into the IDEA's plugin folder.
Windows and Linux: typically USER_HOME/IDEA_version/config/plugins or IDEA_HOME/plugins
MacOS: ~/Library/Application Support/Idea_version/ or IDEA_HOME/plugins
The zip file holds several MPS plugins, three of which are essential:
mps-core - holds the core MPS functionality
mps-java - enables BaseLanguage and its extensions
mps-vcs - allows VCS for MPS models in IntelliJ IDEA
After installation, the plugin directory should look something like this:
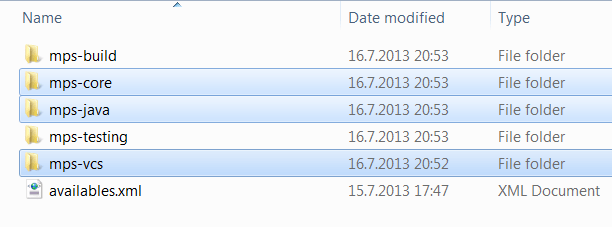
This will enable MPS and the core set of languages to be available inside IntelliJ IDEA once you restart it.
Turn MPS on and off
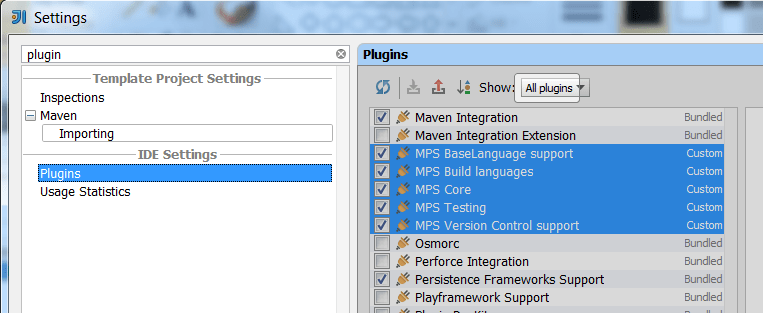
The Plugin Manager in IntelliJ IDEA should now list several MPS plugins, which you can turn on and off as needed:
Try BaseLanguage inside IntelliJ IDEA
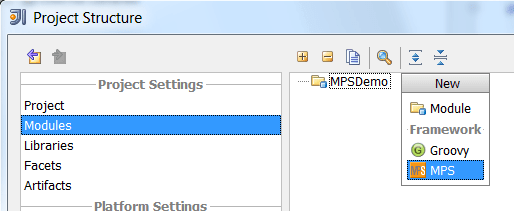
You can now enable the MPS facet for your IntelliJ IDEA projects:
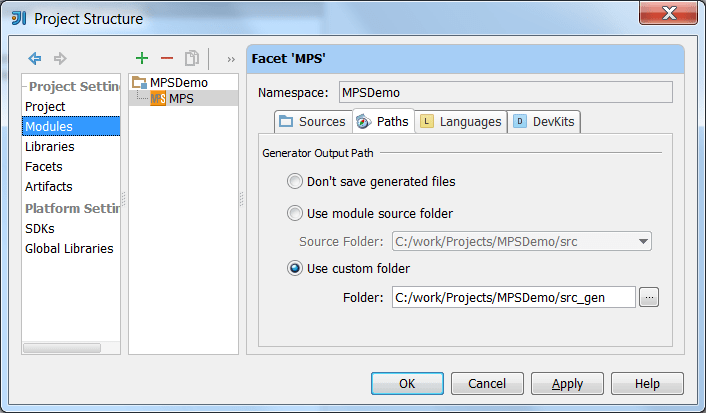
The facet offers several configuration points, but you most likely want to stick to the default settings for your first experiments.
Adding the MPS facet to a project's module will create a models node in the Project View and allow you to create MPS models. If not, just create one on the Sources tab:
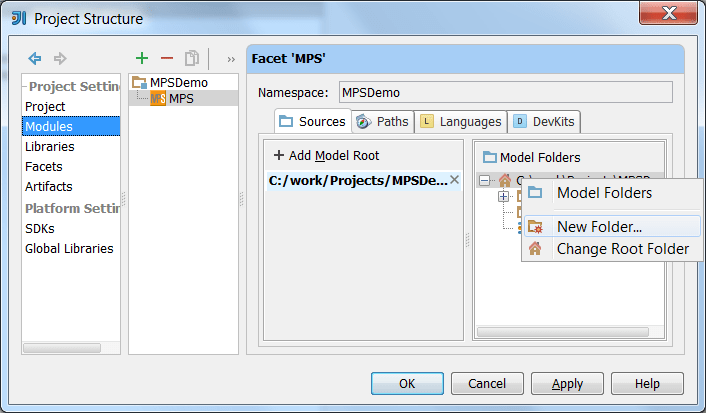
You need to mark it as a Model Folder (the icon next to the models folder should turn blue):
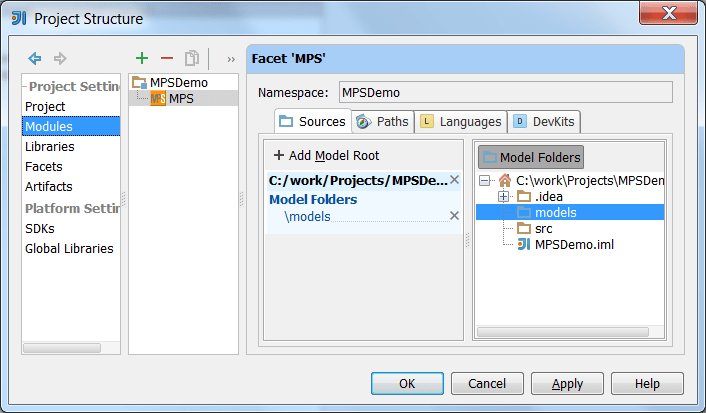
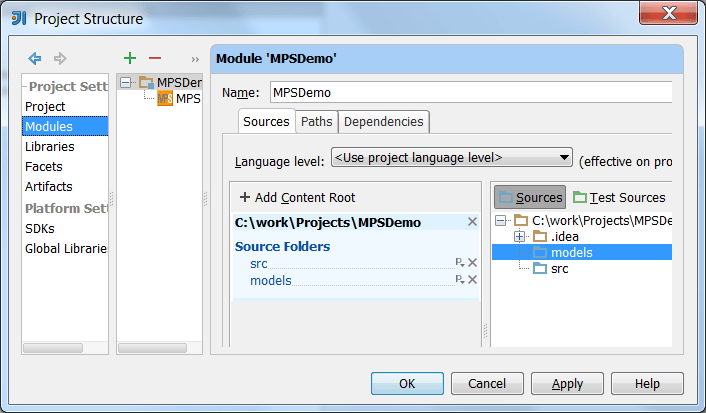
The final step is to mark the models folder as a Sources directory of the module:
Playing with MPS models
Once the MPS facet is configured and has one or more Model Roots marked Model as well as Sources Folders, you can create models in them:

When creating a new model, you have to specify its name and choose one of the available model Kinds through the Create New Model dialog:
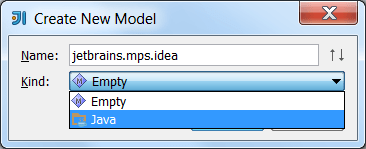
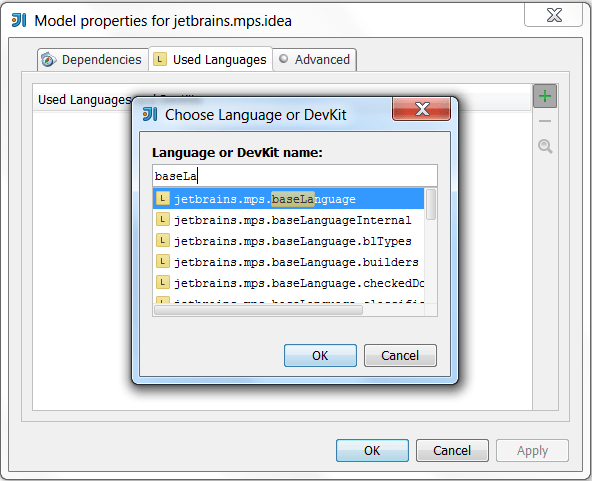
Each model Kind in this case represents a preconfigured set of used languages for the model. This is a convenient shorthand that still allows you to tune the list of used languages manually at any time through the Model Properties dialog by pressing F4 or Alt+Enter on the model node inside the Project View: The list of Kinds is currently set to contain only these two options (Empty and Java), but will be configurable in the future releases.
Right-clicking on a model will display the imported models and used languages:
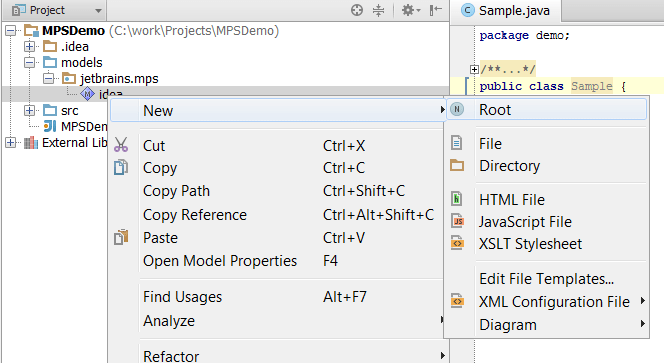
The MPS models let you create new nodes from the imported languages the same way you would do it in MPS itself: Model Nodes in the Project View represent the content of MPS models and just like in MPS they are similar to java packages. You can create model elements (Roots) in them:
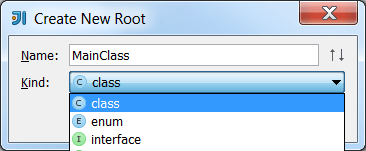
Similarly to when we were creating new MPS models, you give each root element a name and a kind, which now means its MPS Concept:
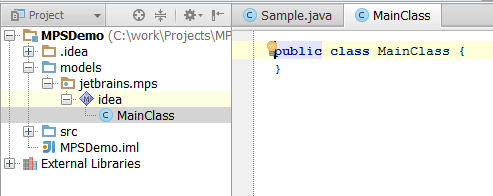
The root nodes are displayed in the Project View and look very similar to how other resources and files look in IntelliJ IDEA. The projectional editor for a root node can be opened by double-clicking on the root node or by pressing F4.
Code generation
The code process of MPS models is tied to the IntelliJ IDEA's make/rebuild project actions and so will be triggerred automatically.
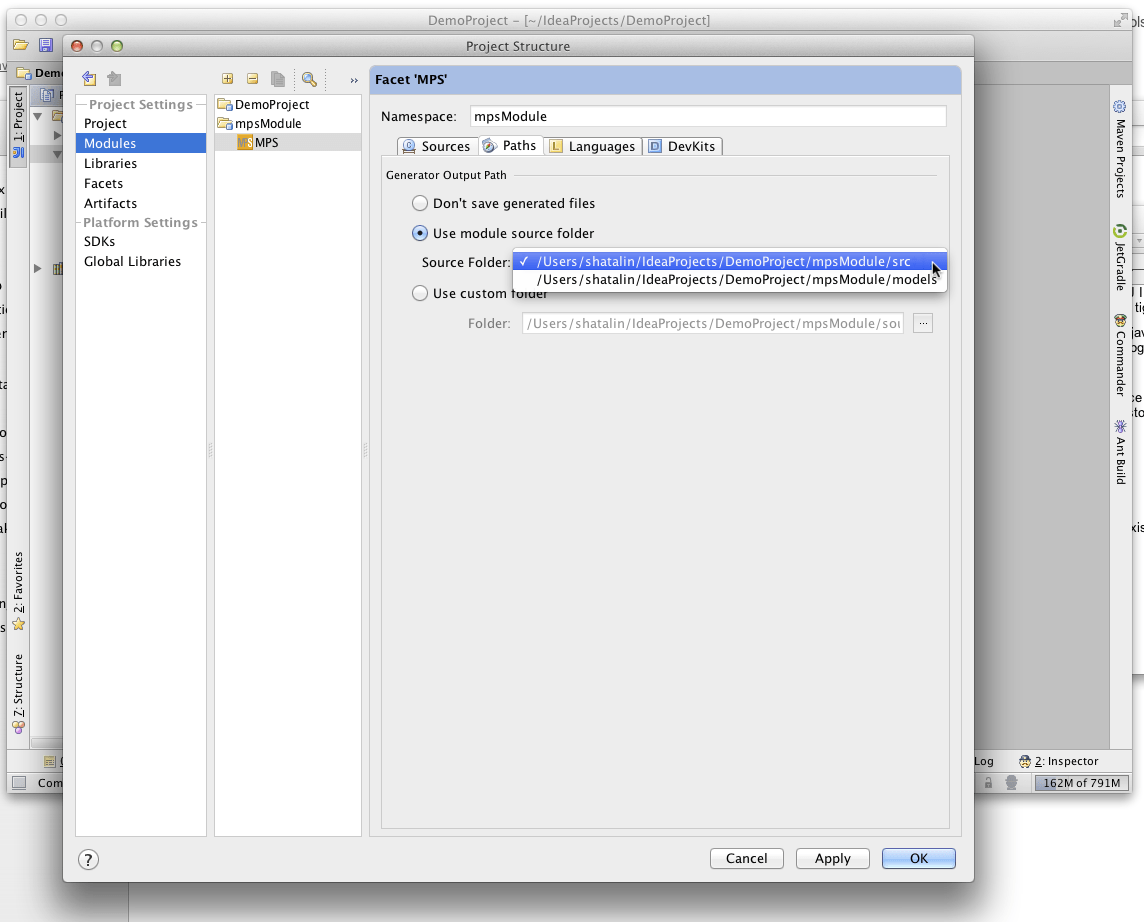
It's possible to configure where to store the generated source code. This is configured through the MPS facet settings dialog. There are three options you can choose from:
The generated code stays in memory only. It will be available during the compilation process only and never saved to disk at all
It can be saved into a configured source folder of this module
It can be saved into any other directory wherever on the disk
Install the language plugin
Now you probably can't wait to try out your own language inside IntelliJ IDEA. All you need to do is to unpackage the plugin zip file into the same IntelliJ IDEA's plugins folder that we unzipped the core plugin into earlier:
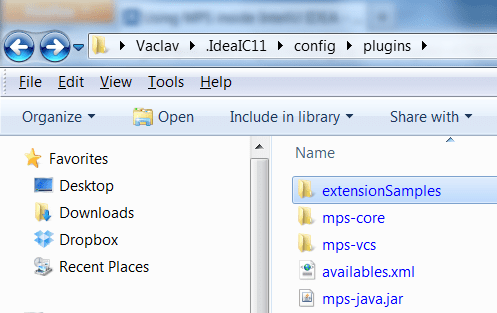
Additionally, many of the plugins have been shared through the IntelliJ IDEA plugin repository and so can be comfortably downloaded through the IDEA's plugin manager.
After you restart IntelliJ IDEA, you will be able to add your language(s) that came through the plugin to the list of used languages:
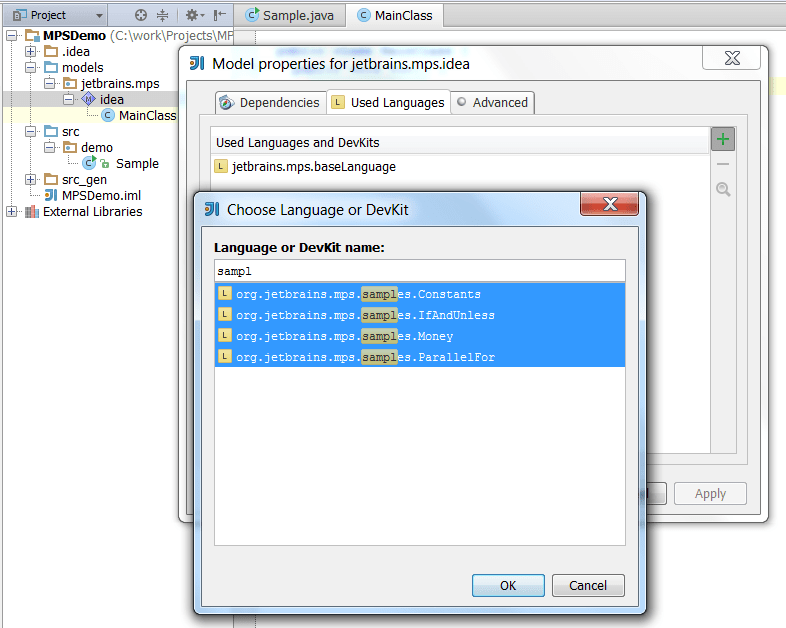
This should be enough to enable your custom language(s) for use inside IntelliJ IDEA.
Adding runtime libraries
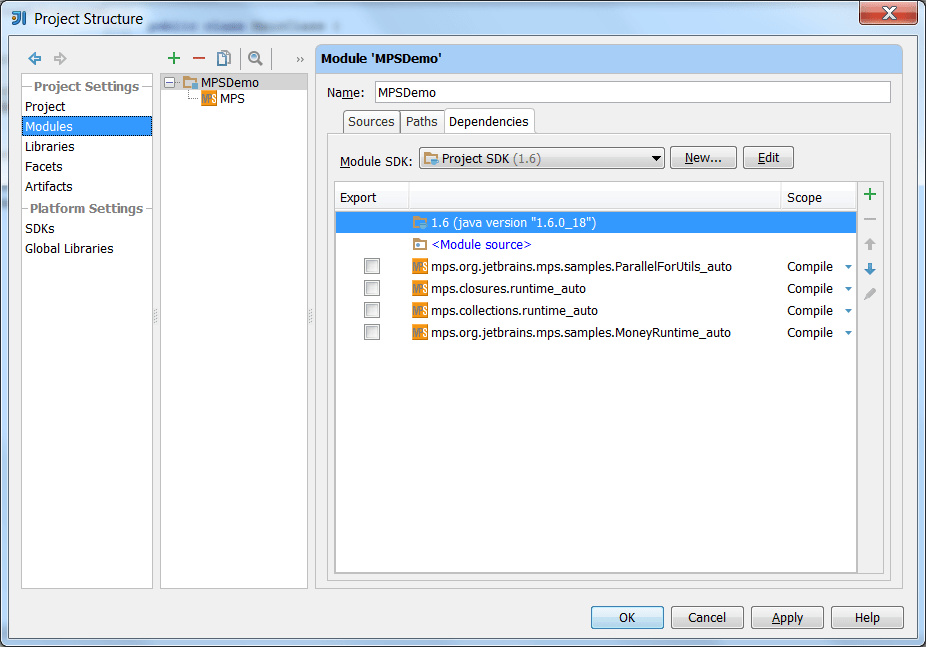
Your languages will typically come with runtime dependencies on other languages or solutions. Although they typically come bundled as jar files inside the plugin zip file, they need to be imported as module dependencies into IntelliJ IDEA.. The MPS facet does that automatically once you add a language with a runtime dependency.
Interoperability between Java and BaseLanguage
The MPS IDEA plugin integrates your MPS code tightly into the rest of the Java project. MPS code will seamlessly participate in IDEA's build and make, you can cross-navigate to usages or definitions between Java and BaseLanguage as well as refactorings will correctly include all the sources.
Converting Java code to BaseLanguage
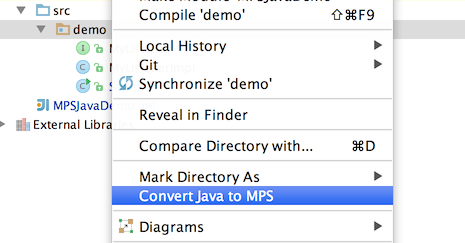
MPS gives you a convenient option to quickly convert Java code to BaseLanguage and migrate it into an MPS model. Just right-click the desired Java package and select Convert Java to MPS.
MPS confiuration options
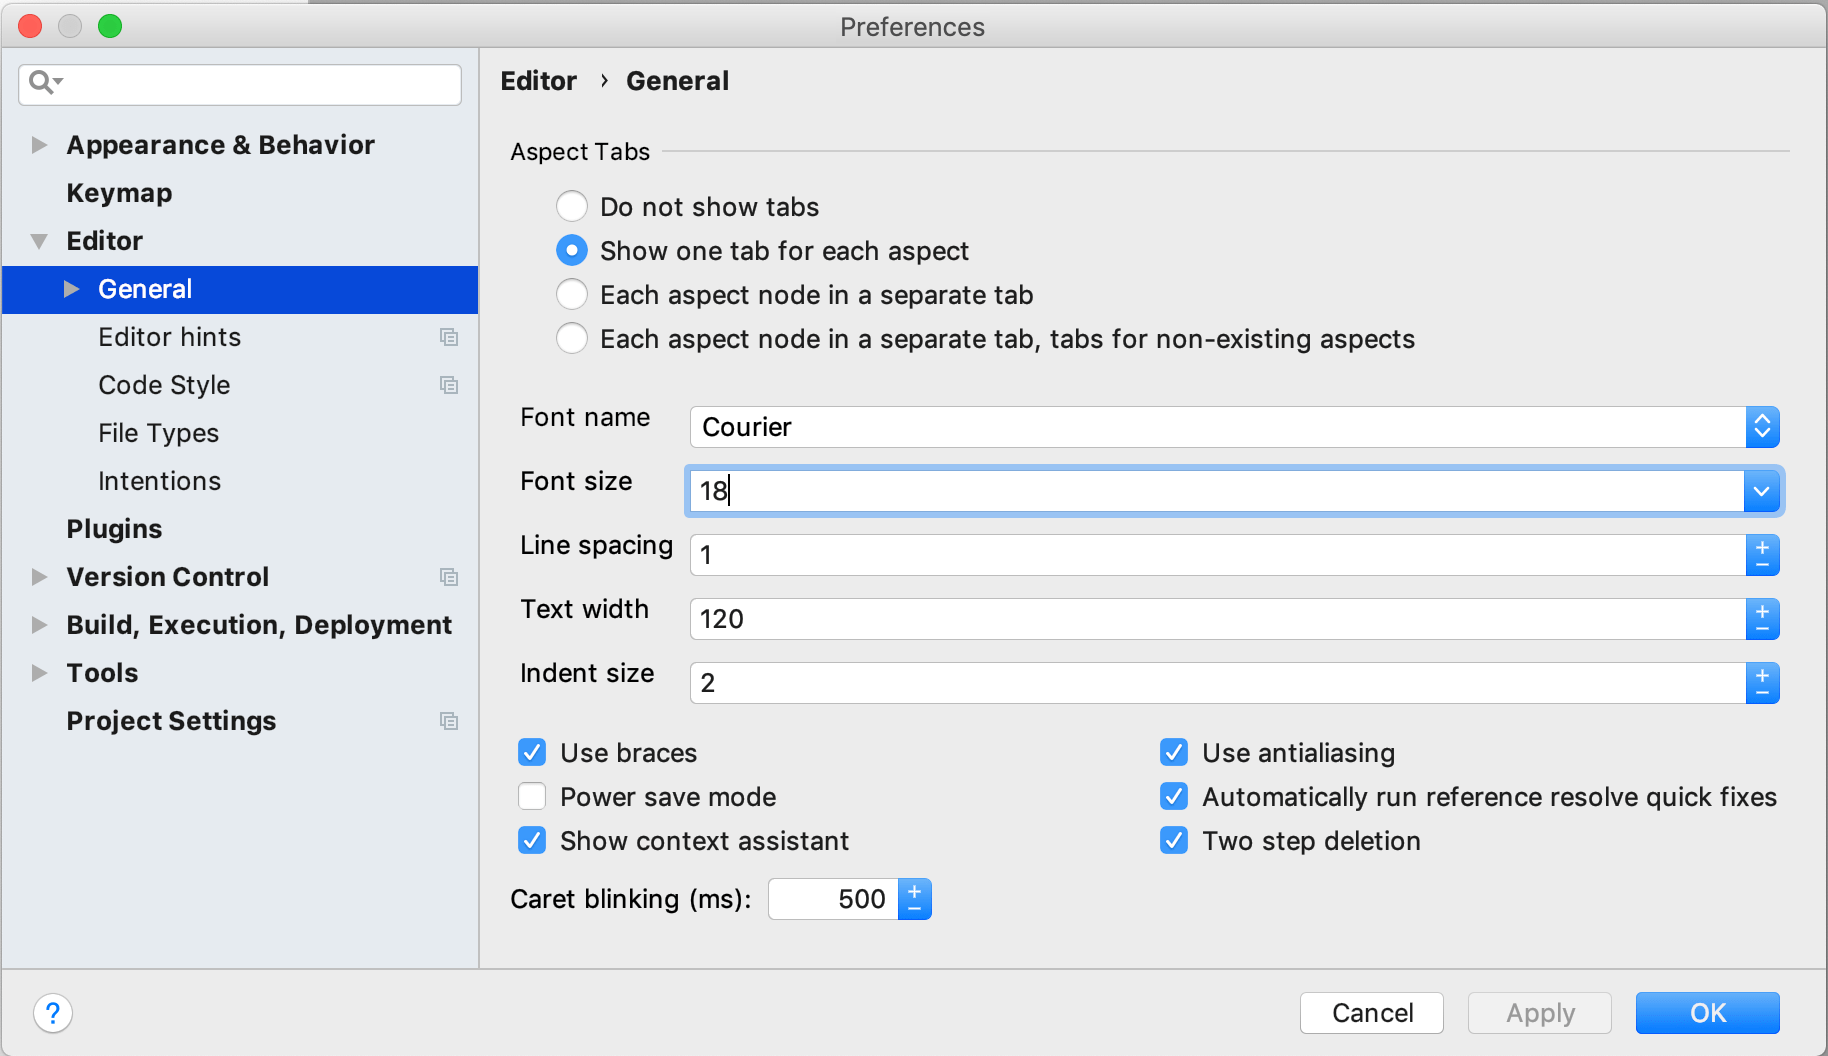
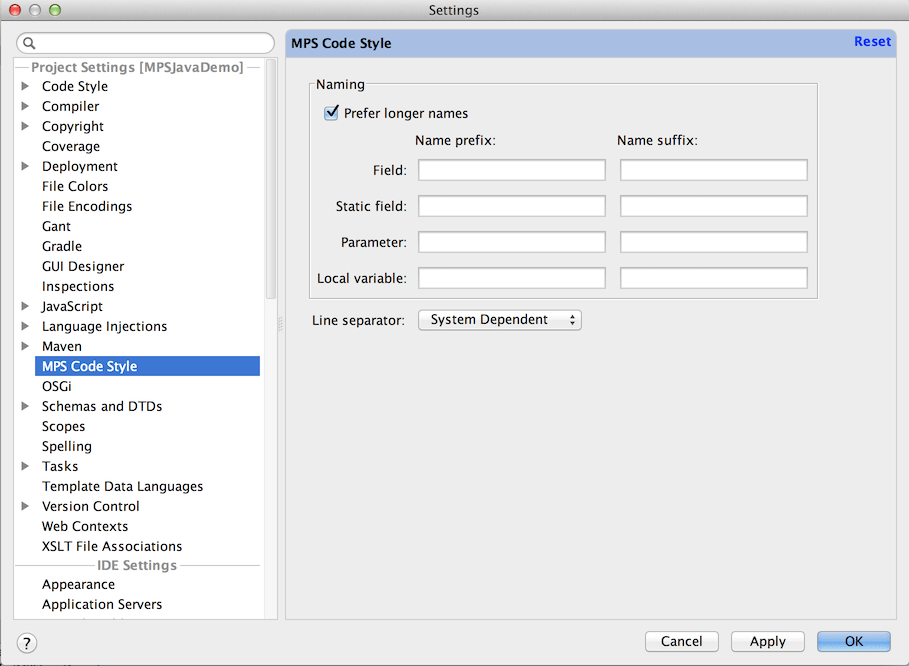
Just like MPS itself, the MPS plugin can be configured and customized using the Settings dialog, which you can invoke through the menu, a toolbar or using a keyboard shortcut (Control + Alt + S / Cmd + ,). MPS has added a couple of configuration screens to the IntelliJ IDEA's Settings dialog, which allow you to configure several aspects of how MPS behaves.
Configure the generator
Additionally, you need to make sure the Use external build flag in the IDEA Compiler settings is turned off, otherwise you won't be able to rebuild your project.
