HTTP Client in AppCode Code Editor
When testing a web service, you can create, edit, and execute HTTP Requests directly in the AppCode code editor.
HTTP Requests are stored in HTTP and REST files and are marked with the ![]() icon.
icon.
Support for HTTP files includes the following features:
Code completion for method types and header fields
Inline documentation for request header fields and doc tags
Viewing a structure of HTTP requests
Language injections inside the request message body
Before you begin, configure the Proxy settings on the HTTP Proxy page of the Settings/Preferences (⌘,) dialog if necessary.
Creating an HTTP request file
You can work with HTTP requests either from scratch files or from physical files of the HTTP Request type.
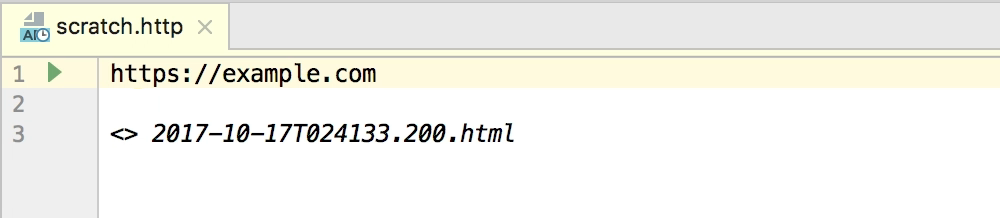
Scratch files can be used to test HTTP requests during development. A scratch file is not stored inside a project, so AppCode can modify it and add additional information about the request. When an HTTP request is executed from a scratch file, the link to the response output file is added below the request and at the top of the requests history file.
Create an HTTP request scratch file
Press ⇧⌘N and select HTTP Request.
Physical files can be used for documenting, testing and validating HTTP requests. A physical file is stored inside your project, and AppCode will not modify it. When an HTTP request is executed from a physical file, this file is not modified. Information about the executed request with the link to the response output file is added to the top of the requests history file.
Create a physical HTTP request file
On the File menu, point to New, and then click HTTP Request.
You can use the Move refactoring (F6) to move HTTP requests from scratches to physical files, as well as between physical files.
Move an HTTP request
-
In the editor, position the caret at the request to be moved and do one of the following:
From the main menu or the context menu, choose .
Press F6.
In the dialog that opens, click
 to select the file or type the full path to the file you want to move the request to. Note that you can specify the name of a non-existing file, in which case a new file with the provided name will be created automatically.
Composing an HTTP request
You can type HTTP requests directly in the created HTTP request file using the following general syntax:
Method Request-URI HTTP-Version
Header-field: Header-value

Request-Body
AppCode uses the HTTP request in Editor format, which provides a simple way to create, execute, and store information about HTTP requests. To get an overview of its possibilities, you can explore the HTTP Requests Collection, which is a handful selection of composed requests.
Open a request from the HTTP Requests Collection
Click
 in the top-right corner of the editor or choose in the main menu.
 -
In the pop-up menu, select the HTTP Requests collection you wish to open:

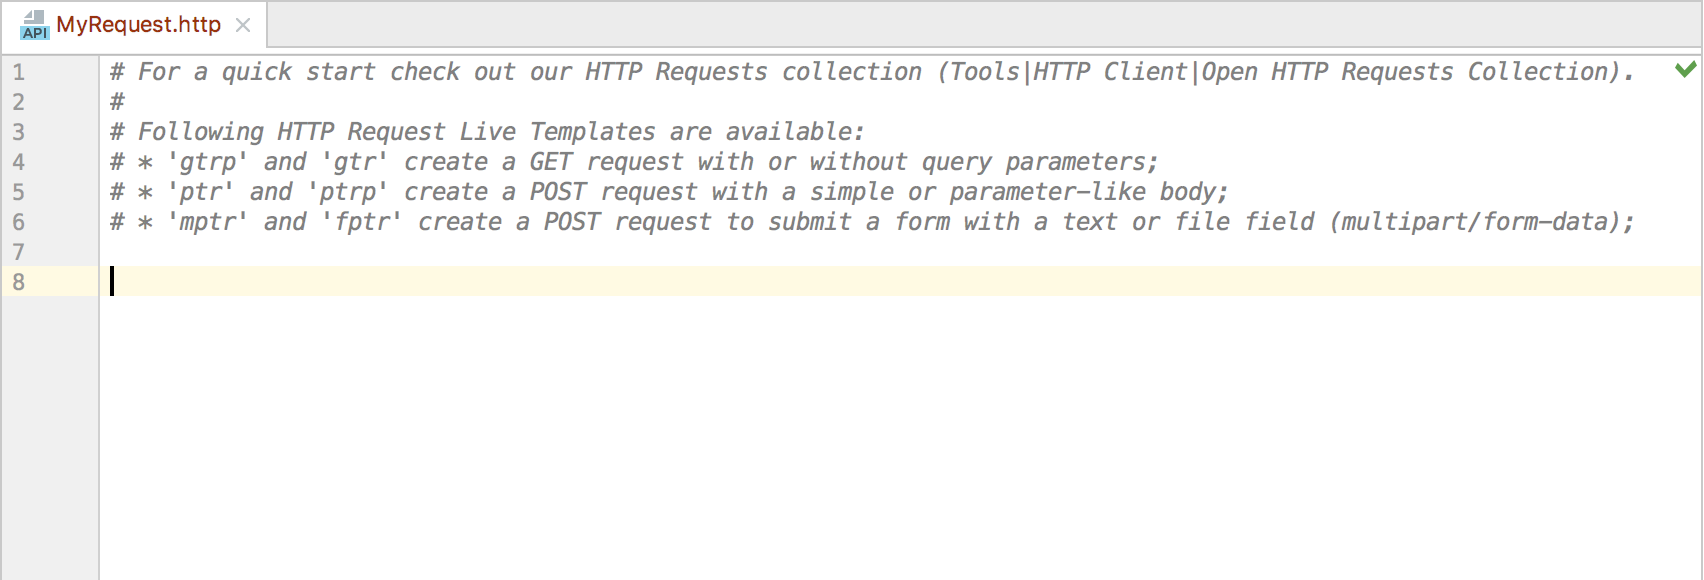
To speed up composing HTTP requests, use live templates. For example, gtr expands to a simple GET request; mptr expands to a multipart/form-data POST request.
Using environment variables
When composing an HTTP request, you can parametrize its elements using environment variables. For example, instead of providing the host name in your request explicitly, you can use the {{host}} placeholder. Then you define a set of environment variables in your project holding the desired host definitions. When you execute the request, you choose between defined environments, for example, the host to send the request to:

The selected environment will be used as the default one when Viewing a structure of the request and opening the request in the browser or creating a run/debug configuration for it.
The name of a variable can be arbitrary, but may only contain letters, digits, the underscore symbols (_), or the hyphen symbols (-). A variable can hold the values for the following request components:
Request host, port, and path
Query parameter or value
Header value
Arbitrary values provided directly inside the request body or supplied in an external file.
Environment variables are defined in the environment files, which must be stored inside the project:
The rest-client.env.json (or http-client.env.json) is a regular file that is meant to be distributed together with your project.
The rest-client.private.env.json (or http-client.private.env.json) is a private file that might include passwords, tokens, certificates, and other sensitive information. This file is added to the list of VCS ignored files by default. Values of variables that are specified in the private file override values in the environment file.
Example: Working with environment files
The following sample http-client.env.json environment file defines two environments: development and production. The additional http-client.private.env.json file holds the authorization sensitive data.
{
    "development": {
        "host": "localhost",
        "id-value": 12345,
        "username": "",
        "password": "",
        "my-var": "my-dev-value"
    },

    "production": {
        "host": "example.com",
        "id-value": 6789,
        "username": "",
        "password": "",
        "my-var": "my-prod-value"
    }
}
{
"development": {
"username": "dev-user",
"password": "dev-password"
},
"production": {
"username": "user",
"password": "password"
}
}The example HTTP request is as follows:
GET http://{{host}}/api/json/get?id={{id-value}}&key={{unresolved_var}}
Authorization: Basic {{username}} {{password}}
Content-Type: application/json

{
    "key": {{my-var}}
}
When you execute the above request, AppCode provides a choice between the defined execution environments:

Depending on your choice, the resulting request will be one of the following:
GET http://localhost/api/json/get?id=12345&key={{unresolved_var}}
Authorization: Basic dev-user dev-password
Content-Type: application/json

{
    "key": "my-dev-value"
}
GET http://example.com/api/json/get?id=6789&key={{unresolved_var}}
Authorization: Basic user password
Content-Type: application/json
{
"key": "my-prod-value"
} Since the {{unresolved-var}} variable is not defined in the environment file, AppCode will send the {{unresolved-var}} text as part of the request in both cases.
Using response handler scripts
With response handler scripts, you can programmatically react to a received HTTP response. By using these scripts, you can automatically process the received data as well as validate it against the conditions that you specify. Response handler scripts are provided as a part of the request within the HTTP request file and are executed as soon as a response is received. To view the response handling examples, open the auth-requests or test-responses requests collections.
You can insert a response handler script into your request either in-place or by referring to an external file.
Insert the script into the request
-
To insert the script in-place, prepend it with
>and enclose it in{% %}:GET host/api/test > {% // Response Handler Script ... %} -
To insert the script from an external file, prepend it with
>:GET host/api/test > scripts/my-script.js
Response handler scripts are written in JavaScript ECMAScript 5.1, with coding assistance and documentation handled by the bundled HTTP Response Handler library. For in-place scripts, this functionality is enabled automatically. For external scripts, you need to enable it manually.
Enable HTTP Response Handler coding assistance in a JavaScript file
Open the script file in the editor.
-
In the context menu, choose Use JavaScript Library | HTTP Response Handler.
The HTTP Response Handler library exposes two objects to be used for composing response handler scripts:
The
clientobject stores the session metadata, which can be modified inside the script. Theclientstate is preserved until you close AppCode. Every variable saved inclient.globalasvariable_nameis accessible to subsequent HTTP requests as{{variable_name}}.responseholds information about the received response: its content type, status, response body, and so on.
Response handler scripts can include tests, which allows you to use the HTTP Client as a testing framework. To create a test, invoke the client.test(testName, function) method. Inside the test, you can assert a condition by invoking the client.assert(condition, message) method, for example:
GET https://httpbin.org/status/200

> {%
    client.test("Request executed successfully", function() {
        client.assert(response.status === 200, "Response status is not 200");
    });
%}Executing an HTTP request
If you are going to test your own web service, make sure the service is deployed and running.
-
Do any of the following:
In the editor, click Run
 in the gutter next to the request you want to execute. In the pop-up menu, select Run <request name>.
 In the editor, select Run <request name> from the request's context menu.
Place the caret at the request you want to execute, press ⌥⏎ and select the Run <request name> intention action.
When the request is executed, AppCode automatically creates a dedicated temporary HTTP Request run/debug configuration for it. You can save it as a permanent run/debug configuration if necessary.
Open a request in the browser
You can open an HTTP request in the browser specified on the Web Browsers page of the Settings/Preferences dialog. Select your system default browser or the one of your choice.
-
Do any of the following:
Place the caret at the request first line and choose on the main menu, or press ⌘B or ⌘↓.
Ctrl+Click (for Windows and Linux) or Command+Click (for macOS) the request line:

Working with HTTP Request Run/Debug Configurations
You can execute HTTP requests by using run configurations of the HTTP Request type. With the run configuration, you can execute a request at any point, add it to Run Dashboard, or a compound configuration.
Refer to Working with Run/Debug Configurations for details.
Create an HTTP Request run/debug configuration
-
Do any of the following:
-
In the editor, select Create <configuration name> from the context menu of the request you want to create a run/debug configuration for.

-
Alternatively, choose from the main menu, then click
 and choose HTTP Request from the list.
-
-
Provide the run/debug configuration parameters:
-
In the Environment list, select an environment that will define the set of environment variables used in the request.
-
In the File field, provide the path to the HTTP request file. You can type the path manually and use path completion (⌃Space) as you type, or click
 and select the required folder in the dialog that opens.
 -
If your request file contains multiple requests, in the Request list choose the index of the request to execute.
-
When you execute an HTTP request from the editor, AppCode automatically creates a temporary run/debug configuration with the request parameters. A temporary run/debug configuration works the same way as a permanent run/debug configuration. You can change its settings using the Run/Debug Configuration dialog and optionally save it as permanent.
Save a temporary HTTP Request run/debug configuration
-
Do any of the following:
In the Run/Debug Configuration selector, choose .
In the Run/Debug Configuration dialog, select the configuration and click the Save icon (
 ).
). In the editor, select Save <configuration name> from the context menu of the executed request.

Execute a request using a run/debug configuration
-
Do any of the following:
In the Run/Debug Configuration selector, select the desired run configuration. Then click the Run icon (
) on the main toolbar or press ⌃R. -
Press ⌃⌥R, select the desired run configuration from the pop-up menu, and press ⏎.

Viewing responses from web services
When you execute an HTTP request, AppCode automatically saves the response into a separate file under the .idea/httpRequests/ directory. You can view the 50 most recently stored responses and navigate to the corresponding files using the requests history. If the request was executed from a scratch file, the link to its response output is also added below the original request:

View a received response
Switch to the Run tool window, which opens automatically as soon as a response is received.
By default, the server response is shown in the format specified in the request header via the content-type field. To have the response converted into another format, click View as HTML
 , View as XML
  , or View as JSON
  .
. -
The results of the tests executed as part of a response handler script, if any, are displayed on the Tests tab of the Run tool window.

Open a response file in the editor
Place the caret at the link to the response you want to open, and choose on the main menu, or press ⌘B or ⌘↓.
Ctrl+Click (for Windows and Linux) or Command+Click (for macOS) the response line:

Compare responses in a scratch file
When a request is executed from a scratch file, the link to the response output file is added below the original request.
-
Do any of the following:
Place the caret at the link to the response file. Press ⌥⏎ and select the Compare with <response name> intention action.
Click the
 icon in the left gutter and select Compare with <response name> from the pop-up menu:
Compare responses in the requests history
When a request is executed from a physical file, the link to the response output is added to the requests history.
Place the caret at the link to the response file. Choose on the main menu, or press ⌘B or ⌘↓ to open this file in a new editor tab.
Choose on the main menu, or press ⌘D. AppCode will prompt you to open a response file from the httpRequests folder.
Select the response file you would like to compare the current file with and click Open.
The two response files will be opened in the Differences viewer allowing you to compare their contents:

Viewing requests history
AppCode automatically saves the 50 recently executed requests into the http-requests-log.http file, which is stored on the project level under the .idea/httpRequests/ directory. Using the requests history, you can quickly navigate to a particular response as well as issue any request again. If a request is issued again from the requests history, its execution information and the link to the response output will be added to the top of the requests history file.

Open requests history
Click
 in the top-right corner of the editor or choose on the main menu.
Configuring Proxy settings
In the Settings/Preferences dialog (⌘,), choose System Settings under Appearance & Behavior, then choose HTTP Proxy.
- In the Proxy dialog that opens, select Manual proxy configuration and specify the following:
Enter the proxy host name and port number in the Host name and Port number fields.
To enable authorization, select the Proxy authentication checkbox and type the user name and password in the corresponding fields.