Configure local PHP interpreters
A local PHP interpreter is a PHP engine installed on your computer as opposed to a remote PHP interpreter that is installed on a remote host, in a Docker container, or in a Vagrant virtual environment.
Configure a local PHP interpreter
Press Ctrl+Alt+S to open settings and then select .
On the PHP page that opens, click
 next to the CLI Interpreter list.
In the CLI Interpreters dialog that opens, click
 in the left-hand pane, then choose Local from the popup menu.
 If you already have a local interpreter configured in PhpStorm, then it is shown in the menu list, and the menu item changes to Other Local.
In the right-hand pane of the dialog, specify the name and general settings for the new PHP interpreter.

Field
Description
Name
Type the interpreter name to distinguish it from others, for example, php_installation_<version>.
PHP executable
Specify the path to the PHP engine installation directory. Type it manually or click
 and select the relevant folder in the dialog that opens.
Configuration file
Specify the path to a custom php.ini configuration file. Use this field if you want to specify a php.ini file different from that autodetected by the IDE and displayed in the non-editable Configuration file field below. Type it manually or click
and select the relevant file in the dialog that opens.Visible only for this project
Select the checkbox to restrict the interpreter's availability only to the current project.
PhpStorm displays the version of the PHP engine detected in the specified folder, the debugger associated with this PHP engine in the php.ini file, and an action link to open the specified php.ini file in PhpStorm's editor.
Clicking
 next to the PHP executable field opens a separate information window with the installation details and the list of loaded extensions and configured options.
 Customize the configuration settings of the PHP installation in the Additional area of the CLI Interpreters dialog.
Field
Description
Debugger extension
Specify the path to the Xdebug executable file for debugging in On-Demand Mode. This way, PhpStorm can activate Xdebug even if it has been disabled in the php.ini file.
Configuration options
Compose a string of configuration directives to be passed through the -d command line option and thus add new entries to the php.ini file. The directives specified in this field override the default directives generated by PhpStorm, such as:
-dxdebug.mode=debug, -dxdebug.client_host=127.0.0.1, -dxdebug.client_port=9003, -dxdebug.start_upon_error=defaultFor example, if you specify the
-dxdebug.start_upon_error=yesdirective, it will override the default-dxdebug.start_upon_error=defaultdirective and thus switch Xdebug to the Just-In-Time (JIT) mode. For more information, refer to Debug in the Just-In-Time mode.-dxdebug.remote_enable=1, -dxdebug.remote_host=127.0.0.1, -dxdebug.remote_port=9000, -dxdebug.remote_mode=reqFor example, if you specify the
-dxdebug.remote_mode=jitdirective, it will override the default-dxdebug.remote_mode=reqdirective and thus switch Xdebug to the Just-In-Time (JIT) mode. For more information, refer to Debug in the Just-In-Time mode.To do that, click
next to the Configuration options field, and then create a list of entries in the Configuration Options dialog that opens.To add a new entry, click
. In the new line, that is added to the list, specify the name of the new entry and its value in the Name and Value fields respectively. You can add as many entries as you need, just keep in mind that they will be transformed into a command line with its length limited to 256 characters.
To delete an entry, select it in the list and click
 .
.To change the order of entries, click
 or
or  .
.
Upon clicking OK, you return to the CLI Interpreters dialog, where the entries are transformed into a command line.
Click Apply and OK to save the changes.
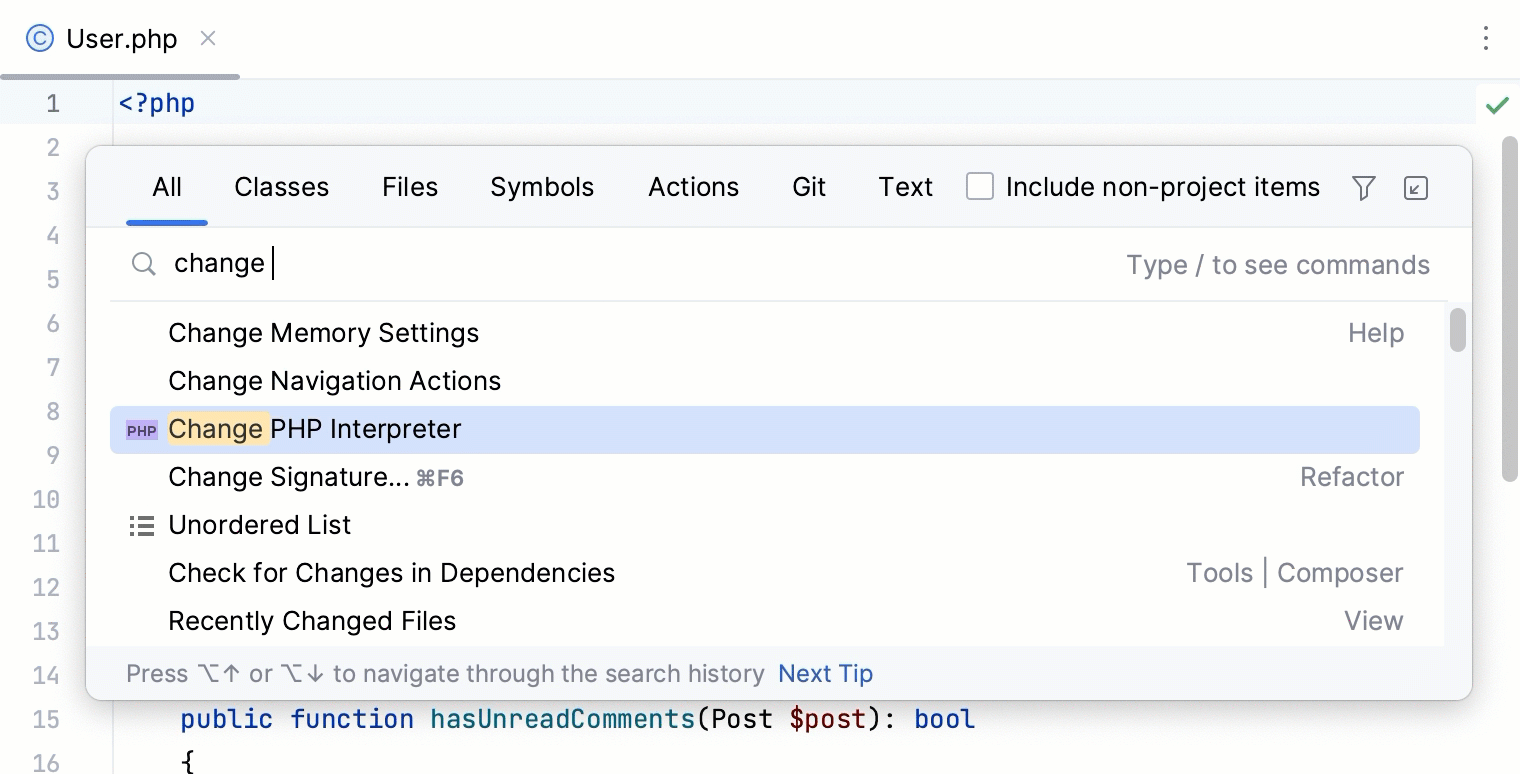
Switch between configured PHP interpreters on the fly
Press Ctrl+Shift+A and start typing
Change PHP interpreter. In the suggestion list, select the Change PHP interpreter action.If necessary, you can assign a keyboard shortcut for this action either directly in the suggestions list by pressing Alt+Enter, or at a later point as described in Keyboard shortcuts.
In the popup menu that opens, select one of the configured local or remote PHP interpreters.
The selected interpreter will be set as the default project interpreter on the PHP page of the Settings dialog (Ctrl+Alt+S) . This will also affect configurations that use the default project interpreter (test frameworks, quality tools, and run/debug configurations) and commands run in the PhpStorm terminal.