PHPUnit
PhpStorm supports unit testing of PHP applications through integration with the PHPUnit testing framework.
Before you start
Make sure the PHP interpreter is configured in PhpStorm on the PHP page, as described in Configure local PHP interpreters and Configure remote PHP interpreters.
Download and install PHPUnit
Before you start, make sure Composer is installed on your machine and initialized in the current project as described in Composer dependency manager.
Download and install phpunit.phar manually
Download phpunit.phar from the PHPUnit Official website and save it on your computer:
If you need full coding assistance in addition to the ability of running PHPUnit tests, store phpunit.phar under the root of the project where PHPUnit will be later used.
If you only need to run PHPUnit tests and you do not need any coding assistance, you can save phpunit.phar outside the project.
Download and install phpunit.phar with Composer
Inside composer.json, add the
phpunit/phpunitdependency record to therequireorrequire-devkey. To get code completion for the package name and version, press Ctrl+Space.Do one of the following:
Click the Install shortcut link on top of the editor panel.
If the Non-installed Composer packages inspection is enabled, PhpStorm will highlight the declared dependencies that are not currently installed. Press Alt+Enter and select whether you want to install a specific dependency or all dependencies at once.
Clicking next to the package record in the composer.json editor gutter will take you to the corresponding Settings page where you can configure PHPUnit manually.

Integrate PHPUnit with a PhpStorm project
If you use a local PHP interpreter, PhpStorm performs initial PHPUnit configuration automatically. In the case of remote PHP interpreters, manual PHPUnit configuration is required.
Configure PHPUnit automatically
Store the phpunit.xml or phpunit.xml.dist configuration file under the project root.
PhpStorm detects the installed PHPUnit executable (or executables, if the project has Composer-managed subprojects with a specified PHPUnit dependency) and creates a test framework configuration per each installed PHPUnit executable on the Test Frameworks page.
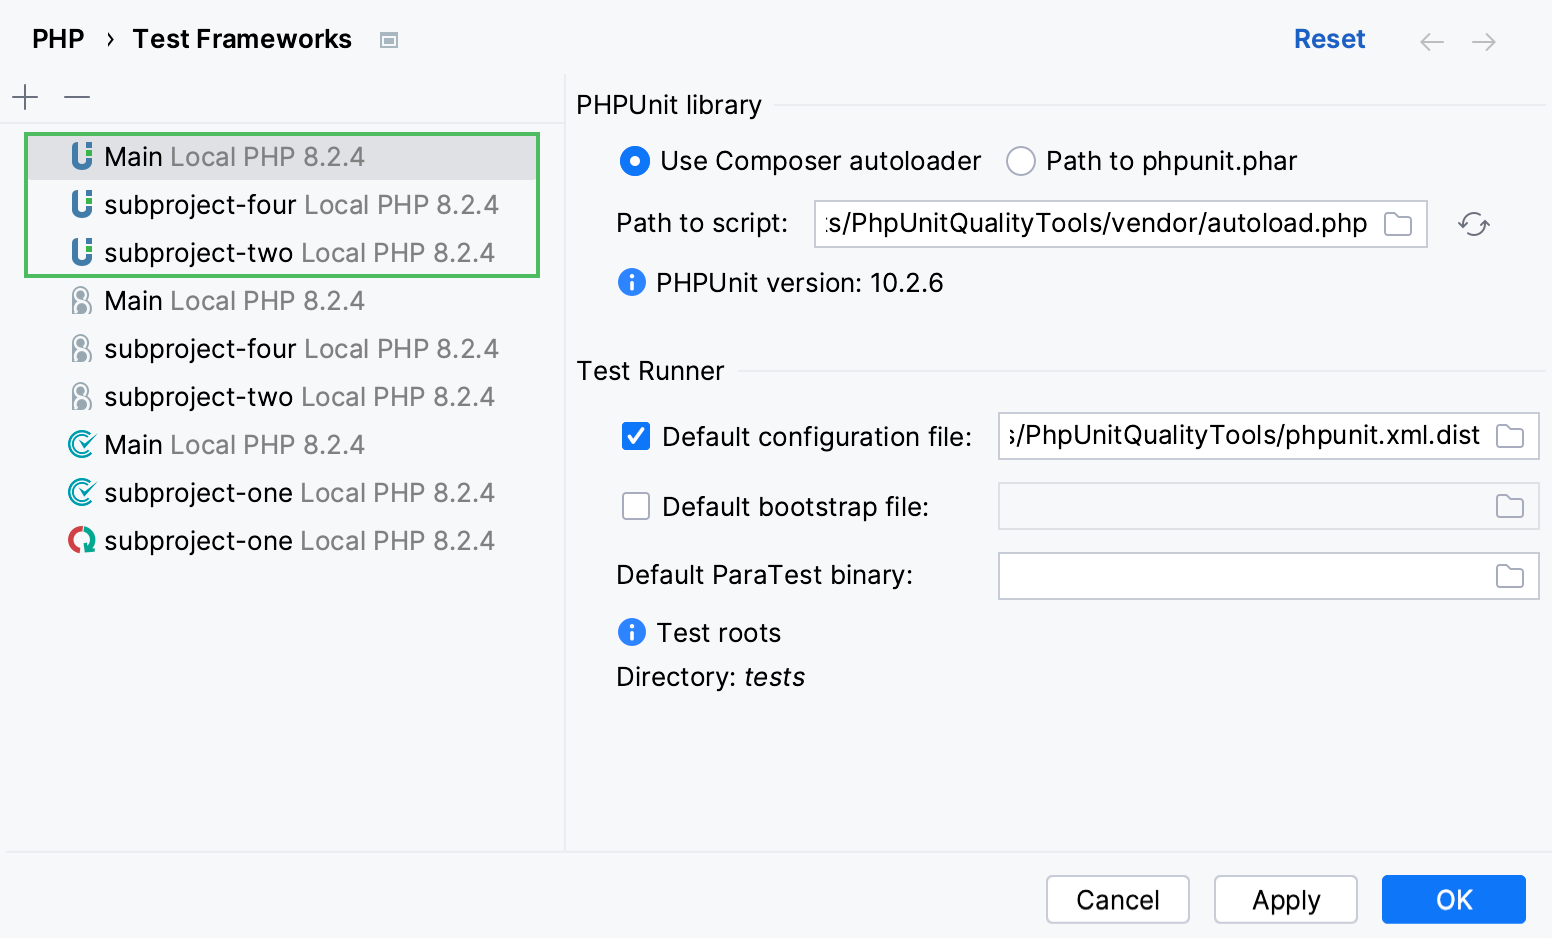
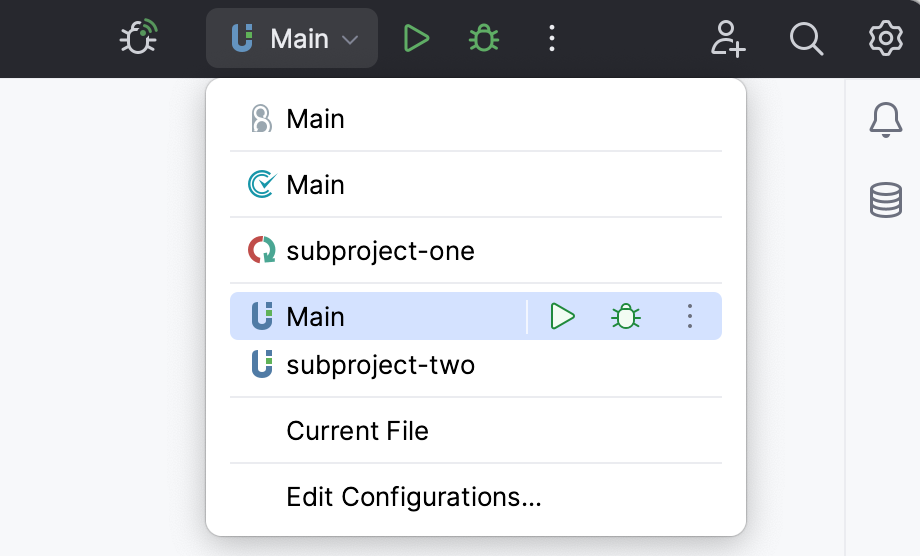
If the phpunit.xml or phpunit.xml.dist configuration file is detected under the project (or subproject) root automatically or specified explicitly during manual configuration, PhpStorm also creates a respective PHPUnit run/debug configuration.
Configure PHPUnit manually
In the Settings dialog (Ctrl+Alt+S) , go to .
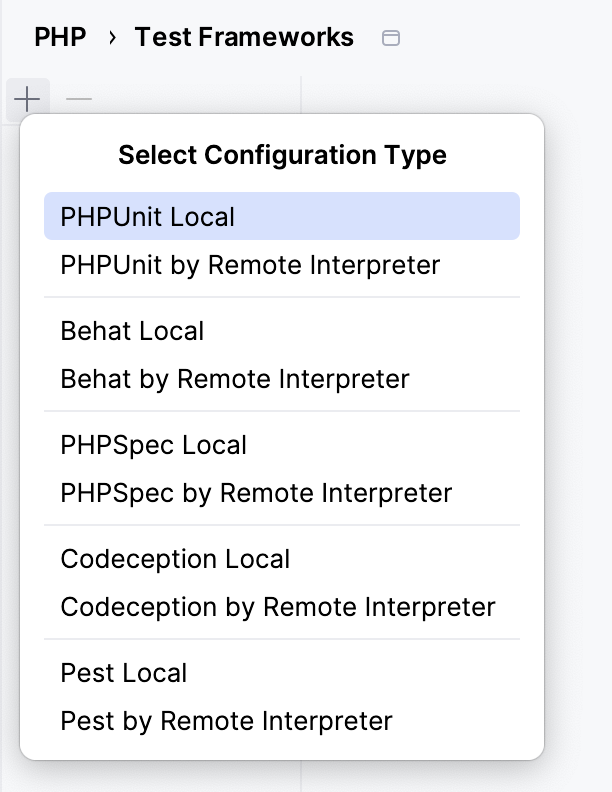
On the Test Frameworks page that opens, click
in the central pane and choose the configuration type from the list:
In local configurations, the default project PHP interpreter is used. For more information, refer to Default project CLI interpreters.
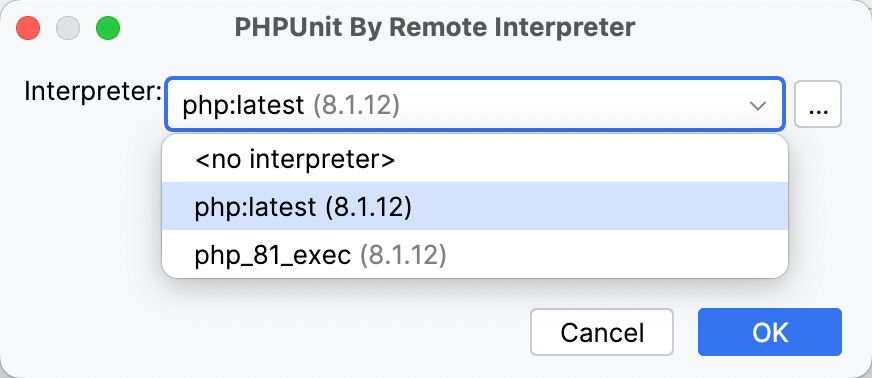
To use PHPUnit with a remote PHP interpreter, choose one of the configurations in the dialog that opens:
In the right-hand pane, choose the PHPUnit library installation type:
To use Composer autoloader, specify the path to the autoload.php file in the vendor folder. For more information, refer to Composer.
To run PHPUnit from phpunit.phar, download phpunit.phar, save the archive in the project root folder, and specify the path to it. For local configurations, you can download the archive by clicking the provided download link. To use it in the current project, make sure a default PHP interpreter is defined.
When you click
, PhpStorm detects and displays the PHPUnit version.
In the Test Runner area, set the path to the configuration XML file to be used for launching and executing scenarios.
You can also type the path to a bootstrap file to have a PHP script always executed before launching tests. In the field, specify the location of the script. Type the path manually or click
and select the desired folder in the dialog that opens.
Note that you can also provide an alternative configuration and bootstrap file for a specific PHPUnit run/debug configuration when editing it.
Generate a PHPUnit test for a class
Open the Create New PHP Test dialog by doing any of the following:
Go to . Then, choose PHP Test | PHPUnit Test from the context menu.
In the Project tool window, press Alt+Insert or right-click the PHP class to be tested and choose .
In the editor of the PHP class to be tested, place the caret at the definition of the class. Then, press Alt+Enter and select Create New Test from the popup menu. This way, you can generate a test for a PHP class defined among several classes within a single PHP file.
To create a test for a certain method, place the caret within the method declaration. The chosen method will be automatically selected from the list of methods in the Create New PHP Test dialog.
In the Create New PHP Test dialog that opens, provide the parameters of the generated test.
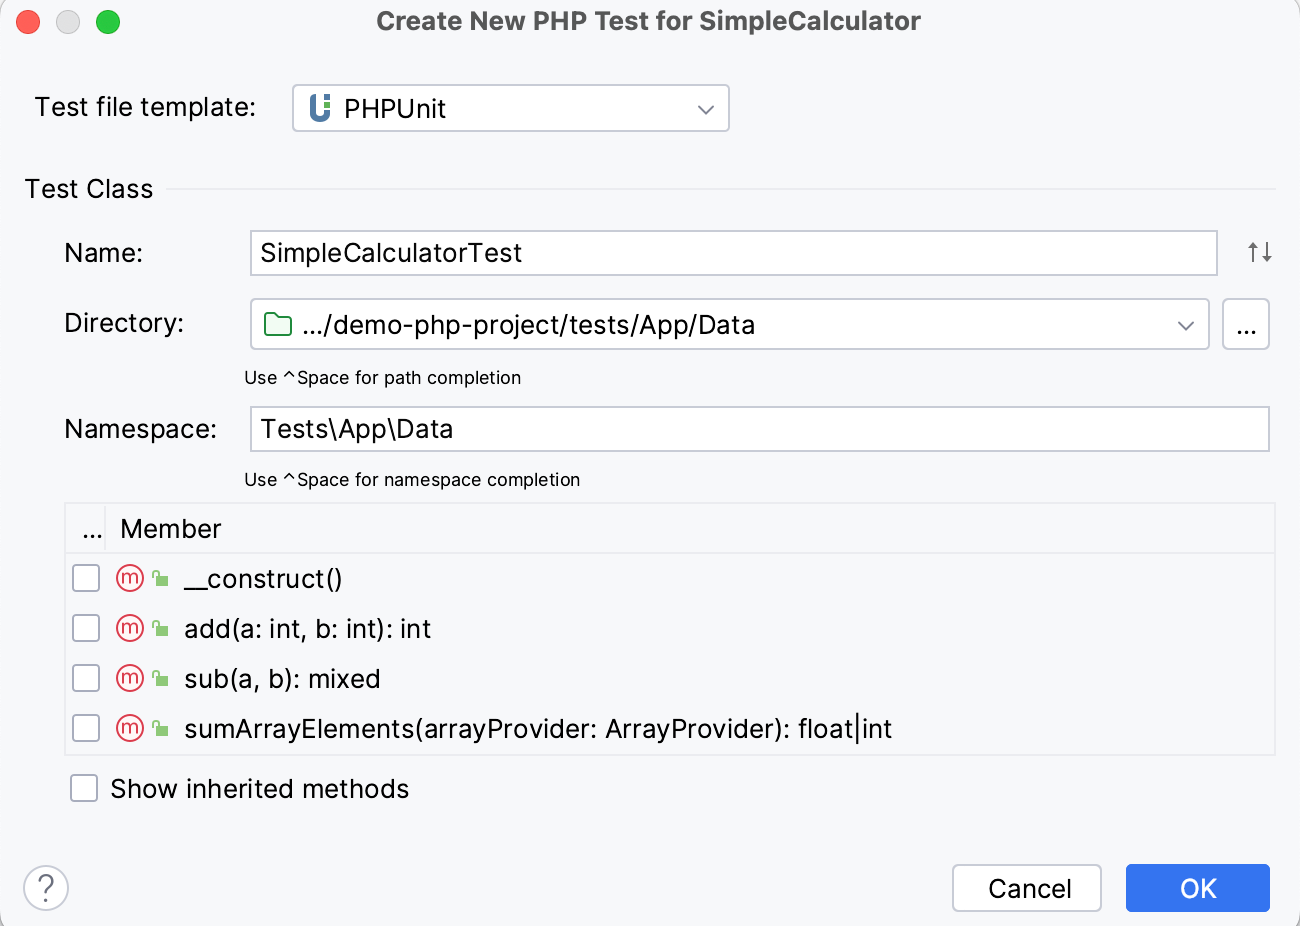
Test file template: the template based on which PhpStorm will generate the test class. Make sure that PHPUnit (or PHPUnit<6 if you are using PHPUnit version 6 or earlier) is selected from the list.
Name: the name of the test class. PhpStorm automatically composes the name from the production class name as <production class>Test.php.
Directory: the folder for the test class file, which is automatically suggested based on the containing directory and namespace of the production class, the configured test sources root and its PSR-4 package prefix, or the
directoryvalue specified in the phpunit.xml configuration file.To specify a different folder, click
next to the Directory field and choose the relevant folder.
Namespace: the namespace the test class will belong to, which is automatically suggested based on the containing directory and namespace of the production class, the configured test sources root and its psr-4 package prefix.
Member: the list of production class methods to generate test method stubs for. Select the checkboxes next to the required production class methods. To include inherited methods from parent classes, select the Show inherited methods checkbox.
PhpStorm will automatically compose the test methods' names as
test<production method>. You can customize the code templates used for generating test method stubs on the Code tab of the File and Code Templates settings page.
After the test is created, you can navigate back to the production class by choosing Navigate | Go to Test Subject. For more information, refer to Navigate between a test and its test subject.
Generate PHPUnit test methods
Open the required test class in the editor and place the caret anywhere inside the class definition.
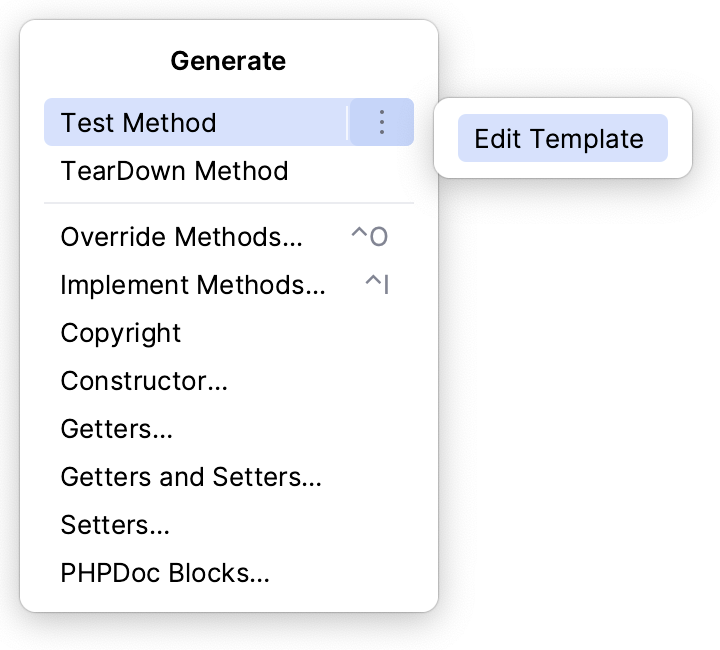
Choose Generate in the context menu or press Alt+Insert. Then choose Test Method from the Generate list.
Set up the test fixture, that is, generate stubs for the code that emulates the required environment before test start and returns the original environment after the test is over:
Choose Generate in the context menu or press Alt+Insert. Then choose SetUp Method or TearDown Method from the Generate list.
For more information, refer to Fixtures on the PHPUnit Official website.
You can customize the code templates used for generating PHPUnit test methods on the File and Code Templates page of the Settings dialog (Ctrl+Alt+S) . To quickly access this page, in the Generate list, select Edit Template from the submenu of a method.
Run and debug PHPUnit tests
You can run and debug single tests as well as tests from entire files and folders. PhpStorm creates a run/debug configuration with the default settings and launches the tests. You can later save this configuration for reuse.
Run or debug PHPUnit tests
In the Project tool window, select the file or folder to run your tests from and choose Run '<file or folder>' or Debug '<file or folder>' from the context menu of the selection:
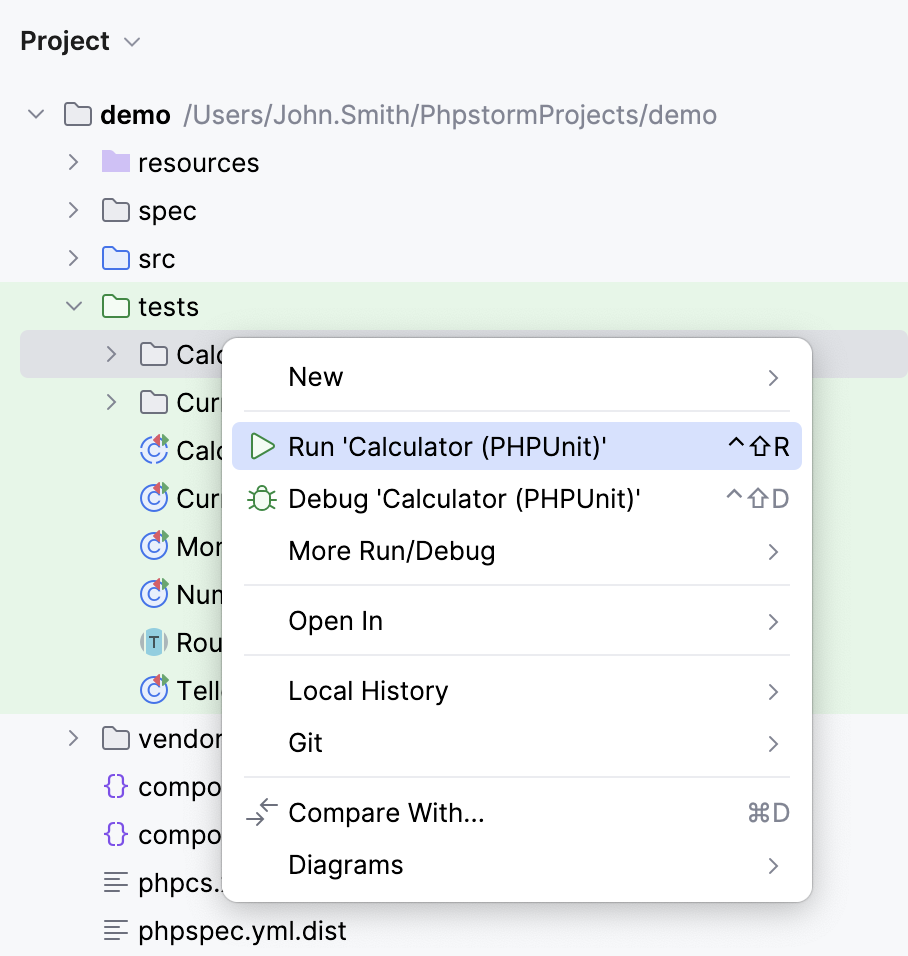
PhpStorm generates a default run configuration and starts a run or debug test session with it.
Run or debug a single test
You can run or debug a single test for a specific test class or test method from the file editor window.
Open the test file in the editor, click
in the gutter next to the test and choose Run '<test_name>' or Debug '<test_name>' from the context menu. Alternatively, place the caret at the corresponding line and press Ctrl+Shift+F10.

Run a test for a single data set
If the PHPUnit test uses a data provider, you can run single tests for some types of data sets. Data sets that can be run separately are marked with the gutter icon in the editor.
In the file editor, click
in the gutter next to the data set (or right-click the corresponding code line) and select Run '<test_name>'.

Run a selection of tests
Open the target file in the editor, right-click the desired test target, that is, a class or a method being tested, and either choose or press Ctrl+Shift+T.
From the popup menu, select the tests to be executed. For multiple selection use Ctrl and Shift.

Press Ctrl+Shift+F10 to run the tests selection.
After a test session is over, PhpStorm automatically creates a run/debug configuration with its Test scope set to Composite. For more information, refer to PHPUnit.
Save autogenerated configuration as permanent
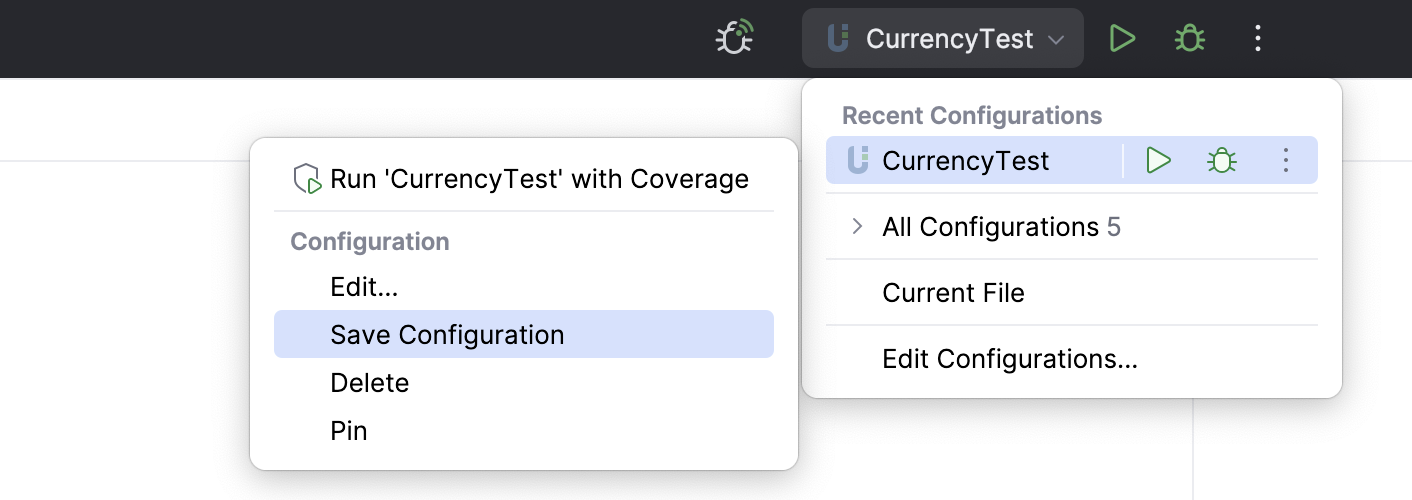
After a test session is over, choose Save Configuration from the context menu of the respective run/debug configuration in the run widget.
Run or debug tests through a previously saved run/debug configuration
Choose the required PHPUnit configuration from the list on the toolbar and click
or
.
Create a custom run/debug configuration
In the Project tool window, select the file or folder with the tests to run and choose Create run configuration from the context menu. Alternatively, go to in the main menu, then click
and choose PHPUnit from the list.
In the PHPUnit dialog that opens, specify the scenarios to run, choose the PHP interpreter to use, and customize its behavior by specifying the options and arguments to be passed to the PHP executable.
Run PHPUnit tests in parallel
To speed up execution of PHPUnit tests in PhpStorm, you can run them in parallel processes using the ParaTest package. The parallel execution option can be set for PHPUnit tests that are grouped in folders (test suites).
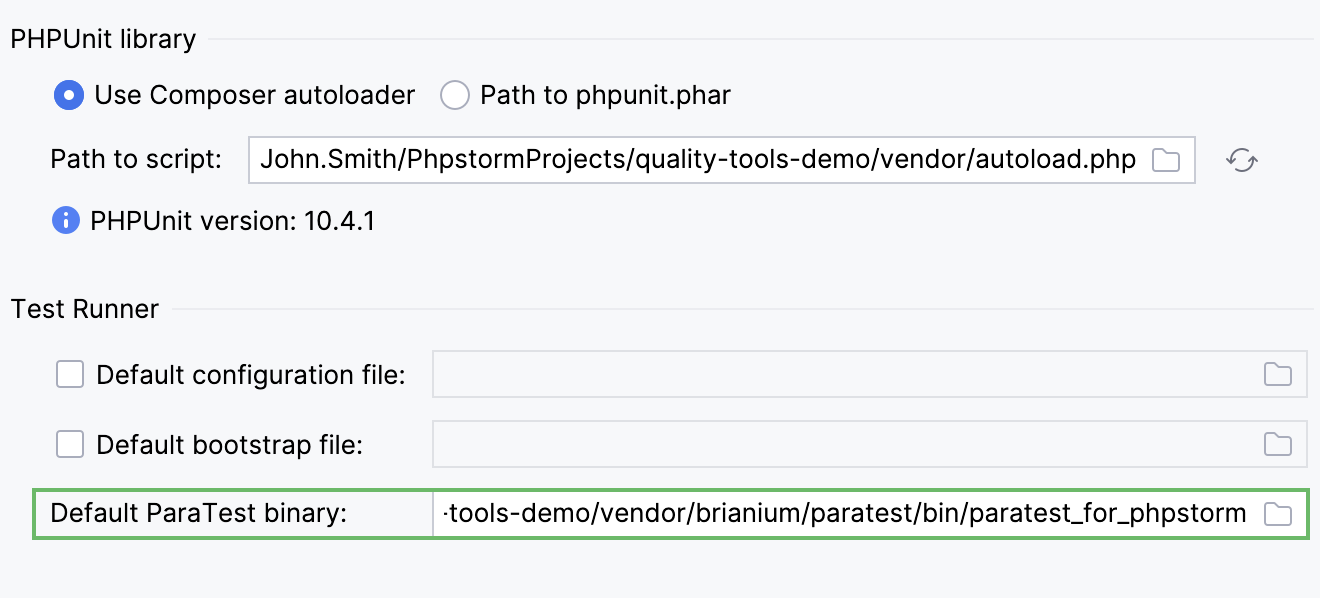
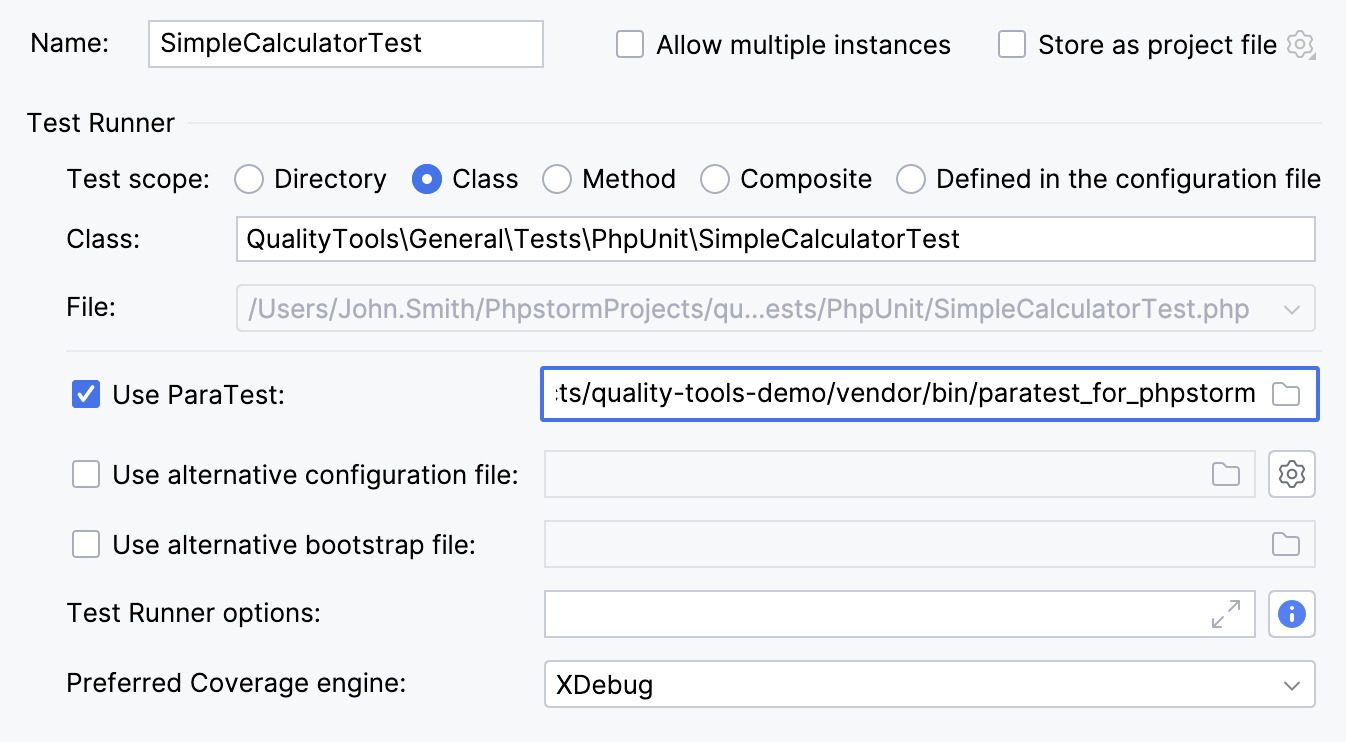
Set the path to the ParaTest binary file for PhpStorm in the Test Runner settings by either of the following ways:
In the Settings dialog (Ctrl+Alt+S) , go to and set the Default ParaTest binary field.
For existing run configurations, open the Run Configuration dialog, select the Use ParaTest checkbox and set the path to the file in the field.
In the Project tool window, right-click the folder to run the tests from and select the Run <test_name> (PHPUnit) with ParaTest option from the context menu.

Alternatively, right-click the phpunit.xml config file and select the Run `phpunit.xml (PHPUnit)` with ParaTest option from the context menu.
Monitor test results
PhpStorm shows the tests execution results in the Test Runner tab of the Run tool window.

The tab is divided into 2 main areas:
The left-hand area lets you drill down through all unit tests to see the succeeded and failed ones. You can filter tests, export results, and use the context menu commands to run specific tests or navigate to the source code.
The right-hand area displays the raw PHPUnit output.
Run PHPUnit tests automatically
You can have PhpStorm re-run tests automatically when the affected code is changed. This option is configured per run/debug configuration and can be applied to a test, a test file, a folder, or a composite selection of tests, depending on the test scope specified in this run/debug configuration.
Run the tests.
On the Run toolbar, click
Rerun Automatically.

Optionally, set a time delay for launching the tests upon the changes in the code. To do so, on the Run toolbar, click
and select
Test Runner Settings | Set Auto-Test Delay.
