PhpStorm Workshop Materials
This page describes how to get started with the hands-on PhpStorm workshop materials available from GitHub.
In the hands-on PhpStorm workshop materials, you'll learn about many of the features and productivity tools available in the PhpStorm IDE. Here's a 5-minute screencast guiding you through the materials:
Prerequisites
To complete the workshop materials, you will need at least PhpStorm 2016.1 or later installed on your system, either the full version or a free trial. Many things will work with earlier versions too, but to do everything in these materials version 2016.1 or later is recommended (as it uses a pre-configured vagrant machine).
You will need Vagrant 1.8+ and VirtualBox 5+ (both are free).
A git command line will be great to have as well.
1. What is covered?
This course does not cover every option and feature in PhpStorm. Instead, it gives a number of practical exercises to enhance your everyday workflow as a PHP developer.
Those exercises come as a PhpStorm project, in which every file is a new exercise that may contain code and tips to get things done. There are exercises focusing on navigation, editing, inspections, live templates, refactoring, tools like Composer and the REST client, and other areas.
This workshop is self-paced, meaning you can work your way through exercises on your own, whenever and wherever you want.
2. Keyboard shortcuts
We'll cover a vast number of keyboard shortcuts to boost your productivity in PhpStorm. Other IntelliJIDEA-based IDEs use the same keyboard shortcuts, so if you know how to work with PhpStorm, you'll know how to work with WebStorm, RubyMine, PyCharm, and IntelliJ IDEA, and vice versa. A cheat sheet is available online and is included in the workshop download.
3. Getting started
Let's fetch the workshop materials!
3.1. Create a new project in PhpStorm using Check out from Version Control
On the Welcome screen, click Check out from Version Control, then select "Git" from the list. 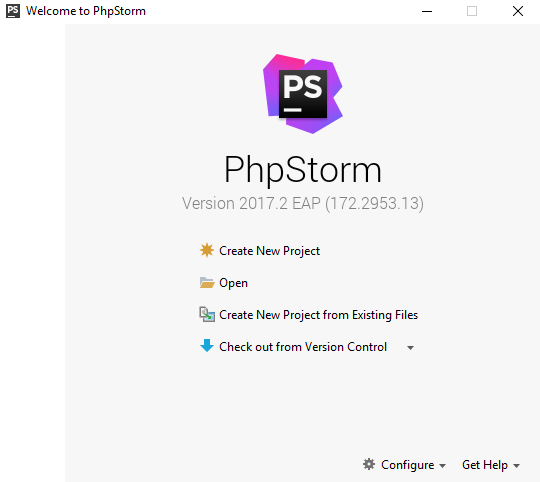
3.2. Clone PhpStorm Workshop repository
Clone the repository with the Git Repository URL: https://github.com/JetBrains/phpstorm-workshop. 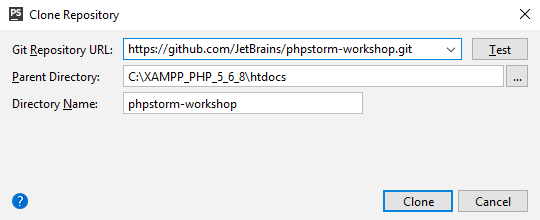
Note that in PhpStorm 2017.1.1 or later, you can create a PhpStorm Workshop project directly from the Create New Project dialog. Choose the "PhpStorm Workshop" project type in the left-hand side menu, then select the Vagrant or Docker project type (we recommend using Vagrant). 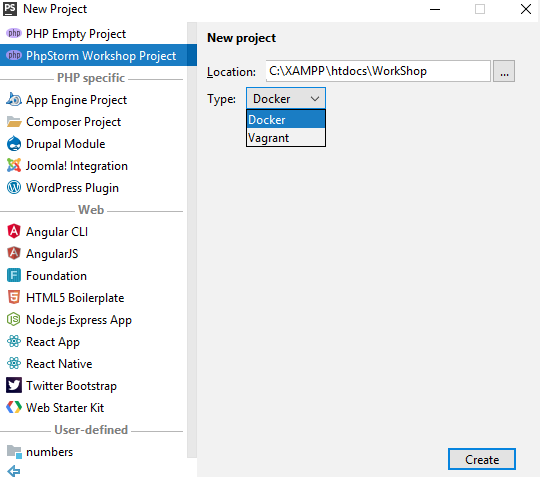
3.3. Explore the project
The project contains a number of different folders and files. These correspond with the topics in the slide deck. Each folder includes one or more exercises. Most exercises are self-contained, but some build on previous ones. 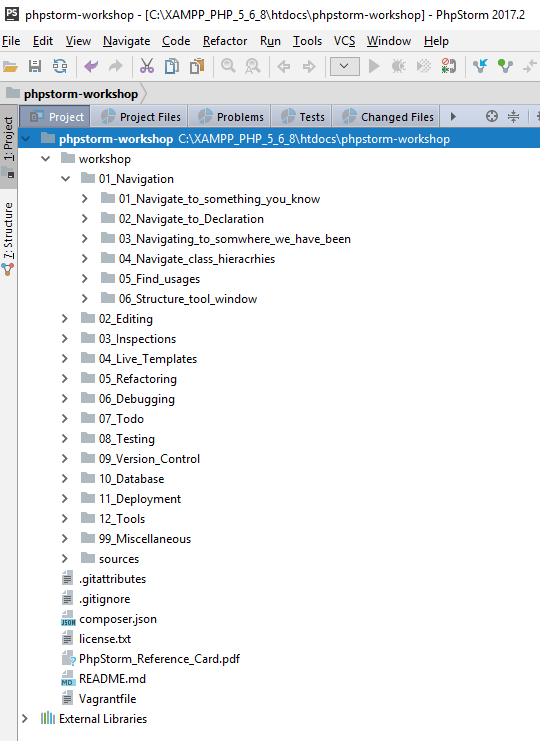
-
Readme.mdwith additional information about PhpStorm Workshop. -
PhpStorm Reference Card.pdf– the PhpStorm keymap. The latest version can always be found on the PhpStorm website.
3.4.1. Start Vagrant machine
Most exercises require having a Vagrant box running. You may start it by selecting Tools->Vagrant->Up inside PhpStorm (make sure you have Vagrant installed). 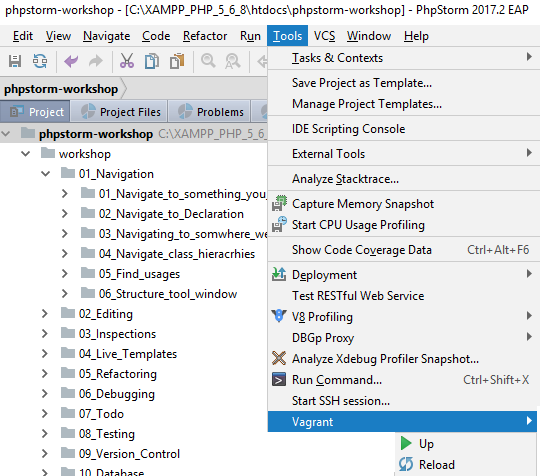
3.4.2. Run Docker (if you have chosen Docker project type)
If you have chosen the Docker project type, the Workshop project will contain a pre-configured environment based on Docker containers. Most exercises not related to the editor require having Docker containers running.
- Install Docker from https://www.docker.com/ (free).
- In PhpStorm, open Settings | Build, Execution, Deployment | Docker and enter the following API URL:
- Windows:
tcp://localhost:2375. - Linux, MacOS:
unix:///var/run/docker.sock.
- Windows:
- Update the
XDEBUG_CONFIGvariable indocker-compose.ymlwith your IP address. This is necessary for Web Debugging.
To get the right IP address that is available from Docker, use one of the following commands:- Windows: execute
ipconfigand copyipfromDockerNATinterface from theIPv4 Addressfield. - MacOS: execute
ifconfig en0and copyIPfrom theinetfield. - Linux: execute
ifconfig docker0and copyIPfrom theinet addrfield.
- Windows: execute
- Uncomment the appropriate line for
sftpservice in the samedocker-compose.yml. This is necessary for Deployment to work correctly. - Start all required Docker containers by executing
docker-compose upinside the Terminal.
4. Feedback and pull requests
If you find an error and know what is wrong, feel free to fix it and send a pull request. If you discover an interesting PhpStorm feature which is not covered, fork our GitHub repository, add your content, and send us a pull request.
Feedback is welcome through the comments below or on GitHub. Thanks!