Pug (Jade) Template Engine
PhpStorm integrates with the Pug (Jade) template engine.
Before you start
Download and install Node.js.
Install and enable the Pug (former Jade) repository plugin on the Plugins page as described in Managing plugins.
Changes to the UI
The Pug (ex-Jade) plugin introduces the following changes to the PhpStorm UI:
The Jade file item is added to the menu.
The Pug files are marked with
 ; the Jade files are marked with
  .
.-
Coding assistance is provided in the Pug (Jade)-specific and HTML context:
- Code formatting
Syntax highlighting
- Code completion
- Color schemes
Using Pug(Jade) templates in a Node.js application
At runtime, the Pug (Jade) files fill be transformed into HTML pages.
Create a project from scratch, or around existing sources, or based on a NodeExpress template.
-
Create a Pug (Jade) file. Follow these steps:
In the Project Tool Window, select the directory in which you want to create a new file. To do that, for example, choose .
From the context menu, choose Jade file and specify the filename in the dialog that opens.
-
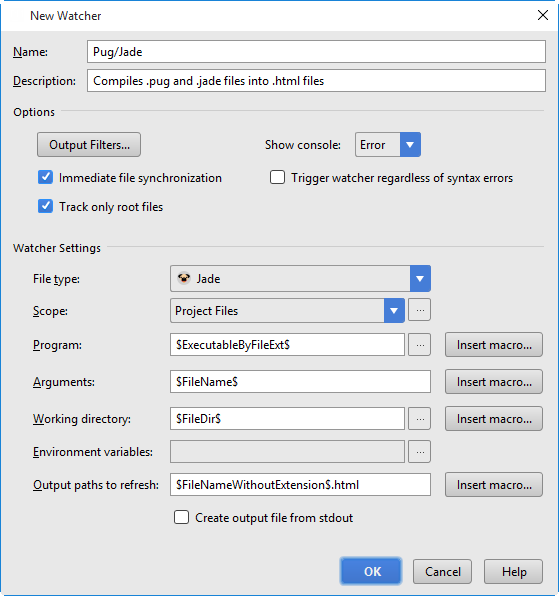
Create a File Watcher to transform files with the extension .jade or .pug into .html pages:
Click the Add Watcher link in the upper right-hand corner of the editor.
-
In the New Watcher Dialog, accept the default predefined settings.
Note that if the executable is in the PATH, then you should not specify it explicitly. Depending on the file extension (.jade or .pug), the corresponding executable is invoked.

As you edit a .pug/.jade file, PhpStorm invokes the file watcher which creates an .html file with the name of the processed .pug/.jade file and stores the generated
htmlcode in it.
Configuring syntax highlighting
You can configure Pug/Jade-aware syntax highlighting according to your preferences and habits.
-
In the Settings/Preferences dialog (Ctrl+Alt+S), go to .
Select the color scheme, accept the highlighting settings inherited from defaults or customize them as described in Configuring Colors and Fonts.