Psalm
PhpStorm provides code quality check through integration with the Psalm tool, which validates your code for consistency against a set of validation rules.
To use Psalm from PhpStorm instead of command line, you need to register it in PhpStorm and configure it as a PhpStorm code inspection. Once installed and enabled in PhpStorm, the tool is available in any opened PHP file, and no additional steps are required to launch it. The on-the-fly code check is activated upon every update in the file thus making it easy to get rid of discovered problems.
Errors and warnings reported by Psalm on-the-fly are displayed as popup messages. When the tool is run in the batch mode, the errors and warnings are displayed in the Inspection Results tool window. Each message has the psalm prefix to distinguish it from PhpStorm internal inspections.
Psalm integration is implemented via the open-source Psalm plugin. This plugin is bundled with PhpStorm and is enabled by default.
Prerequisites
Prior to integrating Psalm in PhpStorm, make sure the following prerequisites are met:
The directory containing the PHP engine executable must be added to the system
path. This allows code quality tool scripts execute calls to the system-wide PHP engine.For Docker Compose-based remote interpreters, make sure to use
runmode.In the Settings/Preferences dialog Ctrl+Alt+S, go to .
On the PHP page that opens, click
 next to the CLI Interpreter list.
In the CLI Interpreters dialog that opens, set the Lifecycle mode for the selected interpreter to Always start a new container ('docker-compose run').

Install and configure Psalm
Psalm scripts can be used as local scripts, the scripts associated with PHP interpreters, or scripts declared as project dependencies and installed via Composer, which is the preferable and recommended way.
Install Psalm with Composer
Before you start, make sure Composer is installed on your machine and initialized in the current project as described in Composer dependency manager.
When you install Psalm with Composer, PhpStorm automatically downloads the necessary scripts, registers them in the IDE, and, optionally, enables and configures the corresponding code inspection.
Inside composer.json, add the vimeo/psalm dependency record to the
requireorrequire-devsection. Press Ctrl+Space to get code completion for the package name and version.Do one of the following:
Click the Install shortcut link on top of the editor panel.
If the Non-installed Composer packages inspection is enabled, PhpStorm will highlight the declared dependencies that are not currently installed. Press Alt+Enter and select whether you want to install a specific dependency or all dependencies at once.
Click ![]() next to the package record in the composer.json editor gutter to jump to the corresponding Settings/Preferences page and configure Psalm manually.
next to the package record in the composer.json editor gutter to jump to the corresponding Settings/Preferences page and configure Psalm manually.
Reset Psalm configuration
After Psalm is initially configured, further modifications in composer.json will not affect the inspection configuration. To apply newer changes, reset the Psalm configuration.
In the Settings/Preferences dialog Ctrl+Alt+S, navigate to .
On the Quality Tools page that opens, expand the Psalm area and click
next to the Configuration list.In the Psalm dialog that opens, empty the Psalm path field.

Update the project Composer dependencies by clicking Update on top of the composer.json editor panel. See Update dependencies for details.
PhpStorm will perform the Psalm configuration anew and thus apply the changes in composer.json.
Configure Psalm manually
You can use the manually downloaded local PHP code quality tool scripts or scripts associated with PHP interpreters. There can be a number of local and remote PHP interpreters, the one specified on the PHP page of the Settings/Preferences dialog is considered Project Default. Learn more about configuring PHP interpreters in Configure remote PHP interpreters or in Configure local PHP interpreters.
Choose a Psalm script to use
In the Settings/Preferences dialog Ctrl+Alt+S, navigate to .
On the Quality Tools page that opens, expand the Psalm area. From the Configuration list, choose the Psalm script:
To use the script associated with a specific remote PHP interpreter, choose the name of this interpreter.
To use a local script, choose Local. In this case the local Psalm will be executed no matter which PHP interpreter - local or remote - is used in the project. Note that there can be only one Local configuration for Psalm because PhpStorm runs a script (psalm.bat for Windows or psalm for Linux and macOS) that contains a path to a PHP engine.
To use the script associated with the default project interpreter, that is, the one chosen on the PHP page of the Settings/Preferences dialog, choose By default project interpreter.
Configure a local Psalm script
Download and install the Psalm scripts.
To check the Psalm installation, switch to the installation directory and run the following command:
psalm --versionIf the tool is available, you will get a message in the following format:
Psalm 3.17.1@8f2117914813e4dc89ff4ed372785ce93b902fd1Register the local Psalm script in PhpStorm:
In the Settings/Preferences dialog Ctrl+Alt+S, navigate to .
On the Quality Tools page that opens, expand the Psalm area and click
next to the Configuration list.In the Psalm dialog that opens, specify the location of the psalm.bat or psalm Psalm executable in the Psalm path field. Type the path manually or click
 and select the relevant folder in the dialog that opens.
To check that the specified path to psalm.bat or psalm ensures interaction between PhpStorm and Psalm, that is, the tool can be launched from PhpStorm and PhpStorm will receive problem reports from it, click the Validate button. This validation is equal to running the
psalm --versioncommand. If validation passes successfully, PhpStorm displays the information on the detected Psalm version.
If necessary, in the Tool process timeout field, specify how long you want PhpStorm to wait for a result from Psalm, whereupon the process is terminated to prevent excessive CPU and memory usage.
Configure a Psalm script associated with a PHP interpreter
In the Settings/Preferences dialog Ctrl+Alt+S, go to .
On the Quality Tools page that opens, expand the Psalm area and click
next to the Configuration list. The Psalm dialog opens showing the list of all the configured Psalm scripts in the left-hand pane, one of them is of the type Local and others are named after the PHP interpreters with which the scripts are associated.Click
 on the toolbar. In the Psalm by Remote Interpreter dialog that opens, choose the remote PHP interpreter to use the associated script from. If the list does not contain a relevant interpreter, click and configure a remote interpreter in the CLI Interpreters dialog as described in Configure remote PHP interpreters.
When you click OK, PhpStorm brings you back to the Psalm dialog where the new Psalm configuration is added to the list and the right-hand pane shows the chosen remote PHP interpreter, the path to the Psalm associated with it, and the advanced Psalm options.
If necessary, in the Tool process timeout field, specify how long you want PhpStorm to wait for a result from Psalm, whereupon the process is terminated to prevent excessive CPU and memory usage.
Configure Psalm as a PhpStorm inspection
Configure the Psalm inspection with Composer
You can include the information on the Psalm configuration file inside the scripts section of composer.json. When you install or update project dependencies, the specified configuration file will be detected and the Psalm validation inspection will be enabled automatically.
If no configuration file is specified in the scripts section of composer.json, PhpStorm will additionally check the project root to locate the ruleset with the psalm.xml or psalm.xml.dist default name.
In the
scriptssection of composer.json, add thepsalmPsalm launch command into one of the leaf elements.Provide the
--configargument and the path to the configuration file:"scripts": { "psalm": "vendor/bin/psalm --config=psalm.xml" }
Configure the Psalm inspection manually
In the Settings/Preferences dialog Ctrl+Alt+S, click Inspections under Editor.
On the Inspections page that opens, expand the node and select the checkbox next to Psalm validation.
On the right-hand pane of the page, configure the Psalm tool using the controls in the Options area:
From the Severity list, choose the severity degree for the Psalm inspection. The selected value determines how serious the detected discrepancies will be treated by PhpStorm and presented in the inspection results.
From the Scope list, choose the scope to limit the inspection application to.
In the Configuration file field, provide the path to the Psalm configuration file. If the file is not present, PhpStorm displays the notification prompting you to create it.

Select the Show info checkbox to have Psalm report the errors that are at a lower level than the errorLevel specified in the configuration file. If the checkbox is not selected, such errors will be ignored.
Select the Find unused code checkbox to have Psalm report the located unused code (including unused variables).
Select the Find unused @psalm-suppress annotations checkbox to have Psalm report all unused @psalm-suppress annotations.
Initialize Psalm caches
While the Psalm validation inspection can be run on a single file, Psalm will still make a pass on the entire project. On large projects, waiting for Psalm response when running it for the first time can exceed the limit specified in the Tool process timeout field in the Psalm dialog. In such cases, PhpStorm displays the error message:

Click the Init Cache link to have Psalm make a pass on the entire project and generate caches in the configured cache directory. If you are using a remote interpreter, make sure to set the cache directory to the location, which is accessible from within the remote environment.
Click the Exclude from Psalm analysis link to add the current file to the ignored files list.
Run Psalm in the batch mode
From the main menu, select .
Select the inspection profile from the list, or click
to configure a new profile in the Inspections dialog that opens. You can also click to check, which fixes will be applied and make sure that the Psalm validation inspection is enabled.View the inspection results in the Inspection results tool window. Errors and warnings reported by Psalm are prefixed with to distinguish them from PhpStorm internal inspections.
Exclude files from Psalm Validation inspection
When waiting for Psalm response exceeds the limit specified in the Tool process timeout field in the Psalm dialog, PhpStorm suggests adding the file to the ignore list.
In the Settings/Preferences dialog Ctrl+Alt+S, navigate to .
On the Quality Tools page that opens, expand the Psalm area and click the Show ignored files link.
To add a file, click
and locate the desired file in the dialog that opens.To delete a file from the list and have Psalm process it again, select the file and click
 .
.To remove all the files from the list, click
 .
.
Use extended @psalm annotations
Besides regular PHPDoc comments, PhpStorm supports Psalm-specific annotations, which are used by Psalm for performing code analysis. When specifying an annotation, in most cases you can omit the @psalm- part. To use code completion, press Ctrl+Space.
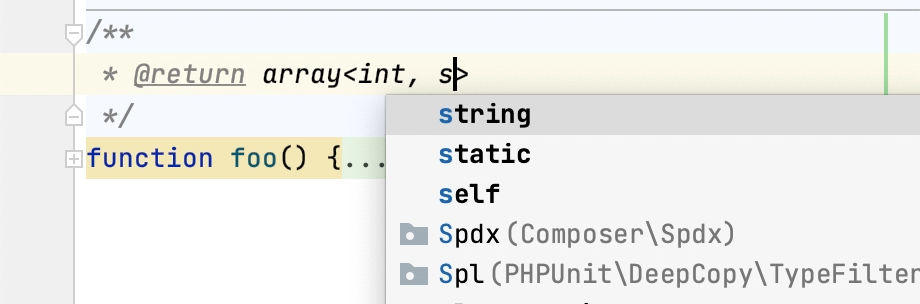
Types support
You can use the Psalm type annotations for pseudotypes such as numeric or scalar to provide PhpStorm with additional type information.

When providing type definitions via the @psalm-param or @psalm-var tags, you can use the constants' values unions (|) and wildcards (*) for constants sharing a common prefix.

Generics support
With the @template annotations, you can introduce basic generics support in PhpStorm. Initial support covers a simple case of a function returning one of its parameters.
