Resolve Git conflicts
When you work in a team, you may come across a situation when somebody pushes changes to a file you are currently working on. If these changes do not overlap (that is, changes were made to different lines of code), the conflicting files are merged automatically. However, if the same lines were affected, Git cannot randomly pick one side over the other, and asks you to resolve the conflict.
In Git, conflicts may arise when you attempt to perform one of the following operations: pull, merge, rebase, cherry-pick, unstash changes or apply a patch. If there are conflicts, these operations will fail, and you will be prompted to accept the upstream version, prefer your version, or merge the changes:
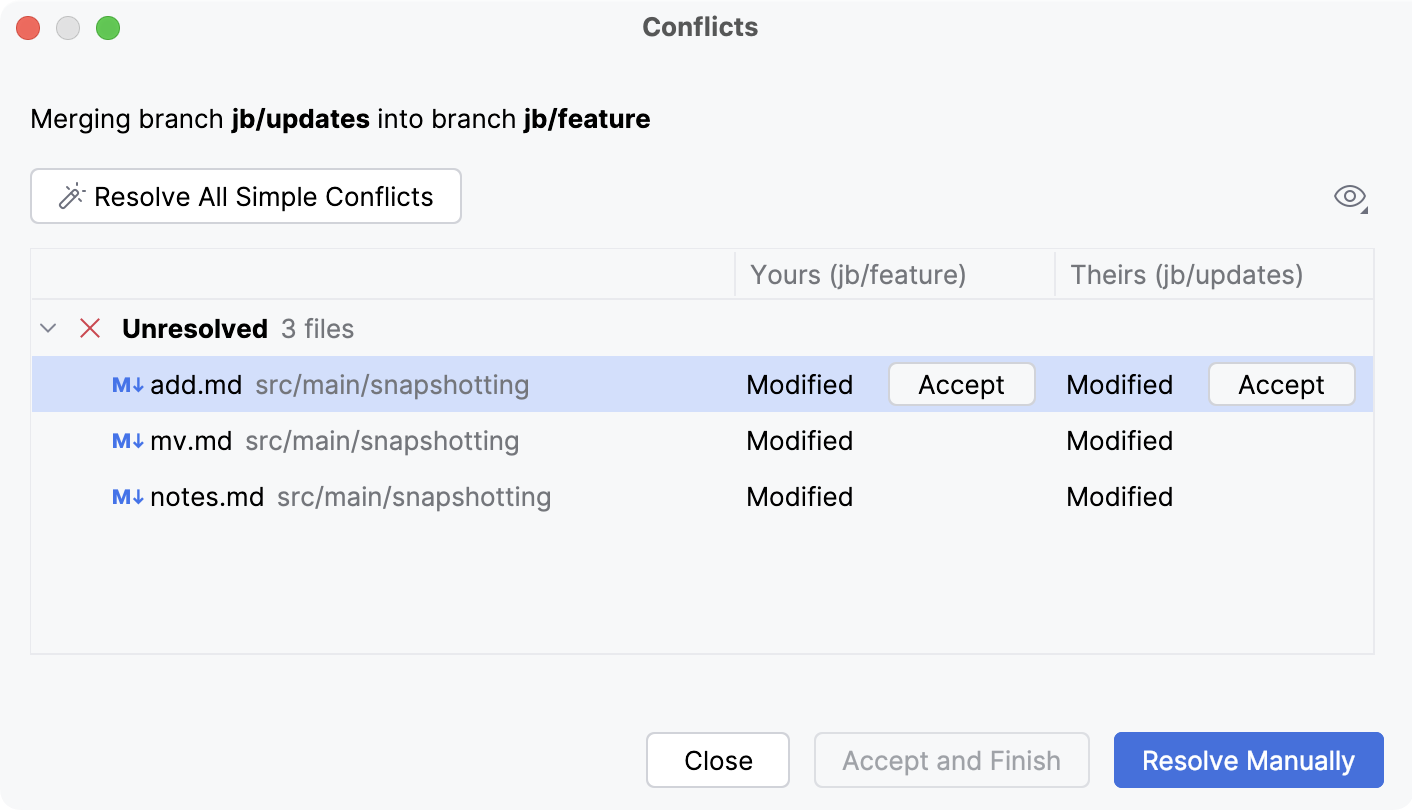
The Conflicts dialog is triggered automatically when a conflict is detected on the Git level.
For each file with conflicting changes, there are three options to resolve conflicts:
Accept Yours: keep the changes from the currently checked-out branch and discard the changes from the branch you are merging.
Accept Theirs: accept the changes from the branch you are merging and discard the changes from the currently checked-out branch.
Resolve each conflict manually: review each conflict and choose which changes to keep.
When you double-click a file with conflicting changes, PhpStorm opens a tool for resolving conflicts locally. This tool consists of three panes:
The left pane shows the read-only local copy
The right pane shows the read-only version checked in to the repository.
The central pane is a fully-functional editor where the results of resolving conflicts are displayed. Initially, the contents of this pane are the same as the base revision of the file, that is, the revision from which both conflicting versions are derived.
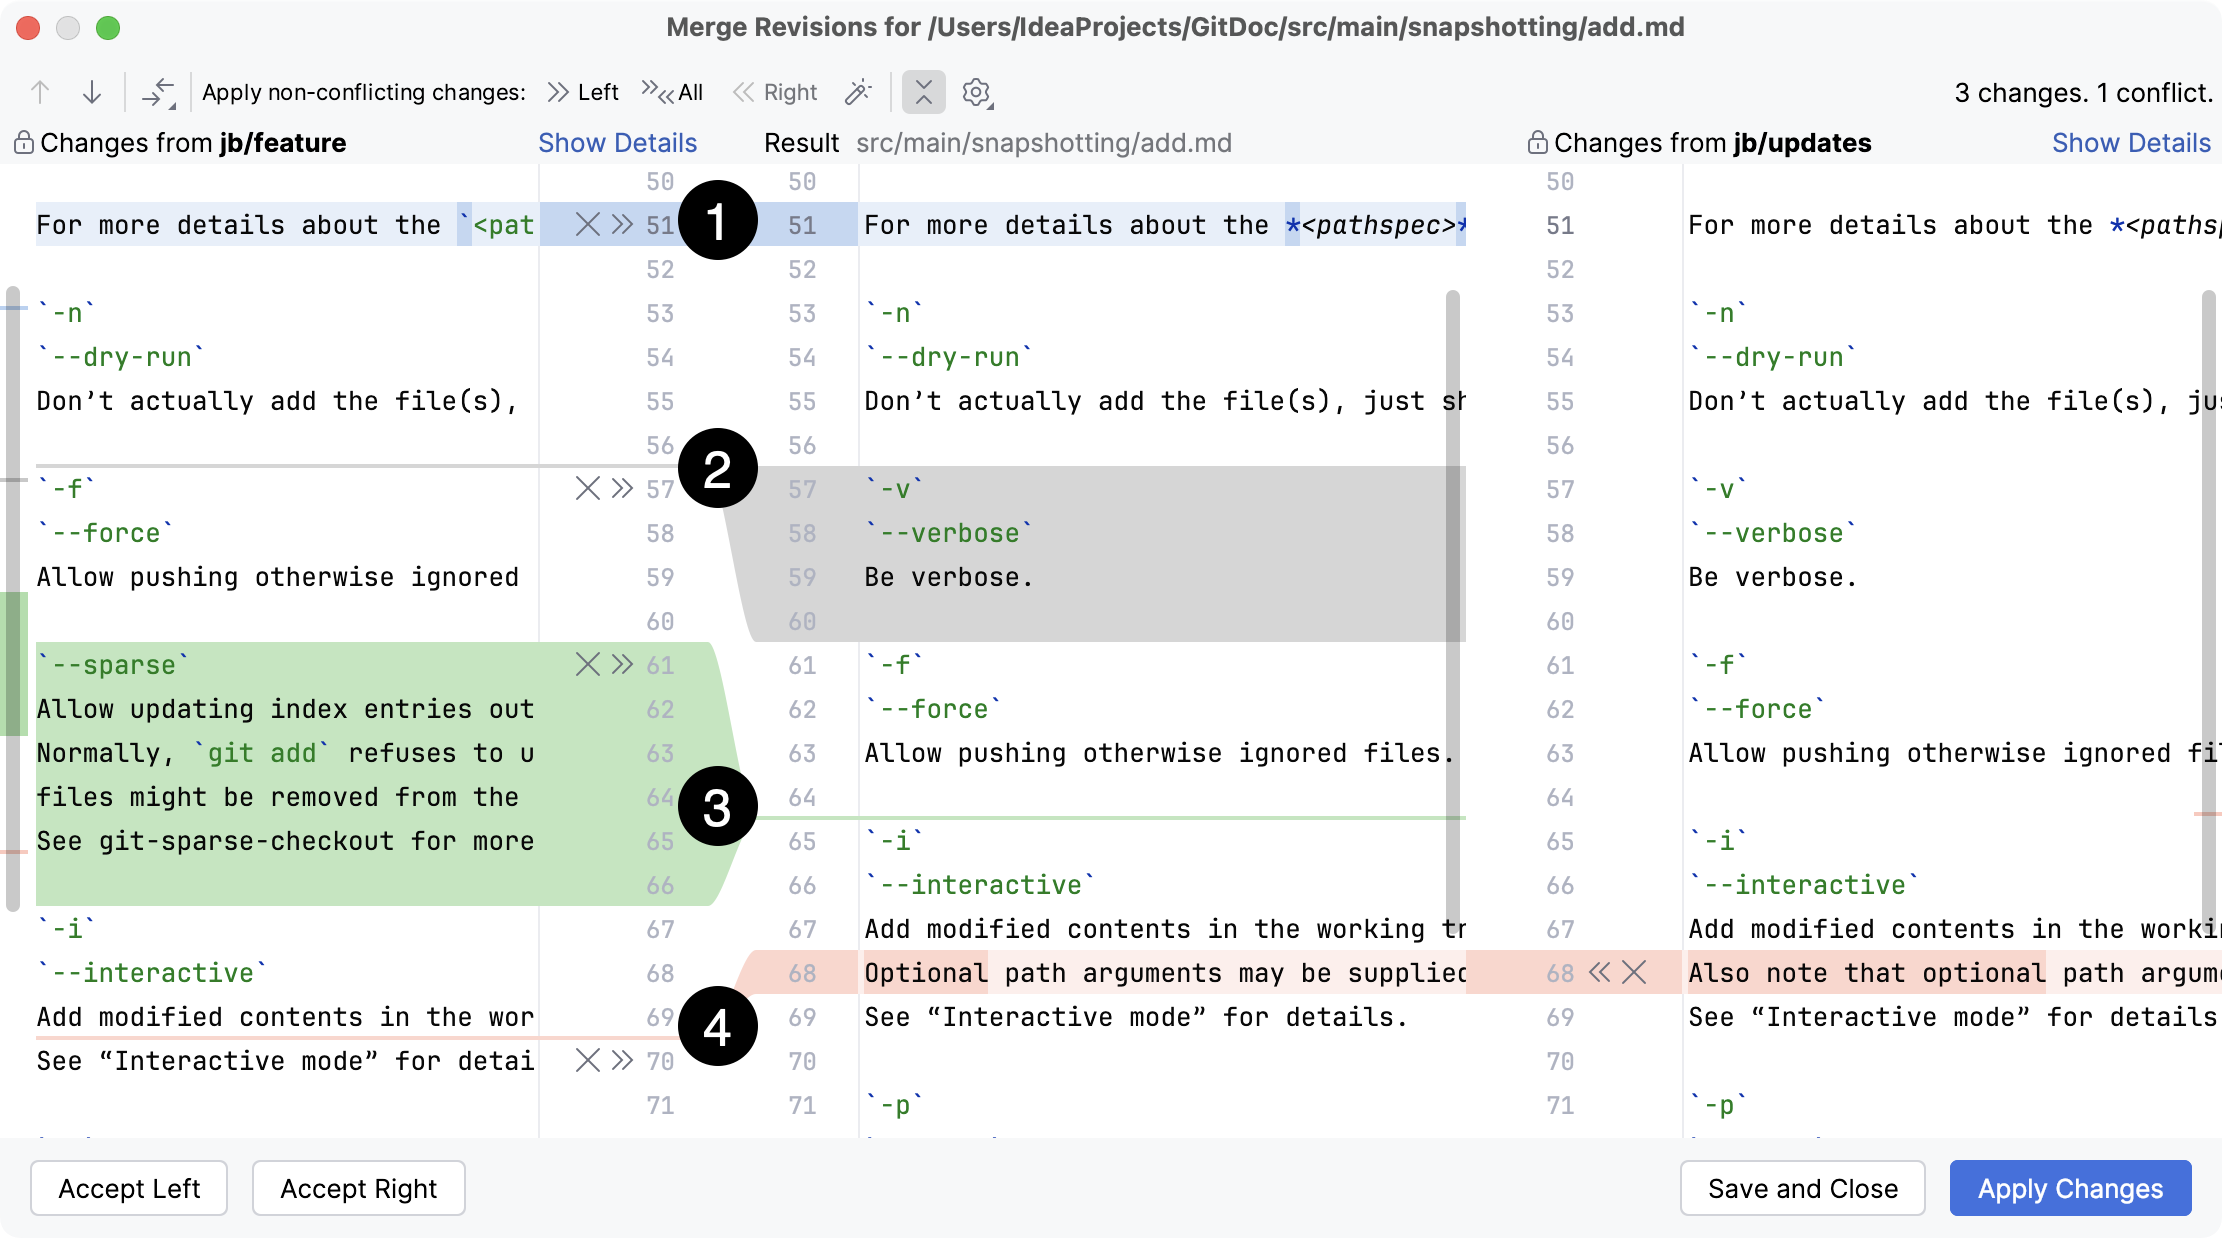
Modified line
Deleted lines
Newly added lines
Conflicting lines
Resolve conflicts
Before resolving conflicts for each file manually, you can automatically merge non-conflicting changes in all files by clicking Resolve All Simple Conflicts in the Conflicts dialog.
To start merging conflicting changes, select one of the files with conflicts in the Conflicts dialog and click Resolve Manually.
To automatically merge all non-conflicting changes, click
 (Apply All Non-Conflicting Changes) on the toolbar. You can also use the
  (Apply Non-Conflicting Changes from the Left Side) and
  (Apply Non-Conflicting Changes from the Right Side) to merge non-conflicting changes from the left/right parts of the dialog, respectively.
To resolve a conflict, you need to select which action to apply (accept
 or ignore
  ) to the left (local) and the right (repository) versions and check the resulting code in the central pane: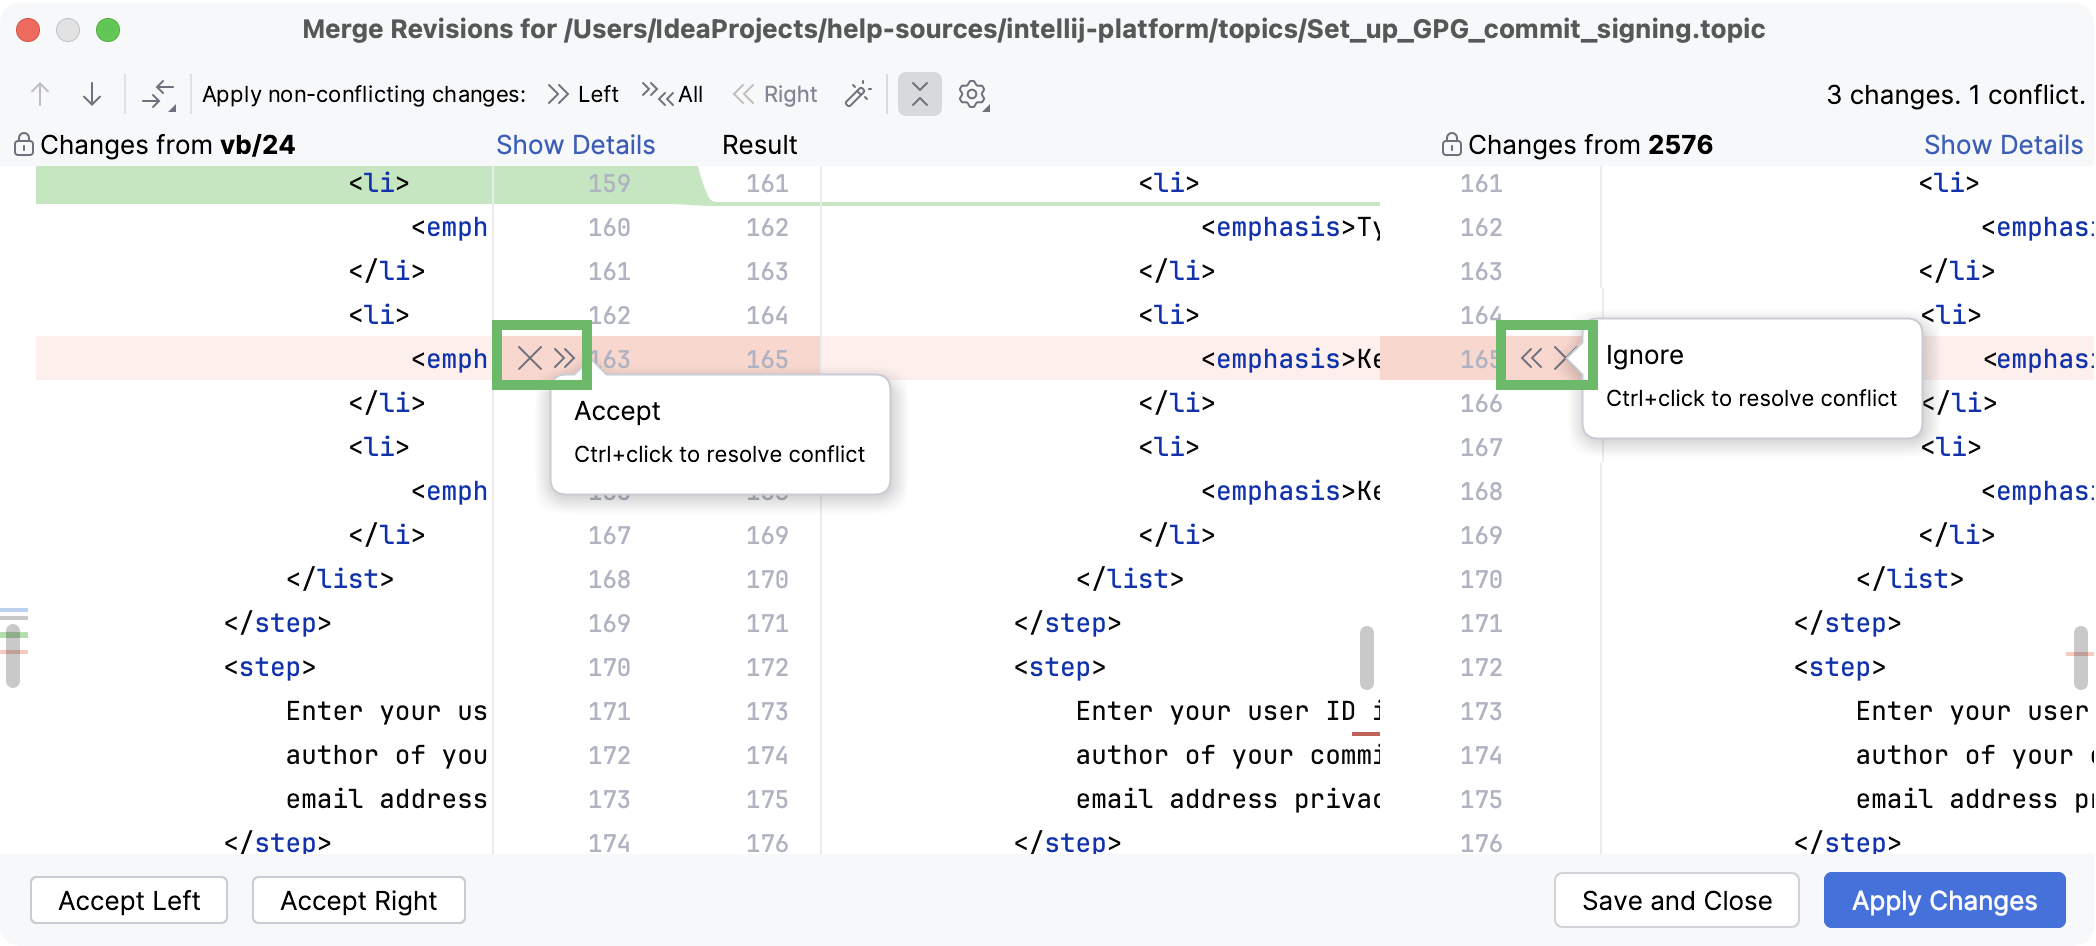
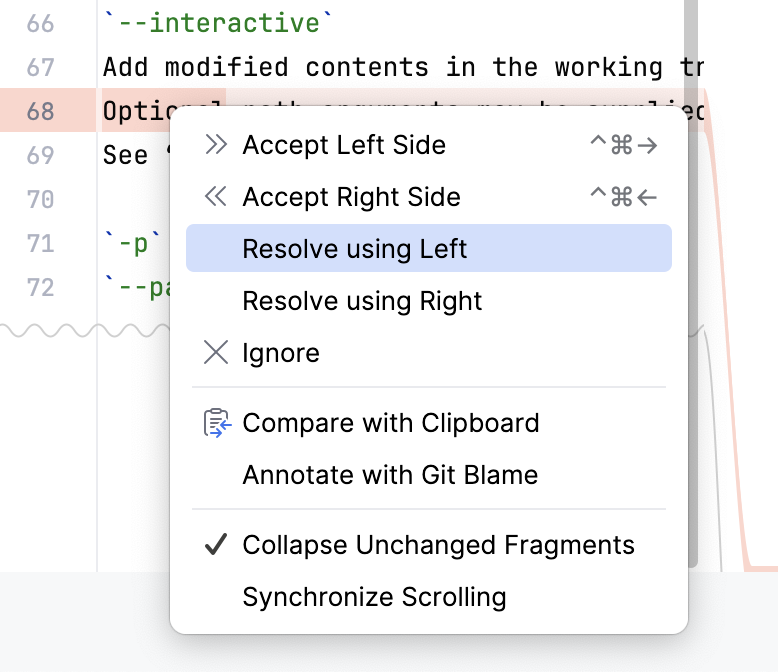
You can also right-click a highlighted conflict in the central pane and use the commands from the context menu. The Resolve using Left and Resolve using Right commands provide a shortcut to accepting changes from one side and ignoring them from the other side, respectively:
For simple conflicts (for example, if the beginning and the end of the same line have been modified in different file revisions), the Resolve simple conflicts
 button that allows merging the changes in one click becomes available.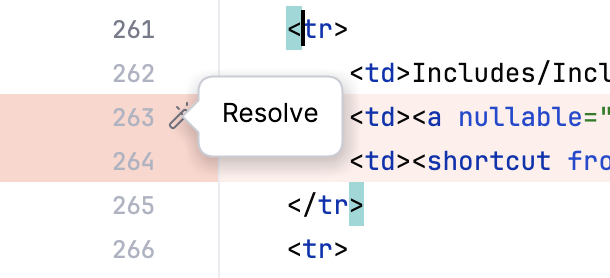
Such conflicts are not resolved with the Apply All Non-Conflicting Changes action since you must make sure that they are resolved properly.
It may also be useful to compare different versions to resolve a conflict. Use the
 toolbar button to invoke the list of options. Note that Base refers to the file version that the local and the repository versions originated from (initially displayed in the middle pane), while Middle refers to the resulting version.
 Review merge results in the central pane and click Apply Changes. The current file will close, and the next file with conflicts will open.
If you click Save and Close, the current file will close, and you will be returned to the list of remaining conflicts:
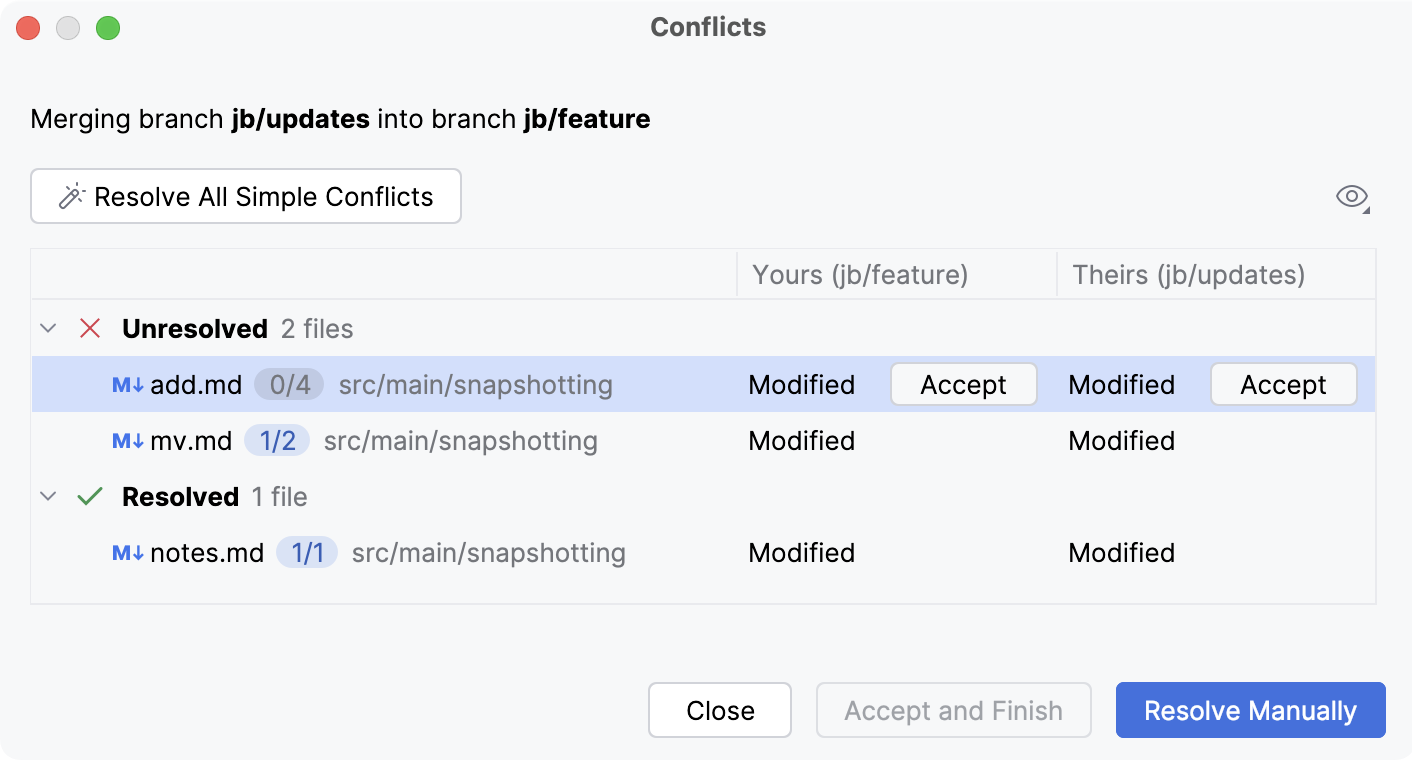
If you need to revert the merge result, right-click the file in the Conflicts dialog and select Revert conflict resolution. The file will return to its conflicted state.
If there are no remaining conflicts, the Conflicts dialog enables the Accept and Finish option. Click it to complete the merge.
Productivity tips
- Apply non-conflicting changes automatically
You can configure PhpStorm to always apply non-conflicting changes automatically instead of telling it to do so from the Merge dialog. To do this, select the Automatically apply non-conflicting changes option on the Tools | Diff Merge settings page Ctrl+Alt+S.
- Manage changes in the central pane
You can manage changes in the central pane using the toolbar that appears when you hover over a change marker in the gutter and then click it. The toolbar is displayed together with a frame showing the previous contents of the modified line:

For example, when there are multiple non-conflicting changes, and you only need to skip one or two of them, it's easier to apply all of them simultaneously using the Apply all non-conflicting changes action and then undo the unwanted ones using the Revert action from this toolbar.
Handle conflicts related to LF and CRLF line endings
Quite often, people working in a team and contributing to the same repository use different operating systems. This may result in problems with line ending, because Unix, Linux and macOS use LF, and Windows uses CRLF to mark the end of a line.
PhpStorm displays the discrepancies in line endings in the Diff Viewer, so you can fix them manually. If you want Git to solve such conflicts automatically, you need to set the core.autocrlf attribute to true on Windows and to input on Linux and macOS (for more details, refer to Dealing with line endings). You can change the configuration manually by running git config --global core.autocrlf true on Windows or git config --global core.autocrlf input on Linux and macOS.
However, PhpStorm can automatically analyze your configuration, warn you if you are about to commit CRLF into a remote repository, and suggest setting the core.autocrlf setting to true or input depending on your operating system.
To enable smart handling of LF and CRLF line separators, open the Settings dialog Ctrl+Alt+S, and select the Version Control | Git node on the left. Enable the Warn if CRLF line separators are about to be committed option.
After you have enabled this option, PhpStorm will display the Line Separators Warning Dialog each time you are about to commit a file with CRLF separators, unless you have set any related Git attributes in the affected file (in this case, PhpStorm supposes that you clearly understand what you are doing and excludes this file from analysis).
In the Line Separators Warning Dialog, click one of the following:
Commit As Is to ignore the warning and commit a file with
CRLFseparators.Fix and Commit to have the
core.autocrlfattribute set totrueorinputdepending on your operating system. As a result,CRLFline separators will be replaced withLFbefore the commit.
If, at a later time, you need to review how exactly conflicts were resolved during a merge, you can locate the required merge commit in the Log tab of the Git tool window Alt+9, select a file with conflicts in the Commit Details pane in the right, and click or press Ctrl+D. For more information, refer to Review how changes were merged.