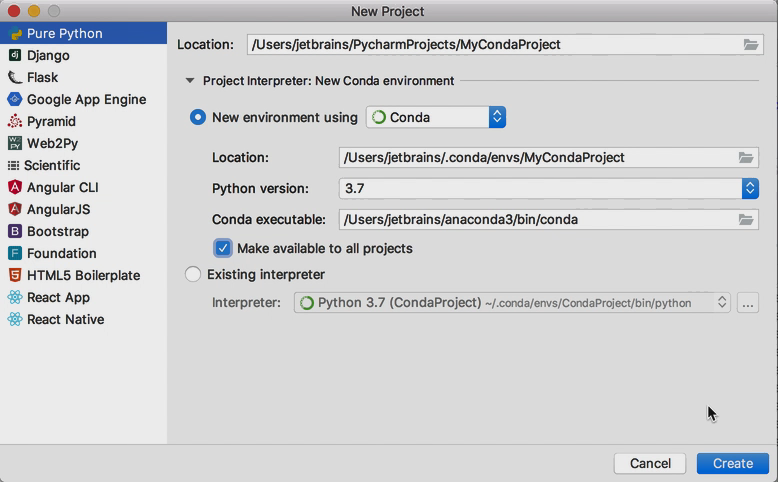
Configure a Conda virtual environment
PyCharm supports creating virtual environments for Python with Conda. Before you start, ensure that Anaconda or Miniconda is downloaded and installed on your computer. The following procedure applies to all supported operating systems. Use the platform switcher at the top of this page to view shortcuts specific to your operating system.

To create a Conda environment
-
Open the Add Python Interpreter dialog by either way:
When you're in the Editor, the most convenient way is to use the Python Interpreter widget in the Status bar. Click the widget and select
If you are in the Settings/Preferences dialog (Ctrl+Alt+S), select . Click the
 icon and select Add.
-
In the left-hand pane of the Add Python Interpreter dialog, select Conda Environment. The following actions depend on whether the Conda environment existed before.
If New environment is selected:
Specify the location of the new Conda environment in the text field, or click
 and find location in your file system. Note that the directory where the new Conda environment should be located, must be empty!
Select the Python version from the list.
Specify the location of the Conda executable file in the text field, or click
 and find location in the Conda installation directory.
Select the Make available to all projects checkbox, if needed.
If Existing environment is selected:
Specify the required interpreter: use the list, or click
 and find one in your file system (for example, C:\Users\jetbrains\Anaconda3\python.exe).
Select the checkbox Make available to all projects, if needed.
Click OK to complete the task.
For any of the configured Python interpreters, you can: