Share your IDE settings
PyCharm lets you back up your IDE settings or share them between different instances of PyCharm or between different JetBrains IDE products that you use. This helps you recreate a comfy working environment if you are working from different computers and avoid the annoyance of things looking or behaving differently from what you are used to.
Depending on the category it belongs to, a setting can be backed up and synced between your IDE instances by one of the following ways:
Via the Backup and Sync plugin: your data is stored under JetBrains Account, which makes the synced settings available in all IDEs where you log in with that account.
The settings you can backup include: IDE themes, keymaps, color schemes, system settings, UI settings, menus and toolbar settings, project view settings, editor settings, code completion settings, parameter name hints, live templates, code styles, and the list of enabled and disabled plugins.
By exporting the settings you want to share as a ZIP archive and then importing them to a different IDE instance. You can export your code style settings, configured deployment servers, Git settings, including registered GitHub accounts, the Debugger settings, Registry keys, and more.
Share settings via the Backup and Sync plugin
Enable the Backup and Sync plugin
This functionality relies on the Backup and Sync plugin, which is bundled and enabled in PyCharm by default. If the relevant features are not available, make sure that you did not disable the plugin.
Press Ctrl+Alt+S to open settings and then select .
Open the Installed tab, find the Backup and Sync plugin, and select the checkbox next to the plugin name.
Enable settings backup and synchronization
On the computer with the IDE instance that contains the settings you want to share, sign in to either of the following:
Your IDE: from the main menu choose Help | Register, choose to activate your license with the JetBrains Account and enter your credentials.
Toolbox App: click the gear icon
 in the top right corner of the application, select Settings and click Log in. Note that by signing in to Toolbox App, you automatically sign in to all JetBrains products that you run.
If, instead of the JetBrains account, you use an activation code or a license server to activate PyCharm, press Ctrl+Alt+S to open settings and select Backup and Sync | Log in with JetBrains account to sign in to your JetBrains account.
Press Ctrl+Alt+S to open Settings, go to , and then click Enable Backup and Sync.
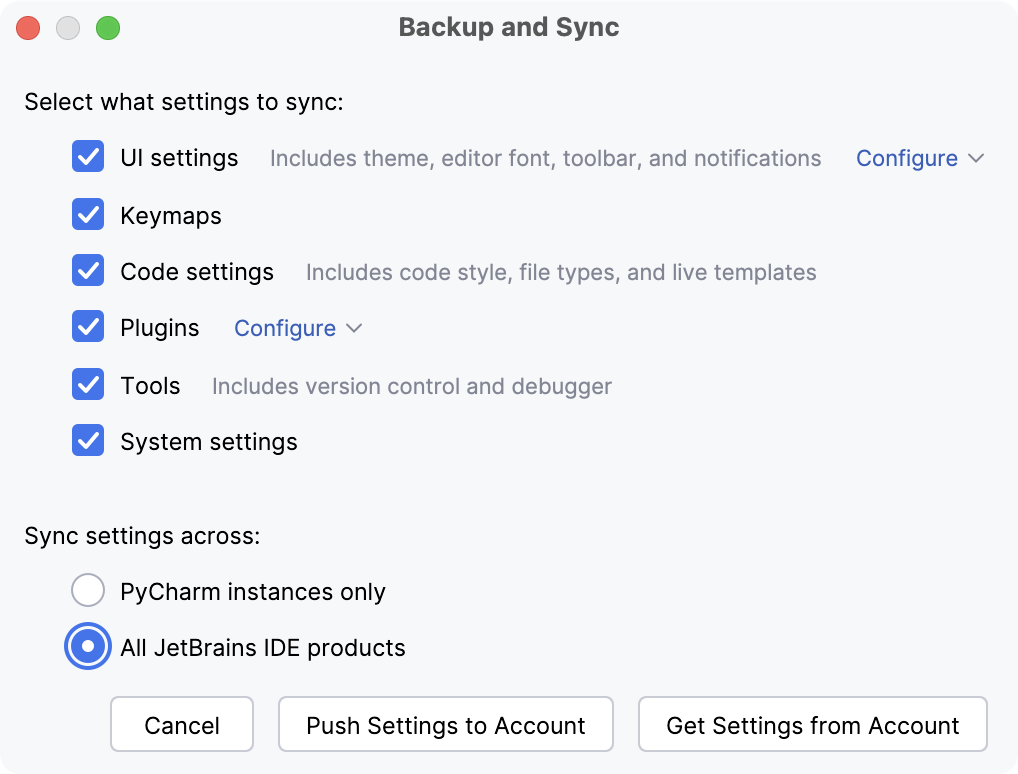
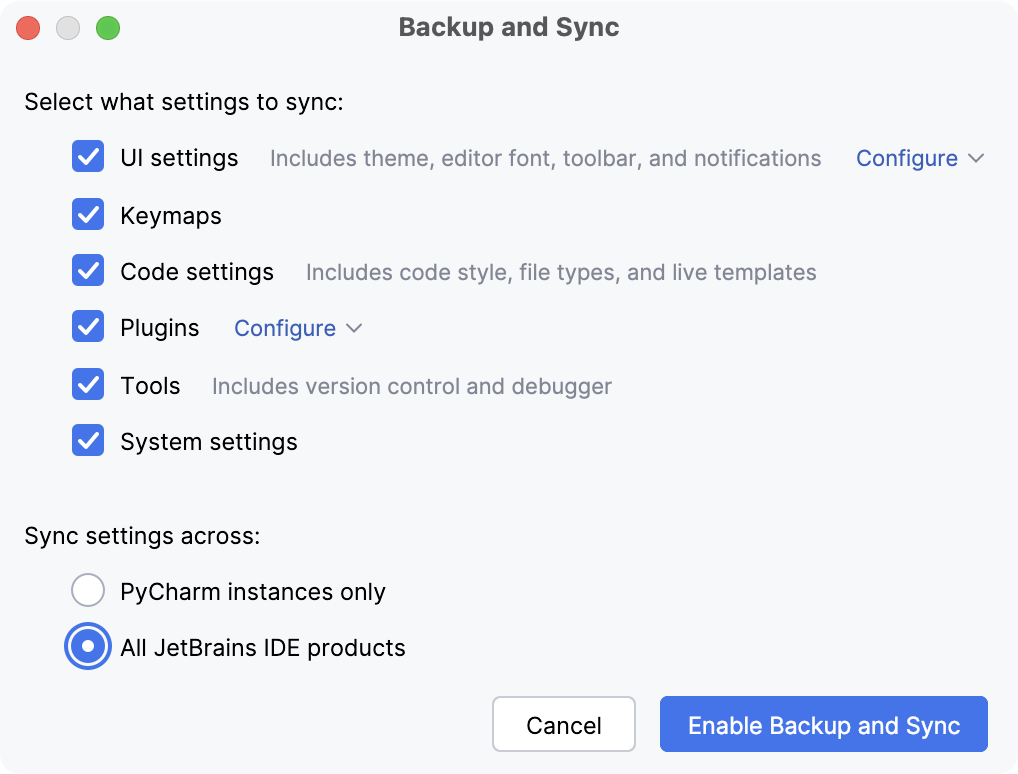
In the Backup and Sync dialog that opens, select the setting categories that you want to share and if you want to share them across PyCharm instances only or across all JetBrains IDEs.
The following step depends on whether there are settings linked to your JetBrains Account.

Click Push Settings to Account to override the settings stored on the JetBrains server with your local settings and use them as the shared ones.

Click Enable Backup and Sync.
In the other IDE instance, where you want these settings to be applied, open Settings Ctrl+Alt+S, go to , and then click Enable Backup and Sync.
In the Backup and Sync dialog that opens, select Get Settings from Account.
Your local settings will be automatically synchronized with the settings stored on the JetBrains server each time you modify a setting and each time the JetBrains server receives setting updates from another IDE.
Plugin states are synchronized as follows:
If a plugin is installed on both IDEs, Backup and Sync synchronizes the plugin state (enabled or disabled) between the two IDEs.
If a plugin is installed and enabled on one IDE but is not installed on the other IDE, Backup and Sync will install it on the other IDE.
If a plugin is installed and disabled on one IDE, and it is not installed on the other IDE, Backup and Sync will not install it on the other IDE.
If you uninstall a plugin, and it is installed on the other IDE, Backup and Sync will disable but not uninstall it on the other IDE.
Disable settings backup and synchronization
You can either disable settings backup and synchronization for a single IDE or completely remove all settings from the JetBrains cloud server and disable synchronization for all IDEs connected to your JetBrains account.
In the upper-right corner of the PyCharm window, click the gear icon
and select Backup and Sync.
On the Backup and Sync page that opens, click Disable Backup and Sync.
Confirm disabling settings synchronization. To disable synchronization on all of your IDEs, select Remove data from JB account and disable for all IDEs.
Settings synchronized with Backup and Sync
This list describes settings categories that you can enable and disable on the Backup and Sync page. The list is not comprehensive, but it gives you an overview of the IDE settings that compose each category.
- UI settings
- Code settings
- Tools
Version Control
- System settings
Registry keys
Export your settings manually
Export settings to a ZIP archive
Select from the main menu.
Select the settings you want to export and specify the path to the target archive.
Import settings from a ZIP archive
Select from the main menu.
Select the ZIP archive that contains your settings in the dialog that opens.
Select the settings you want to apply in the Select Components to Import dialog that opens and click OK.