Running IPython/Jupyter Notebook Cells
Launching Jupyter Notebook
To run a Jupyter Notebook, follow these steps:
- Open the desired
*.ipynbfile for editing. - On the toolbar, click
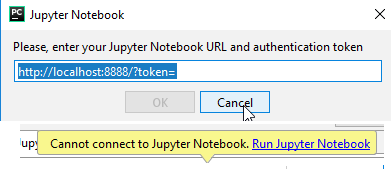
 . PyCharm shows Start Jupyter Notebook dialog box.
 - Next step depends on the location of the notebook whose cell is to be run.
- If the notebook whose cell you want to execute is already started outside PyCharm, and you wish to connect to it, then specify the Notebook server URL (copy it from the command line where this notebook was launched, and next paste to the Start Jupyter Notebook dialog box):

- If the notebook whose cell you want to execute isn't yet started, then in the Start Jupyter Notebook the users should click Cancel, and then click the Run Jupyter Notebook link that appears on top of the editor:

After that, run/debug configuration for this notebook is automatically created.
PyCharm shows the notebook kernel in the Jupyter Notebook tab of the Run tool window:

When running another notebook, the corresponding kernel starts:

- If the notebook whose cell you want to execute is already started outside PyCharm, and you wish to connect to it, then specify the Notebook server URL (copy it from the command line where this notebook was launched, and next paste to the Start Jupyter Notebook dialog box):
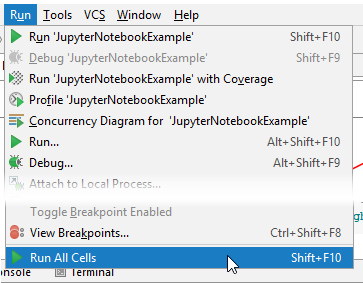
To run ALL CELLS in a Jupyter Notebook, on the main menu choose :

Progress indication
Note that each cell has its number to the left:

When a cell is being executed, the number changes to an asterisk:

When ready, the cell number insreases:

Last modified: 26 October 2017