Jupyter Notebook Support
Prerequisite
Prior to working, make sure that the following prerequisite is met:
Jupyter Notebook is properly installed on your computer. To learn how to install Jupyter Notebook, refer to the official documentation.
Notebook support
PyCharm supports Jupyter Notebook, recognizes *.ipynb files, and allows you to edit them.
Jupyter Notebook files are marked with ![]() icon.
icon.
A Notebook file <file name>.ipynb shows document cells including code, text, equations etc.
Notebook support includes:
Support for local and (in the Professional edition) remote interpreters. See section To configure a remote connection for a notebook, follow these steps: for details.
-
Coding assistance:
Error and syntax highlighting.
Ability to create line comments (Ctrl+/).
Dedicated kernel view: Jupyter Notebook tab in the Run tool window.
Ability to run cells.
Configuring an interpreter for a notebook
To configure a remote connection for a notebook, follow these steps:
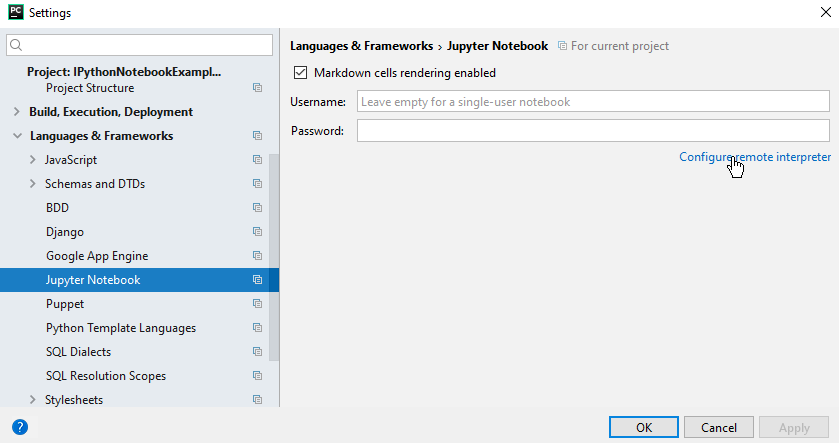
Open the Jupyter Notebook page of the Settings/Preferences dialog.
On this page, select or clear the Markdown cells rendering enabled option, and specify the username and password. Note that for the single-user notebooks these fields are optional - leave them blank.
Fill in the username (for JupyterHub) and password.
Click the link Configure remote interpreter. You'll find yourself at the Project Interpreter page.

Configure the remote interpreter, as described in the section Configuring Python Interpreter.
Creating and opening ipynb files
To create an *.ipynb file:
-
Do one of the following:
Right-click the target directory in the Project tool window, and choose New on the context menu.
Press Alt+Insert
Choose the option Jupyter Notebook.
In the dialog box that opens, type the file name.
To open the existing .ipynb files, follow the same steps as for the files of the other types.
File *.ipynb in the editor
The *.ipynb files feature a toolbar with the following buttons:
Item | Tooltip | Description |
|---|---|---|
Run cell (Win Shift+Enter/macOS⇧⏎) | Click this button to execute the current cell. | |
Interrupt kernel (Win Ctrl+I/macOS ⌘I) | Click this button to stop the current kernel. | |
Restart kernel | Click this button to restart the current kernel. | |
Move cell up (Win Ctrl+Shift+Up/macOS ⇧⌘↑) | Click the button to move the selected cell up | |
Move cell down (Win Ctrl+Shift+Down/macOS ⇧⌘↓) | Click the button to move the selected cell down | |
Insert cell below (Win Ctrl+=/macOS ⌃=) | Click this button to add an empty cell under the current one. |