File templates
File templates are specifications of the default contents for new files that you create. Depending on the type of file you are creating, templates provide initial code and formatting expected in all files of that type (according to industry or language standards, your corporate policy, or for other reasons).
PyCharm provides predefined templates for all supported file types suggested when you create a new file. The set of suggested file types depends on the module and configuration, as well as the properties of your current location in the Project tool window. For example, PyCharm will not suggest creating a Python file outside of the Python source or test directories.
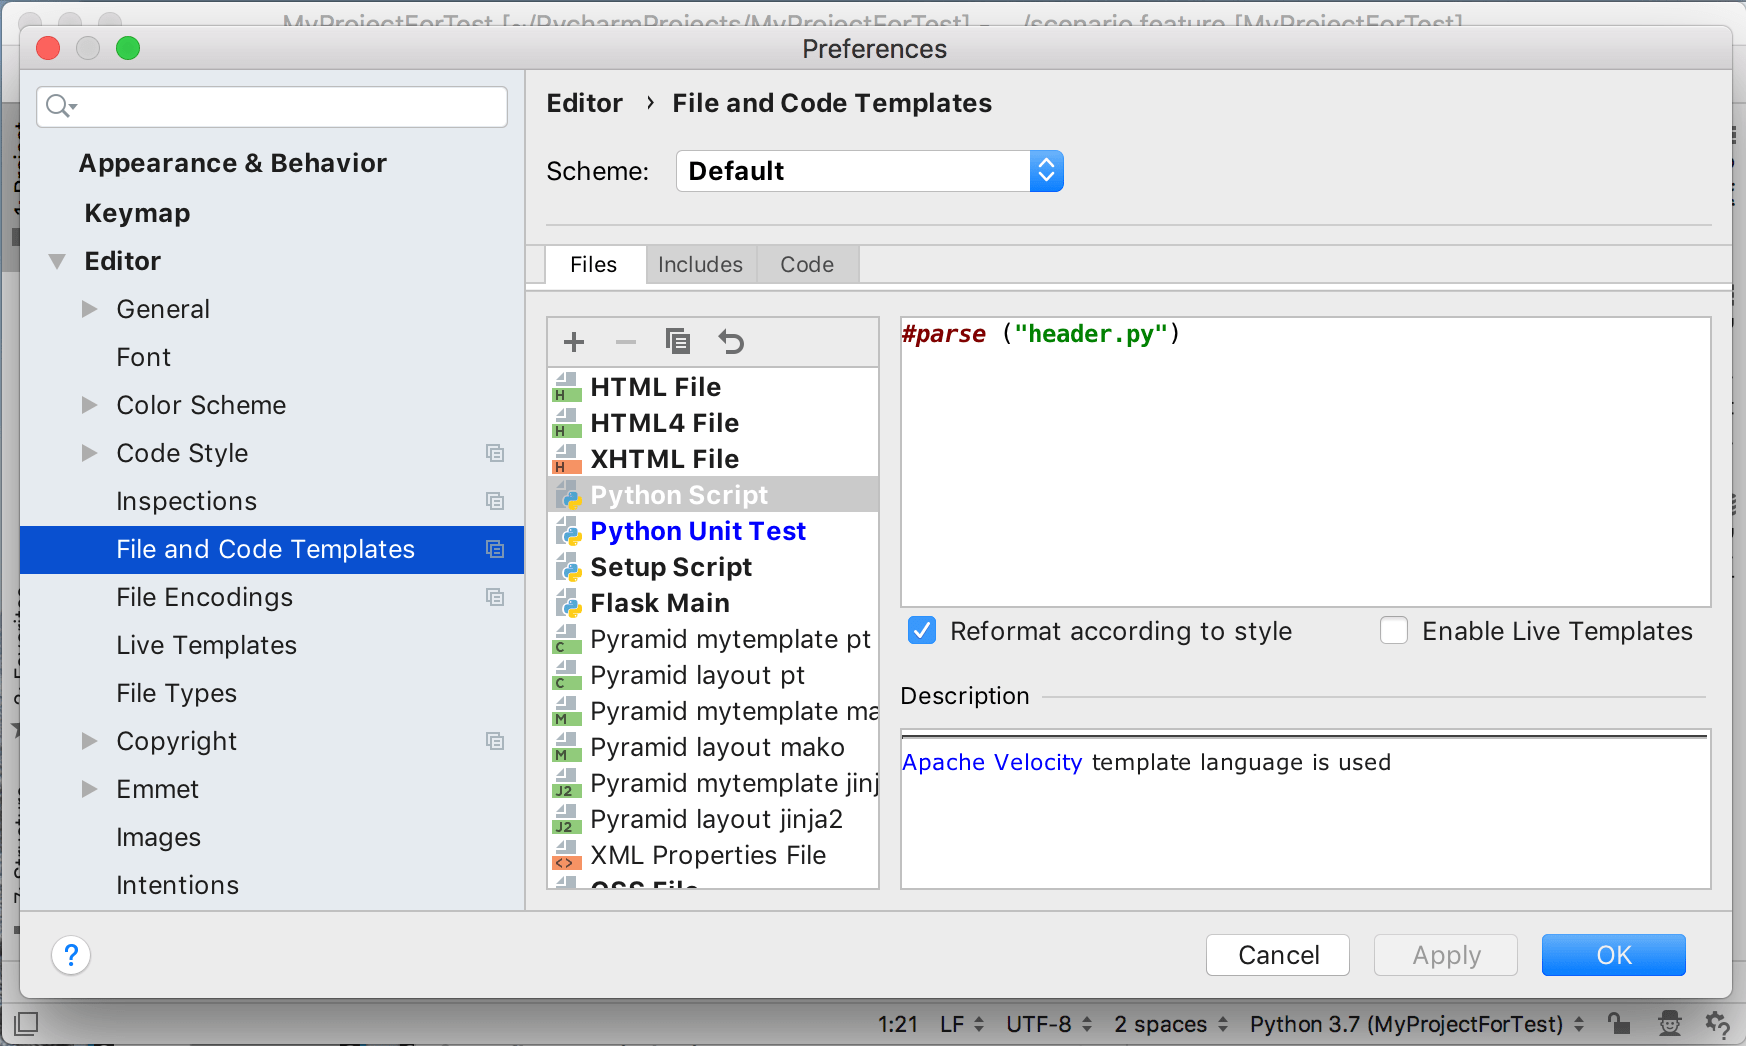
To manage and configure file templates, open the Editor | File and Code Templates page of the IDE settings Ctrl+Alt+S.
The Default scope controls templates that apply to the entire workspace in any project. They are stored in the IDE configuration directory under fileTemplates.
The Project scope controls templates that apply only to the current project. They are stored in the project folder under .idea/fileTemplates. These templates can be shared among team members.
By default, the list of templates contains only predefined templates provided by PyCharm. Some of them are internal, which means they cannot be deleted or renamed. The names of internal templates are shown in bold. The names of templates that you modified, as well as custom templates that you created manually, are shown in blue.
PyCharm uses several types of templates, separated into the following tabs:
The Files tab contains file templates for creating new files.
The Includes tab contains pieces of reusable content for inserting into file templates (for example, if a specific header applies to multiple file templates).
The Code tab contains internal templates for code fragments (snippets) used by PyCharm to generate various constructs. You can edit the available snippets on this tab, but you cannot create new ones.
To create custom code snippets, use Live templates.
The Other tab contains templates used by various application servers and frameworks. You can edit existing built-in templates on this tab, but not create new ones.
The following procedures describe how to create file templates. Similar procedures can be used for creating include templates.
Create a new file template
Press Ctrl+Alt+S to open IDE settings and select Editor | File and Code Templates.
On the Files tab, click
 and specify the name, file extension, and body of the template.
Apply the changes and close the dialog.
Copy an existing file template
Press Ctrl+Alt+S to open IDE settings and select Editor | File and Code Templates.
On the Files tab, click
 and modify the name, file extension, and body of the template as necessary.
Apply the changes and close the dialog.
Save a file as a template
Open a file in the editor.
Choose from the menu.
In the Save File as Template dialog, specify the new template name and edit the body, if necessary.
Apply the changes and close the dialog.
Syntax
File and code templates use the Velocity Template Language (VTL), which includes the following constructs:
Fixed text (markup, code, comments, and so on), which is rendered as-is.
Variables, which are replaced by their values.
Various directives, including #parse,
#set,#if, and others.
Fore more information, see the VTL reference guide.
The following example shows the default template for creating a Gherkin features file in PyCharm:
In this template, ${USER} and ${DATE} are template variables. When you create a new Gherkin file, this template generates a feature file with contents similar to the following: