Plugins
Plugins extend the core functionality of PyCharm. For example, install plugins to integrate the IDE with version control systems, issue trackers, build management servers, get coding assistance support for various languages and frameworks, and more.
Most plugins can be used with any JetBrains product. Some are limited only to commercial products, others require a separate license.
Install plugins
By default, PyCharm includes bundled plugins that come with the IDE as part of its installation. You can install additional plugins from JetBrains Marketplace or from a local archive file (ZIP or JAR).
Install a plugin from Marketplace
Open settings or press Ctrl+Alt+S in your IDE and then select .
Click the Marketplace tab and type the plugin name in the search field.
Type a forward slash
/in the search string to see options for filtering and sorting search results. For example, you can add the following options to your search string to list only AI-related plugins and sort them alphabetically by name:/tag:AI /sortBy:nameTo install the plugin, click Install and restart the IDE if prompted.
To install a specific version, go to the plugin page in JetBrains Marketplace, download and install it as described in Install plugin from disk. For example, you can do it if the most recent version of the plugin is broken.
Open plugin settings
Open settings or press Ctrl+Alt+S in your IDE and then select .
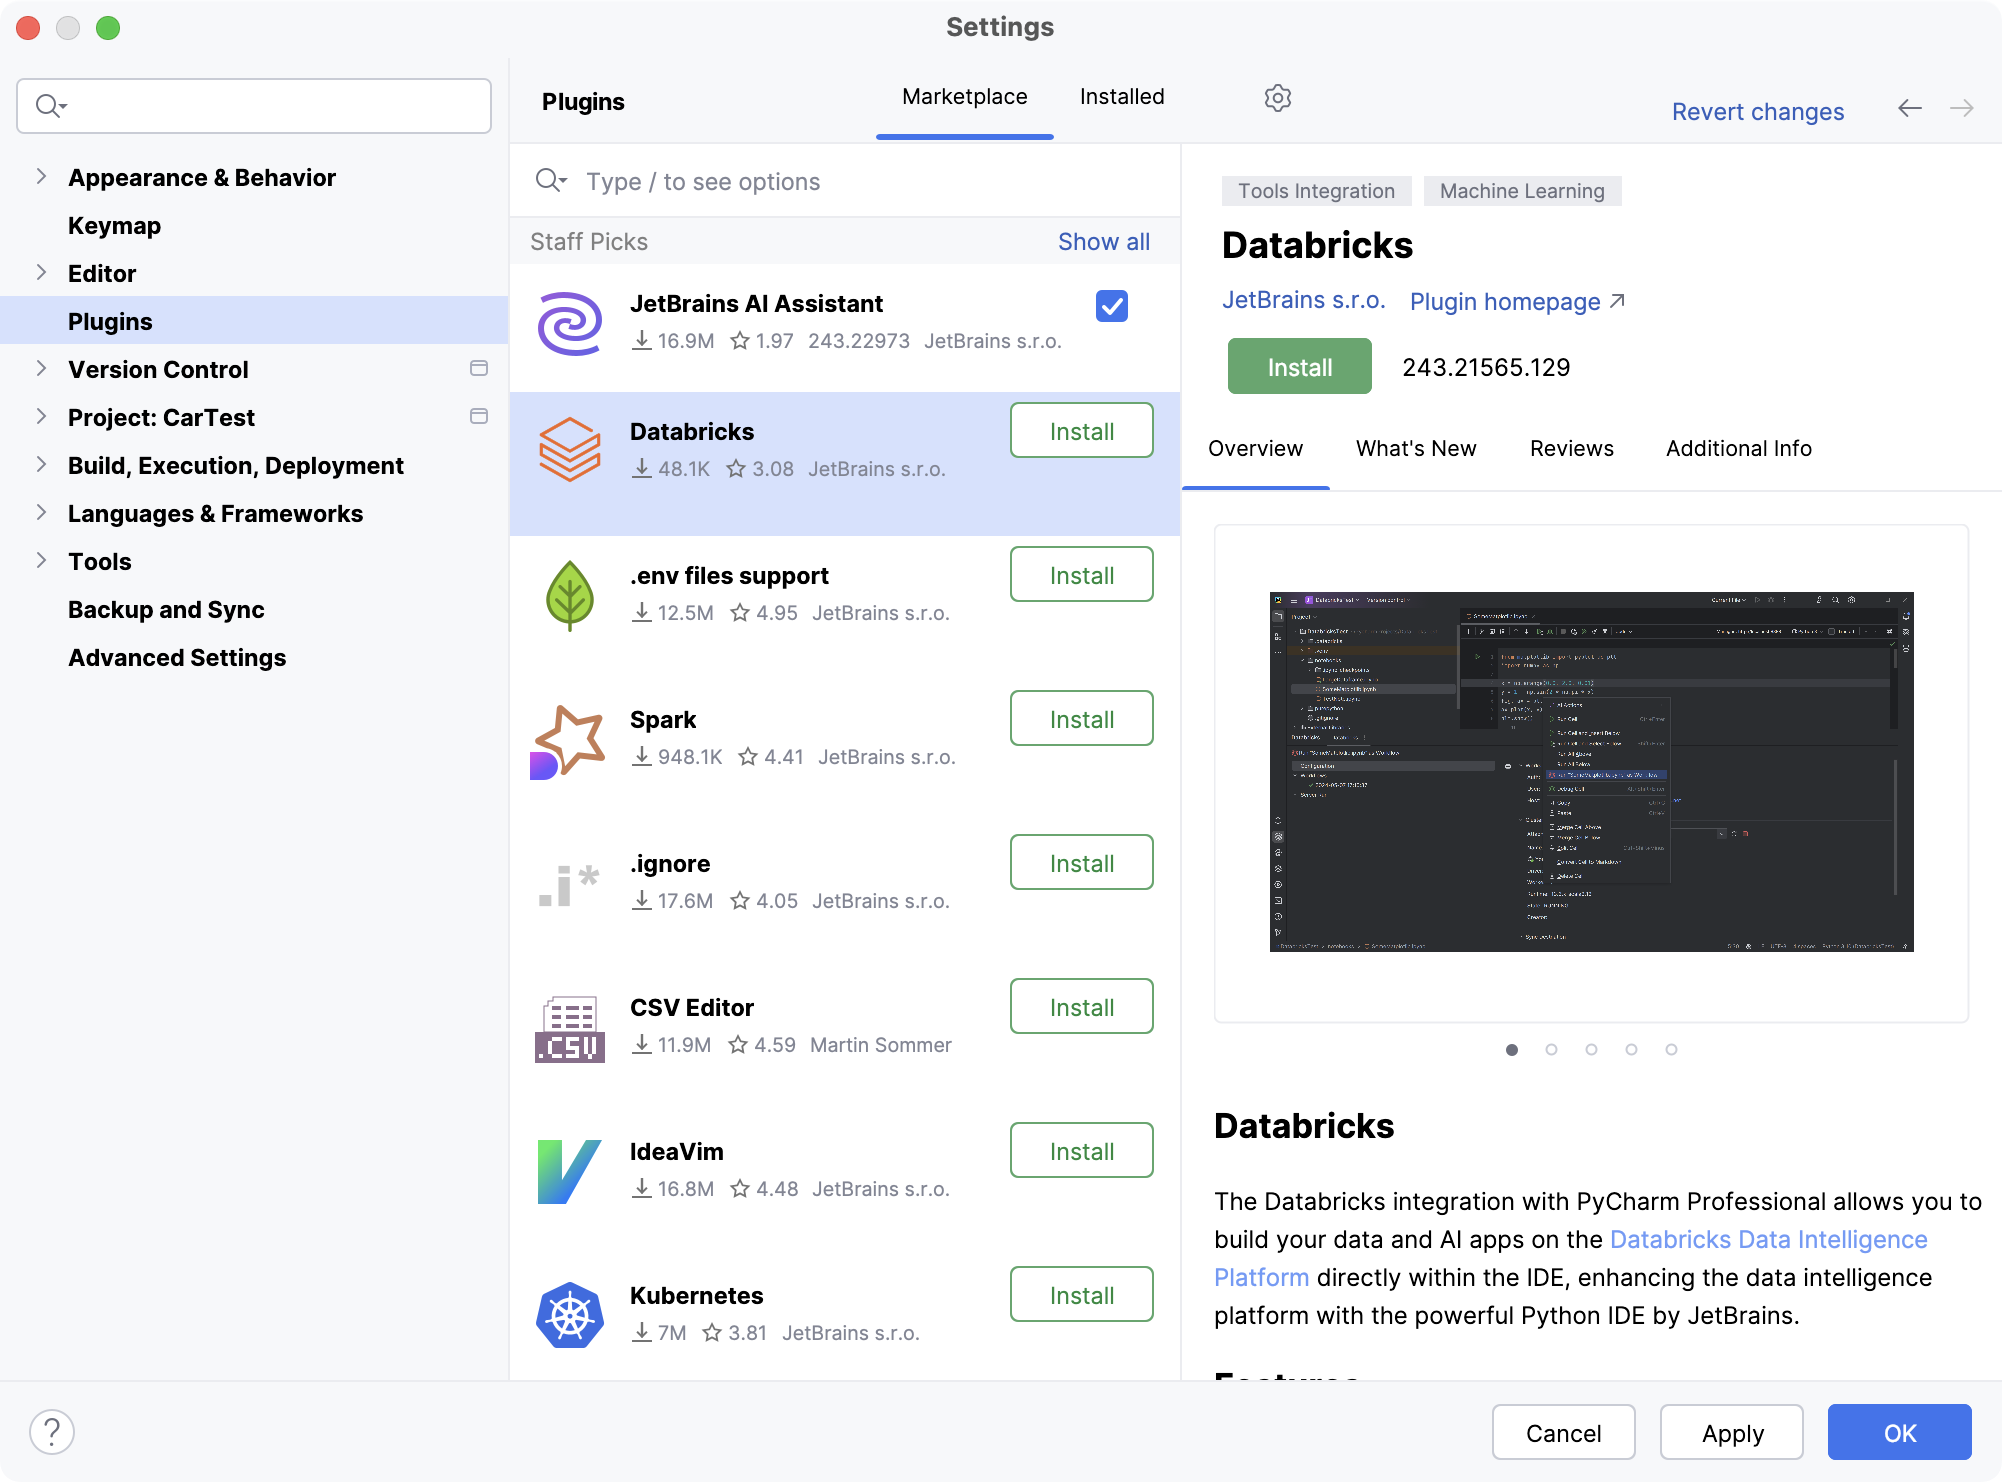
Use the Marketplace tab to browse and install plugins from JetBrains Marketplace or from a custom plugin repository.
Use the Installed tab to browse bundled and installed plugins, enable, disable, update, or remove them. Disabling unnecessary plugins can increase performance.
If a plugin depends on some other plugin, you can find a list of the dependencies in the Additional Info tab. If your project depends on certain plugins, add them to the list of required plugins.
Install plugin from disk
You can install a plugin from disk if you need a specific plugin version that you have downloaded from JetBrains Marketplace or a plugin provided by a third party. In this case, you install the plugin from a local ZIP or JAR archive.
Download the plugin archive (ZIP or JAR).
Open settings or press Ctrl+Alt+S in your IDE and then select .
On the Plugins page, click
 Settings and then click Install Plugin from Disk.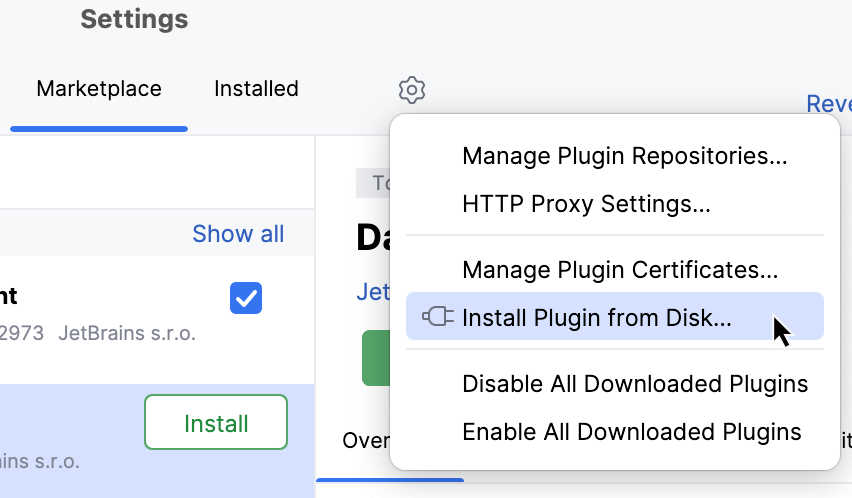
Select the plugin archive file and click OK.
Click OK to apply the changes and restart the IDE if prompted.
Install plugin from command line
Install plugins from the command line when you want to automate IDE setup or install plugins without using the graphical interface.
Quit the IDE on which you want to install the plugin.
In JetBrains Marketplace, find a page of the plugin that you want to install, scroll down to the Additional Information section, and copy the value from the Plugin ID parameter, for example,
org.jetbrains.plugins.github.Install the plugin:
Navigate to the bin directory under your PyCharm installation directory and run the following command:
pycharm64.exe installPlugins <PluginID>For example:
pycharm64.exe installPlugins org.jetbrains.plugins.githubRun the following command:
open -na "PyCharm.app" --args installPlugins <PluginID>For example:
open -na "PyCharm.app" --args installPlugins org.jetbrains.plugins.githubNavigate to the bin directory under your PyCharm installation directory and run the following command:
pycharm.sh installPlugins <PluginID>For example:
pycharm.sh installPlugins org.jetbrains.plugins.github
For more information, refer to Install plugins from the command line.
Update plugins
Update plugins manually
Open settings or press Ctrl+Alt+S in your IDE and then select .
If a new version of an installed plugin is available, the Update button appears in the plugin settings. Click it to update the plugin.
To configure whether your IDE should check for updates, open Settings Ctrl+Alt+S and go to . On this page, you can also click Check for Updates to manually check your plugin repository for available plugin updates.
If you prefer the IDE to update all plugins automatically, you can configure it accordingly.
For more information about the IDE and plugin updates, refer to Update PyCharm.
Update plugins automatically
By default, PyCharm notifies you to manually update a plugin when a new version of the plugin becomes available. You can configure PyCharm to automatically download plugin updates and apply them on the next IDE restart.
Open settings or press Ctrl+Alt+S in your IDE and then select .
Click
Settings and select Update Plugins Automatically.Alternatively, go to and select Update plugins automatically.
Deactivate plugins
Disable plugins
You can disable a plugin without removing it if you do not need the corresponding functionality, but you do not want to uninstall the plugin from your IDE.
Open settings or press Ctrl+Alt+S in your IDE and then select .
Open the Installed tab, find and select the plugin that you want to disable.
On the plugin's description pane, click Disable.
Alternatively, you can use the checkboxes in the list of plugins or the Disable all buttons for plugin categories.
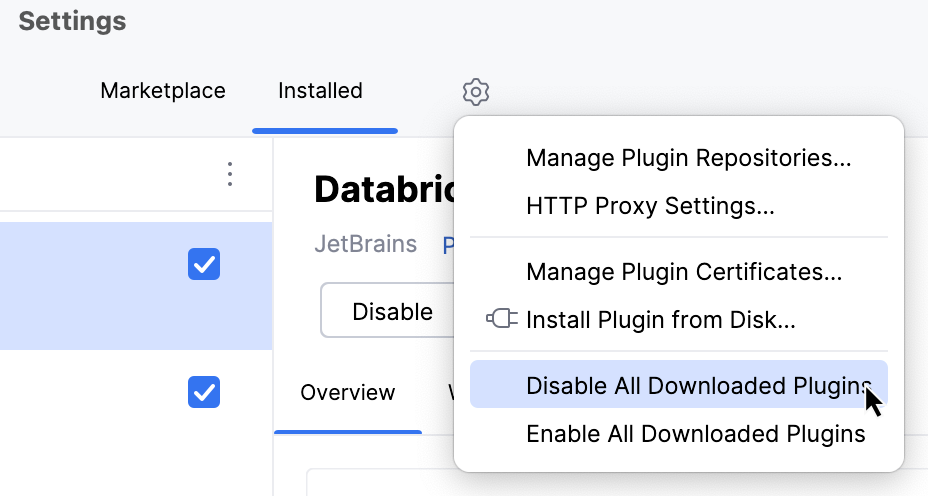
You can disable or enable all manually installed plugins at once (non-bundled) in the menu under Settings.
Uninstall plugins
Open settings or press Ctrl+Alt+S in your IDE and then select .
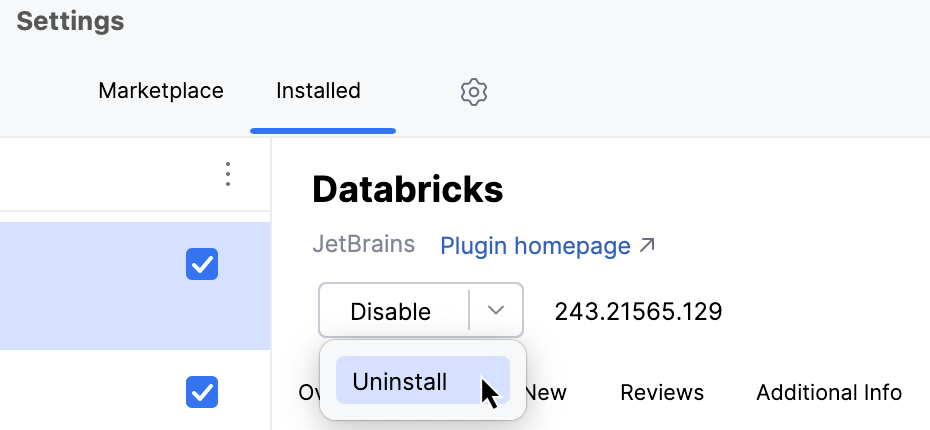
Open the Installed tab and find the plugin that you want to remove.
Expand the Disable list and select Uninstall.
Required plugins
A project may require plugins that provide support for certain technologies or frameworks. You can add such plugins to the list of required plugins for the current project, so that PyCharm will verify that the plugins are installed and enabled. It will notify you if you forget about some plugin, or someone on your team is not aware about the dependency as they work on the project.
Add a required plugin for your current project
Press Ctrl+Alt+S to open settings and then select .
On the Required Plugins page, click
 Add and select the plugin. Optionally, specify the minimum and maximum version of the plugin.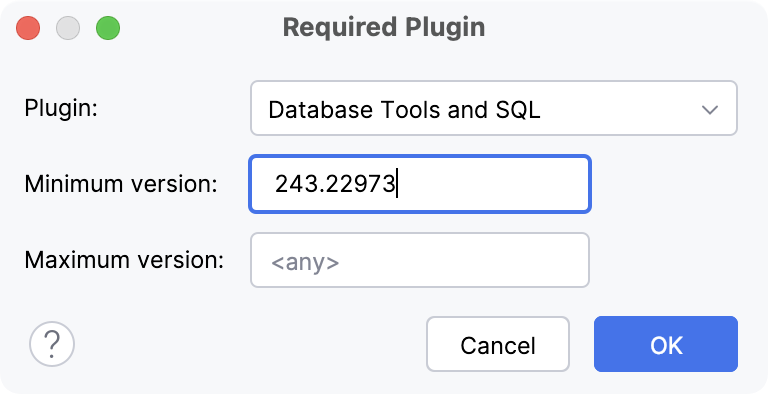
The list of required plugins is stored in the .idea/externalDependencies.xml file of your project. When you open the project in PyCharm, it will notify you if the required plugin is disabled, not installed, or requires an update.
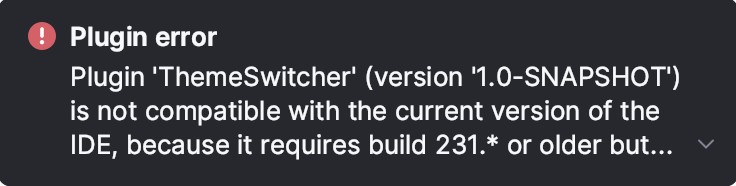
Click the link in the notification message to quickly enable, install, or update the required plugin.
Suggested plugins
When you open a project, PyCharm can suggest installing and enabling plugins based on libraries used in your project. Do not confuse suggested plugins with required plugins that you can manually add to a project so that your teammates also use it.
If you don't need a particular plugin, you can prevent PyCharm from suggesting it. You can also use your notification settings to disable or enable notifications of all plugin suggestions and the way they are displayed.
Disable suggestions of a plugin
When a notification of a suggested plugin appears, click Don't suggest again.
Next time when you open a project, PyCharm will not suggest this plugin.
Check a project for suggested plugins
You can check your project for suggested plugins except for plugins for which you have disabled suggestions.
Press Ctrl+Shift+A and start typing Check Suggested Plugins.
Select the Check Suggested Plugins action.
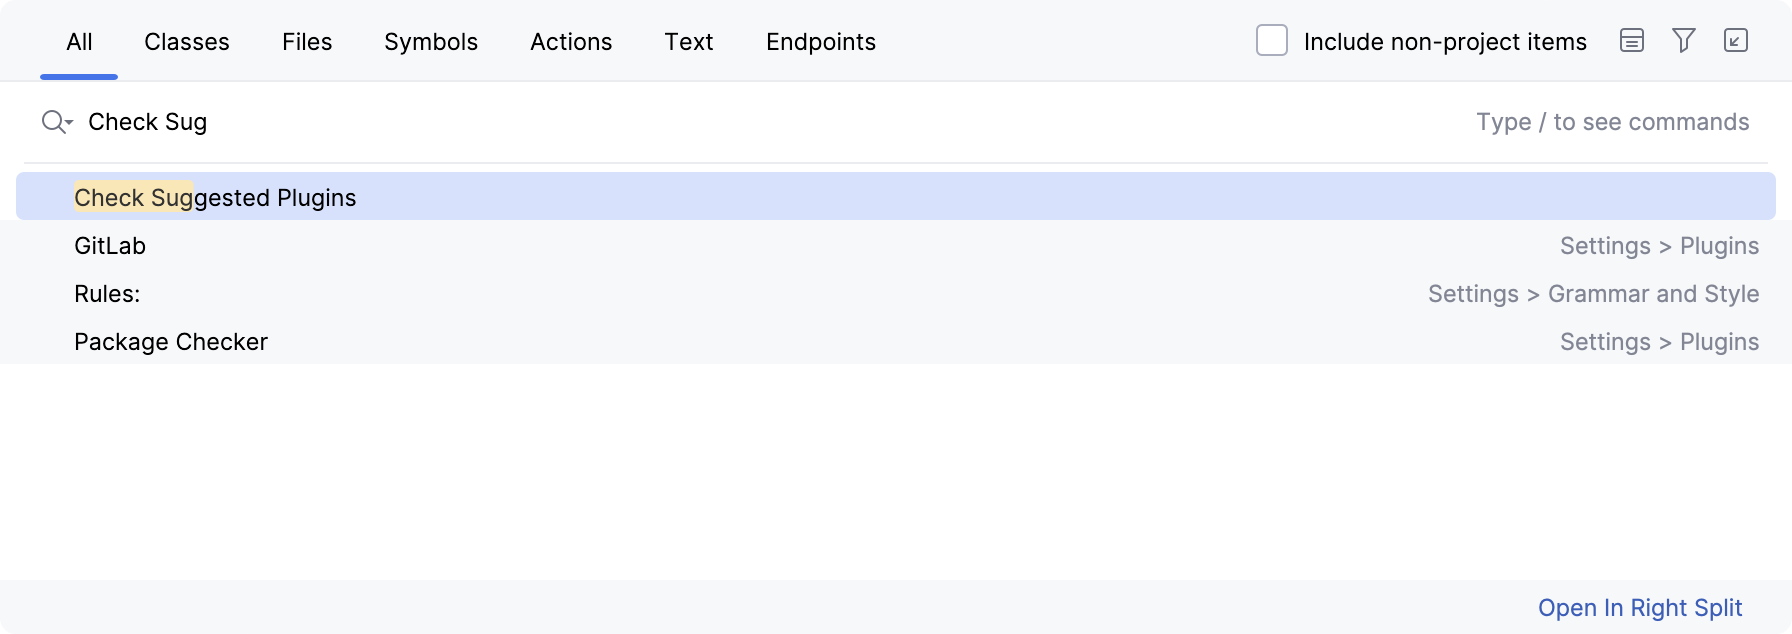
If PyCharm has a plugin applicable to your project, you'll see the notification message. Click the link in the notification message to install or enable the suggested plugin.
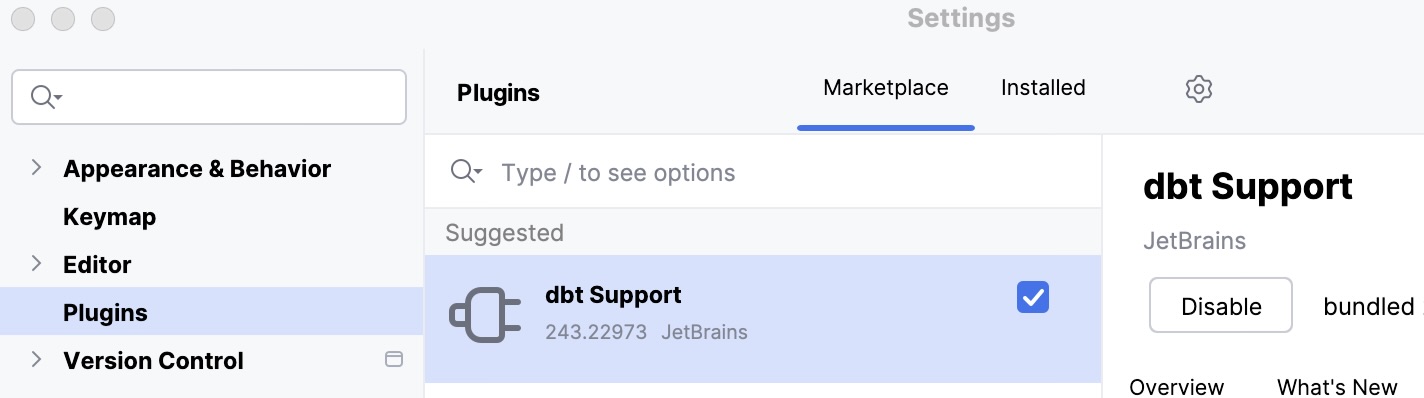
Alternatively, you can open the IDE settings (Ctrl+Alt+S) and go to : If there are plugins suggested for your project, they will be displayed on top of the plugin list, in the Suggested section.
Custom plugin repositories
By default, PyCharm is configured to use plugins from JetBrains Marketplace. This is a public repository where everyone can host their plugins. However, if you develop plugins for internal use only, you can set up a custom plugin repository for them.
For more information about setting up a custom plugin repository, see the IntelliJ Platform SDK documentation.
Once you set up your plugin repository, add it to PyCharm:
Add custom repositories
Open settings or press Ctrl+Alt+S in your IDE and then select .
On the Plugins page, click
Settings and select Manage Plugin Repositories….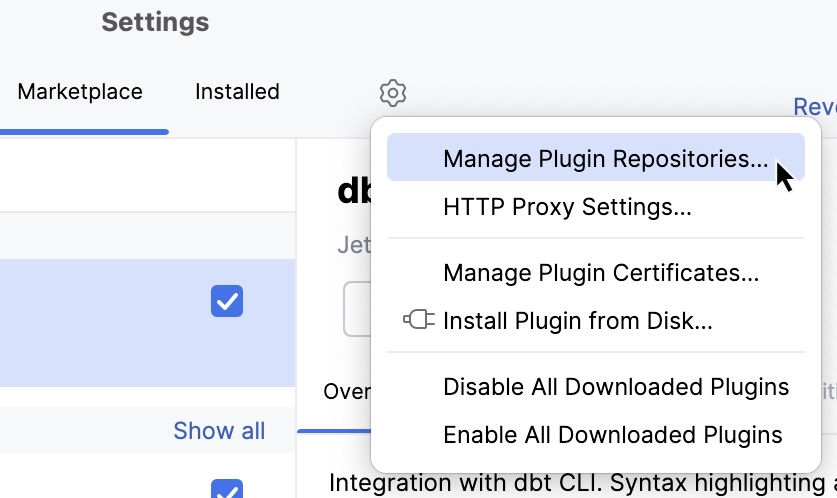
In the Custom Plugin Repositories dialog, click
Add and specify your repository URL. It must point to the location of the XML file that describes your plugin, for example, updatePlugins.xml. The file can be on the same server as your custom plugins, or on a dedicated one.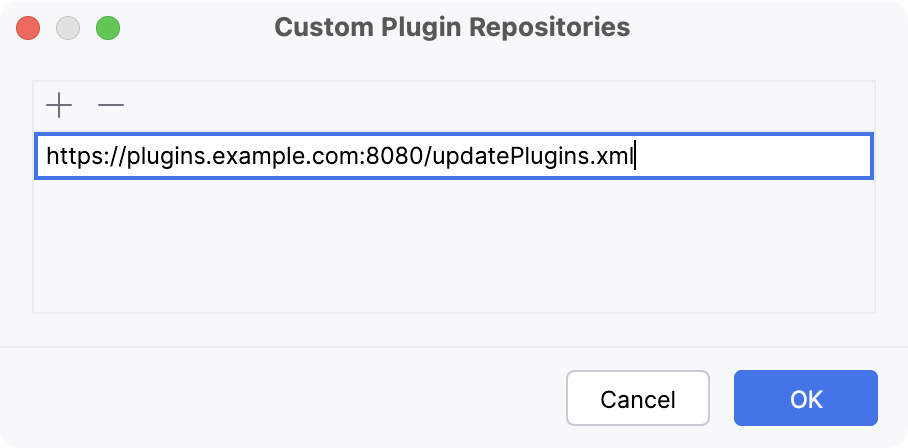
Click OK in the Custom Plugin Repositories dialog to save the list of plugin repositories.
Click OK in the Settings dialog to apply the changes.
When you search for plugins, PyCharm will show you results both from default JetBrains Marketplace and any custom repositories that you specify. To browse only a certain custom plugin repository, type repository: followed by the URL of the repository in the search field on the Marketplace tab of the Plugins page. For example:
Alternatively, you can add your custom plugin repositories using the idea.plugin.hosts property:
Go to .
Add the
idea.plugin.hostsproperty to the platform properties file and specify the URL of the XML file that describes your plugin. For example:idea.plugin.hosts="http://plugins.example.com:8080/updatePlugins.xml"Restart PyCharm.
You may want to replace default JetBrains Marketplace with your custom plugin repository. This can be helpful if you want only your custom repository plugins to be available from PyCharm.
Replace the default plugin repository
Go to .
Add the
idea.plugins.hostproperty to the platform properties file and specify the URL of the application that can properly handle requests from PyCharm, that is, act as the default plugin repository application instead of JetBrains Marketplace.In particular, it should handle the following requests:
Restart PyCharm.
If you replace the default plugin repository, the search field on the Marketplace tab of the Plugins dialog will browse only the plugins in the new default repository and any custom repositories that you add.
Productivity tips
Install plugins from links
Some websites that integrate with the IDE, documentation pages, and tutorials might include links that open your IDE and prompt you to install a plugin. When you click an installation link:
Your IDE opens.
The IDE checks whether the requested plugin is available.
If the plugin is compatible, you are prompted to install or enable it.
After installation, the plugin is ready to use. If a restart is required, the IDE will prompt you.
If multiple plugins are included in the link, you can install them in a single operation.
For example, you can use this link to install the Mercurial plugin.