Apply formatting rules
Auto-format edited and pasted code
When you type code in the editor, ReSharper reformats expressions as soon as you type a semicolon ; and reformats blocks of code as soon as you type a closing brace }. If necessary, you can disable these kinds of auto-formatting on the page of ReSharper options Alt+R, O.
ReSharper also lets you automatically apply your formatting rules when you paste code. By default, pasted code is not fully reformatted but only indentation settings are applied. If you want to fully format pasted code, or disable formatting on paste, use the Auto-format on paste selector on the page of ReSharper options Alt+R, O.
Note that by default, Visual Studio applies its own formatting rules for edited and pasted code. If you are using ReSharper auto-formatting features, we recommend that you disable Visual Studio auto-formatting. You can do it in Visual Studio options (). For C# for example, clear the corresponding check-boxes on the options page.
Reformat existing code
ReSharper provides several ways to reformat existing code. In short, you can always use Control+Alt+L, but there are a few details and alternatives described below.
Reformat existing code in any scope
Select the scope where you want to reformat code:
Make a selection in the editor to reformat code in the selection.
Place the caret anywhere in the file to reformat code in the file.
Select one or more items in the Solution Explorer to reformat code in files under these items and their child items.
Press Control+Alt+L or choose from the main menu. Alternatively, you can press Control+Shift+A, start typing the command name in the popup, and then choose it there.
You can reformat code in the current selection right from the Alt+Enter list.
Reformat current selection
In the editor, select a block of code that you want to reformat.
Press Alt+Enter and choose .

Alternatively, you can use code cleanup to reformat code in any scope. Code cleanup may be helpful if you want to combine code reformatting with applying other code styles.
Reformat code with Code Cleanup
Select the scope where you want to reformat code:
Make a selection in the editor to reformat code in the selection.
Place the caret anywhere in the file to reformat code in the file.
Select one or more items in the Solution Explorer to reformat code in files under these items and their child items.
Do one of the following:
Press Control+Alt+F or choose from the main menu.
Right-click anywhere in the text editor or right-click the selection and choose Cleanup Code in the context menu.
In the Code Cleanup dialog that opens, select the Built-in: Reformat Code profile.
Click Run. ReSharper will reformat code in the selected scope according to your formatting preferences.
If you want to reformat code without opening the Code Cleanup dialog to choose a profile, you can bind the default Reformat Code profile to the silent cleanup and run it by pressing Control+Shift+Alt+F. You can also create a custom cleanup profile that would combine code reformatting with other code style tasks.
You can apply formatting preferences every time you save changes in a file to make sure that your edits always comply with your code style.
Automatically apply formatting preferences on saving changes
Select from the main menu or press Alt+R O.
Go to the cleanup profiles settings page: .
Select the Built-in: Reformat Code profile and click Set as default (the default profile is also used for silent cleanup).
Go to the options page and select Automatically run cleanup when saving a file.
Optionally, you can restrict automatic cleanup to specific files by a file mask.
You can also select Only changed parts of file to make sure that cleanup is applied to the code affected by your changes, and the rest of the code in the file is not modified.
If you choose to clean up only the changed parts of files, you can fine-tune this behavior with the following options:
Perform full cleanup if partial cleanup is not possible — depending on this option, ReSharper will either clean up the whole file or skip the file if it is not possible to restrict the cleanup to the modified parts of the file.
Allow cleanup on save for shared files — use this option to enable or disable partial cleanup in files that are included in the solution several times, such as files from shared projects.
Click Save in the dialog to apply the modifications and let ReSharper choose where to save them, or save the modifications to a specific settings layer by choosing this layer from the Save To selector. For more information, see manage and share resharper settings.
The next time you finish editing and save the file (Ctrl+S) or all files (Ctrl+Shift+S) , ReSharper will clean up the affected files using the selected profile. If the default cleanup profile is not selected, ReSharper will prompt you to choose one of the profiles.
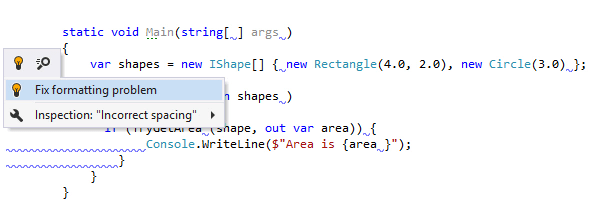
Use code inspection to maintain formatting rules in C# and C++
In C# and C++, code formatting style can be also maintained using the code inspection features. ReSharper provides several dozens of formatting inspections, which are all disabled by default.
Depending on the solution, your codebase may have hundreds of minor formatting violations, like different indent sizes across methods, different case-label indents in switch-statements, missing line breaks, and so on. Enabling code inspections for all those violations could be too noisy.
On the other hand, there are formatting problems that decrease code readability or may influence your understanding of the code. For example:
multiple type members on one same line,
multiple statements on one line,
incorrect indent around child statement,
incorrect indent around declaration braces.
For such formatting problems, we recommend enabling code inspections.
Keep existing formatting
You can apply some formatting rules 'softly', meaning that such rules will be applied when ReSharper produces new code with code completion and code generation features, applies code templates and performs refactorings, but these rules will be ignored when you reformat existing code (for example, with Control+Alt+L).
To keep formatting rules less strict, use the Keep existing..., Keep max blank lines, and Simple wrap preferences for specific contexts. You can check or change the configuration of those preferences in ReSharper options Alt+R, O:

Reformat code with different line-break styles
ReSharper also allows you to use explicit actions rather than formatting rules to reformat similar code in different ways. These actions are most helpful when you opt to keep existing formatting for the related rules. However, if you have stricter settings, then the corresponding explicit formatting actions will not work because such configurations mean that formatting rules should always be applied in the affected contexts. For example, if Keep existing... preferences are disabled, then the wrap/chop/spacious/compact commands described below will render the same result. If some wrapping rules are set to Chop..., code in the corresponding contexts will always be chopped even if you invoke wrap/compact commands.
Wrap and chop long lines
The Wrap long line and Chop long line actions become available when your caret is on a line, which is longer than the allowed maximum line length — you can configure it with the Right margin (columns) preference on the page of ReSharper options Alt+R, O.
You can press Alt+Enter and choose one of the actions to add the necessary line breaks.

The Wrap long line will add just enough line breaks to make sure that the configured line length is not exceeded:
The Chop long line will add line breaks for each entity on the line:
Compact, spacious, and strict format for code blocks
Another set of actions for explicitly reformatting selected code helps you enforce more compact (fewer line breaks) or more spacious (more line breaks) style.
To invoke these actions, select a block of code (you can press Control+W multiple times to select a logical block) , press Alt+Enter and choose .

If you have too many line breaks, which do not help read the code, it may be a good idea to remove them. In the example below, the empty getters and setters do not bring any useful information and can be safely placed on single lines. You can do this with the Compact format (fewer line breaks) action:
You may want to use Spacious format (chop) to make a multi-line code block even easier to read. For example, you may want to add more line breaks in a complicated if statement or a heavy XElement constructor call:
The Strict format action will reformat the selection ignoring any existing line breaks independently of how the Keep existing... preferences are configured; the Reindent only action will fix indentation without applying any other formatting preferences.