HTML
JetBrains Rider brings powerful support for HTML that includes syntax and error highlighting, formatting according to the code style, structure validation, code completion, on-the-fly preview during a debugging session (Live Edit), and much more.
HTML specification is configurable with the Default HTML language level preference on the page of JetBrains Rider settings (Ctrl+Alt+S). By default, specification HTML 5.0 from W3C is assumed.
Creating an HTML file
On the main menu, choose , and then choose HTML File in the pop-up list. JetBrains Rider creates a stub file based on the HTML file template and opens it in the editor.
Generating references in an HTML file
JetBrains Rider can generate <script>, <link>, or <img> tags inside <head>. For <img> tags, JetBrains Rider also generates the width and height attributes.
Select a JavaScript, CSS, or image file in the Project tool window and drag it into the HTML file.
Previewing output of an HTML file in a browser
Select on the main menu and then select the desired browser from the list. To open the JetBrains Rider default browser, select Default.
Alternatively, hover your mouse pointer over the code to show the browser icons bar, and click the icon that indicates the desired browser:

If you have only one browser configured, just press Alt+F2.
Viewing HTML source code of a web page in the editor
Choose .
In the Open URL dialog box that opens, type the URL address of the web page or choose a previously opened URL from the list.
Viewing embedded images
JetBrains Rider offers several ways to view images embedded in an HTML file. You can use navigation to source, open an image in an external graphical editor, or preview images on-the-fly.
To view an image in JetBrains Rider
Select the image file in the Project tool window, and choose on the context menu of the selection or press F4.
Alternatively, place the cursor at the reference to the image in the editor, and choose on the context menu or press F12
To view an image in an external editor
Configure the path to the external editor on the Images page ( for Windows and Linux or for macOS).
Select the image file in the Project tool window, and choose or press Ctrl+Alt+F4.
Extracting an include file
You can extract a fragment of HTML or CSS code into a separate include file. Entire JavaScript code blocks inside a <script> tags can also be extracted.
In the editor, select the code block to be extracted and choose on the main menu or on the context menu of the selection.
In the Extract Include File dialog box that opens, specify the name of the target include file in the Name for extracted include file text box.
In the Extract to directory text box, specify the directory to store the include file in. Leave the predefined directory or choose another one.
Click OK, when ready. JetBrains Rider extracts the selected source code into the specified file in the target directory and generates the corresponding reference in the source file.
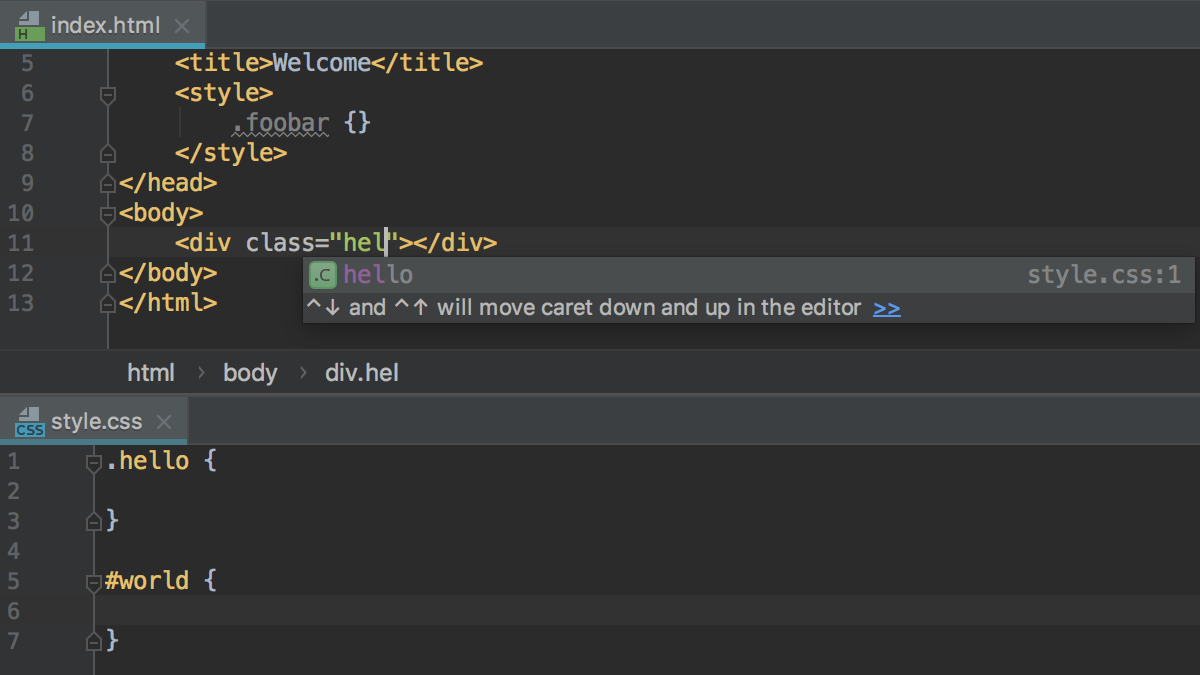
Project-wide code completion for CSS classes
JetBrains Rider first suggests classes and ids from the style tag and linked files. But if no matching results are found, JetBrains Rider also suggests symbols defined in all stylesheet files in the project. 