Differences viewer for database objects
The differences viewer shows you differences and similarities between two database objects. In JetBrains Rider, you can compare two database objects of the same type. For example, you can compare two schemas, two tables, or two routines. JetBrains Rider shows you the differences in the structures of these two objects.

The Compare Content action compares the output of tables, views, and materialized views. To find this action, select two objects in the Database tool window () and right-click the selection. Also, you can double-click these objects and then compare them from the editor.
You can compare the contents of two objects that belong to different types. For example, the output of a table and a materialized view.

Compare database objects
See the description of the dialog controls in the reference section.
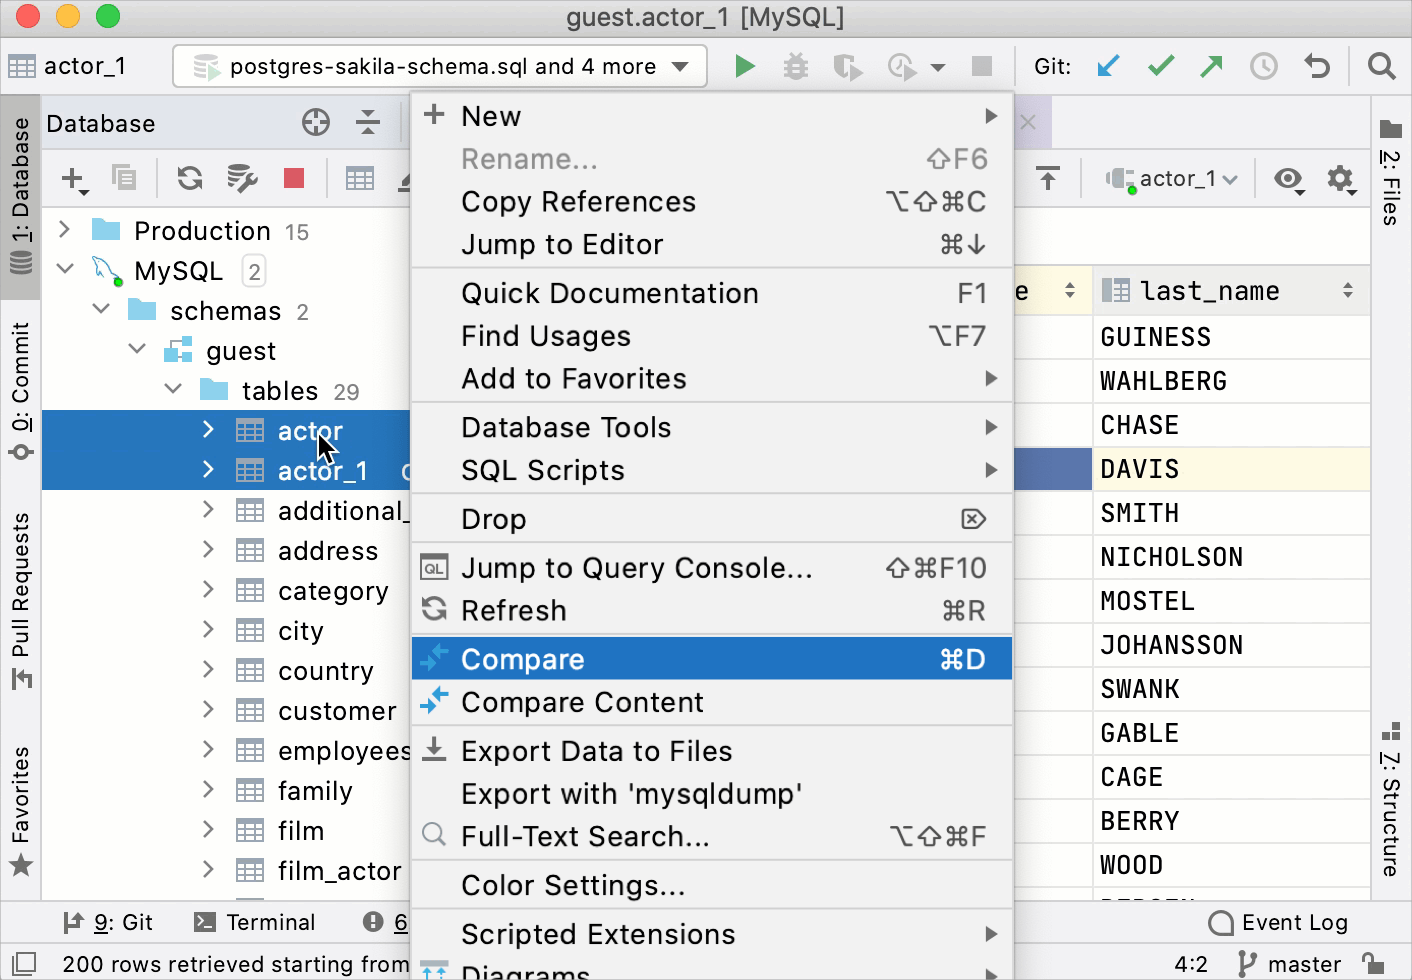
In the Database tool window (), select two objects of the same type. For example, two tables.
Right-click the selection and navigate to Compare. Alternatively, press Ctrl+D.
Generating migration statements
You can generate a set of statements for making data definitions in the left-hand and the right-hand parts identical. Use one of the following buttons in the upper part of the view:
Apply Right to the Left: generate statements for the left-hand object.
For example, you can apply the state of the
actor_1table to theactortable (see the following screenshot). The following statements are generated for theactortable:alter table actor modify actor_id smallint unsigned null; alter table actor modify first_name varchar(45) null; alter table actor modify last_name varchar(45) null; alter table actor modify last_update timestamp null; alter table actor drop column new_column; drop index idx_actor_last_name on actor; alter table actor drop primary key;Apply Left to the Right: generate statements for the right-hand object.
For example, you can apply the state of the
actortable to theactor_1table (see the following screenshot). The following statements are generated for theactor_1table:alter table actor_1 modify actor_id smallint unsigned auto_increment; alter table actor_1 modify first_name varchar(45) not null comment 'First name in uppercase'; alter table actor_1 modify last_name varchar(45) not null; alter table actor_1 modify last_update timestamp default CURRENT_TIMESTAMP not null on update CURRENT_TIMESTAMP; alter table actor_1 add new_column int null; create index idx_actor_last_name on actor_1 (last_name); alter table actor_1 add primary key (actor_id);
Statements are generated for the items marked with
 ,
,  ,
,  , and
, and  . If you do not want to generate statements for an item, right-click the * cell and select Set Do Nothing.
Compare the contents of tables, materialized views, and views
The Compare content action compares the output of tables, views, and materialized views. Description of Tolerance and Detect column insertion is available in the following chapter.
By default, when you issue a query, the number of returned rows is limited to 500. This limitation is introduced to avoid an overload (for example, when your SELECT statement returns one million rows). To increase the number of compared rows, configure the Limit page size to parameter.
Compare the contents of two tables from the Database tool window
By default, when you issue a query, the number of returned rows is limited to 500. This limitation is introduced to avoid an overload (for example, when your SELECT statement returns one million rows). To increase the number of compared rows, configure the Limit page size to parameter.
In the Database tool window (), select two tables.
Right-click the selection and navigate to Compare Content.
If needed, change the value of the Tolerance parameter in the comparison dialog. The Tolerance parameter defines a maximum number of differences that are allowed between two result sets. For example, if you want to consider two rows as equal if their data differs in a single column, enter
1in the Tolerance field.
Compare the contents of two tables from the editor
Double-click two tables that you want to compare.
In the editor, click the Compare Content button (
 ) and select the second table.
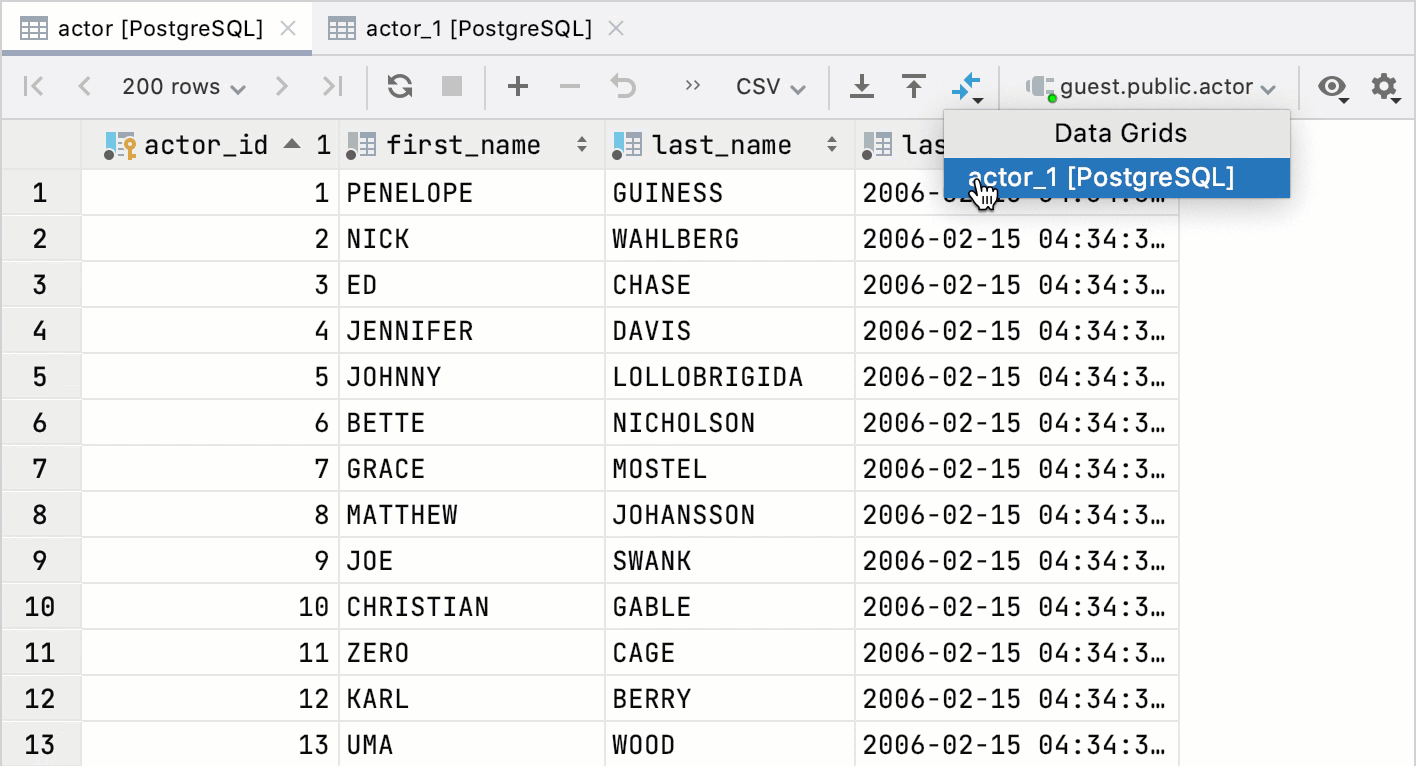
Controls of the difference viewer for database objects
Toolbar
| Icon | Tooltip and shortcut | Description |
|---|---|---|
| F7 Shift+F7 | Navigate between next and previous differences. When the last or first difference is hit, JetBrains Rider suggests to press F7/ Shift+F7 once more and compare other items. | |
| Refresh F5 | Refresh the contents of the differences viewer. | |
| Show new items on left side | Display items that are present in the first of the compared objects and are missing in the second one in the left pane. | |
| Show difference | Display items that are present in both database objects but have different contents. | |
| Show equal files | Display items that are present in both objects and have the same contents. | |
| Show new files on right side | Show the items that are present in the second of the compared objects and are missing in the first one. | |
| Compare New Files with Each Other | Compare items that are considered different. Sometimes an item exists in one object, and another item with a similar name in the other object. For example, you have the last_name column in the Also, there might be a situation when you think an item was renamed but is otherwise identical to an item in another object. You can compare these two items, one of which is present in the right object and another in the left, even though such items are treated as different entities. To compare these items, select them in the left and the right pane and click the Compare New Files with Each Other icon 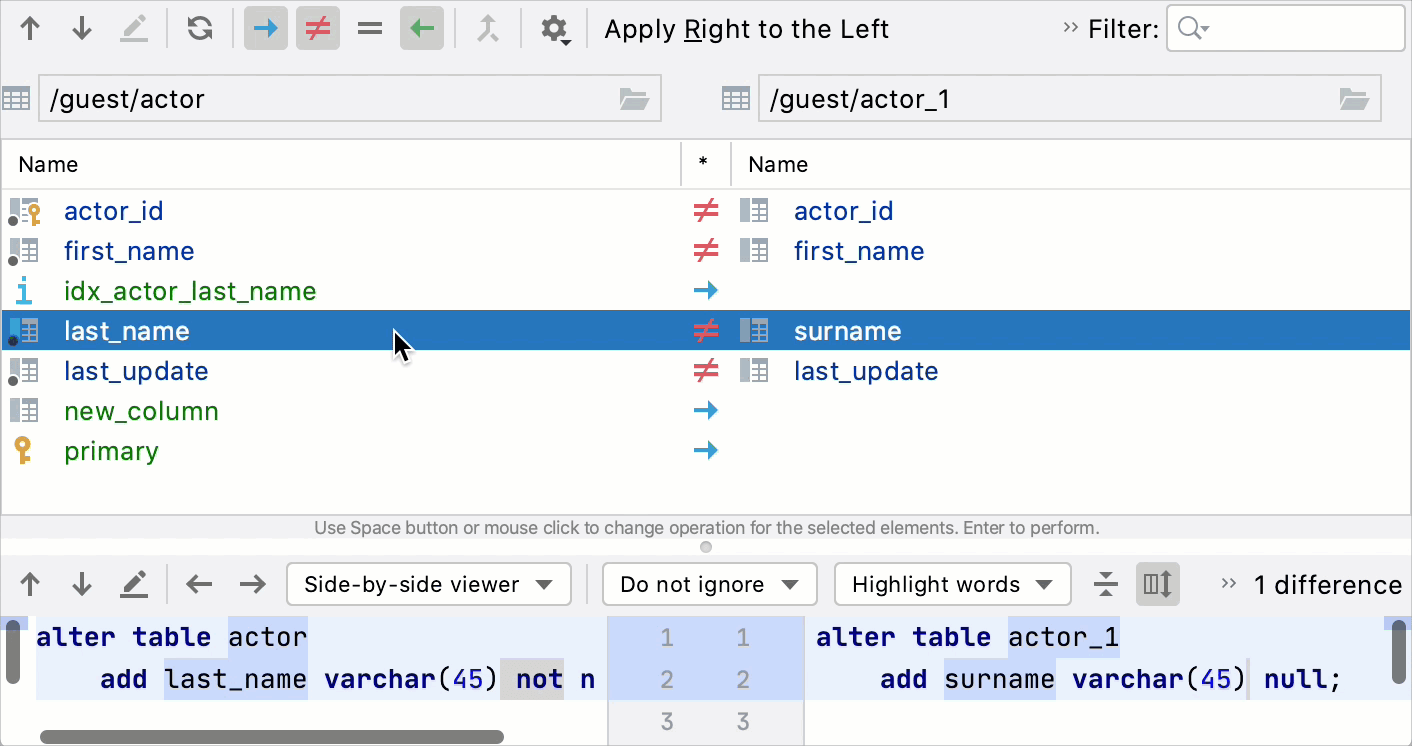 To revert this operation, right-click the pair and select Cancel Comparing New Files with Each Other.  | |
| Settings | Select options that you want to ignore during the comparison. All the options are enabled by default. | |
Apply Right to the Left Apply Left to the Right | Generate migration statements. For more information about generating migration statements, see Generating migration statements. | |
| Help F1 | Open a browser and show the corresponding help page. | |
| Filter | Filter items in comparing objects. You can type a table name and filter all the items according to this name. Use the asterisk wildcard (*) to replace any number of arbitrary characters. To apply the filter, press Enter. |
Comparison table
The table lists the items that meet the comparison requirements set by the filter and toolbar buttons.
| Item | Description |
|---|---|
| Name | The column lists names of object items. |
| * | The column lists actions that will be applied to the pair of items in one row.
|
Differences pane
The differences pane is displayed only for items that have the same names and exist in both objects. If an item exists only in one object, the pane displays the contents of the selected item.
To switch between the panes of the differences viewer, press Ctrl+Tab. The active pane has the cursor.
| Item | Tooltip and Shortcut | Description |
|---|---|---|
Previous Difference / Next Difference Shift+F7/ F7 | Jump to the next or previous difference. | |
Previous / Next Alt+Left/ Alt+Right | Compare the next pair of items. | |
Jump to Source F4 | Open a definition of the selected object in the active pane in the editor. The caret is placed in the same position as in the Differences Viewer. | |
| Viewers | Select a viewer mode: side-by-side or unified. The side-by-side mode has two panels, and the unified mode has one panel. | |
| Whitespace | Define how the differences viewer should treat whitespaces.
| |
| Highlighting mode | Select the way differences are highlighted. The available options are:
| |
| Collapse unchanged fragments | Collapse all the unchanged fragments in both items. The amount of non-collapsible unchanged lines is configurable in the Diff & Merge settings page. To open the Diff & Merge page, open settings by pressing Ctrl+Alt+S and navigate to . | |
| Synchronize scrolling | Click this button to scroll both differences panes simultaneously. If this button is released, each of the panes can be scrolled independently. | |
| Settings | Open a list of available settings. These commands are also available from the context menu of the differences viewer gutter. | |
| Help F1 | Open a browser and show the corresponding help page. | |
Controls of the difference viewer for contents
In the differences viewer for contents, you can use the same sorting functionality that is available in the data editor. For more information about sorting columns, see Sort data.
Detect column insertion
When the tables have a different number of columns, extra columns in the table with more columns are ignored. If the Detect column insertion option is on, the most different columns are ignored. On the following picture, the first column in the second table is the most different and so it is ignored. As a result, the second row is shown as containing the same data.

If the option is off, ignored are the last of the columns. On the following picture, the last column in the second table is ignored. So all the rows are shown as containing different data.

Tolerance
The Tolerance parameter defines how many columns might differ to consider two rows equal. For example, if you set Tolerance to one, rows that differ in one column are considered equal.

With tolerance set to zero, such rows are considered different.