Tailwind CSS
JetBrains Rider integrates with Tailwind CSS providing Tailwind CSS syntax support, completion for Tailwind CSS class names, as well as CSS functions and directives, preview of the resulting CSS on hover, and Tailwind CSS-specific inspections.
Tailwind CSS support in JetBrains Rider is backed by the Tailwind CSS Language Server that detects the Tailwind CSS package and, based on the package version, searches for a Tailwind CSS-specific project configuration:
With Tailwind CSS 4, the Language Server looks for a CSS file with an
@import "tailwindcss"directive.With Tailwind CSS 3, the Language Server looks for a tailwind.config.js file.
JetBrains Rider is shipped with a bundled Tailwind CSS Language Server. However, it is recommended that you keep the Language Server up to date by downloading the latest server version and specifying the path to it on the page as described in Configure the Tailwind CSS Language Server.
Before you start
Make sure you have Node.js on your computer. Configure a Node.js runtime in your project as described in Configuring a local Node.js interpreter, in Using Node.js on Windows Subsystem for Linux, or in Configuring remote Node.js runtimes.
Make sure the CSS and Tailwind CSS bundled plugins are enabled in the Installed tab of the Settings | Plugins page as described in Managing plugins.
Make sure, the
tailwindcsspackage is listed as a dependency in your package.json and you project is configured correctly, via an@import "tailwindcss"directive in a CSS file (TailwindCSS 4) or in a tailwind.config.js (TailwindCSS 3) file.Alternatively, install and configure Tailwind CSS as described below.
Set up Tailwind CSS in ASP.NET or Blazor project
Find detailed instructions on the Tailwind CSS official website.
Open the embedded Terminal (Alt+F12) and type:
npm install -D tailwindcssOpen the CSS file where you want to use Tailwind CSS and add the following
importstatement to it:@import "tailwindcss";Restart the Tailwind CSS Language Server. To do that, click the Language Services widget on the Status bar (the icon is either
 or
or ), and then click
next to Tailwind CSS.
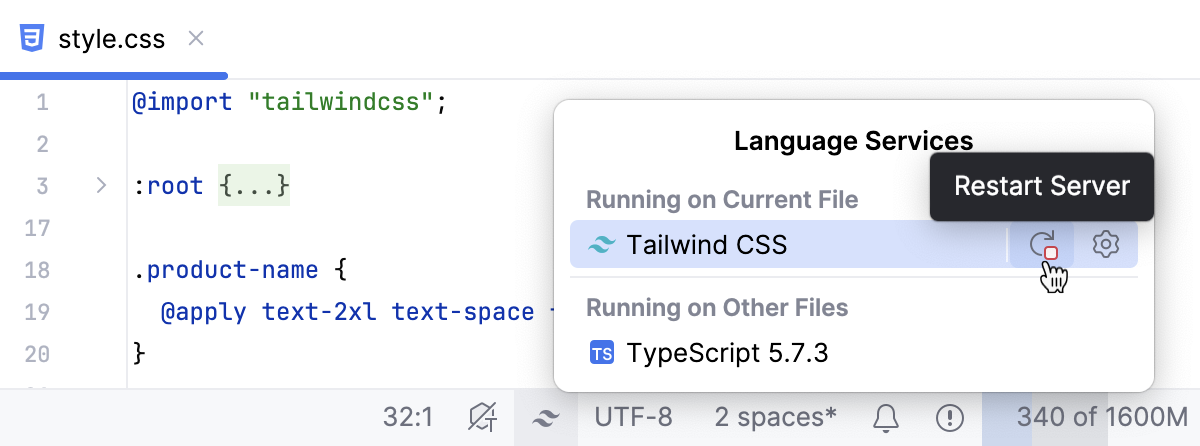
Open your HTML file and add a link to the CSS file under the
<head></head>tag, for example,<link href="/src/styles.css" rel="stylesheet">
Configure the Tailwind CSS Language Server
Tailwind CSS support in JetBrains Rider is backed by the Tailwind CSS Language Server that detects the Tailwind CSS package and, based on the package version, searches for a Tailwind CSS-specific project configuration:
With Tailwind CSS 4, the Language Server looks for a CSS file with an
@import "tailwindcss"directive.With Tailwind CSS 3, the Language Server looks for a tailwind.config.js file.
JetBrains Rider is shipped with a bundled Tailwind CSS Language Server. However, it is recommended that you keep the Language Server up to date.
You can also customize the default Tailwind CSS configuration options.
Install the latest version of the @tailwindcss/language-server package globally. To do that, open the embedded Terminal (Alt+F12) and type:
npm install -g @tailwindcss/language-serverOpen the Settings/Preferences dialog (Ctrl+Alt+S) and go to .
In the Language Server field, specify the path to the
@tailwindcss/language -serverpackage.Optionally, customize the default Tailwind CSS configuration options. For example, you may want to tune the HTML attributes list for which to provide class completions or use an experimental regular expression format to specify additional places where completions should be triggered.
In the Configuration area, update the properties to add configuration options.
Complete Tailwind CSS classes
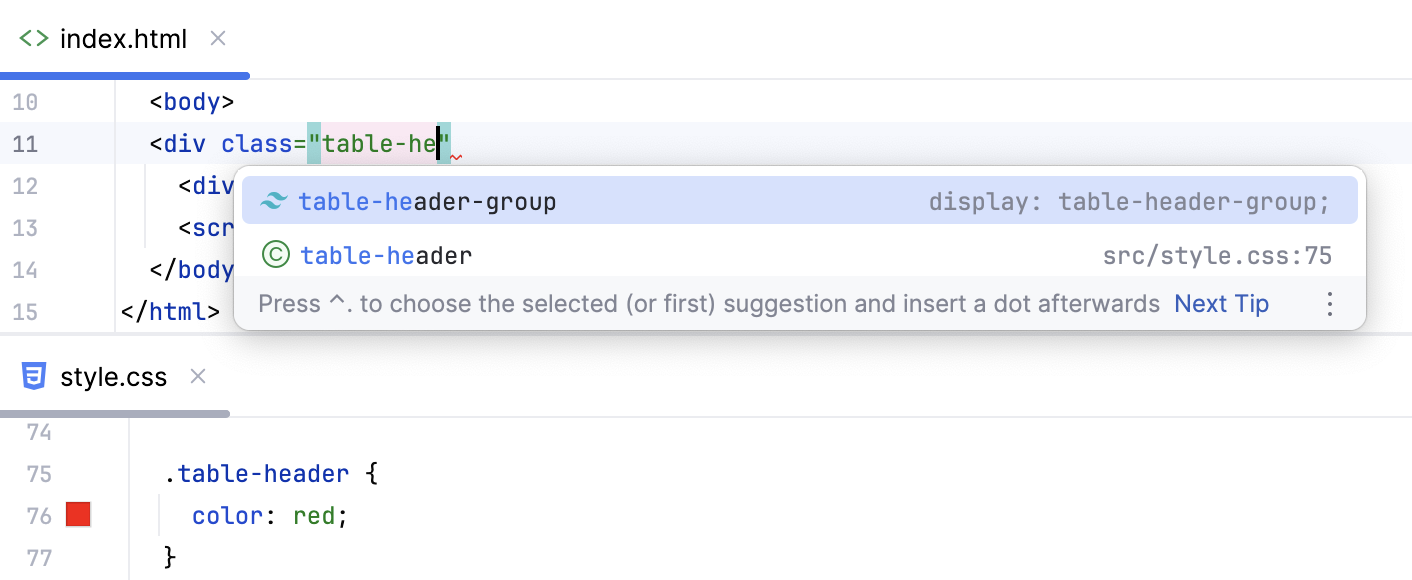
The Tailwind CSS Language Server provides autocompletion for Tailwind CSS classes in various contexts, for example, in HTML and in CSS files after @apply directives, in JavaScript string literals, etc. In completion lists, suggestions from the Language Server are marked with ![]() while
while ![]() indicates suggestions from classes that are already used in the project.
indicates suggestions from classes that are already used in the project.
Preview the resulting CSS
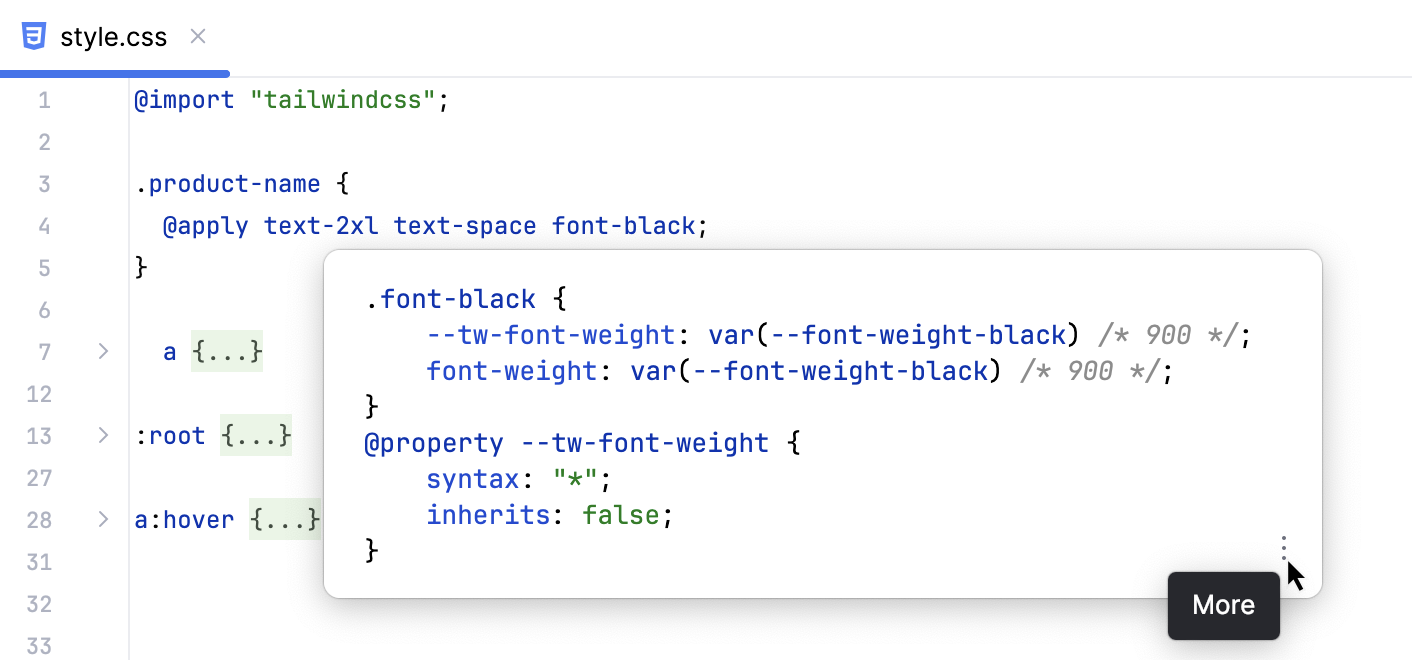
When you hover over a Tailwind CSS class in an HTML or CSS file, JetBrains Rider shows you a Documentation popup with the preview of the resulting CSS. To view the preview in a tool window, click and select Show in Documentation Tool Window.
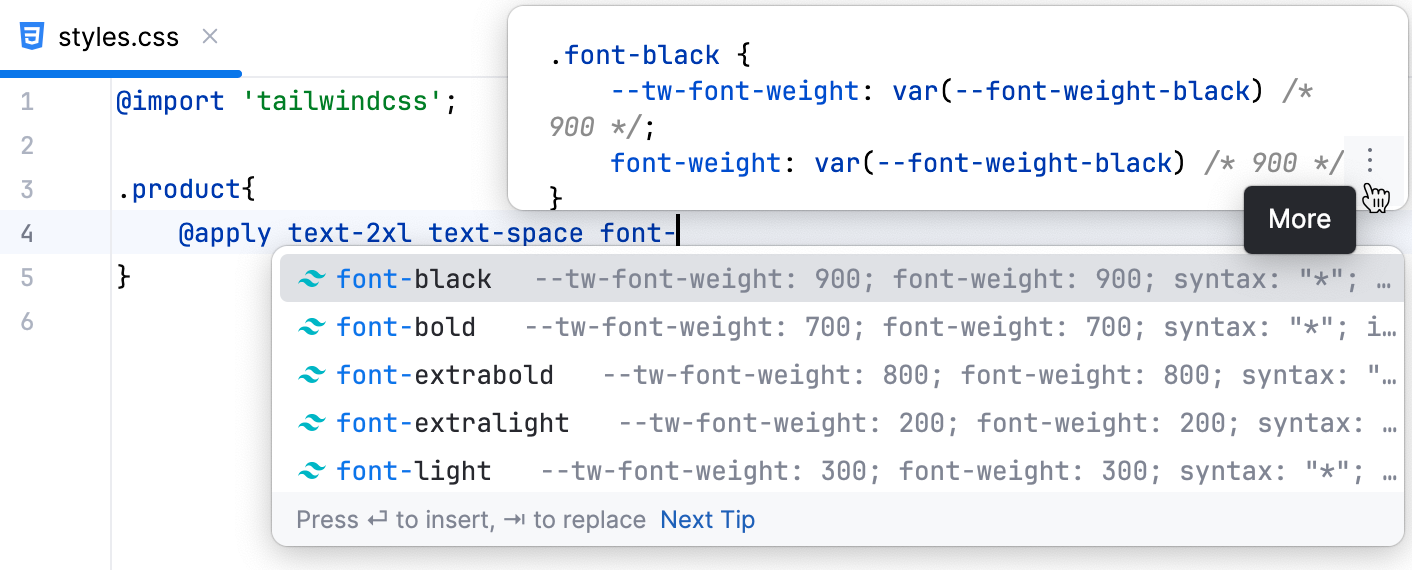
The preview is also shown in the Documentation popup (Ctrl+Q) when you complete your code.
Tailwind CSS support in .slim, .haml, and other files
JetBrains Rider can provide completion for Tailwind CSS classes within other filetypes, for example, in .slim, .haml, .jte, .kte, etc.
Press Ctrl+Alt+S to open settings and then select .
In the
includeLanguagesproperty, add contexts where you want to get completion for Tailwind CSS classes. Use the following format:"slim": "slim""haml": "haml""jte": "html""kte": "html"
To enable Tailwind CSS class completion in Slim templates and .haml files, set the
emmetCompletionsproperty totrue.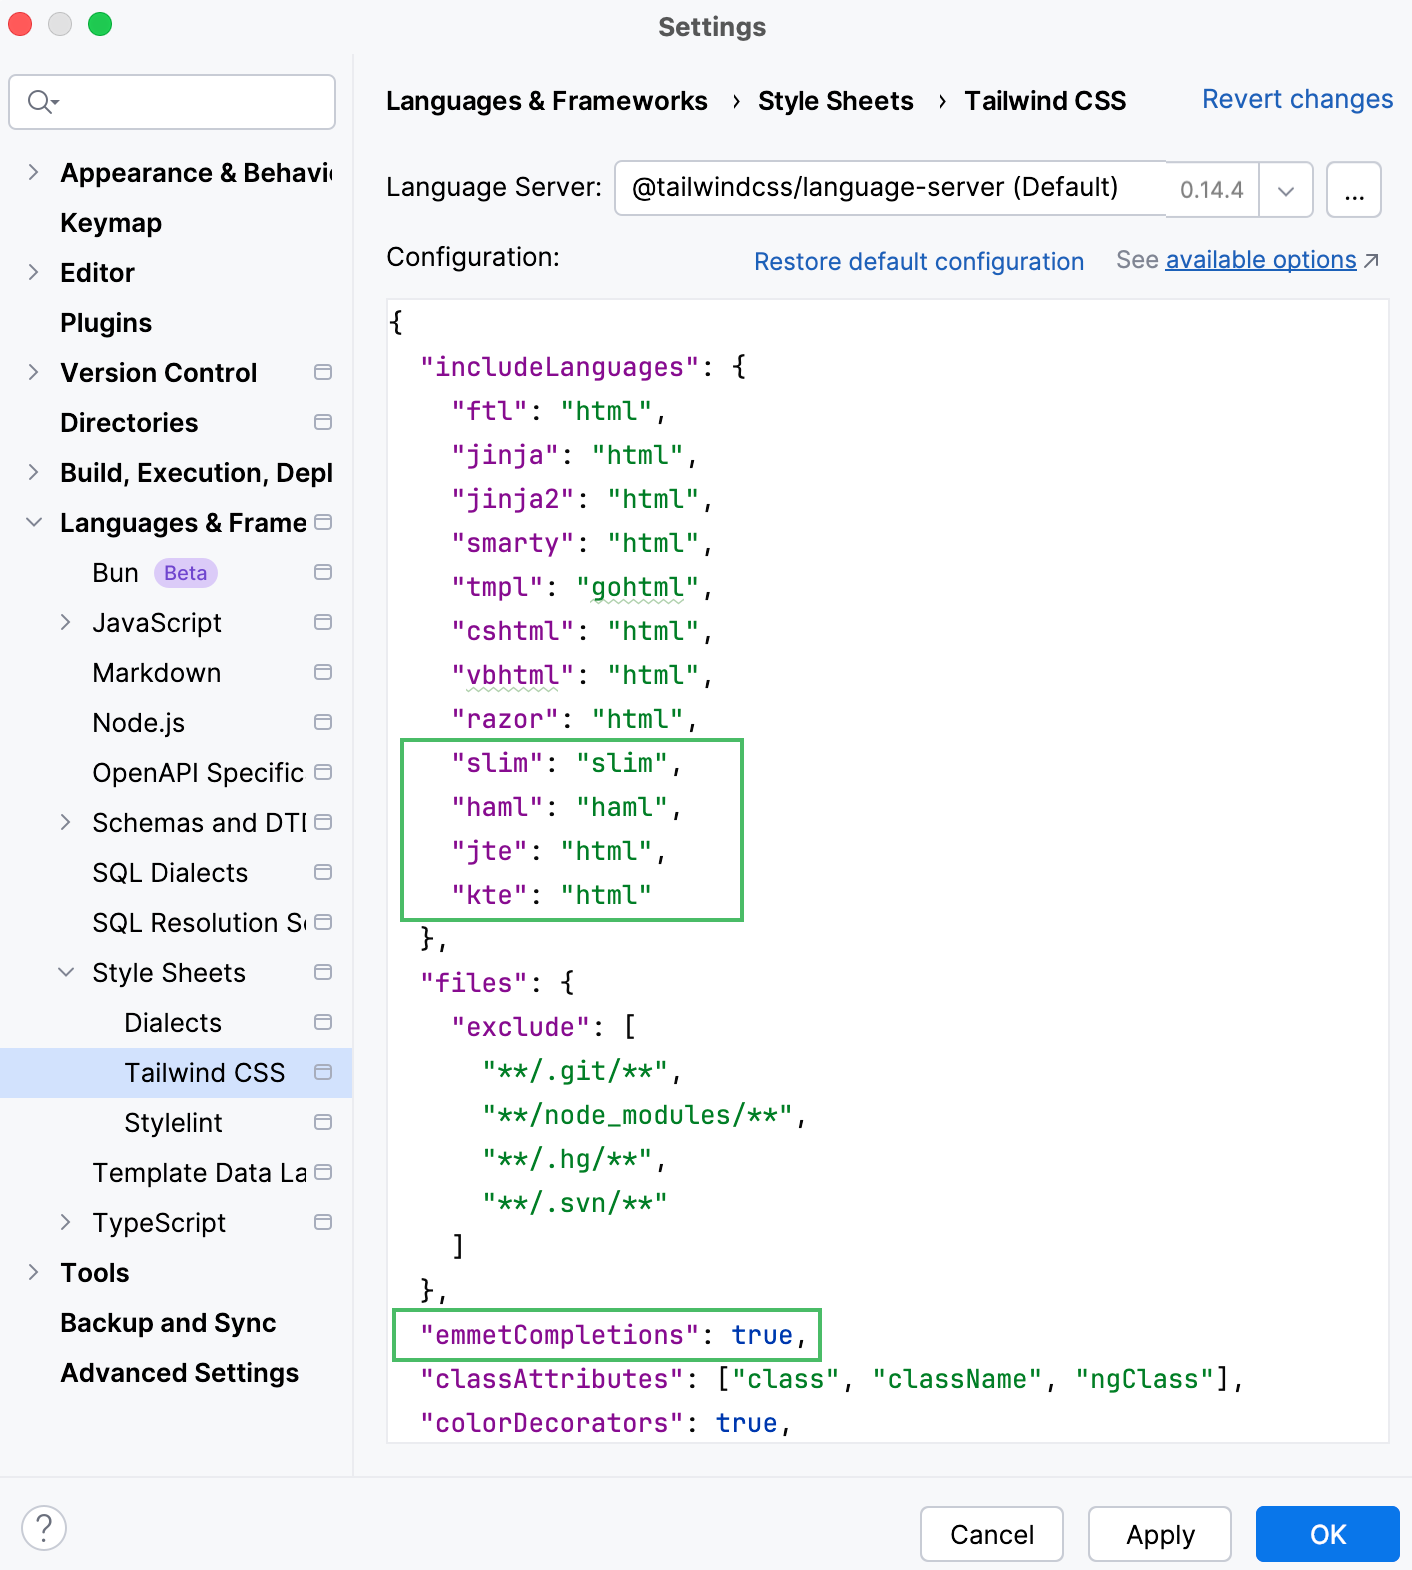
Troubleshooting
If you stop getting Tailwind CSS-specific coding assistance, that may happen for one of the following reasons:
- Tailwind CSS Language Server is outdated
Install the latest version of the Tailwind CSS Language Server as described above.
- The CSS file with @import 'tailwindcss' is corrupted
If a CSS file with @import 'tailwindcss' is corrupted, it may break server initialization. In that case, an error indicator
is shown on the Status bar and also next to the Tailwind CSS item.
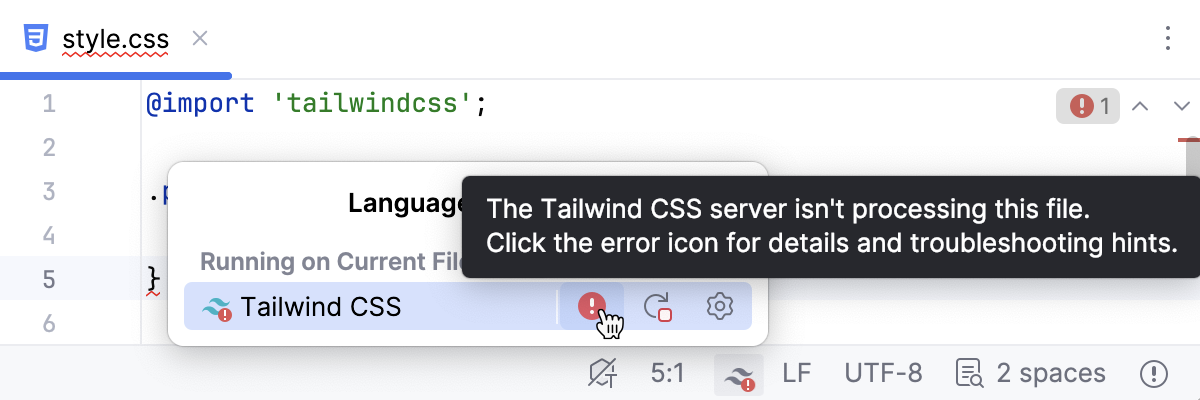
To fix the problem:
Try commenting out everything except
@import "tailwindcss", save the CSS file, and restart the server.Remove comments, save the file, and restart the server step by step until you locate the fragment where the problem is.
- The Tailwind CSS Language Server does not start
When such errors occur, the Language Services widget in the Status bar and the Tailwind CSS item are marked with
.

Most often, such errors are caused by incorrect Node.js configuration. To solve the problem:
Press Ctrl+Alt+S to open settings and then select .
Make sure that Node.js is selected in the Preferred runtime field.
Make sure that the path to your Node.js runtime is correct.
Learn more from Configuring Node.js interpreters.