Part 4. Using the Navigation Bar
In this section:
- Introduction
- How to make the Navigation Bar visible?
- How to open a file using the Navigation Bar ?
- What to do if the list of files in the Navigation Bar is too long ?
- Is the right-click menu available on the Navigation Bar?
- Summary
- What's next?
Introduction
The Navigation Bar is an alternative to the Project tool window that can be percieved as a means of navigation. For example, to open a file, locate it in the Project tool window and press F4, use the right-click menu to find usages or find in path etc.
However, the Project tool window eats the screen space. So to save the screen space for the editor, let's get rid of the Project tool window.
In this tutorial we'll navigate through the source code using the Navigation Bar only! So let's close the Project tool window by clicking the button ![]() :
:

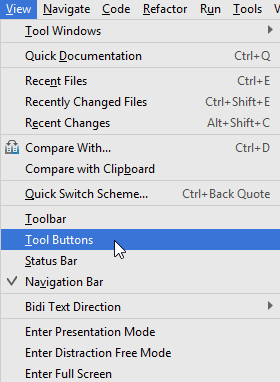
Then, (to completely get rid of it) clear the check command on the menu:
How to make the Navigation Bar visible?
If you don't see the Navigation Bar, make it visible. To show the Navigation Bar, do one of the following:
- On the View menu, select the check command Navigation Bar.
Now you see the Navigation Bar on top of RubyMine window, under the title bar and the main menu:

- Press Alt+Home.
The Navigation Bar shows in the middle of the editor pane (or RubyMine window, if no files are open in the editor). To hide the Navigation bar, press Escape.
Now see the buttons starting at the project root, all the way down to the currently-visible file.
How to open a file using the Navigation Bar ?
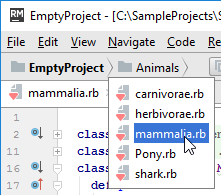
If you want to open the file Mammalia.rb in the folder Animals, you simply click Animals on the Navigation Bar, and then click mammalia.rb:
However, you can use the keyboard only, not using your mouse pointer. This is how it's done:
- Show the Navigation Bar (Alt+Home).
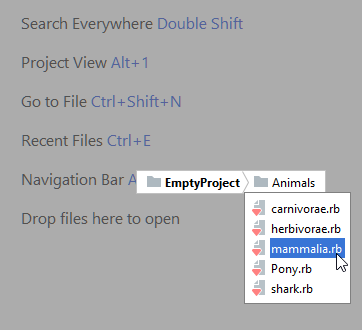
- Press Enter. The nested directories and files are shown, and you should use the arrow keys to navigate through the list. Repeat this step as required.
- Finally, press Enter to open the desired file:
What to do if the list of files in the Navigation Bar is too long ?
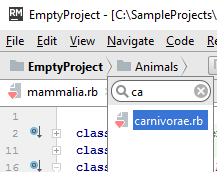
If you have too long a list of files in your folder, then all its content won't fit in the Navigation Bar window. In this case, use speed search - it works in the Navigation Bar as well as in the tool windows.
Just click the desired folder in the Navigation bar and start typing:
Is the right-click menu available on the Navigation Bar?
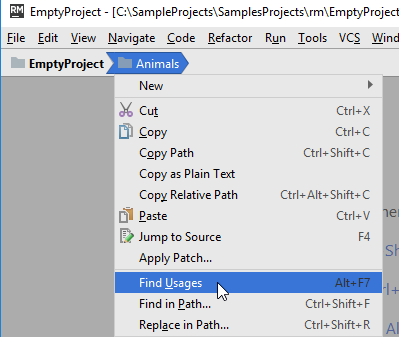
The answer is yes. Right-click the desired button in the Navigation Bar and choose any of the available commands.
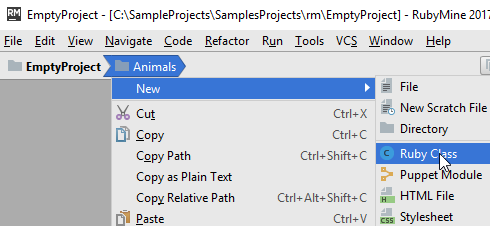
For example, RubyMine allows easy creation of a file or folder from the Navigation Bar. To do that, right-click the desired folder button in the Navigation Bar, and choose one of the available file types on the menu:
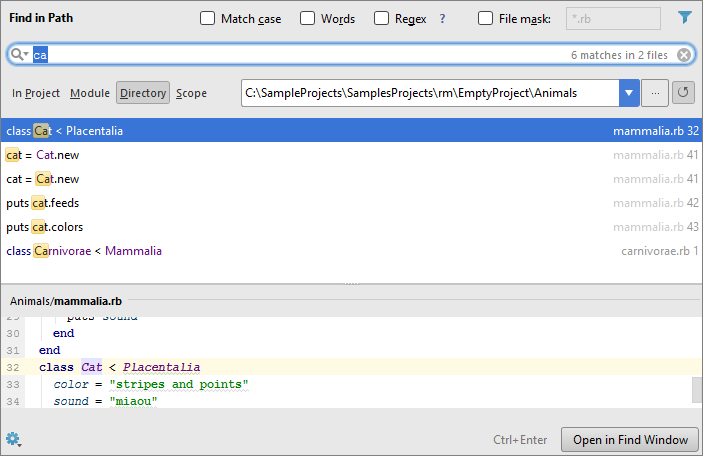
Also, use the command Find in Path. Right-click the folder Animals in the Navigation Bar, choose Find in Path, type ca in the dialog box that opens, and observe results:
Summary
This tutorial is over - congrats! Here you've learned how to:
- Navigate around your source code using the Navigation Bar only.
- Use the keyboard shortcuts for navigation purposes.
What's next?
Let's proceed with Part 5 and learn how to navigate between the various parts of RubyMine's UI. Learn also how to do that using the keyboard shortcuts.