Part 5. Navigating to the UI Elements
In this section:
Introduction
In this tutorial, we'll explore the various types of navigation between the elements of RubyMine's UI.
Using the Switcher
The Switcher works same as Alt+Tab/ ⌘+Tab and is an extremely efficient pop-up.
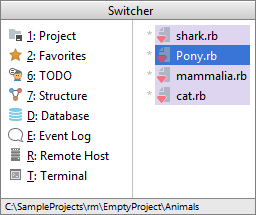
To show this pop-up, press Ctrl+Tab - and keep holding Ctrl. As soon as you release the Ctrl button, the Switcher disappears, leaving you with what you've just selected.
While the Switcher is visible, move around with the arrow keys, or Tab/ Shift+Tab to move forward/backwards through the Switcher columns.
Jumping between RubyMine's components
Suppose you've selected a class in the editor, and would like to find it in the Project view. This is how it's done...
Place the caret at the class Mammalia.rb, and press Alt+F1 (). From the list of available components, choose Project View, and then Project.
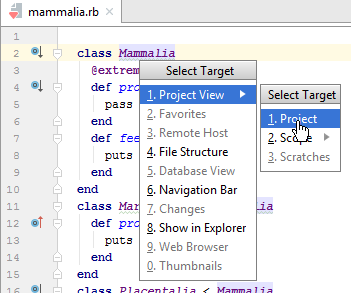
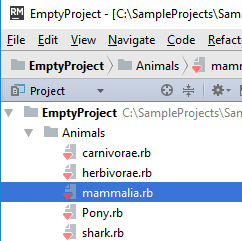
The caret resides at the class mammalia.rb in the Project view:
If you want to find the opened in the editor file in the File Explorer/Finder, you can also do it using Select In.... Just select the option Reveal in Finder (for macOS) or Show in Explorer (for Windows and *NIX):
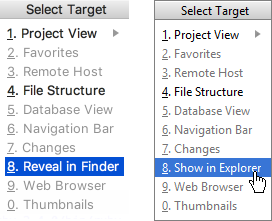
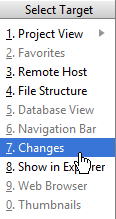
Finally, suppose that a file opened in the editor has some changes that should be pushed to a Git repository. To jump to the Version Control tool window, again press Alt+F1 and choose Changes in the list of components:
Summary
This tutorial is over - congrats! Here you've learned how to:
- Work with the Switcher.
- Use Select In... functionality to find a file in the Project or Version control tool windows, or to find a file in the Explorer/Finder.