Creating Models
In this section:
Generators for creating models
RubyMine makes it possible to stub out models using the Rails generators:
- The model generator creates a model class that defines a database table, and a migration that defines columns within the table. Besides that, a unit test and a test fixture are created.
- The scaffold generator creates a model class that defines a database table, and a migration that defines columns within the table. Besides that, a controller, forms and the other necessary resources are created.
To create a model
- Do one of the following:
- In the dialog box that opens, start typing the generator name, for example,
modelorscaffold.
Note that for creating models in diagram, only
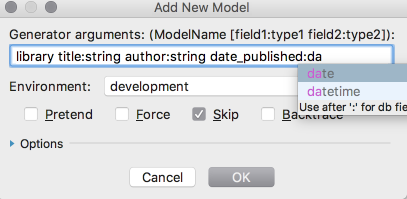
modelgenerator is used. - Type the name of a model to be created, in singular, and the list of fields and their types. Note that code completion is available for the field types.

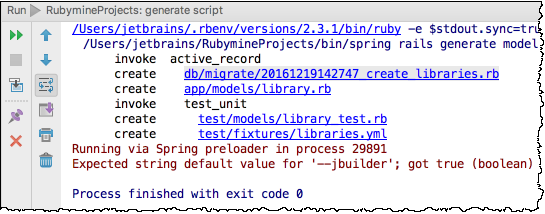
A migration is created.
- Create columns in the table. To do that, you have to run the migration in one of the following ways:
- Run migration as a script with the temporary run configuration. Click the migration hyperlink in the console to open the migration file in the editor:

Then press Ctrl+Shift+F10. In this case the current migration runs in the
developmentenvironment, or in the one defined in theenvironment.rbfile. - Run migration as a Rake task. For example, you can choose on the main menu, and start typing
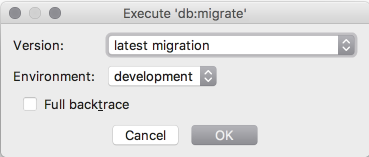
mig. Then selectdb:migratefrom the suggestion list.In the Execute db:migrate dialog box, select the desired migration, and the environment that defines the database to which the migration will be applied.

The results is shown in the Run tool window:

Once a model is created, you can view all the fields declared in this model, in the Rails view, and navigate from these table column to the corresponding methods.
- Run migration as a script with the temporary run configuration. Click the migration hyperlink in the console to open the migration file in the editor: