Part 3. Finding Usages
Introduction
Finding usages is another search facility, which can also be perceived as the navigation feature. Suppose, you want to find all the usages of a certain class or method across the entire project, which could amount to a huge number of occurrences!
This is where RubyMine comes to help. Let's see how.
Finding all usages
For example, let's find all usages the class Mammalia, and then navigate to one of the encountered usages.
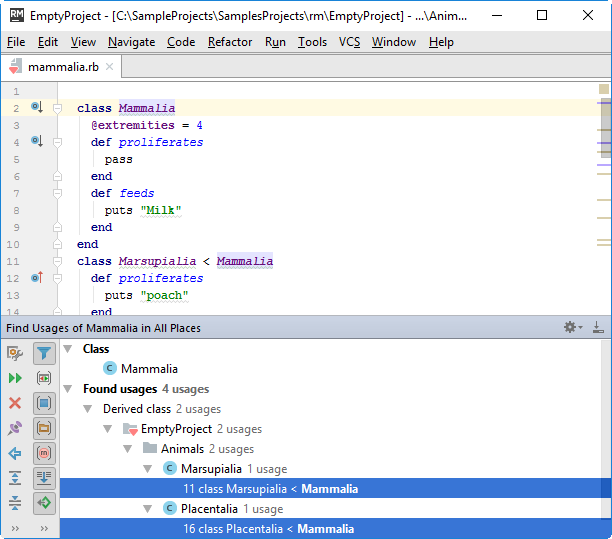
Place the caret at the class declaration, and press Alt+F7. The encountered usages of this class show up in the Find tool window:
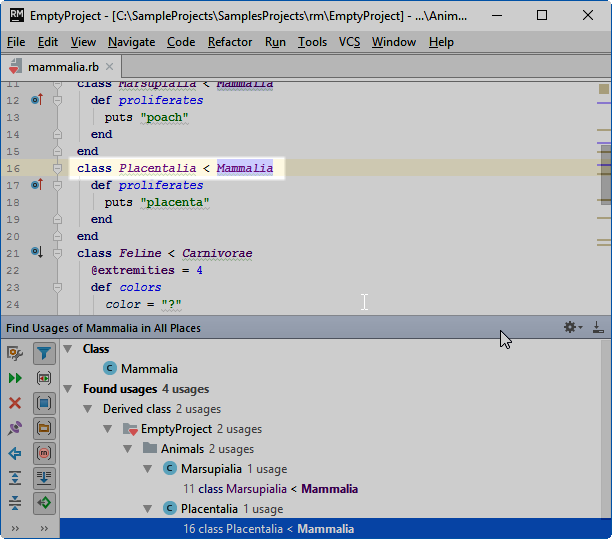
If you select one of the usages in the Find tool window and press Enter, RubyMine will open the corresponding file in the editor, with the caret at the class Mammalia usage:
By the way, you can find this action on the context menu of any symbol; for example, on the context menu of the class Mammalia.
This way you can find usages of a symbol with the default settings (across the entire project, overwriting the contents of one tab in the Find tool window).
Other types of finding usages
Besides finding usages, RubyMine provides several other actions performing actually the same task, but in a slightly different manner. All these actions are available on the main menu ():
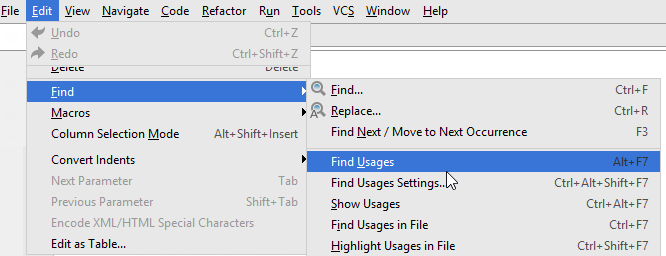
Some of these actions are mapped to the keyboard shortcuts by default. Let's explore them in details.
Changing search options, or finding usages via dialog
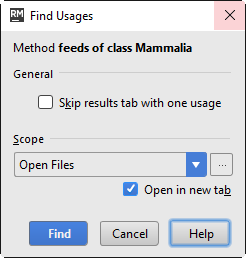
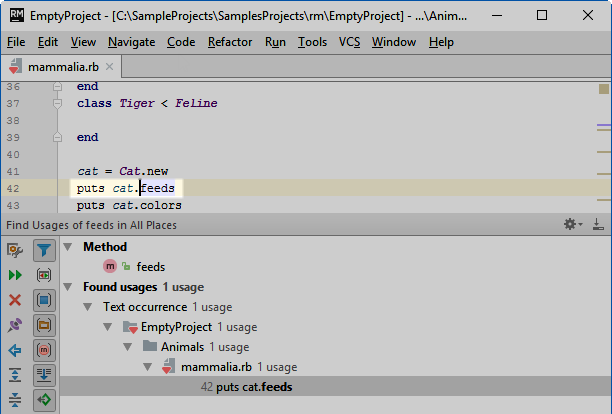
Place the caret at the declaration of a symbol, for example, at the declaration of the method feeds, and press Ctrl+Shift+Alt+F7. You see the dialog box, where you can change the search options. For example, you prefer to look for usages of a method in the open files, and open each search results in a new tab in the Find tool window:
Click the button Find: RubyMine shows a new tab in the Find tool window, with the found usage of the method feeds. Double-click this entry (or use the arrow keys and Enter ) - RubyMine opens the editor with the caret at the corresponding usage:
Viewing usages as a list
In some cases, viewing usages in the Find tool window seems inconvenient. RubyMine provides an action that shows usages as a pop-up list. For example, let's see the usages of the class Placentalia.
So place the caret at the class declaration, and then press Ctrl+Alt+F7 (or choose on the main menu):
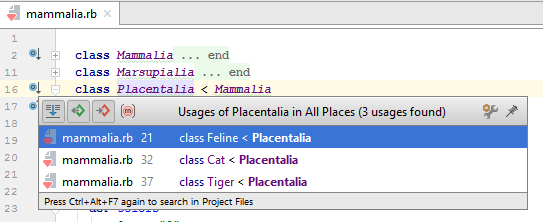
If you select one of the usages using the arrow keys and Enter (for example. class Feline), RubyMine will jump to the corresponding usage and place the caret at it.
Now look at the toolbar of the pop-up window. If you still think that it would be nice to view usages in the Find tool window, click the pin button ![]() . The pop-up list disappears, and instead you see the search results in the well-known Find tool window.
. The pop-up list disappears, and instead you see the search results in the well-known Find tool window.
Finally, if you are not happy with the search options, click ![]() to show the dialog box.
to show the dialog box.
Viewing usages in the current file
To view usages of a symbol in the current file, press Ctrl+Shift+F7 (or choose on the main menu):
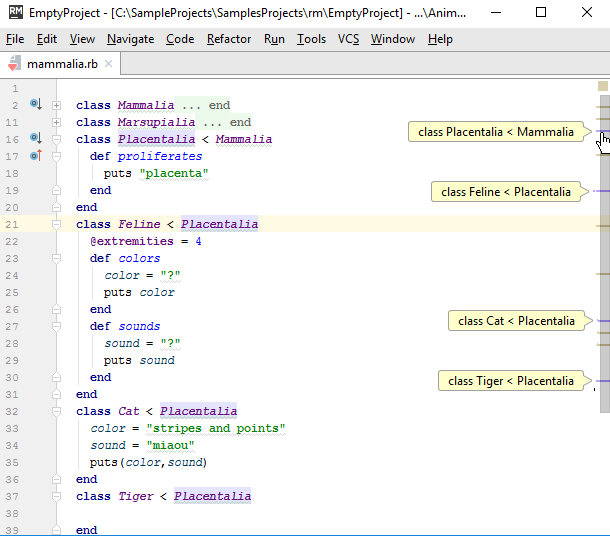
As you see, each of the usages is marked with a stripe in the right gutter. When you hover your mouse pointer over such a marker, a balloon with the description of a specific usage appears. If you click the stripes, you can navigate from one usage to another.
Summary
This tutorial is over - congrats! Here you've learned how to:
What's next?
Let's proceed with Part 4 and see how to navigate using Navigation bar only.