Using Docker Compose as a Remote Interpreter
Prerequisites
Make sure that the following prerequisites are met:
- Docker is installed. You can install Docker on the various platforms, but here we'll use the mac OS installation.
Note that you might want to repeat this tutorial on different platforms; then use Docker installations for Windows and Linux (Ubuntu, other distributions-related instructions are available as well).
-
Before you start working with Docker, make sure that the Docker Integration plugin is enabled. The plugin is bundled with RubyMine and is activated by default. If the plugin is not activated, enable it on the Plugins settings page of the Settings / Preferences Dialog as described in Enabling and Disabling Plugins.
-
Before you start working with Docker, make sure that the Ruby Docker plugin is enabled. The plugin is bundled with RubyMine and is activated by default. If the plugin is not activated, enable it on the Plugins settings page of the Settings / Preferences Dialog as described in Enabling and Disabling Plugins.
Preparing an example
We'll use the same example as for Docker. So go to , then point to :
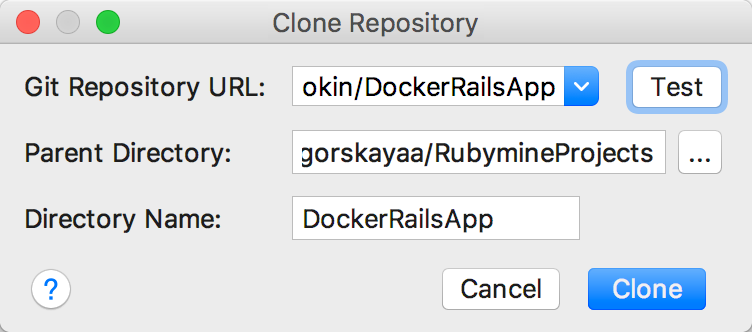
Enter the repository's URL and click Test just in case... Your connection is successful! Next, click Clone to download the project from GitHub. RubyMine asks you whether you want to open the directory - answer Yes.
Adding files for Docker and Docker-Compose
In the Project tool window, right-click the project root and choose (Alt+Insert), enter the file name (here Dockerfile) and enter the following code:
FROM ruby:2.3.3
RUN apt-get update -qq && apt-get install -y build-essential libpq-dev nodejs
RUN mkdir /myapp
ADD Gemfile /myapp/Gemfile
ADD Gemfile.lock /myapp/Gemfile.lock
RUN bundle install
ADD . /myapp
Next, repeat the same steps for the docker-compose.yml file and enter the following code:
version: '2'
services:
  web:
    build: .
    command: bundle exec rails s -p 3000 -b '0.0.0.0'
    volumes:
      - .:/myapp
    ports:
- "3000:3000"Configuring Docker
Now that we've prepared our example, let's configure Docker. To do that, open Preferences dialog (Ctrl+Alt+S or click ![]() on the main toolbar) and click the Docker page under the Build, Execution, Deployment node. Click
on the main toolbar) and click the Docker page under the Build, Execution, Deployment node. Click ![]() to create a Docker server.
to create a Docker server.
Accept the suggested default values:
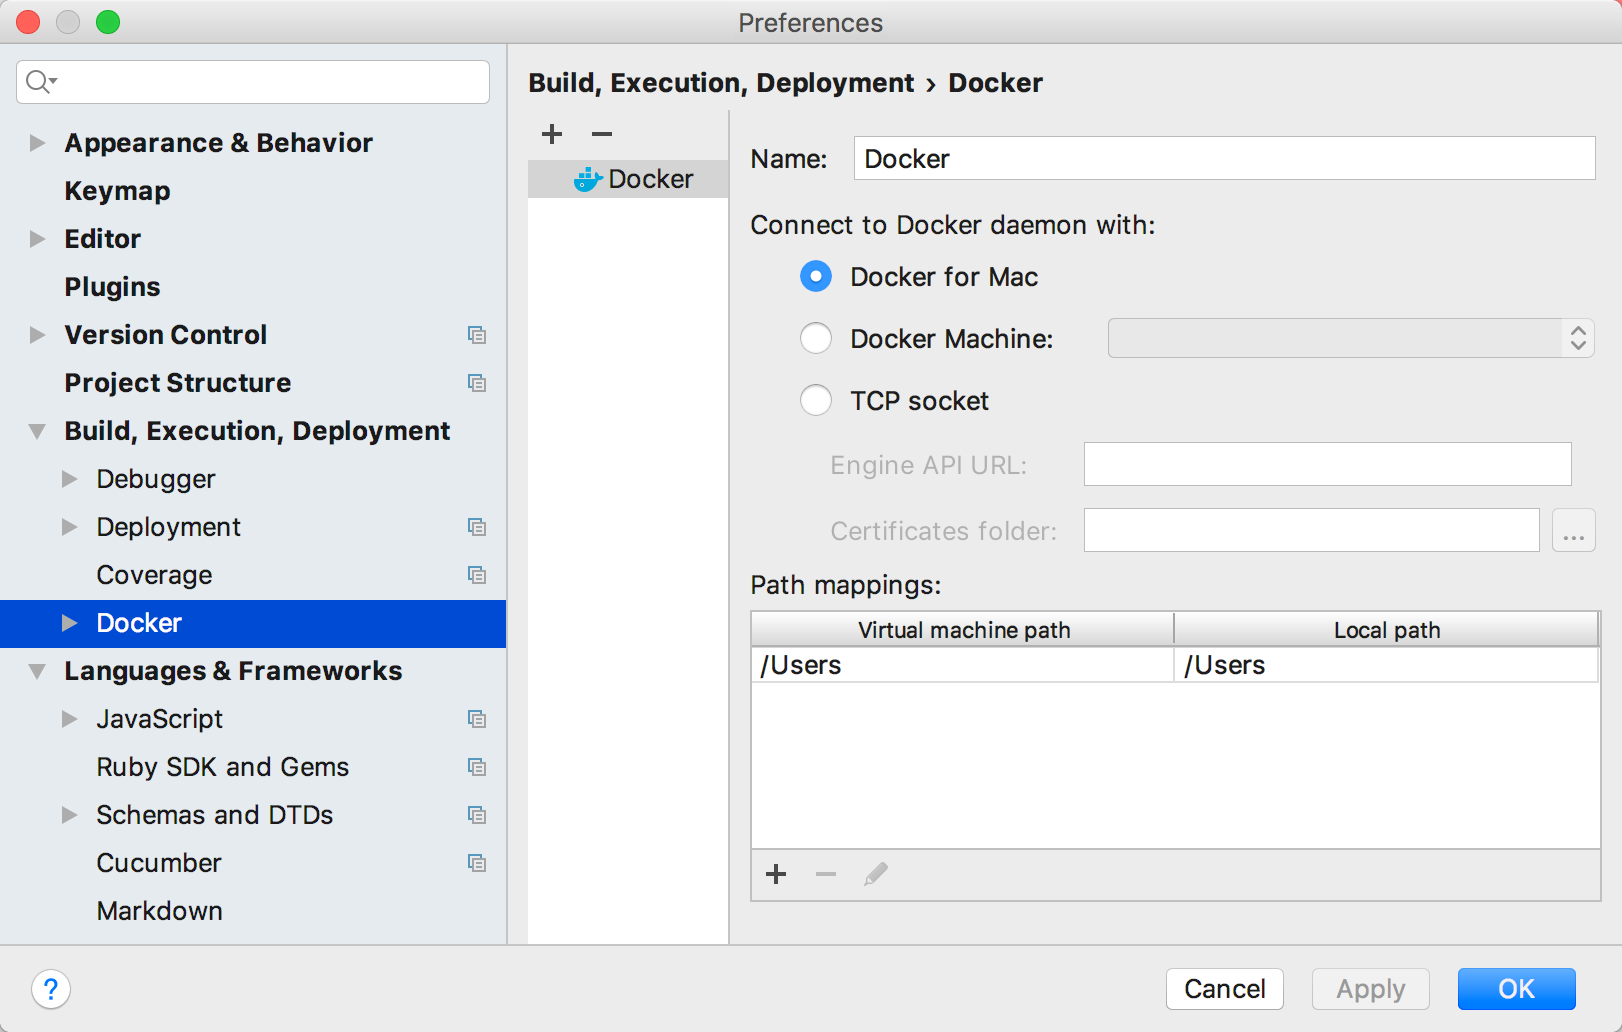
For macOS, select Docker for Mac to connect to the Docker daemon. Next, apply changes.
Configuring Docker Compose as a remote interpreter
Let's now define a remote interpreter based on Docker-Compose.
To do it, open the Preferences dialog (press Ctrl+Alt+S or click ![]() on the main toolbar).
on the main toolbar).
Next, click the Ruby SDK and Gems page. On this page, click + and choose New remote...:
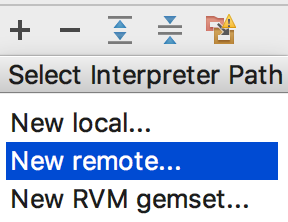
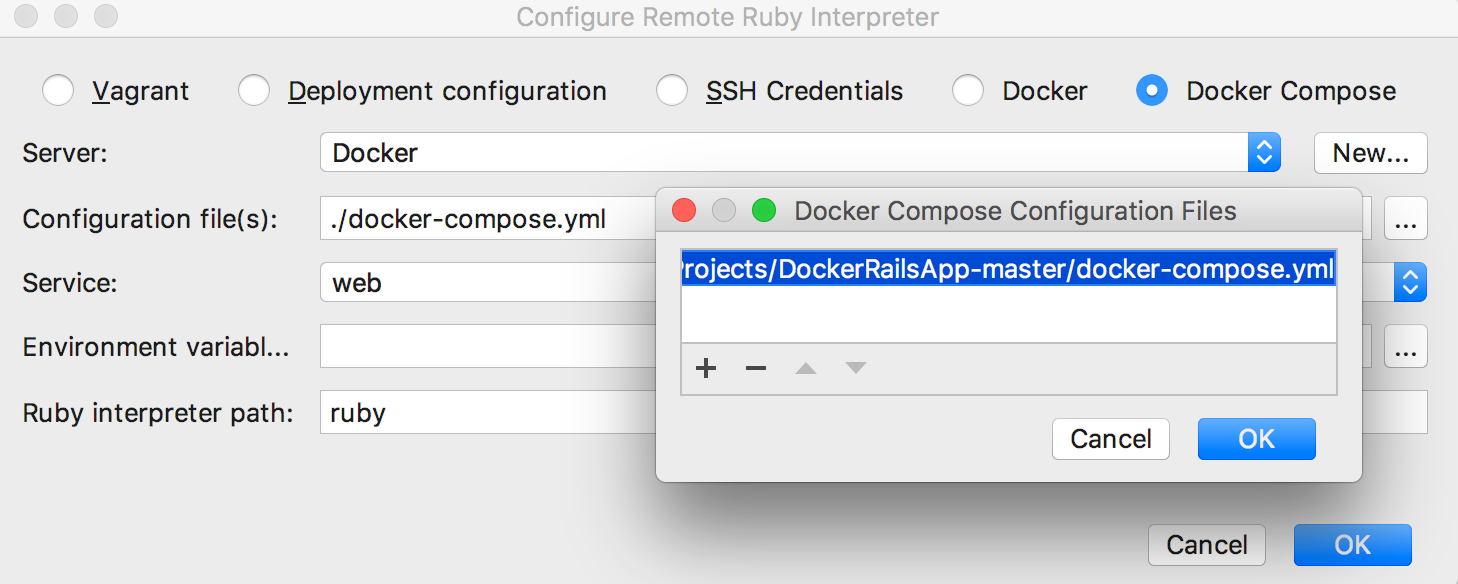
In the dialog box that opens, select the Docker-Compose option, from the drop-down list select the Docker server (if the desired server is missing, click New...), Docker-Compose configuration file (here docker-compose.yml, click the browse button to find the required file), choose the desired service (here web) and Ruby interpreter path:
Then you can take your time waiting while RubyMine gets your remote interpreter and installs the required gems:

Finally, in the Preferences dialog, Ruby SDK from the Docker-Compose container should appear in the list of available SDKs, marked with the 'Remote' prefix. Later, you have to select this new interpreter as the project interpreter, by selecting the corresponding radio-button:
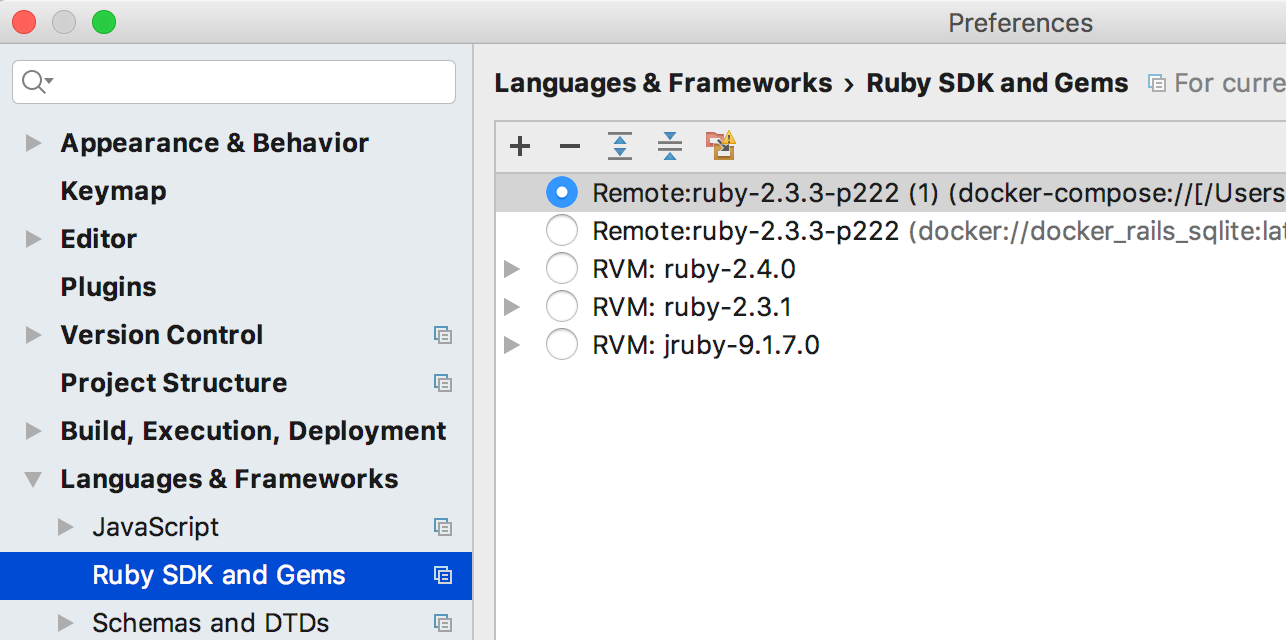
Apply changes and close the dialog.
Using the Docker tool window
Since we've configured Docker, the Docker tool window button appears at the bottom of RubyMine's main window:

Click this button and see your container running:

Running your application under Docker-Compose
First, as we are executing a Rails application, we must run a migration.
To do that, on the main menu choose and in the dialog box that opens, start typing migrate:

Choose db:migrate. The migration is executed.
Next, create the ordinary Rails server run/debug configuration. To do that, on the main menu choose ; in the dialog box that opens click + and select Rails.
Launch this configuration ():

To see output in your web browser, follow the link:
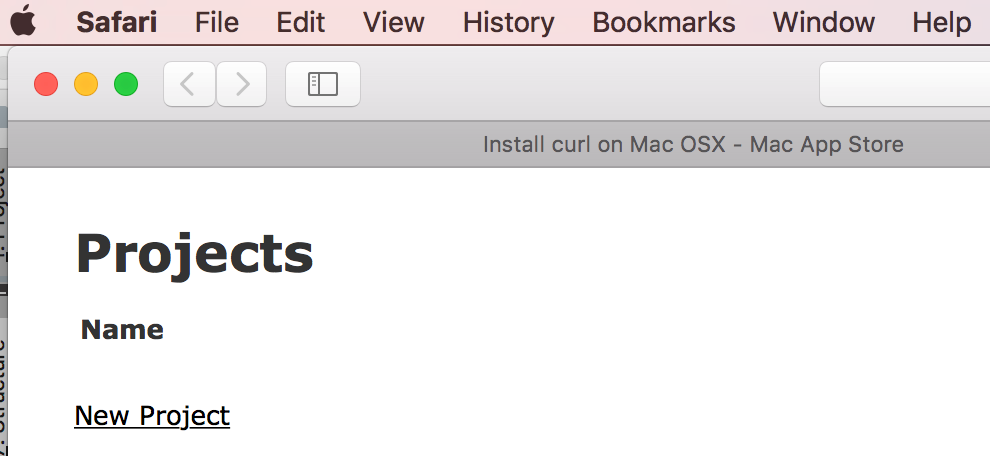
Debugging your application under Docker-Compose
These gems should be written to the Gemfile of your project:
gem 'debase'
gem 'ruby-debug-ide'
For example:
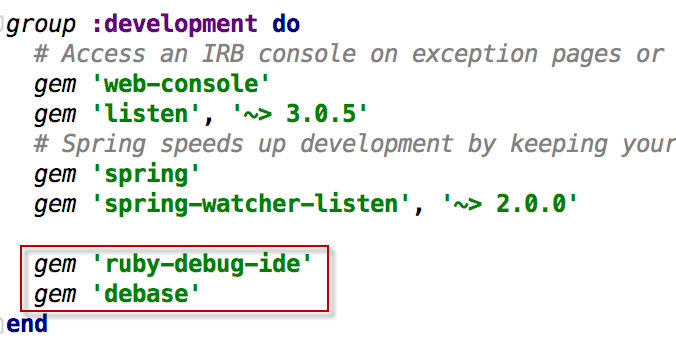
Next, execute the docker build . command. By the way, RubyMine suggests an intention action in the Gemfile for running the docker build . command (if these gems are missing):
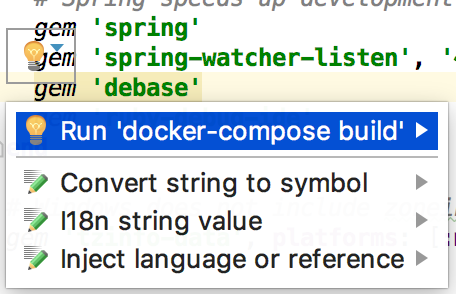
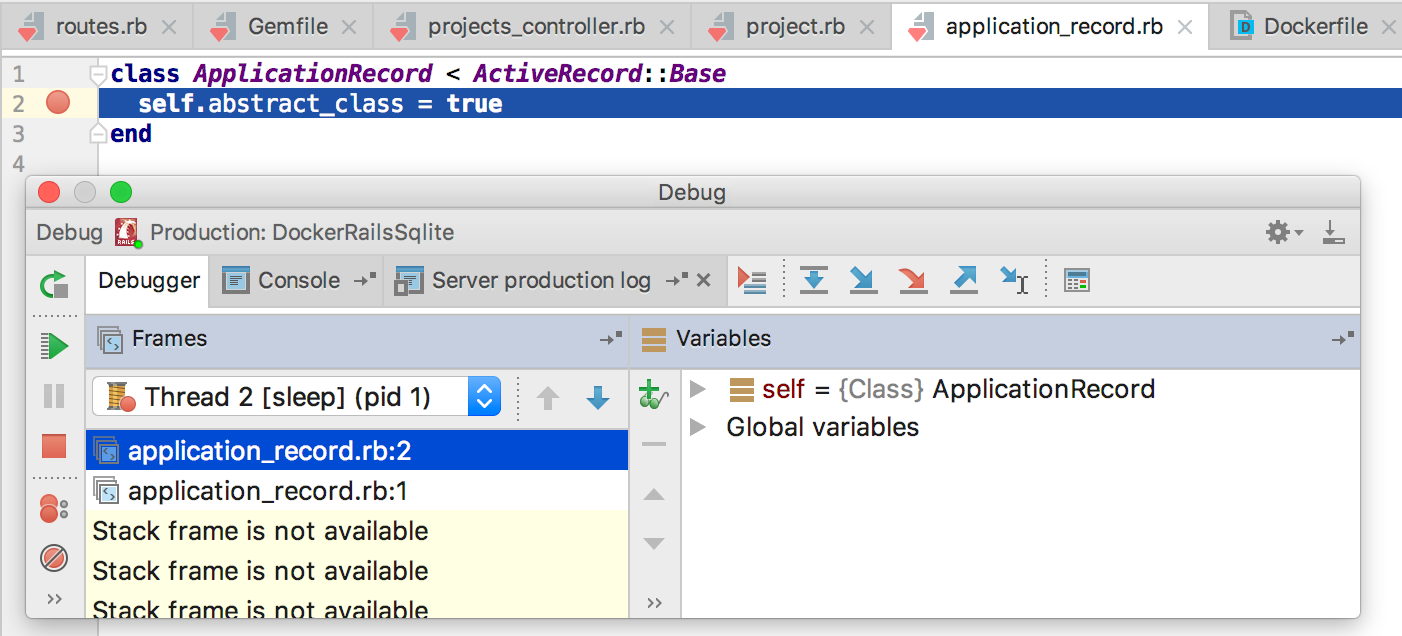
Next, let's launch our Rails application in the debug mode under Docker Compose. To do that, set a breakpoint and on the main menu choose , or just click ![]() next to the run/debug configuration drop-down with the
next to the run/debug configuration drop-down with the Production:DockerRailsSQLite run/debug configuration selected:

The result is shown below:
Summary
Let's summarize what has been done with the help of RubyMine:
- We downloaded a Rails application from GitHub and opened it.
- We added specific Docker Compose files to our project.
- We configured a remote interpreter based on Docker Compose.
- We ran our Rails application in the Docker Compose container.
- We debugged our Rails application in the Docker Compose container.