Manage data sources
Data source is a location of data for your application. In RubyMine, you can define the following data sources:
Database data source: operational databases that contain data (see Database connection).
Data Definition Language (DDL) files: SQL files that contain data definition language statements.
Configure data source settings
In the Database tool window (), select a data source that you want to change.
Click the Data Source Properties icon (
 ) on the toolbar.
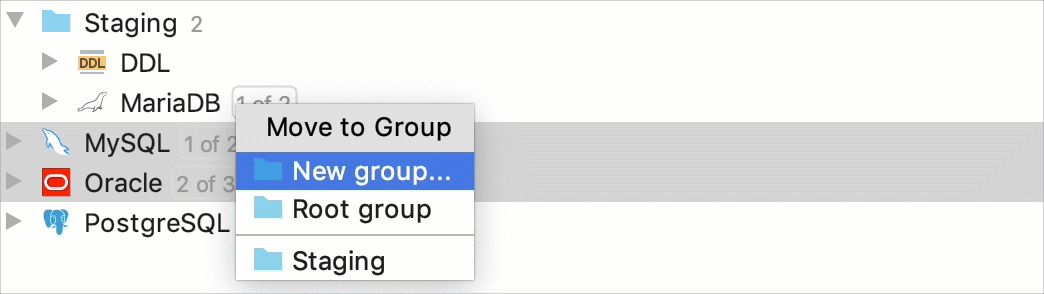
Group data sources
If you have a number of different databases, you can group their data sources in the Database tool window ().
To group data sources, select the necessary data source, press F6, or select Move to Group from the context menu.
To create a new group, drag one data source onto the other. If you want to place the data source into an existing group, drag it to the existing group node.
To remove a data source from the group, move the data source to the root list.
Configure display options for data sources
-
To group, enable, or sort data sources, click the Show Options menu icon
 on the title bar of the Database tool window and select the necessary options.
 In the Database tool window (), the view of the data source changes instantly.

Assign a color to a data source
To have better differentiation between production and test databases, you can assign a color to a data source.
In the Database tool window (), click the Data Source Properties icon
. Alternatively, press Shift+Enter. Select the data source for which you want to assign a color.
-
Click the Choose color icon (
 ) and select a color.
Assign a color to query consoles and grids
The text data viewer can use the color of the data source. To set a color, right-click a data source and select Color Settings. In the Database Color Settings dialog, select the dialog and coloring options. To have the data source color applied for query consoles and grids, select the In console editors and grids checkbox.
Filter objects from the toolbar
-
To select the necessary objects, use the Filter icon on the toolbar
 .
. 