WSL
WSL (WSL 2) – Windows Subsystem for Linux – is a compatibility layer for running Linux binary executables natively on Windows 10 and later. Currently, it supports several Linux distributions, such as Ubuntu, OpenSUSE, and SLES.
Enable the Remote Execution Agent plugin
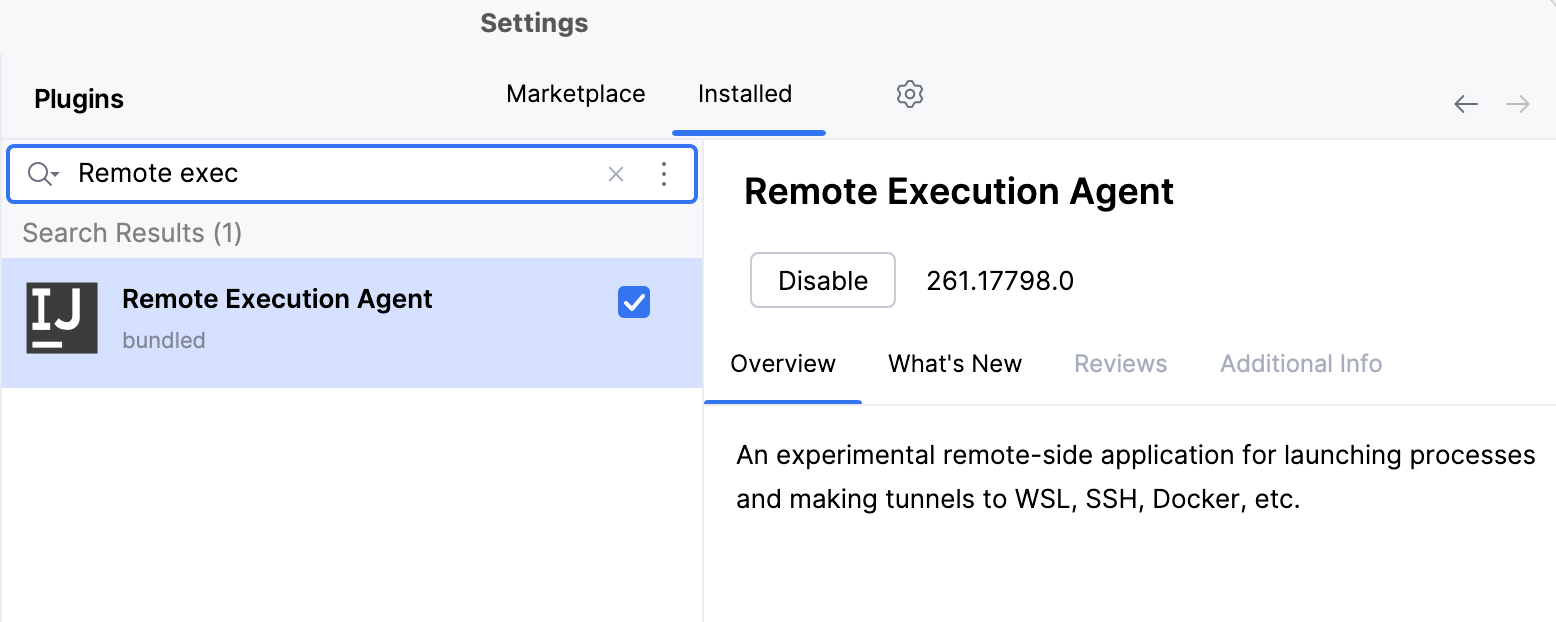
Make sure this plugin is installed and enabled to ensure the proper performance of your IDE.
In the Settings dialog (Ctrl+Alt+S) , select Plugins.
Start typing the name of the plugin.
Do one of the following:
If the plugin is not installed, on the Marketplace tab, click Install. Wait for RubyMine to install the plugin, switch to the Installed tab, and make sure it is enabled. If not, click Enable.
If the plugin is installed, find the plugin on the Installed tab and make sure it is enabled. If not, click Enable.
The image below shows the plugin in the enabled state.
Apply the changes and close the settings dialog.
Configure WSL
Download and install a WSL distribution (for instance, Ubuntu) from Microsoft Store on your Windows machine.
For this step, be sure to use at least Windows 10 or later with the latest “Fall Creators Update” (minimum version 1709, build 16299.15). See the official guide Install the Windows Subsystem for Linux for instructions.
To work with WSL 2, your Windows version should be 10 build 18917 or later. Follow these instructions to switch the distributive.
Run the Linux distribution.
Upon the first launch, the system may prompt you to enable the Windows optional feature. In this case, you need to do the following:
Open Windows PowerShell as Administrator and run
Enable-WindowsOptionalFeature -Online -FeatureName Microsoft-Windows-Subsystem-LinuxRestart your computer.
(Optional) If your Linux distribution doesn't come with
rsync, you need to install it, for example:apt-get install rsyncyum install rsync
You can create a project and store it in the WSL environment, open one from the WSL file system, and develop your projects further in WSL.
Open a project stored in the WSL file system
In RubyMine, you can directly open a project stored in the WSL file system and work with it like with any other project.
Click Open on the Welcome screen or select from the main menu.
In the dialog that opens, select the folder in the WSL file system that contains the project to open, or type the path to the project location manually.
The path syntax is
\\wsl.localhost\DistributionNamewhereDistributionNameis the name of your Linux distribution such as Ubuntu, Debian, Arch, and so on.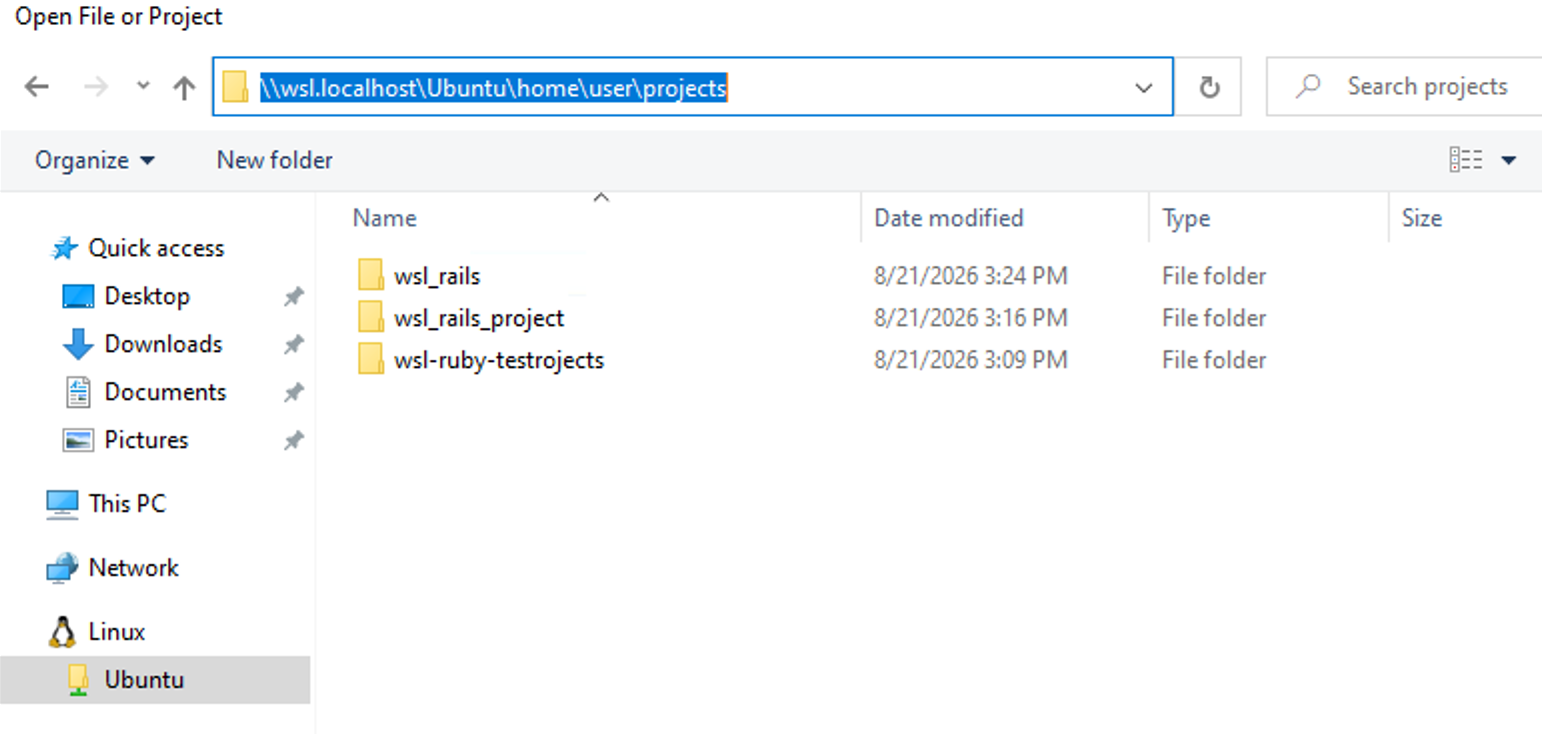
Custom WSL distributions
RubyMine allows you to use custom Linux distributions run on WSL. This can be done by editing the wsl.distributions.xml configuration file created by RubyMine automatically after detecting WSL.
Add a custom distribution
Open the %APPDATA%\JetBrains\<product><version>\config\options\wsl.distributions.xml file.
Add the
descriptorelement and provide settings to access your custom distribution. Note that theidvalue should be unique. For example:<!-- ... --> <descriptor> <id>DEBIAN_CUSTOM</id> <microsoft-id>Debian</microsoft-id> <executable-path>debian-custom.exe</executable-path> <presentable-name>Debian GNU/Linux - Custom</presentable-name> </descriptor> <!-- ... -->You can specify
executable-pathin two ways:Specify the executable name of a custom distribution. In this case, RubyMine will find a custom distribution in %LOCALAPPDATA%\Microsoft\WindowsApps.
Specify the absolute path to the custom distribution executable.
Restart RubyMine and add your custom distribution as a remote interpreter.
WSLg
WSLg lets you run Linux GUI applications and shows their output on the Windows desktop.
We do not recommend running RubyMine through WSLg. RubyMine already provides native WSL integration, which is the preferred approach.
Keep in mind the following:
WSLg has limitations related to rendering, popups, window management, input methods, and desktop integration.
We do not provide dedicated support, installation guidance, onboarding, or product-specific fixes for running RubyMine through WSLg.