# Internationalization and localization
> For the complete documentation index, see [llms.txt](https://www.jetbrains.com/help/ruby/llms.txt).
RubyMine supports various features that help you internationalize and localize Rails applications and plain Ruby projects. You can create or edit locale properties using intention actions right in the editor, run an inspection allowing you to find missing keys, preview localized values, and so on. These capabilities are available for various project file types, including ruby scripts, HTML, ERB, and HAML files.
We’ll use the [sample Rails application](https://github.com/JetBrains/sample_rails_app) to show internationalization capabilities of the IDE. You can repeat the steps below by [checking out](set-up-a-git-repository.html#clone-repo) this application.
## Manage locale files
Following [i18n](https://guides.rubyonrails.org/i18n.html) conventions, RubyMine automatically loads dictionary files (YAML or Ruby) stored in the `config/locales` directory. When creating a project, the `en.yml` file is created by default.
Procedure: Add custom locale folders
You can provide paths to custom locale folders.
1. Open the Settings dialog `Ctrl+Alt+S` (Windows), `⌘ Comma` (macOS), `⌘ Comma` (IntelliJ IDEA Classic (macOS)), `⌘ Comma` (macOS System Shortcuts), `Ctrl+Alt+S` (XWin), `Ctrl+Alt+S` (GNOME), `Ctrl+Alt+S` (KDE), `Ctrl+Alt+S` (Emacs), `Ctrl+Alt+S` (Sublime Text), `⌘ Comma` (Sublime Text (macOS)), `Ctrl+Alt+S` (Visual Studio), `⌘ Comma` (Visual Studio (macOS)), `Meta+Comma` (TextMate), `Ctrl+Alt+S` (NetBeans), `Ctrl+Alt+S` (Eclipse), `⌘ Comma` (Eclipse (macOS)).
2. go to the Project Structure page and switch to the I18n tab.
3. Click the Add icon to open the file browser.
4. Select the required folder.
Procedure: Add a dictionary file
1. Go to `config/locales` in the Project view.
2. Click  New File or Directory on the tool window toolbar (`Alt+Insert` (Windows), `⌘ N` (macOS), `⌃ N` (IntelliJ IDEA Classic (macOS)), `⌘ N` (macOS System Shortcuts), `Alt+Insert` (XWin), `Alt+Insert` (GNOME), `Alt+Insert` (KDE), `Alt+Insert` (Emacs), `Ctrl+N` (Sublime Text), `⌘ N` (Sublime Text (macOS)), `Ctrl+N` (Visual Studio), `⌘ N` (Visual Studio (macOS)), `Meta+Shift+N` (TextMate), `Alt+Insert` (NetBeans), `Alt+Insert` (Eclipse), `⌘ N` (Eclipse (macOS))) and select File from the list of file types.
3. In the New File dialog, specify the name, for example, `ger.yml` and press Enter.
The new file is created empty. You can create locale properties by adding key-value pairs manually or via the dedicated dialog as described in the procedure below.
## Create locale properties
RubyMine provides an inspection for keys that do not exist in any locale. To see this capability in action, do the following:
Procedure:
1. Open the `app/views/static_pages/home.html.erb` file and scroll down to the following code:
```HTML
Welcome to the Sample App
```
2. Replace it with the code below:
```HTML
<%= t('.welcome') %>
```
3. Hover over the .welcome key to see a warning:
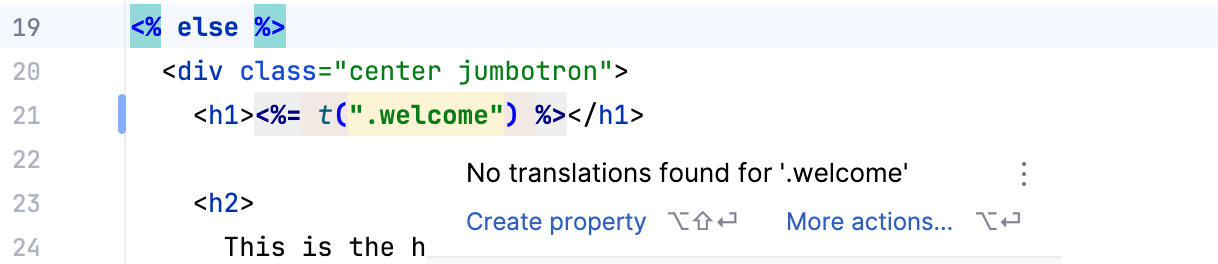
4. Click Create Property.
5. In the invoked dialog, specify the property value:
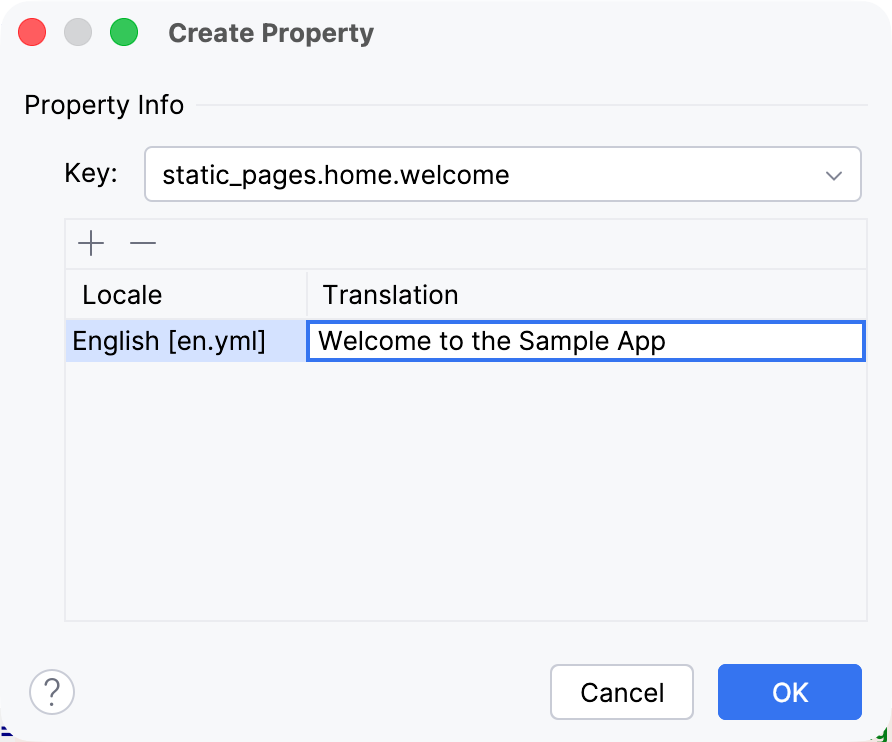
6. Use the  button to add translations for other locales.
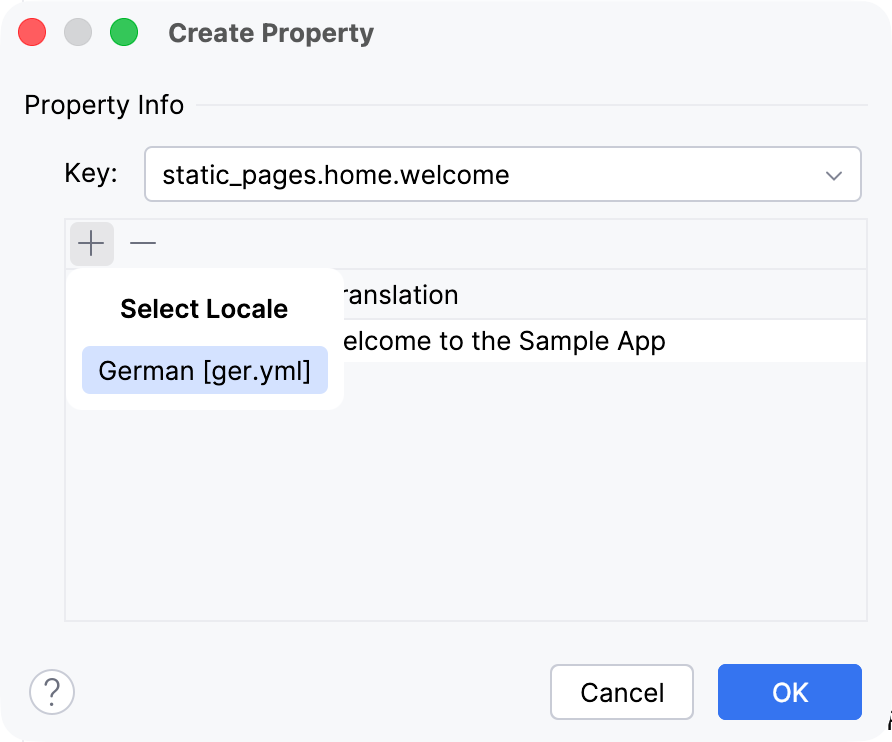
7. Then, click OK to create the specified translations in the dictionary files:
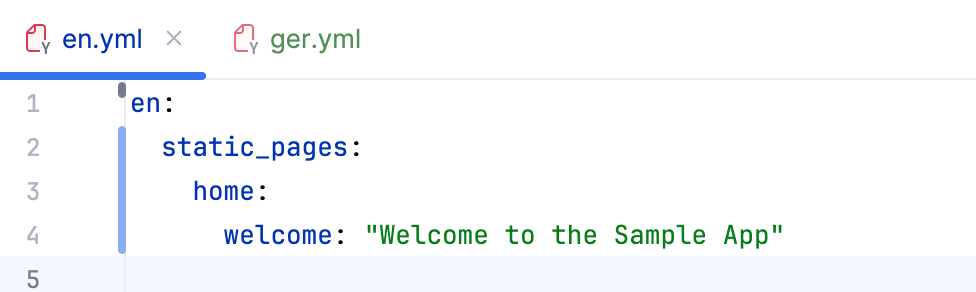
8. You can [navigate](navigating-through-the-source-code.html#go_to_declaration) from the key called within t method to the corresponding keys in the dictionaries.

## Extract hard-coded strings
RubyMine enables you to extract hard-coded strings into locale files. To try this capabiltity using the [sample Rails application](https://github.com/JetBrains/sample_rails_app), do the following:
Procedure:
1. Open the `app/views/static_pages/home.html.erb` project file and scroll down to the following code:
```HTML
<%= link_to "Sign up now!", signup_path, class: "btn btn-lg btn-primary" %>
```
2. Place a caret to the “Sign up now!” string, press `Alt+Enter` (Windows), `⌥ ⏎` (macOS), `⌥ ⏎` (IntelliJ IDEA Classic (macOS)), `⌥ ⏎` (macOS System Shortcuts), `Alt+Enter` (XWin), `Alt+Enter` (GNOME), `Alt+Enter` (KDE), `Alt+Enter` (Emacs), `Alt+Enter` (Sublime Text), `⌥ ⏎` (Sublime Text (macOS)), `Alt+Enter` (Visual Studio), `⌥ ⏎` (Visual Studio (macOS)), `Alt+Enter` (TextMate), `Alt+Enter` (NetBeans), `Ctrl+1` (Eclipse), `⌘ 1` (Eclipse (macOS)) and select the I18nize hard-coded string action. Press `Enter` (Windows), `⏎` (macOS), `⏎` (IntelliJ IDEA Classic (macOS)), `⏎` (macOS System Shortcuts), `Enter` (XWin), `Enter` (GNOME), `Enter` (KDE), `Enter` (Emacs), `Enter` (Sublime Text), `⏎` (Sublime Text (macOS)), `Enter` (Visual Studio), `⏎` (Visual Studio (macOS)), `Enter` (TextMate), `Enter` (NetBeans), `Enter` (Eclipse), `⏎` (Eclipse (macOS)).
3. In the Create Property dialog, specify the key and provide the desired translations:
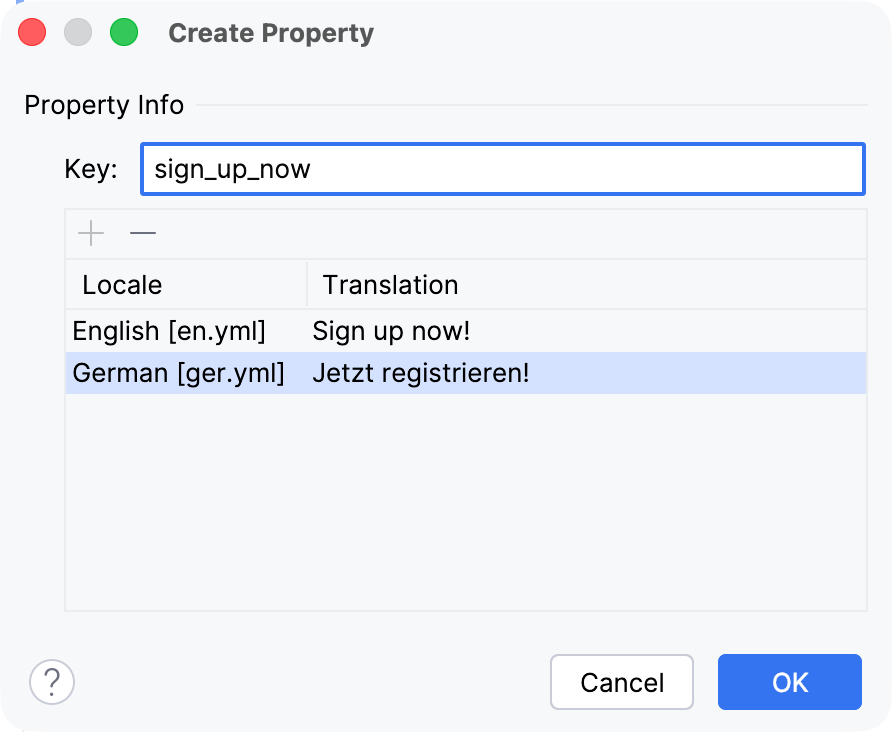
Click OK. RubyMine will add corresponding properties to the locale files and replace the initial string with the t method called for the created key:
```HTML
<%= link_to t('.signup'), signup_path, class: "btn btn-lg btn-primary" %>
```
## View locale values
RubyMine provides the ability to display localized values instead of I18n keys. To try this capabiltity using the [sample Rails application](https://github.com/JetBrains/sample_rails_app), do the following:
Procedure:
1. Place a caret at the required key and press `Ctrl+.` (Windows), `⌘ .` (macOS), `⌘ .` (IntelliJ IDEA Classic (macOS)), `⌘ .` (macOS System Shortcuts), `Ctrl+.` (XWin), `Ctrl+.` (GNOME), `Ctrl+.` (KDE), `Ctrl+.` (Emacs), `Ctrl+.` (Sublime Text), `⌘ .` (Sublime Text (macOS)), `Ctrl+M, H` (Visual Studio), `⌘ .` (Visual Studio (macOS)), `Meta+.` (TextMate), `Ctrl+.` (NetBeans), `Ctrl+.` (Eclipse), `Ctrl+.` (Eclipse (macOS)) to fold it:
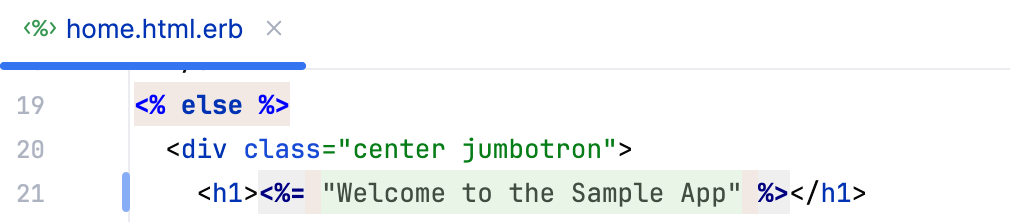
The preview will show the value from the system default locale.
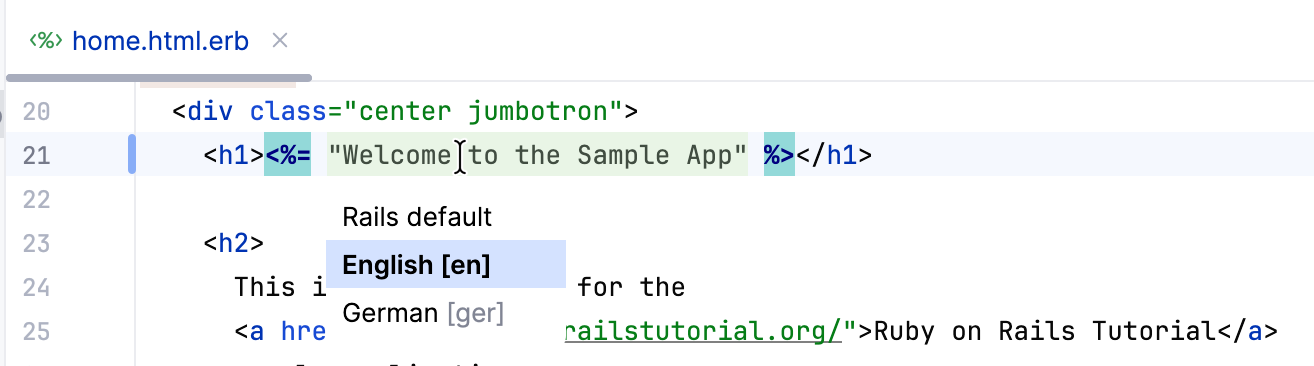
2. To use another locale to preview values, press `Alt+Enter` (Windows), `⌥ ⏎` (macOS), `⌥ ⏎` (IntelliJ IDEA Classic (macOS)), `⌥ ⏎` (macOS System Shortcuts), `Alt+Enter` (XWin), `Alt+Enter` (GNOME), `Alt+Enter` (KDE), `Alt+Enter` (Emacs), `Alt+Enter` (Sublime Text), `⌥ ⏎` (Sublime Text (macOS)), `Alt+Enter` (Visual Studio), `⌥ ⏎` (Visual Studio (macOS)), `Alt+Enter` (TextMate), `Alt+Enter` (NetBeans), `Ctrl+1` (Eclipse), `⌘ 1` (Eclipse (macOS)) and select Change preview locale:
## See also