Install TeamCity Agent
Before installing a TeamCity build agent, make sure to read the system requirements.
Choose a convenient installation option:
using an installer on Windows
installing manually from a ZIP file on any platform
preparing a container based on the official TeamCity Agent image
Install from Windows Executable File
Open the Agents page in TeamCity.
Click Install Build Agents and select Windows Installer to download the installer.
On the agent machine, run
agentInstaller.exeand follow the installation instructions.
Ensure that the user account used for running the agent service has proper permissions.
Install from ZIP File
This option allows you to download agents as archives that can copied to your agent machines.
Available Agent Distributions
You can choose to download full or minimal agent distributions.
The minimal agent distribution is a regular build agent with no plugins. The minimal agent downloads all required plugins upon its first startup.
The full agent distribution includes relevant versions of all plugins currently enabled on the server. This makes the full distribution archive larger but significantly reduces the time spent on the first agent run.
Full agents are preferable if you use scripts for creating agent images (for example, in cloud profiles). All cloud instances with full agents are synchronized with the server from the moment they start, and can run builds right away.
Full agent distributions are also available in two variations:
Regular agent distributions without Java Development Kits. If you download and install this variation, make sure that the agent machine has the required JDK version installed (see Supported Java Versions) and the
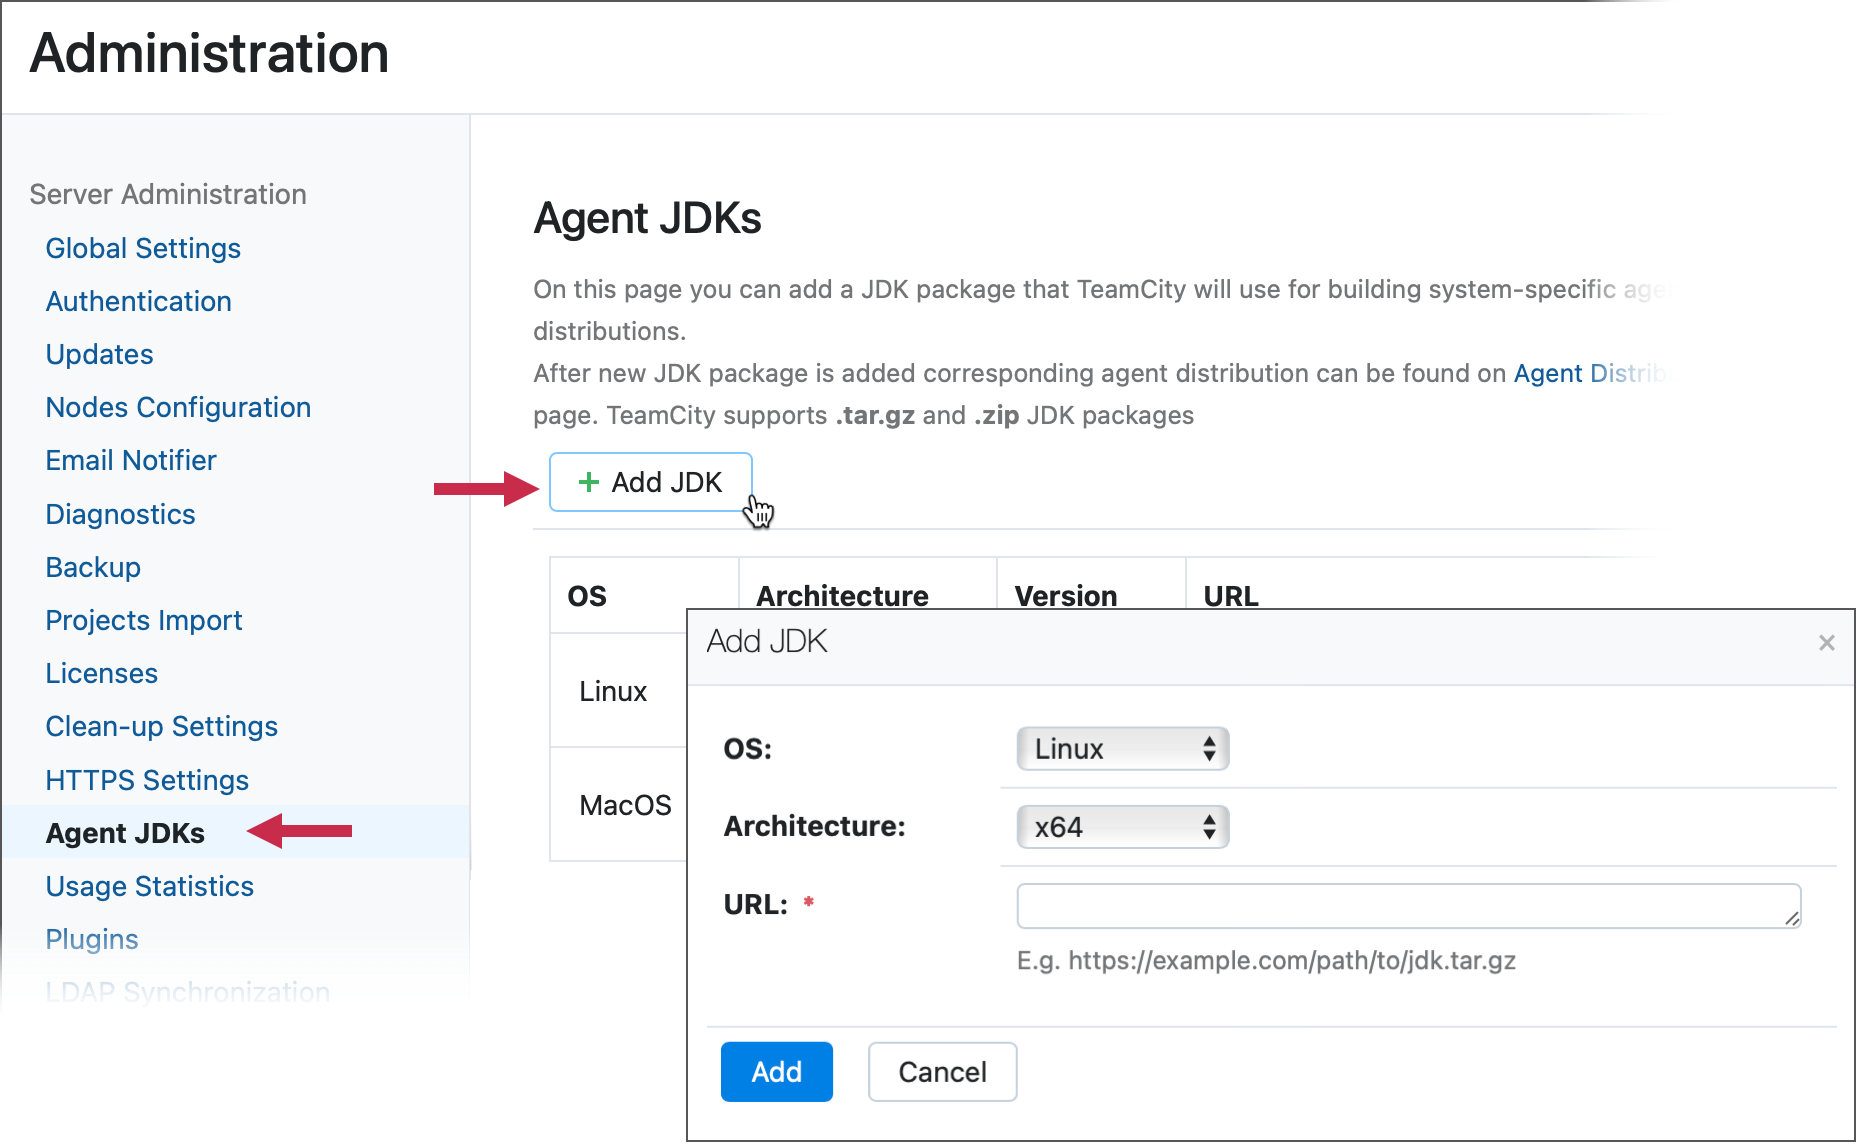
JRE_HOMEorJAVA_HOMEenvironment variables point to the correct installation.Distributions bundled with OS-specific JDKs. These distributions allow you to install an agent and a JDK it requires in a single go. To download these distributions, add required JDK versions on the Administration | Agent JDKs page and wait for TeamCity to build a related agent distribution.

Visit the Supported Platforms and Environments documentation article for the information on which Java versions are supported by TeamCity agents.
How to Install Agents from ZIP Files
Open the Agents page in TeamCity and select Overview in the side navigation bar.
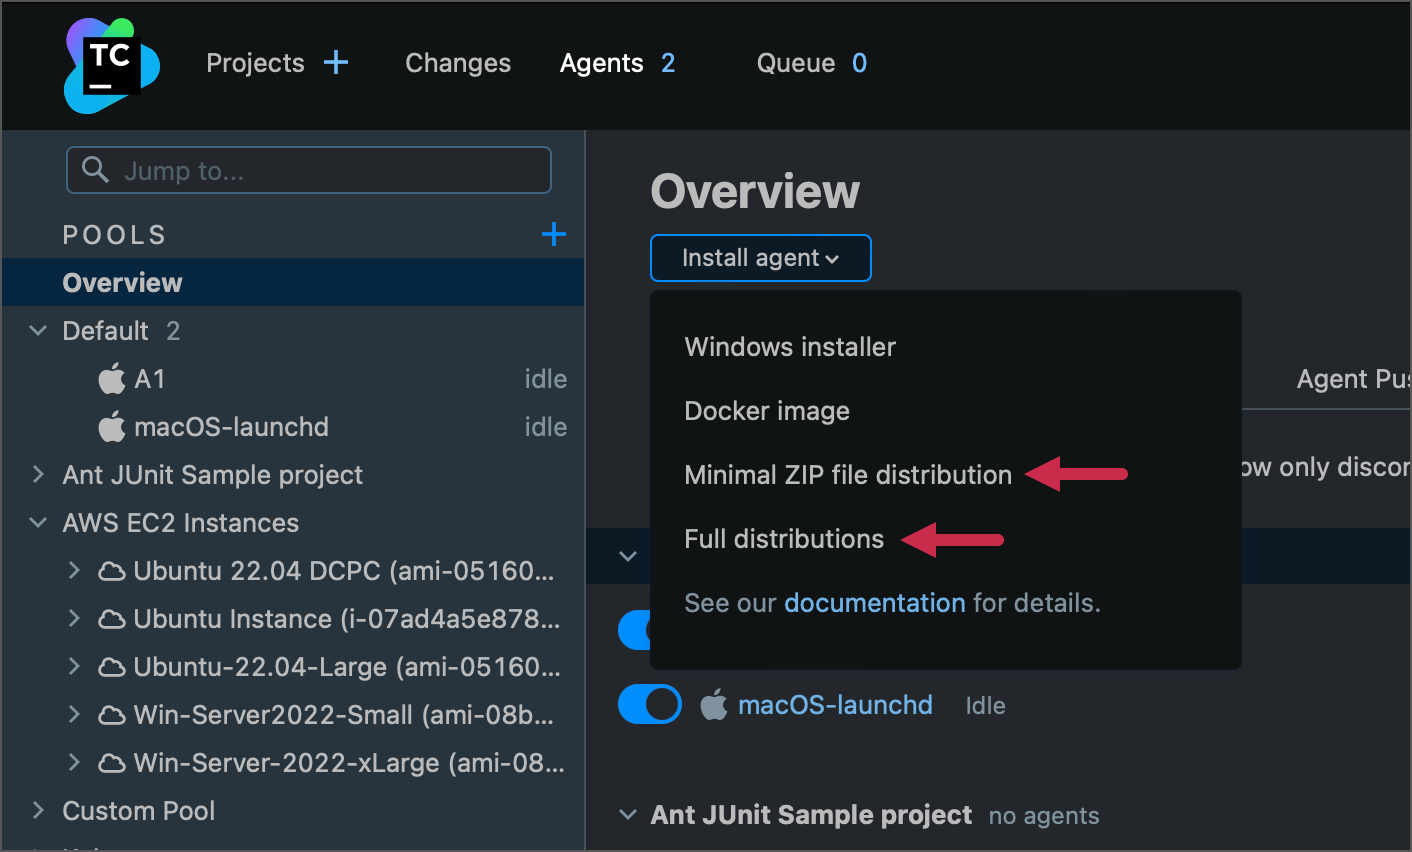
Click the Install agent button and choose the required option.

If you choose the Minimal ZIP file distribution option, the minimal OS-independent archive will start downloading.
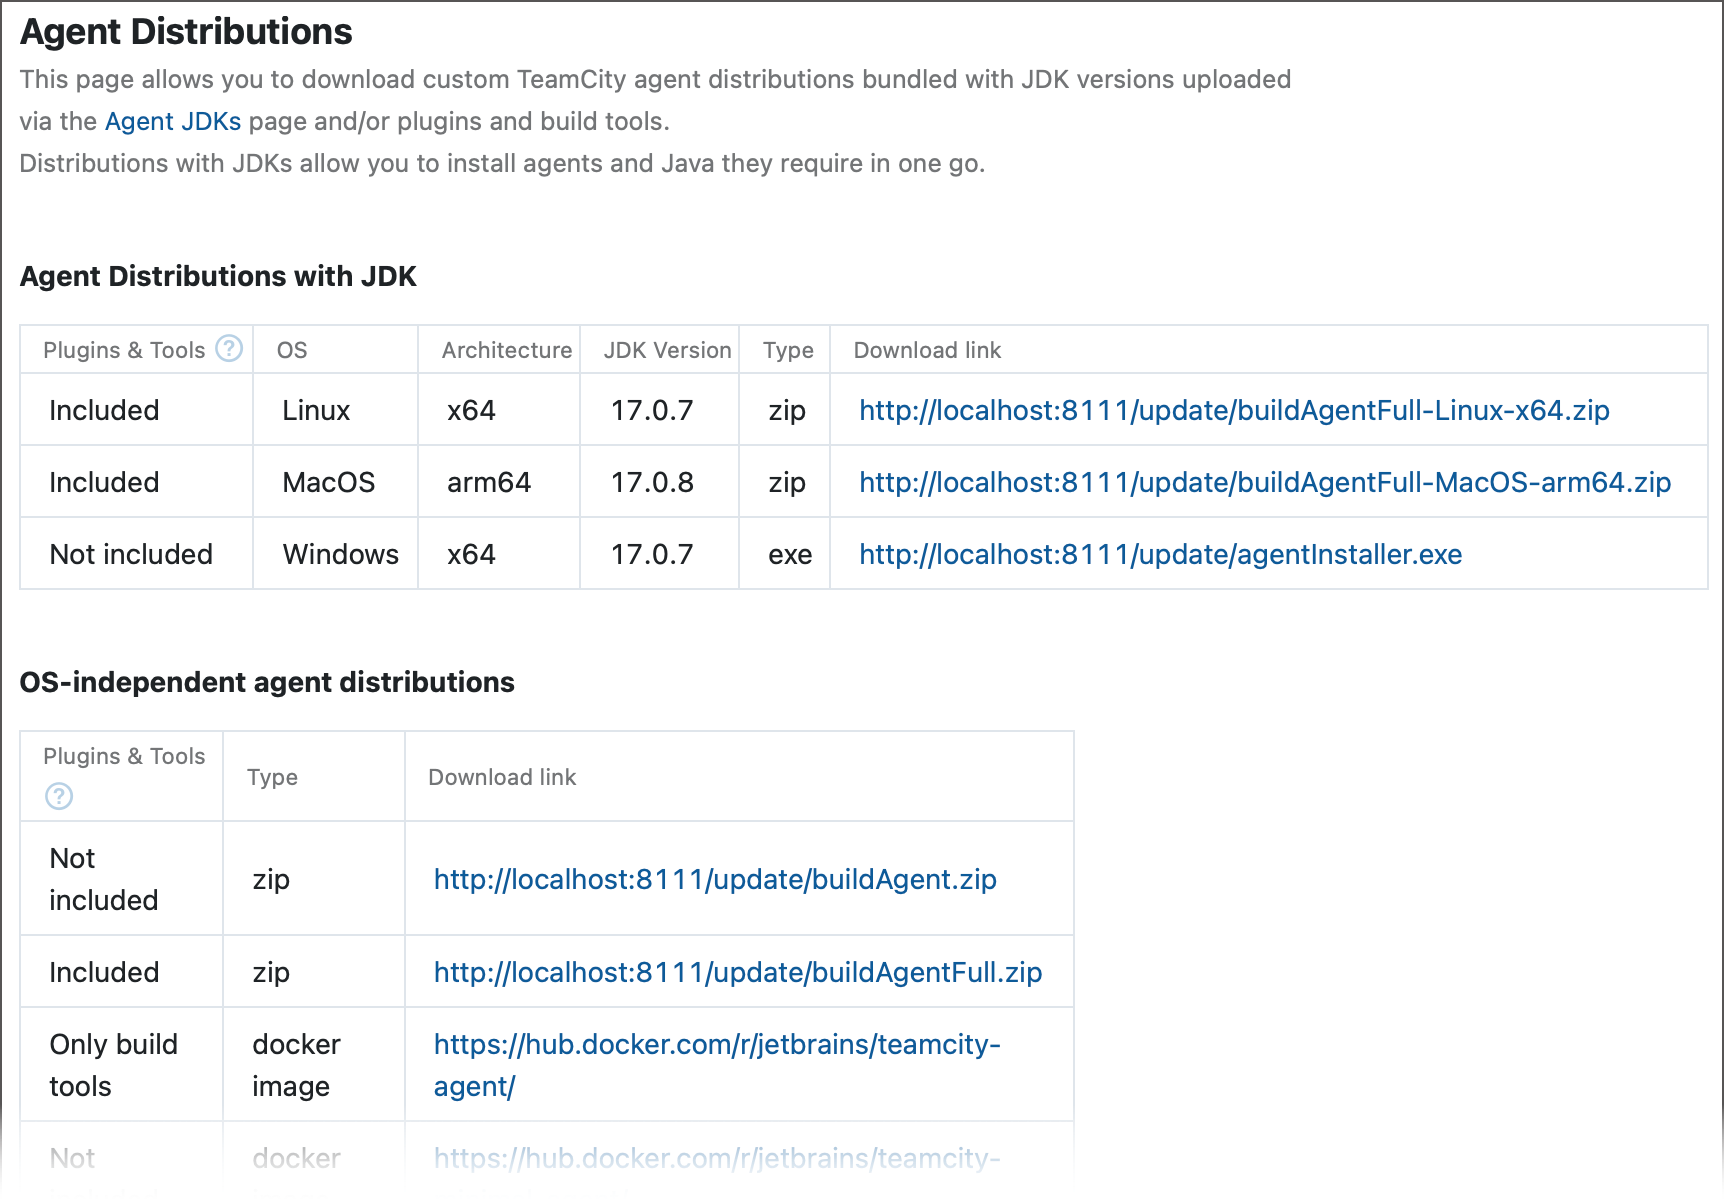
If you opt for the Full disributions option, you will be redirected to the Agent Distributions page that groups available agent archives into two categories: with and without a bundled JDK.

Agents without bundled JDKs are available as regular archives and as Docker images.
Extract the downloaded archive.
Open the
<installation path>\confdirectory and rename thebuildAgent.dist.propertiesfile tobuildAgent.properties.Edit the
buildAgent.propertiesfile to specify the TeamCity server URL (HTTPS is recommended, see these notes) and the name of the agent. Refer to this article for details on the agent configuration.
On Linux, you may need to give execution permissions to the bin/agent.sh shell script.
On Windows, you may want to install the build agent Windows service instead of using the manual agent startup.
Install via Agent Push
TeamCity provides the Agent Push functionality that allows installing a build agent to a remote host. Supported combinations of the server host platform and targets for build agents:
From a Unix-based TeamCity server, build agents can be installed to Unix hosts only (via SSH).
From a Windows-based TeamCity server, build agents can be installed to Unix (via SSH) or Windows (via psexec) hosts.
Remote Host Requirements
There are several requirements for the remote host:
Platform | Prerequisites |
|---|---|
Linux |
|
Windows |
You can test the connection by the following commands:
net use \\target\Admin$ /user:Administrator
dir \\target\Admin$
|
Installation
Note that to access the Agent Push page, a user needs to have the Administer build agent machines permission.
In the TeamCity UI, open Agents | Agent Push and click Install Agent.
If you want to use the same settings for several target hosts, you can create a preset with these settings and use it each time when installing an agent to another remote host.In the Install agent dialog, either select a saved preset or choose " Use custom settings ", specify the target host platform, and configure corresponding settings. Agent Push to a Linux system via SSH supports custom ports (the default is 22) specified as the SSH port parameter. The port specified in a preset can be overridden in the host name (for example,
hostname.domain:2222), during the actual agent installation.You may need to download
Sysinternals psexec.exe, in which case you will see the corresponding warning and a link to Administration | Tools where you can download it.