HTML
WebStorm brings powerful support for HTML that includes syntax and error highlighting, formatting according to the code style, structure validation, code completion, on-the-fly preview during a debugging session (Live Edit) or in the dedicated preview tab in the code editor, and much more.
HTML specification is configurable with the Default HTML language level preference on the Languages and Frameworks | Schemas and DTDs page of the IDE settings Ctrl+Alt+S. By default, specification HTML 5.0 from W3C is assumed.
Create an HTML file
From the main menu, select , and then select HTML File from the list. WebStorm creates a stub file based on the HTML file template and opens it in the editor.
Create references in an HTML file
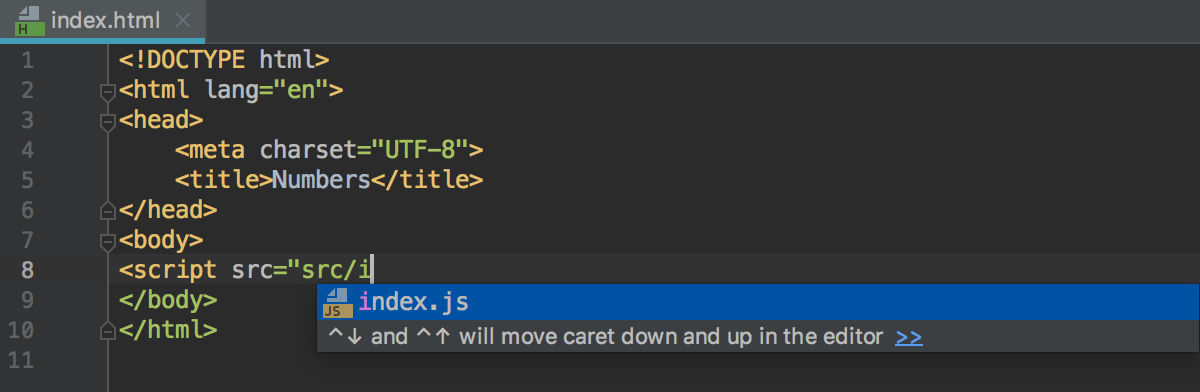
Inside a <script>, <link>, or <img> tag, WebStorm suggests completion for the path to the file you are referencing.
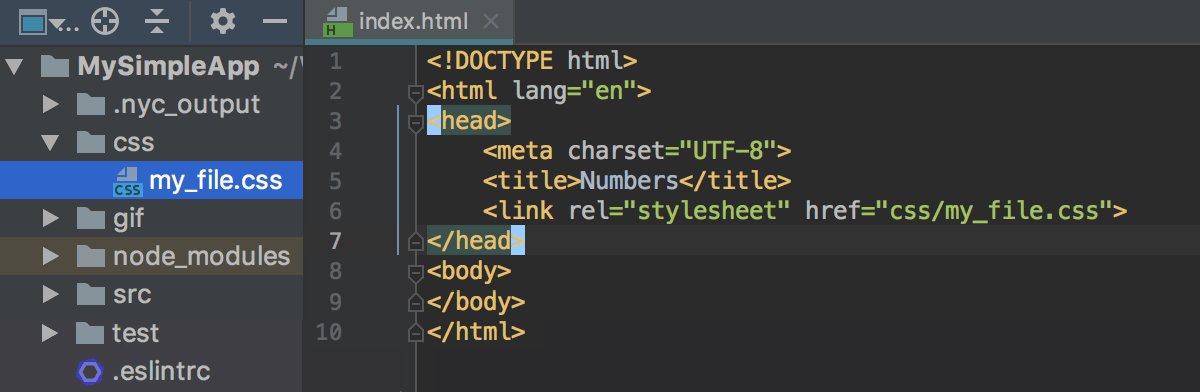
Alternatively, in the Project tool window, select the JavaScript, CSS, or image file you want to reference and drag it into the HTML file. WebStorm generates the <script>, <link>, or <img> tags inside <head>. For <img> tags, WebStorm also generates the width and height attributes.
Wrap code fragments in tags
Select the code fragment to wrap and press Ctrl+Alt+T or select from the main menu.
From the list, select Wrap with Tag. WebStorm encloses the selection in a pair of brackets (
<>and</>).Type the tag inside the opening brackets
<>. WebStorm automatically fills in the tag in the closing brackets</>.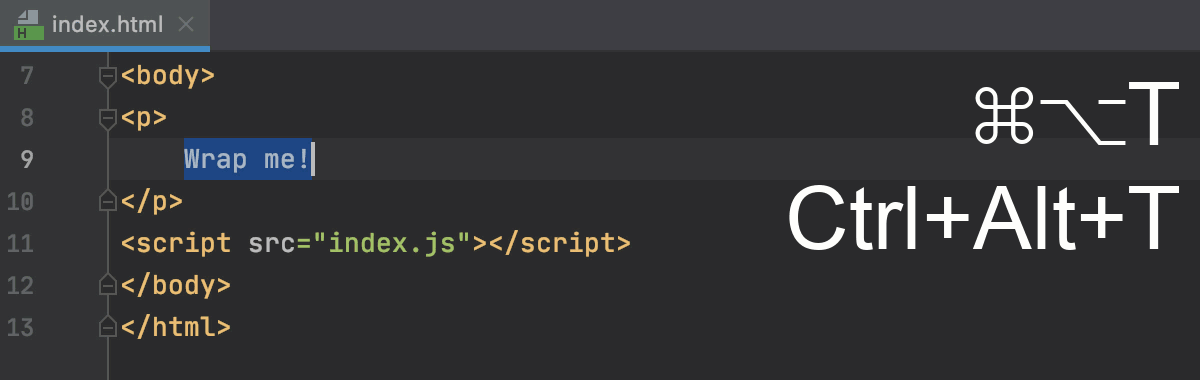
Learn more from Generate code.
Documentation look-up
For most HTML tags and attributes WebStorm can show you a summary from the corresponding MDN article. This summary is displayed in the Documentation popup which also shows the deprecation status of a tag or an attribute and information on its compatibility with various browsers.
If the tag or the attribute is available in all versions of browsers, WebStorm does not show any information about its compatibility.

Otherwise, the Documentation popup also lists the browsers and their versions that support the tag or the attribute.

If the tag or the attribute is deprecated, the popup also informs you about this status.

View documentation for a tag or an attribute
Position the caret at the tag or the attribute and press Ctrl+Q or select from the main menu.
When you hover the mouse pointer over a tag or an attribute, WebStorm immediately displays the reference for it in the Documentation popup.
You can turn off this behavior or configure the popup to appear faster or slower, see Configuring the behavior of Documentation popup below.
Configure the behavior of Documentation popup
To turn off showing documentation automatically, open the Settings/Preferences dialog Ctrl+Alt+S, go to , and clear the Show quick documentation on hover checkbox.
To have the Documentation popup shown faster or slower, open the Settings/Preferences dialog Ctrl+Alt+S, go to , then select the Show the documentation popup checkbox and specify the delay time.
Open the MDN documentation for tags and attributes in the browser
In the Documentation popup Ctrl+Q, click the link at the bottom.
Press Shift+F1 or select from the main menu.
Preview output of HTML files
You can open the output of your HTML code in the built-in WebStorm preview or externally, in a browser of your choice.
By default, after you open an HTML file in the browser or in the built-in preview, WebStorm automatically reloads the page every time this HTML file (or any linked JavaScript or Style Sheet file) is saved manually or automatically, see Save and revert changes.
You can change the default behavior to reload the page as you type so the changes to the HTML or related file immediately appear in the browser or in the built-in preview. See Configure automatic reload below.
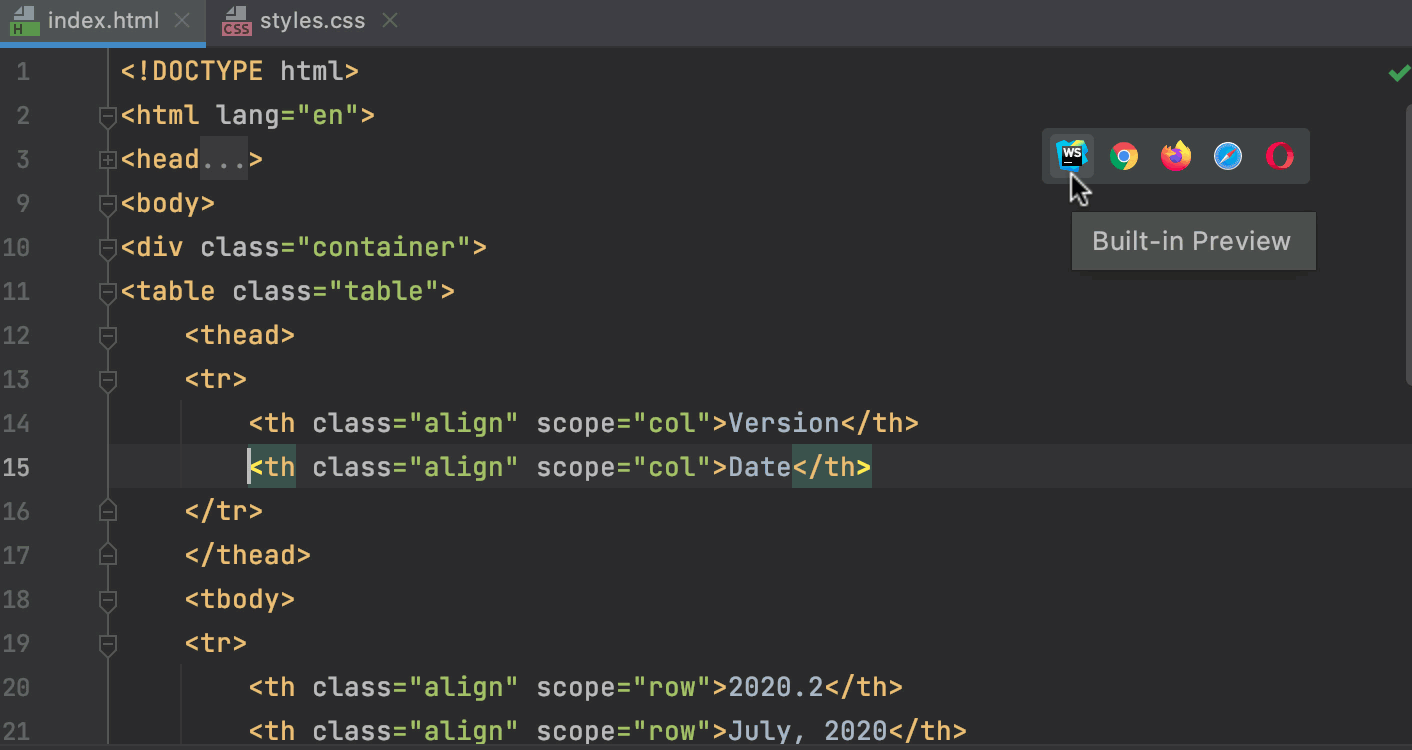
WebStorm built-in preview
WebStorm built-in preview makes your work faster as you no longer need to switch to the browser and refresh the pages. The preview is opened in a separate editor tab and reloaded automatically as you type or when you save the changes, depending on the reload behavior.
Open the WebStorm built-in preview
From the main menu, select , and then select
 from the list.
Alternatively, hover your mouse pointer over the code to show the browser icons popup, and click
.
Preview an HTML file in a browser
To make sure your HTML code is rendered properly in production environment, preview HTML files in specific browsers. The page is reloaded automatically when you save the changes or as you type, depending on the reload behavior.
From the main menu, select , and then select the desired browser from the list.
To open the default WebStorm browser, select Default.
Alternatively, hover your mouse pointer over the code to show the browser icons popup, and click the icon that indicates the desired browser:


If you have only one browser configured, just press Alt+F2.
Configure the browser icons in the popup
Open the Settings/Preferences dialog Ctrl+Alt+S and go to .
To hide some of the icons, clear the Active checkboxes for the unnecessary browsers.
To hide the whole popup, clear the For HTML files checkbox.
Configure automatic reload
By default, after you open an HTML file in the browser or in the built-in preview, WebStorm automatically reloads the page every time this HTML file (or any linked JavaScript or Style Sheet file) is saved manually or automatically, see Save and revert changes.
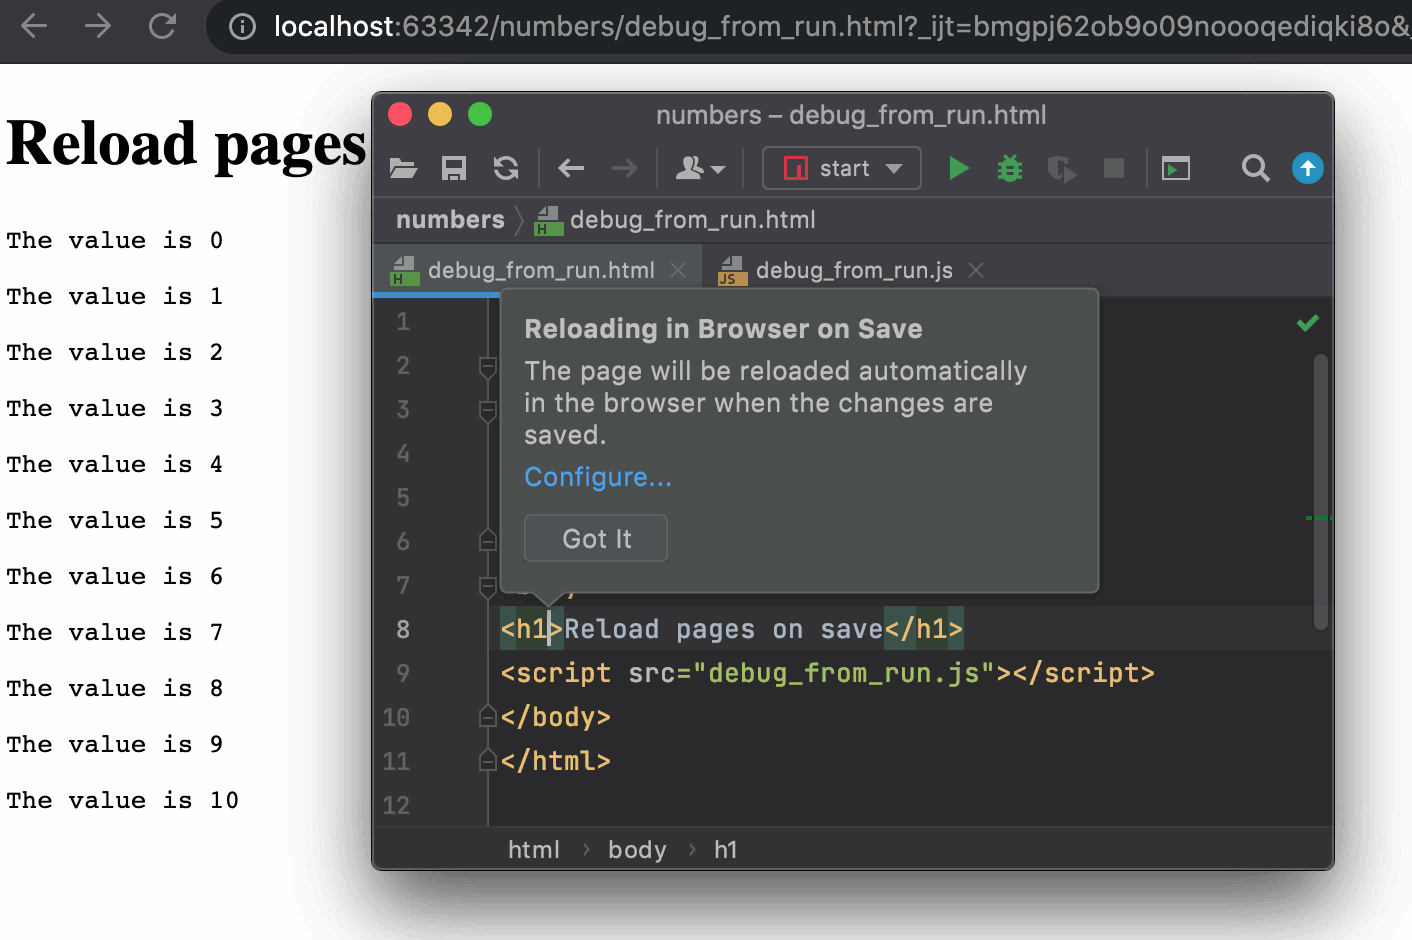
When you save a file that triggers page reload, WebStorm shows a Got it tooltip.

You can change the default behavior to reload the page as you type so the changes to the HTML or related file immediately appear in the browser or in the built-in preview.

Go to the Tools | Web Browsers and Preview page of the IDE settings Ctrl+Alt+S. Alternatively, click Configure in the Got it tooltip.
In the Reload behavior area, from the Reload page in browser and Reload page in built-in preview lists, select the actions that will trigger automatic reload of pages in web browsers and in the built-in preview. By default, On Save is selected.
Select On Change to reload pages as you update the corresponding HTML file or linked files.
Select Disabled to suppress automatic upload.
View HTML source code of a web page in the editor
Press Ctrl+Shift+A and select Open Source Code from URL... from the list.
In the Open URL dialog that opens, type the URL address of the web page or choose a previously opened URL from the list.
View embedded images
WebStorm offers several ways to view images embedded in an HTML file. You can use navigation to source, open an image in an external graphical editor, or preview images on-the-fly.
View images in WebStorm
Select the image file in the Project tool window and press F4.
Alternatively, position the caret at the reference to the image in the editor and press Ctrl+B
To preview an image in a popup instead of in a separate tab, select the reference to it and press Ctrl+Shift+I
View images in an external editor
Select the image file in the Project tool window, and select or press Ctrl+Alt+F4.
WebStorm opens the image in the editor that is used in your OS by default. You can configure another image editor in which the IDE will open files.
Change the default external editor
Right-click an image in the editor and select Edit Path to External Editor from the context menu.
You can also press Ctrl+Shift+A and type
Edit Path to External Editor.In the Path to External Editor dialog, specify the path to the application in which you want to open images and click Save.

Extract include files
You can extract a fragment of HTML code into a separate include file. Entire JavaScript code blocks inside a <script> tags can be extracted as well. WebStorm also suggests adding references instead of duplicates of the selected fragment.
In the editor, select the code block to be extracted and choose from the main menu or from the context menu of the selection.
In the Extract Include File dialog that opens, specify the name of the include file without the extension and the directory to store it in. You can accept the predefined directory or select another one.
Click OK, when ready. WebStorm extracts the selected source code into the specified file in the target directory and generates the corresponding reference in the source file.
Configure syntax highlighting
You can configure HTML-aware syntax highlighting according to your preferences and habits.
In the Settings/Preferences dialog Ctrl+Alt+S, go to .
Select the color scheme, accept the highlighting settings inherited from the defaults or customize them as described in Colors and fonts.