Astro
WebStorm provides basic Astro web framework functionality such as syntax highlighting, code completion with automatic imports, refactorings, navigation, intentions, code folding, Emmet support, and correct formatting.
Before you start
Make sure you have Node.js on your computer.
Install and enable the Astro plugin on the Settings | Plugins page, tab Marketplace, as described in Installing plugins from JetBrains Marketplace.
Create an Astro application
Open your command-line shell or the embedded Terminal (Alt+F12) and type one of the following commands depending on the package manager you are using:
npm create astro@latestfornpmpnpm create astro@latestforpnpmyarn create astrofor Yarn
Answer the questions in the wizard that starts:
Specify the folder where you want your application to be created in the format
./<project_name>.Also specify whether you want your application created based on the Astro official example with starter templates.

Open the generated application with Astro-specific structure ().
Learn more from the Astro official website.
Start with an existing Astro application
To continue developing an existing Astro application, open it in WebStorm and download the required dependencies.
Open the application sources that are already on your machine
Click Open on the Welcome screen or select from the main menu. In the dialog that opens, select the folder where your sources are stored.
Check out the application sources from your version control
Click Clone Repository on the Welcome screen.
Alternatively, select or or from the main menu.
Instead of Git in the main menu, you may see any other Version Control System that is associated with your project. For example, Mercurial or Perforce.
In the dialog that opens, select your version control system from the list and specify the repository to check out the application sources from. For more information, refer to Check out a project (clone).
Download the dependencies
Click Run 'npm install' or Run 'yarn install' in the popup:

You can use npm, Yarn 1, or Yarn 2, refer to npm and Yarn for details.
Alternatively, select Run 'npm install' or Run 'yarn install' from the context menu of package.json in the editor or in the Project tool window (Alt+1) .
Project security
When you open a project that was created outside WebStorm and was imported into it, WebStorm displays a dialog where you can decide how to handle this project with unfamiliar source code.

Select one of the following options:
Preview in Safe Mode: in this case, WebStorm opens the project in a preview mode. It means that you can browse the project's sources but you cannot run tasks and script or run/debug your project.
WebStorm displays a notification on top of the editor area, and you can click the Trust project… link and load your project at any time.
Trust Project: in this case, WebStorm opens and loads a project. That means the project is initialized, project's plugins are resolved, dependencies are added, and all WebStorm features are available.
Don't Open: in this case, WebStorm doesn't open the project.
Learn more from Project security.
Run your application

Open your package.json, click
 in the gutter next to the
 startordevscript, and select Run 'start' from the context menu.To open the application in the browser, click the link in the Run tool window.
While the application is running, all the changes you make to your code are immediately reflected on the page.
Configure the Astro Language Server
Press Ctrl+Alt+S to open settings and then select .
Alternatively, click the Language Services widget on the status bar, select Astro, and click
 .
.
Specify the Astro Language Server package to use.

Specify whether you want to use data from the Astro Language Server for coding assistance.
By default, the Auto option is selected so WebStorm automatically enables integration with the Astro Language Server in any appropriate context.
Select the Disabled option to get coding assistance based only on the data from the internal WebStorm parser and inspections.
Specify the location of the @astrojs /ts-plugin that adds support for
.astroimports in TypeScript files and for renaming symbols and finding references across TypeScript and.astrofiles.
Optionally:
In the Configuration area, customize the default Astro configuration options. The configuration settings are passed to the Astro Language Server in the
.jsonformat.
Configure memory handling
Although WebStorm strives at providing slick integration with language services, there may still arise out-of-memory errors induced by a language service rather than by WebStorm itself.
To prevent out-of-memory errors or have them solved seamlessly, thus ensuring stable operation of language services, you can configure memory handling. Learn more from Language Services
Memory handling settings for the Astro language service are always inherited from the TypeScript language service.
Configure memory handling for TypeScript language service
Open settings by pressing Ctrl+Alt+S and navigate to .
In the Language Services Memory area, choose the memory handling mode:
Select Automatically increase memory, if available to have memory increased and language services restarted silently.
Alternatively, select Set memory limit and specify the maximum memory to use by a language service.
If the specified memory size exceeds the available RAM, WebStorm suggests an appropriate value in a tooltip.
Coding assistance
WebStorm provides basic Astro functionality such as syntax highlighting, code completion with automatic imports, refactorings, navigation, intention actions, correct formatting and code folding, and Emmet support.
Code completion
Besides the common completion, WebStorm provides completion for Astro-specific symbols.
WebStorm shows suggestions for completion as you type. Alternatively, place the caret at the symbol to complete and press Ctrl+Space.

Cloud Completion
WebStorm provides Cloud completion for props, import statements, and tags in template parts of Astro applications.
Cloud completion powered by AI Assistant can autocomplete single lines, blocks of code, and even entire functions in real time based on the project context.
Cloud Completion suggests syntactically acceptable solutions taking the context into account and runs various code inspections in advance to reject the variants that result in errors.
Enable Cloud Completion
Press Ctrl+Alt+S to open settings and select Editor | General | Inline Completion.
Select the Enable cloud completion suggestions checkbox. and select the Universal completion checkbox.

Documentation Look-up
WebStorm shows reference for symbols from your project and from its dependencies as well as for standard objects and methods, including framework-specific fragments.
The Quick Documentation popup appears when you hover over a symbol or on pressing Ctrl+Q. Learn more from Quick Documentation look-up.

Auto import
WebStorm generates import statements on the fly, as you type or complete your code.
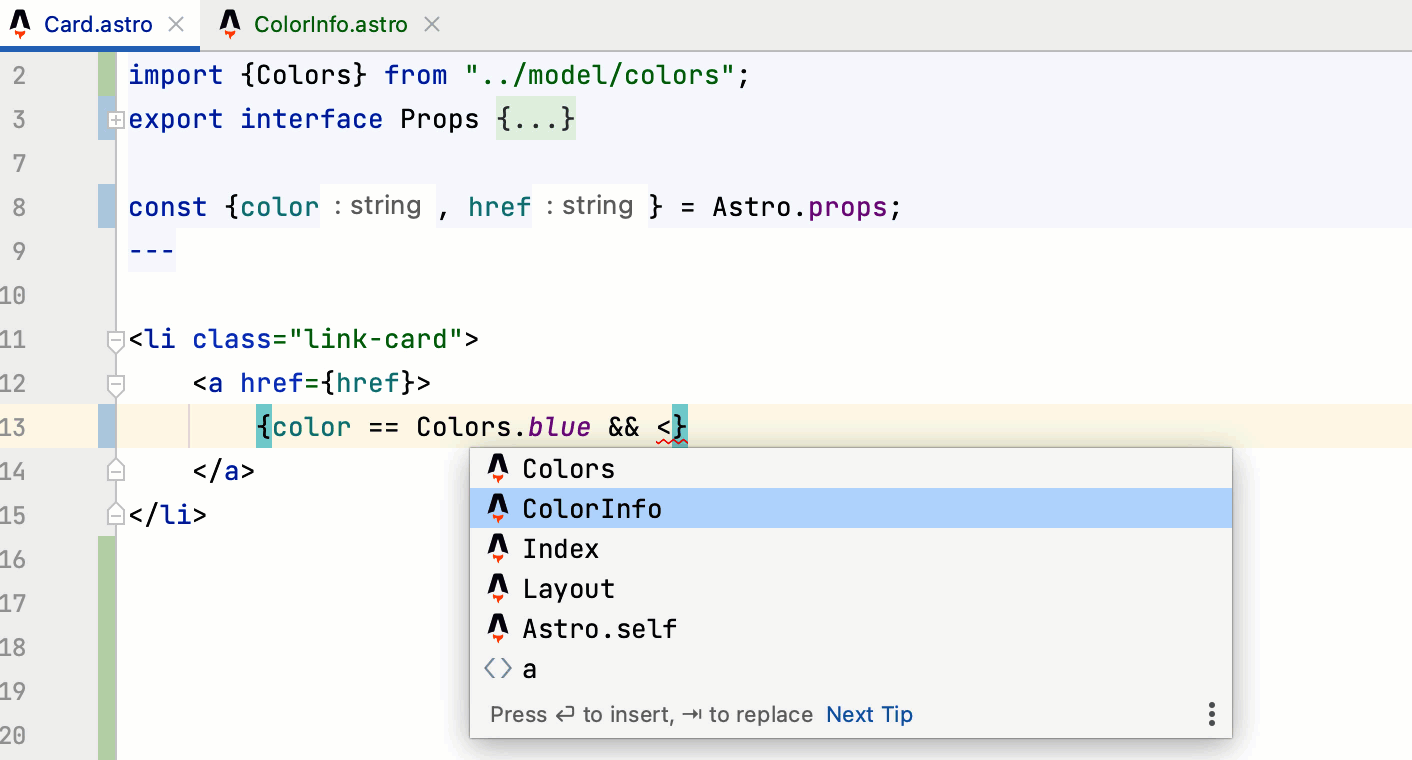
Symbols that have not been imported are marked with an underscore line. To insert an import statement, hover over an underscored symbol, and click the Import <symbol name> link in the popup.

Alternatively, place the caret at the symbol to import, press Alt+Enter, and select Import <symbol name> from the list.

Learn more from Auto import.
Refactoring code
WebStorm supports extract and inline refactorings in Astro-specific context.
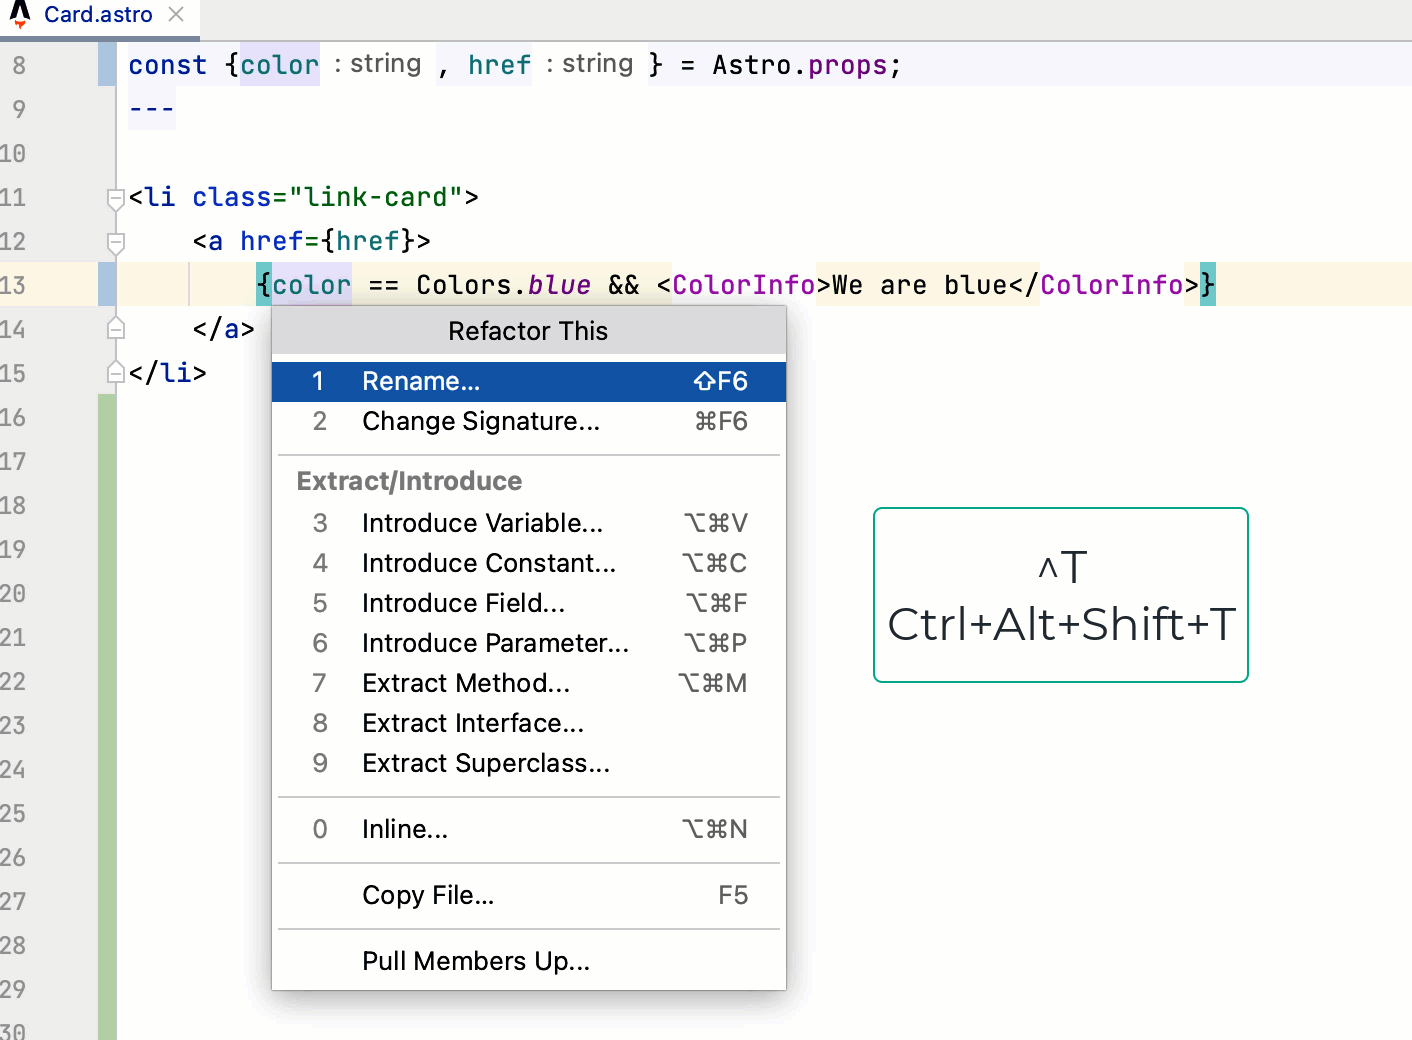
Select a code fragment to refactor or place the caret inside it, press Ctrl+Alt+Shift+T, and select the required refactoring from the list.
Learn more from Code refactoring, Refactoring JavaScript, and Refactoring TypeScript.
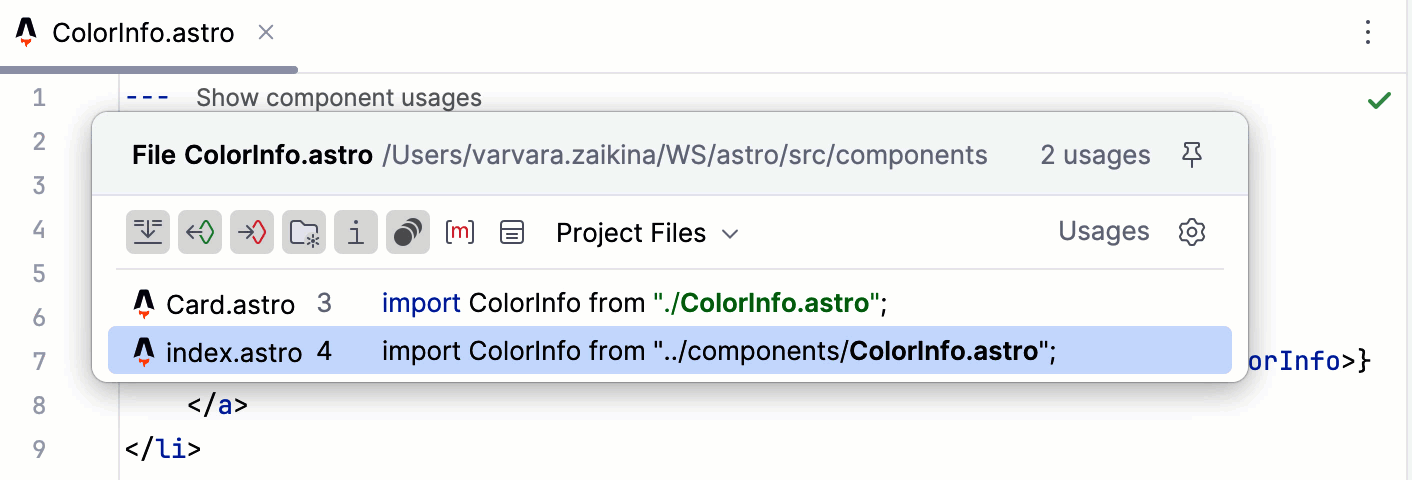
Navigate with component usages
Use inlay hints to jump from a component to its usages. If a component is used more than once, WebStorm shows a list of detected usages. Select the relevant usage to jump to it.
Show component usages hints are displayed by default. To turn them off, press Ctrl+Alt+S to open settings and select Editor | Inlay Hints. Then clear the Component usages checkbox under Code vision.
Alternatively, right-click a Show component usages hint in the editor and select Hide 'Code Vision: Component usages' Inlay Hints.

Use several frameworks within a project
Sometimes you may need to use other frameworks within one Astro project.
To get context-aware coding assistance in each file, create a configuration file .ws-context and specify which framework should be used in each particular file or folder. The settings from this file will override the default configuration.
In the project root, select New | File from the context menu and specify
.ws-contextas the file name.In
.ws-context, use two types of properties:<context-name>with the context value stringA GLOB pattern with a context details object
Use the following context values:
framework:vue,angular,react,svelte,astroangular-template-syntax:V_2,V_17nextjs-project:nextjsastro-project:astrovue-store:vuex,piniavue-class-component-library:vue-class-component,vue -property-decorator,vue-facing-decoratorjsdoc-dialect:jsdoc-typescript,jsdoc-closure
Use path nesting for simplicity.
The last segment of a GLOB path is the file name pattern, it only supports the
*wildcard.If the last segment is a
**it matches all nested directories and files.Top level context properties should have the
/**pattern.
When several patterns match the same file name, the following rules are used for disambiguation:
Choose the pattern with maximum number of path segments, excluding
**segments.Choose the pattern that is a pure file name pattern, which means that it does not end in
**or/.Choose the pattern that was defined first.
Example
Suppose you have a project with a number of frameworks used in various folders.

To get context-aware assistance for each file in the project, add the following code to .ws-context: