Scratch files
Sometimes you may need to create temporary notes or draft up some code outside the project context. Instead of switching to a different application, you can use scratch files and scratch buffers.
Scratch files are fully functional, runnable, and debuggable files that support syntax highlighting, code completion, and all other features for the corresponding file type. For example, while working on one project, you may come up with an idea for a method that you could later use in another project. You can create a scratch file with a draft of the method, which is not stored in your project directory but can be opened when you're working on any other project. You can use scratch files to draft code constructs, HTTP requests, JSON documents, and so on.
Scratch buffers are simple text files without any coding assistance features. Scratch buffers can be used for simple task lists and notes to yourself. They are also not stored in the project directory and can be opened from any other project. You can create up to five scratch buffers with default names, which are rotated and reused by clearing the content.
Scratch files and buffers are stored in the IDE configuration directory under scratches.
Create a scratch file
Go to or press Ctrl+Alt+Shift+Insert.
Alternatively, in the Project tool window (Alt+1), click
 on the toolbar and select .
Select the language of the scratch file.
Scratch files of the same type are automatically numbered and added to the Scratches and Consoles directory of the Project view.
Alternatively, you can create a new scratch file with the contents of the current selection in the editor. Select some text or code, press Alt+Enter and then select Create new scratch file from selection. WebStorm will attempt to detect the language of the selected fragment and use the appropriate type and extension. If it can't detect the language of the selection, WebStorm will create the file with the same type and extension as the original file.
Create a scratch buffer
There is no dedicated menu item for the action to create a new scratch buffer, but you can use the Find Action popup Ctrl+Shift+A and run the New Scratch Buffer action.
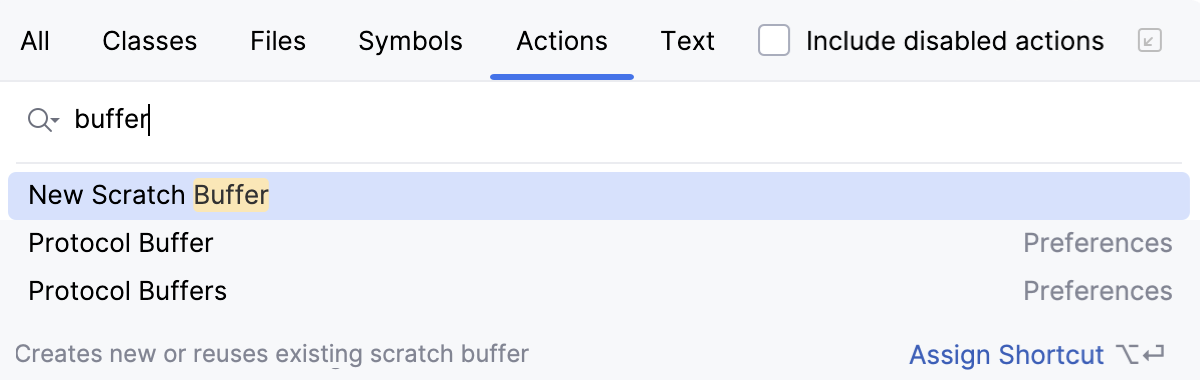
View available scratches
To see the list of created scratch files and buffers, open the Project tool window and select :
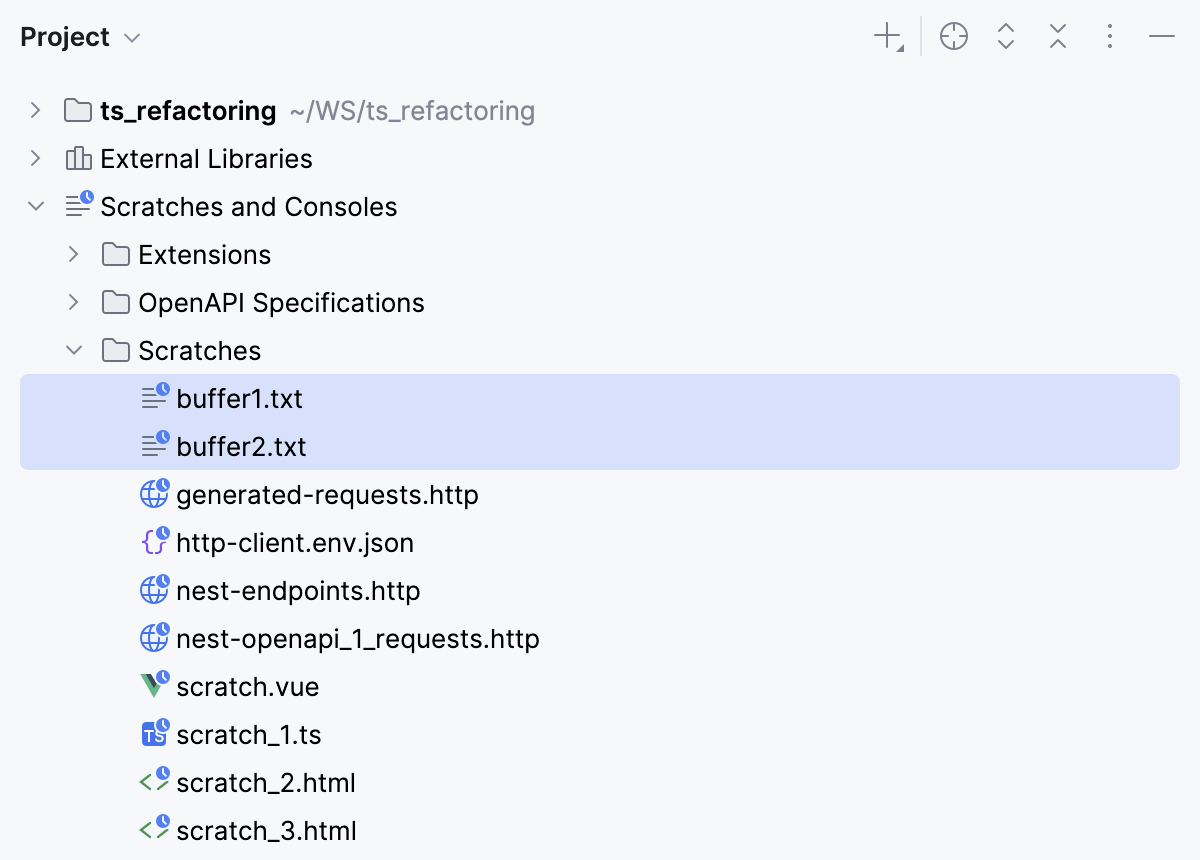
By default, scratch files and buffers are sorted alphabetically by their names and next by their extensions (types), which automatically means that buffer files always come first. To sort scratch files by types, click
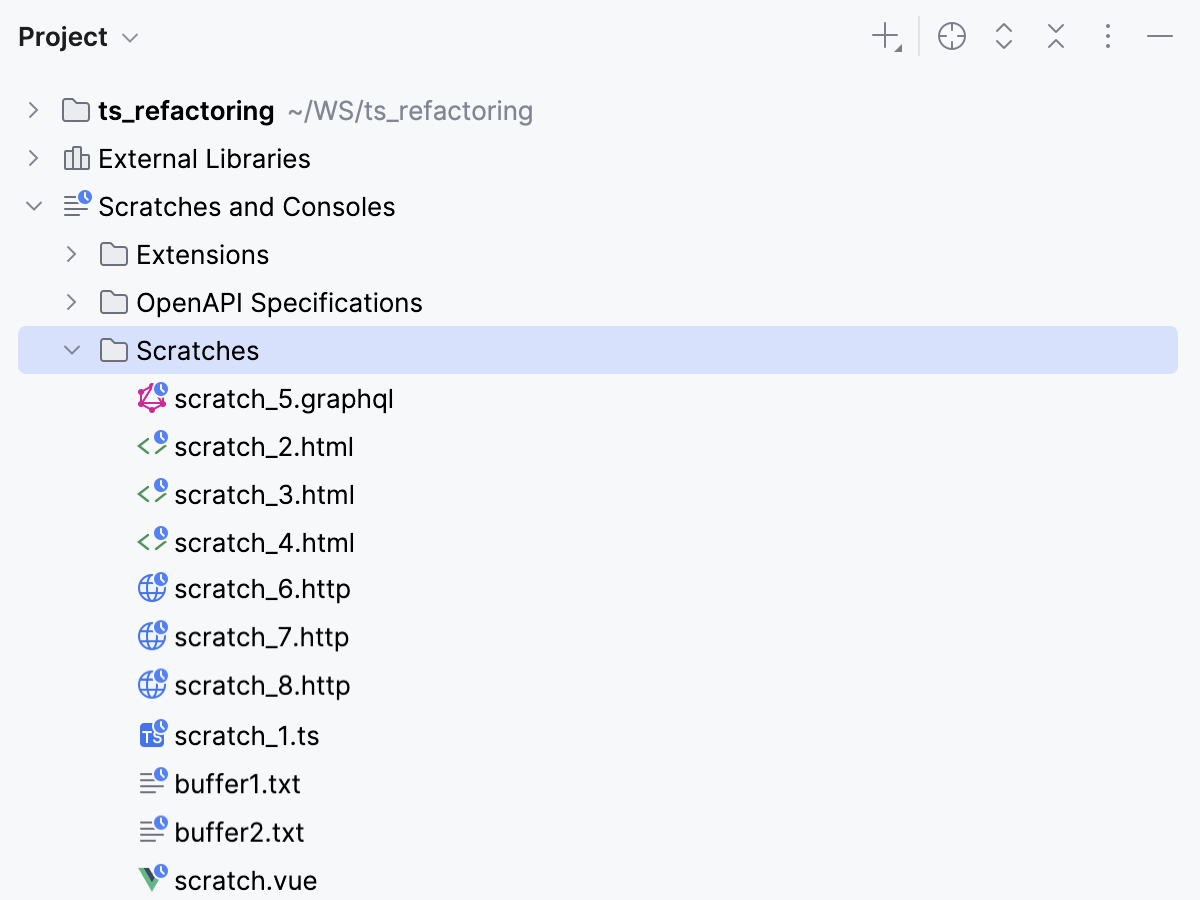
 or right-click the Project tab and select Sort by Type: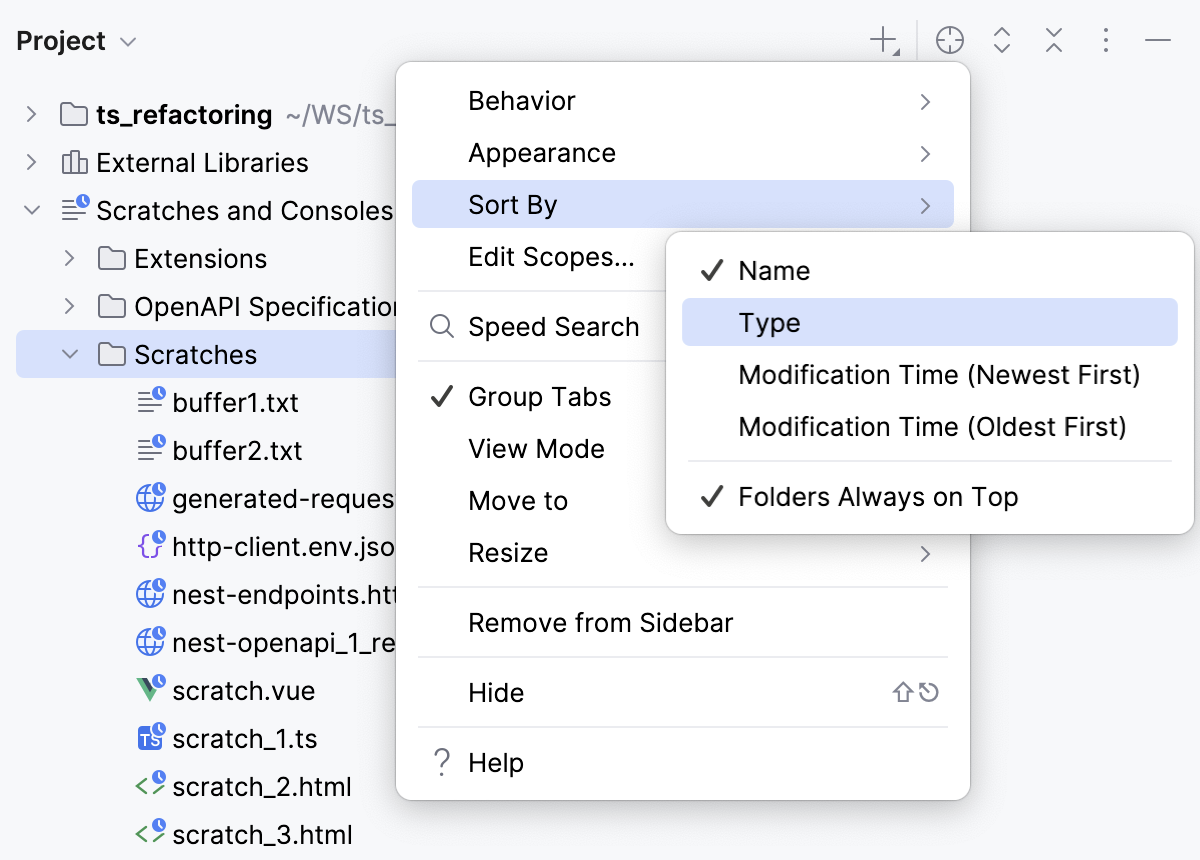
WebStorm sorts scratches alphabetically based on their extensions :
Rename scratches
In the Project tool window, click Scratches under Scratches and Consoles, select the file to rename, and press Shift+F6.
In the dialog that opens, type the new name. Note that specifying another extension does not affect the file type, use the Change Language action for that.
For more information, refer to Renaming files and folders.
Copy scratches
In the Project tool window, in the directory, select the scratch file to copy.
Press F5. In the dialog that opens, type the new filename. Here you can also specify another extension to change the file type. If necessary, select the folder where you want to save the copy.
For more information, refer to Copying files and folders.
Change the language of scratches
In the Project tool window, click Scratches under Scratches and Consoles, and choose from the context menu of the scratch file to change the language for.
Select the desired language. Note the following:
Four last used items are on top of the list, above the separator.
To narrow down the list, start typing the language name.
The action keeps extension in sync, if it exists.
You can assign a shortcut to the Change Language action as described in Configuring keyboard shortcuts.
Include a scratch file into your project
If a scratch file grows into something that you want to use in your project, move it into the desired directory of your project structure.
Open a scratch file in the editor or select it under the directory in the Project view, press F6, and select the target directory in your project.
For more information, refer to Moving files and folders.
Drag a scratch file from the directory in the Project view to the target directory in your project.
Select a scratch file in the directory in the Project view and press Ctrl+X, then select the target directory in your project and press Ctrl+V.
View documentation for scratches
Select any scratch file or buffer in the Project tool window and press Ctrl+Q to view quick documentation with the location, type, size, creation, and modification date of the file.
Run and debug scratches
Run a scratch file
Do one of the following:
Click
 in the gutter and then select Run '<scratch file name>' from the list.
From the context menu of a scratch file in the editor or in the Project tool window, select Run '<scratch file name>'.
WebStorm generates a temporary run/debug configuration with the name of the scratch file. You can save this temporary configuration and re-use it later.
Debug a scratch file
Do one of the following:
Set breakpoints as necessary.
Do one of the following
Click
in the gutter and then select Debug '<scratch file name>' from the list.From the context menu of a scratch file in the editor or in the Project tool window, select Debug '<scratch file name>'.
From the Run widget on the toolbar, select a generated run/debug configuration and then click
 .
.
Run several scratch files at a time
After you have once run a scratch file, you can configure WebStorm to run in automatically as a before-launch task. This way, you can run as many scratch files automatically as you need.
Go to . Alternatively, select Edit Configurations from the Run widget on the toolbar.
In the Run/Debug Configurations dialog that opens, click
on the toolbar, and then select the run/debug configuration type depending on the type of the scratch file you want to run last.In the Before launch area, click
and then select Run Another Configuration from the list.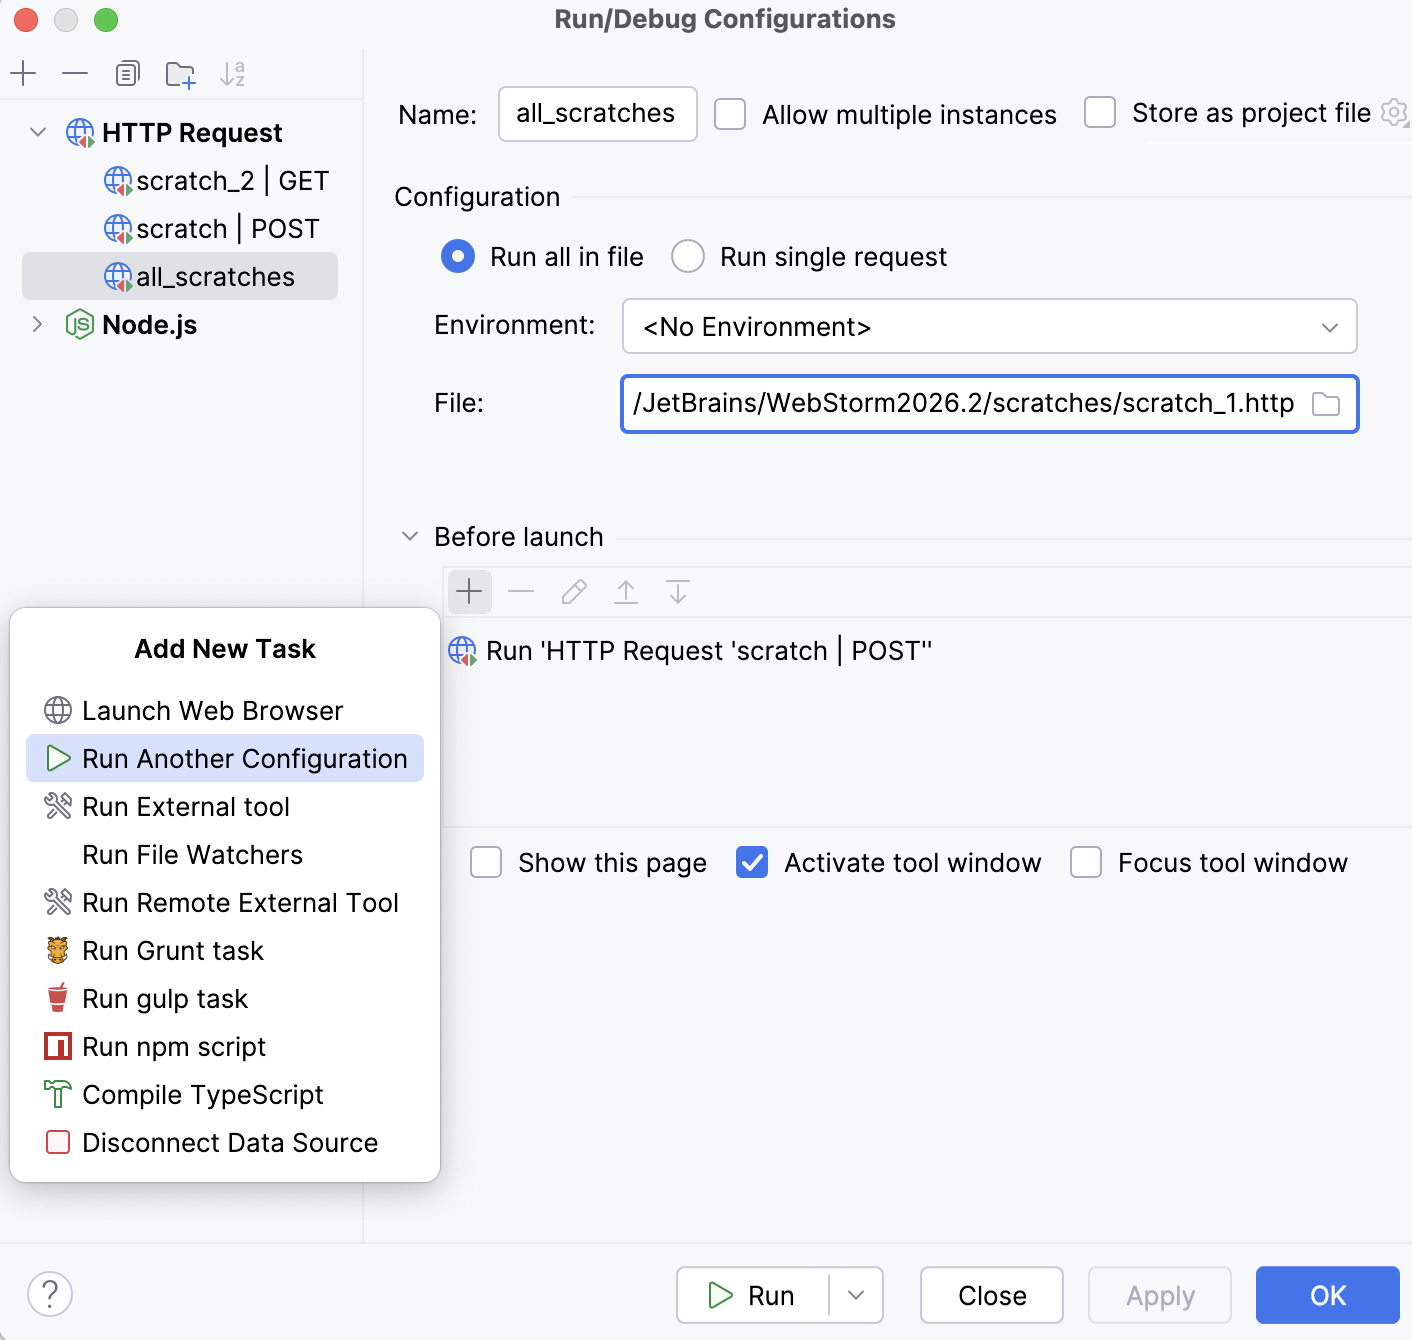
Then select the configuration to run.
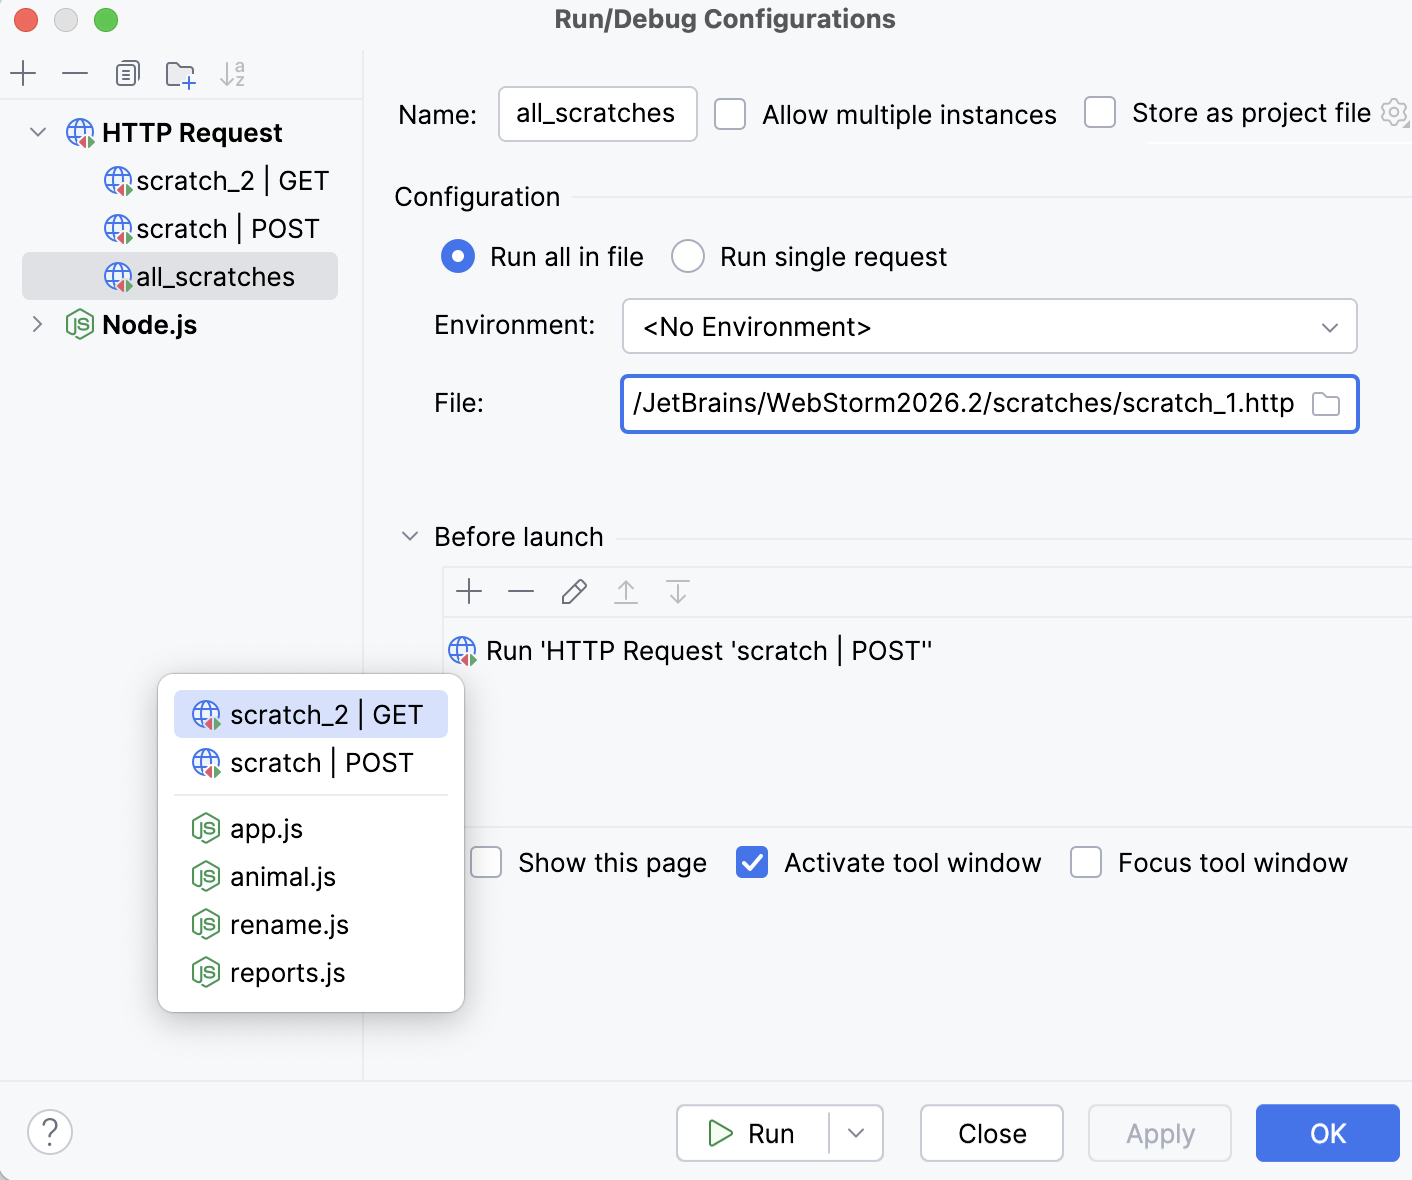
Add as many configurations as you need. Use
 and
and  to configure the order in which the added configurations will be executed.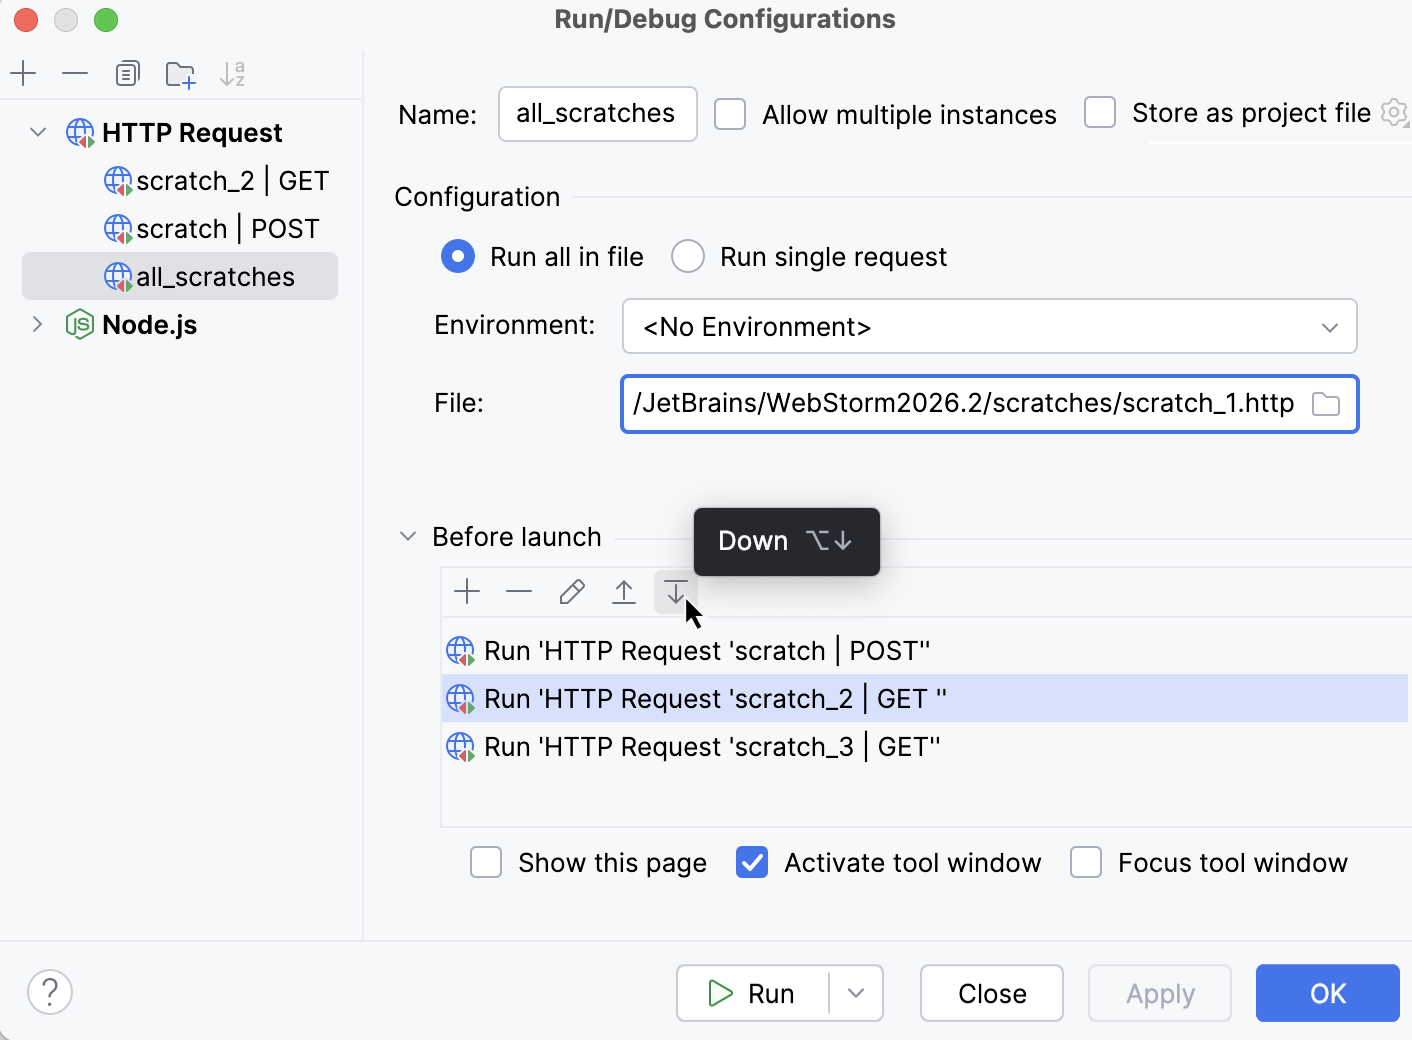
Select the newly created configuration from the Run widget on the toolbar and click
next to it. WebStorm runs all the specified scratch files in the order that are listed in the Before launch area.
Run and debug scratches with external libraries
Install the required packages and add the corresponding import statements to the scratch file. For example, to use JQuery:
Open package.json and add the following packages to the
dependenciesproperty:"dependencies": { "jquery": "^3.5.0", "jsdom": "^16.2.2", "core-js": "^3.6.5", "nuxt": "^2.14.5" }From the context menu of package.json, select Run 'npm install'.
Open your scratch file and add the following import statements:
const {JSDOM} = require("jsdom"); const {window} = new JSDOM(""); const $ = require('jquery')(window);
From the context menu of the scratch file, select Run <scratch_file_name>.
To debug a scratch file, set the breakpoints as required and select Debug <scratch_file_name> from its context menu.