# Export to PDF
Writerside can generate a PDF from your documentation sources. The PDF will contain a table of contents with the page numbers and an optional cover page. It can also have some custom text in the header and footer of every page.
Procedure:
1. In the Writerside tool window , select an instance, click  Export To , and then click PDF.

2. In the Edit Configurations Settings dialog, you can change the following settings:
Name
: Specify a meaningful name to differentiate between several configurations if you have more than one.
Instance
: Select the [instance](instances.html). By default, the configuration will produce a PDF for the instance selected in the Writerside tool window.
Save to
: Specify the directory where you want to save the generated PDF. By default, it will be saved to the root of your [documentation project](projects.html).
Keymap
: If you have several [keymaps](shortcuts.html#reference-from-keymap-file) defined, select the one that will be used in this PDF.
Orientation
: Select between Portrait and Landscape page orientation.
Cover page
: Add a cover page to the PDF output. Without it, the PDF will start with the table of contents as the first page. On the cover page, you can add a title, logo image, description, and a copyright.
Header and footer
: Specify the text that will be used in the header and footer of every page.
Advanced
: Specify the title for the table of contents page.

3. Click Run to start this run configuration.
4. After a successful build, check the output for errors and warnings in the Run tool window. If everything is fine, you will see links to the generated HTML and PDF files.
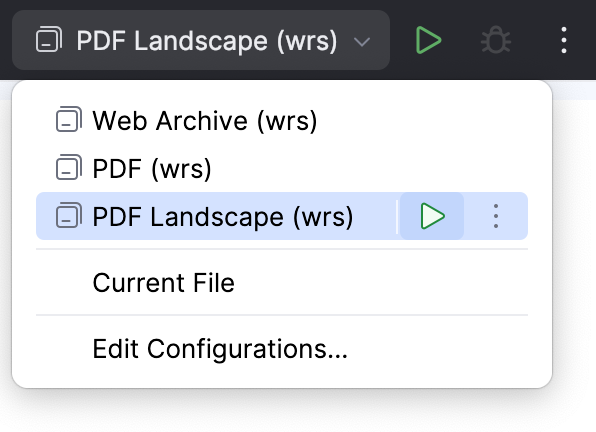
You can create multiple run configurations to quickly generate PDFs for various [instances](instances.html) or the same instance with different keymaps, headers, and footers.
Run them from the configurations widget in the main toolbar:
Procedure: Add more run configurations
1. Click Edit Configurations in the main toolbar widget or select `Run | Edit Configurations` from the main menu.
2. In the Run/Debug Configurations dialog, click  Add New Configuration and add a new Writerside configuration.
Procedure: Produce PDF as a build artifact
By default, the Writerside builder produces a documentation website as the build artifact. If you want to automate PDF generation, add the `-pdf` option to the main builder command `helpbuilderinspect`. In this case, the builder will produce a PDF as an artifact, not the website.
1. Add an XML file with PDF generation options under the [cfg directory](help-modules.html#build-config-dir) . These options are the same as the ones in the [PDF run configuration](#pdf-config-options). Here is an example file with PDF generation options:
```XML
My Awesome App
User Guide
Awesome Co © 2024
Title for Table of Contents page
Windows
```
2. Specify this file as an argument of the `-pdf` option or the value of the `PDF` variable when running the Writerside builder. For more information about running the builder, see [Build with Docker](build-with-docker.html).
## See also
### Related topics
[Build locally](local-build.html) [Build with Docker](build-with-docker.html)