# Build locally
When your help is ready, you can run a local build to make sure there are no build errors and publish the help website manually.
Procedure:
1. In the Writerside tool window , select an instance, click  Export To , and then click Web Archive.

This will create a new Writerside run configuration for building the selected instance into a website.
> **Note:**
> You can select a different instance for this configuration or select a [build group](build-groups.html) if you have any configured and want to build multiple instances at once.
2. If necessary, change the configuration name to something meaningful for you. This will make it easier to differentiate between several configurations if you have more than one.
3. By default, Writerside saves the archive to the root project directory. If necessary, change the location in the Save to field.
4. Click Run.

5. After a successful build, check the output for errors and warnings in the Run tool window.

6. Click Show generated files in a popup that appears in the bottom-right corner to open the directory with the archive.
You can create multiple run configurations to quickly generate help websites for various [instances](instances.html) and outputs.
Run them from the configurations widget in the main toolbar:
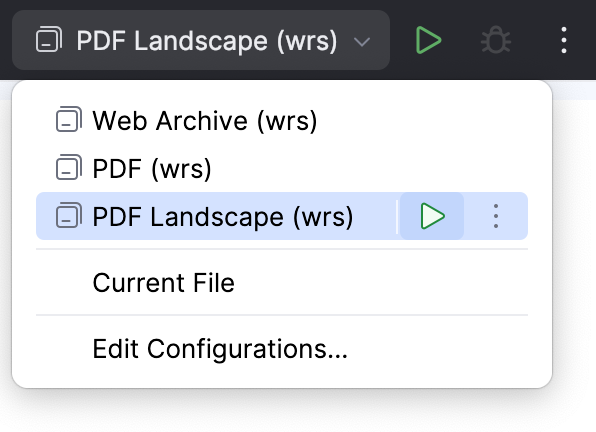
Procedure: Add more run configurations
1. Click Edit Configurations in the main toolbar widget or select `Run | Edit Configurations` from the main menu.
2. In the Run/Debug Configurations dialog, click  Add New Configuration and add a new Writerside configuration.
## Deploy locally
To deploy your help locally, you can unpack the generated ZIP archive to a local directory and run a simple HTTP server in it. Or deploy the static help website to any web server.
Procedure: Run on localhost
1. Download and install [http-server](https://www.npmjs.com/package/http-server).
2. Run the `http-server` command in the directory where you have unpacked the archive with the built help website. For example:
```CONSOLE
http-server ~/my-help
```
3. Open [http://localhost:8080](http://localhost:8080) in a web browser.
## Dry run
If you are running local builds only to check for errors and warnings, you do not need the generated artifacts. In this case, you can enable the dry run mode that runs local builds without saving the ZIP archives with the help website.
Procedure: Enable dry run
1. Press `Ctrl+Shift+A` (Windows), `⌘ ⇧ A` (macOS), `⌘ ⇧ A` (IntelliJ IDEA Classic (macOS)), `⌘ ⇧ P` (macOS System Shortcuts), `Ctrl+Shift+A` (XWin), `Ctrl+Shift+A` (GNOME), `Ctrl+Shift+A` (KDE), `Escape, X` (Emacs), `Ctrl+Shift+P` (Sublime Text), `⌘ ⇧ P` (Sublime Text (macOS)), `Ctrl+I` (NetBeans), `Ctrl+Shift+A` (Visual Studio), `⌘ ⇧ A` (Visual Studio (macOS)), `Ctrl+Shift+A` (Eclipse), `⌘ 3` (Eclipse (macOS)), type `Registry` and open the Registry.
2. In the Registry dialog, start typing `wrs` and enable the wrs.dry.run key.
## See also
### Related topics
[Export to PDF](export-to-pdf.html) [Build with Docker](build-with-docker.html)