# Projects
A documentation project contains all the configuration and content files necessary for authoring and building your documentation.
Writerside allows you to create a dedicated documentation project or add your documentation sources to your development project.
> **Note:**
> There is a known issue with Rider and DataGrip that prevents creating a new project. You can still use Writerside in these IDEs for working with existing documentation projects. However, to create a new project, install Writerside in another IDE.
Procedure: Create new documentation project
1. From the main menu, select `File | New | Project`.
2. In the New Project wizard, select Writerside on the left, then select Starter Project, and then click Next.
3. Specify the name and location for your new project and click Create.
Procedure: Add documentation to existing project
1. Open your existing development project.
2. In the Writerside tool window , click Add documentation, select To Current Project, and then click New.
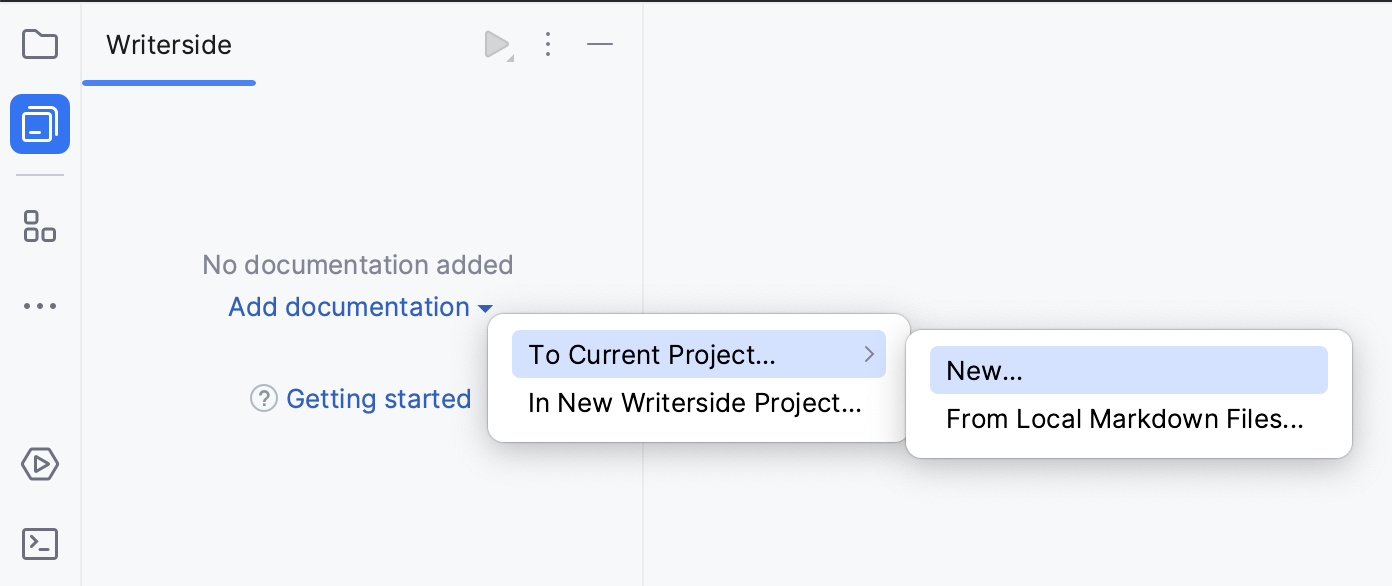
3. Specify a name for the first [help instance](instances.html) and click OK.
## Project templates
Writerside includes several project templates, so you do not have to start with an empty project.
Starter Project
: Minimalistic starter project with one [help instance](instances.html) and a sample Markdown topic to get you started
Playground
: Project with multiple instances and topics to explore the markup and various features
API Docs
: Sample API documentation project
For information about importing existing documentation in Markdown, see [Import from Markdown](import-markdown.html).
## Project structure
Click  in the left-side tool window bar to open the Writerside tool window and work with your documentation project.
Use the Project tool window to browse various configuration files and resources not accessible from the Writerside tool window.
Procedure:
To open the Project tool window, do one of the following:
* From the main menu, select `View | Tool Windows | Project`.
* Click  Project on the left-side tool window toolbar.
* Press `Alt+1` (Windows), `⌘ 1` (macOS), `⌘ 1` (IntelliJ IDEA Classic (macOS)), `⌘ 1` (macOS System Shortcuts), `Alt+1` (XWin), `Alt+1` (GNOME), `Alt+1` (KDE), `Alt+1` (Emacs), `Alt+1` (Sublime Text), `⌘ 1` (Sublime Text (macOS)), `Ctrl+1` (NetBeans), `Ctrl+Alt+L` (Visual Studio), `⌘ ⌥ L` (Visual Studio (macOS)), `Alt+1` (Eclipse), `Alt+1` (Eclipse (macOS)).
Here is an example of a typical Writerside starter project structure:
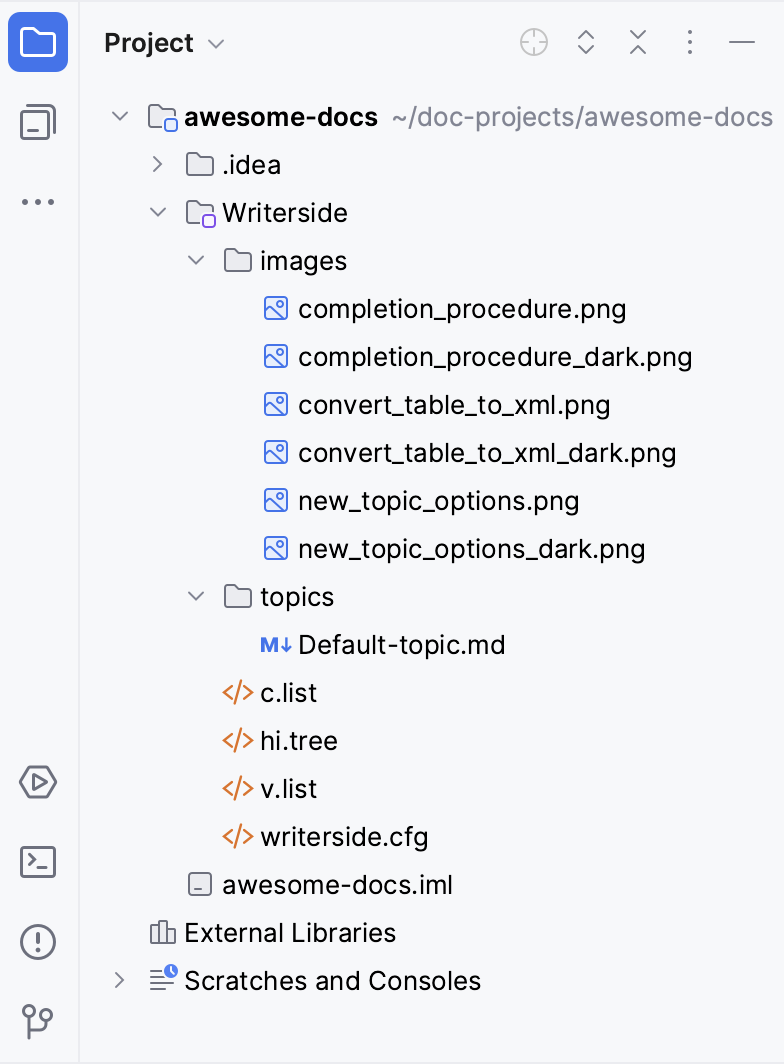
The `Writerside` directory in the previous example is the [help module](help-modules.html) where all configuration and content files of your documentation project are located. You can name it anything you like, for example `docs`.
Whenever we talk about the project root of a Writerside documentation project, we actually mean the corresponding help module root. For more information, see [Module structure](help-modules.html#module_structure).