Time Tracking Tutorial
The Time Tracking feature lets you and your team report the amount of time spent working on issues in your project. This feature helps agencies track how much effort has been spent for different clients and lets development teams measure how the actual work compares to their original estimation. With this feature enabled:
Your team can add work items to issues.
YouTrack calculates the total spent time recorded in each issue.
You can create summary reports that show total spent time for different types of work.
This tutorial shows you how to configure time tracking in YouTrack and use the feature in your project.
Enable Time Tracking
The first step is to enable the time tracking feature in your project.
To enable time tracking:
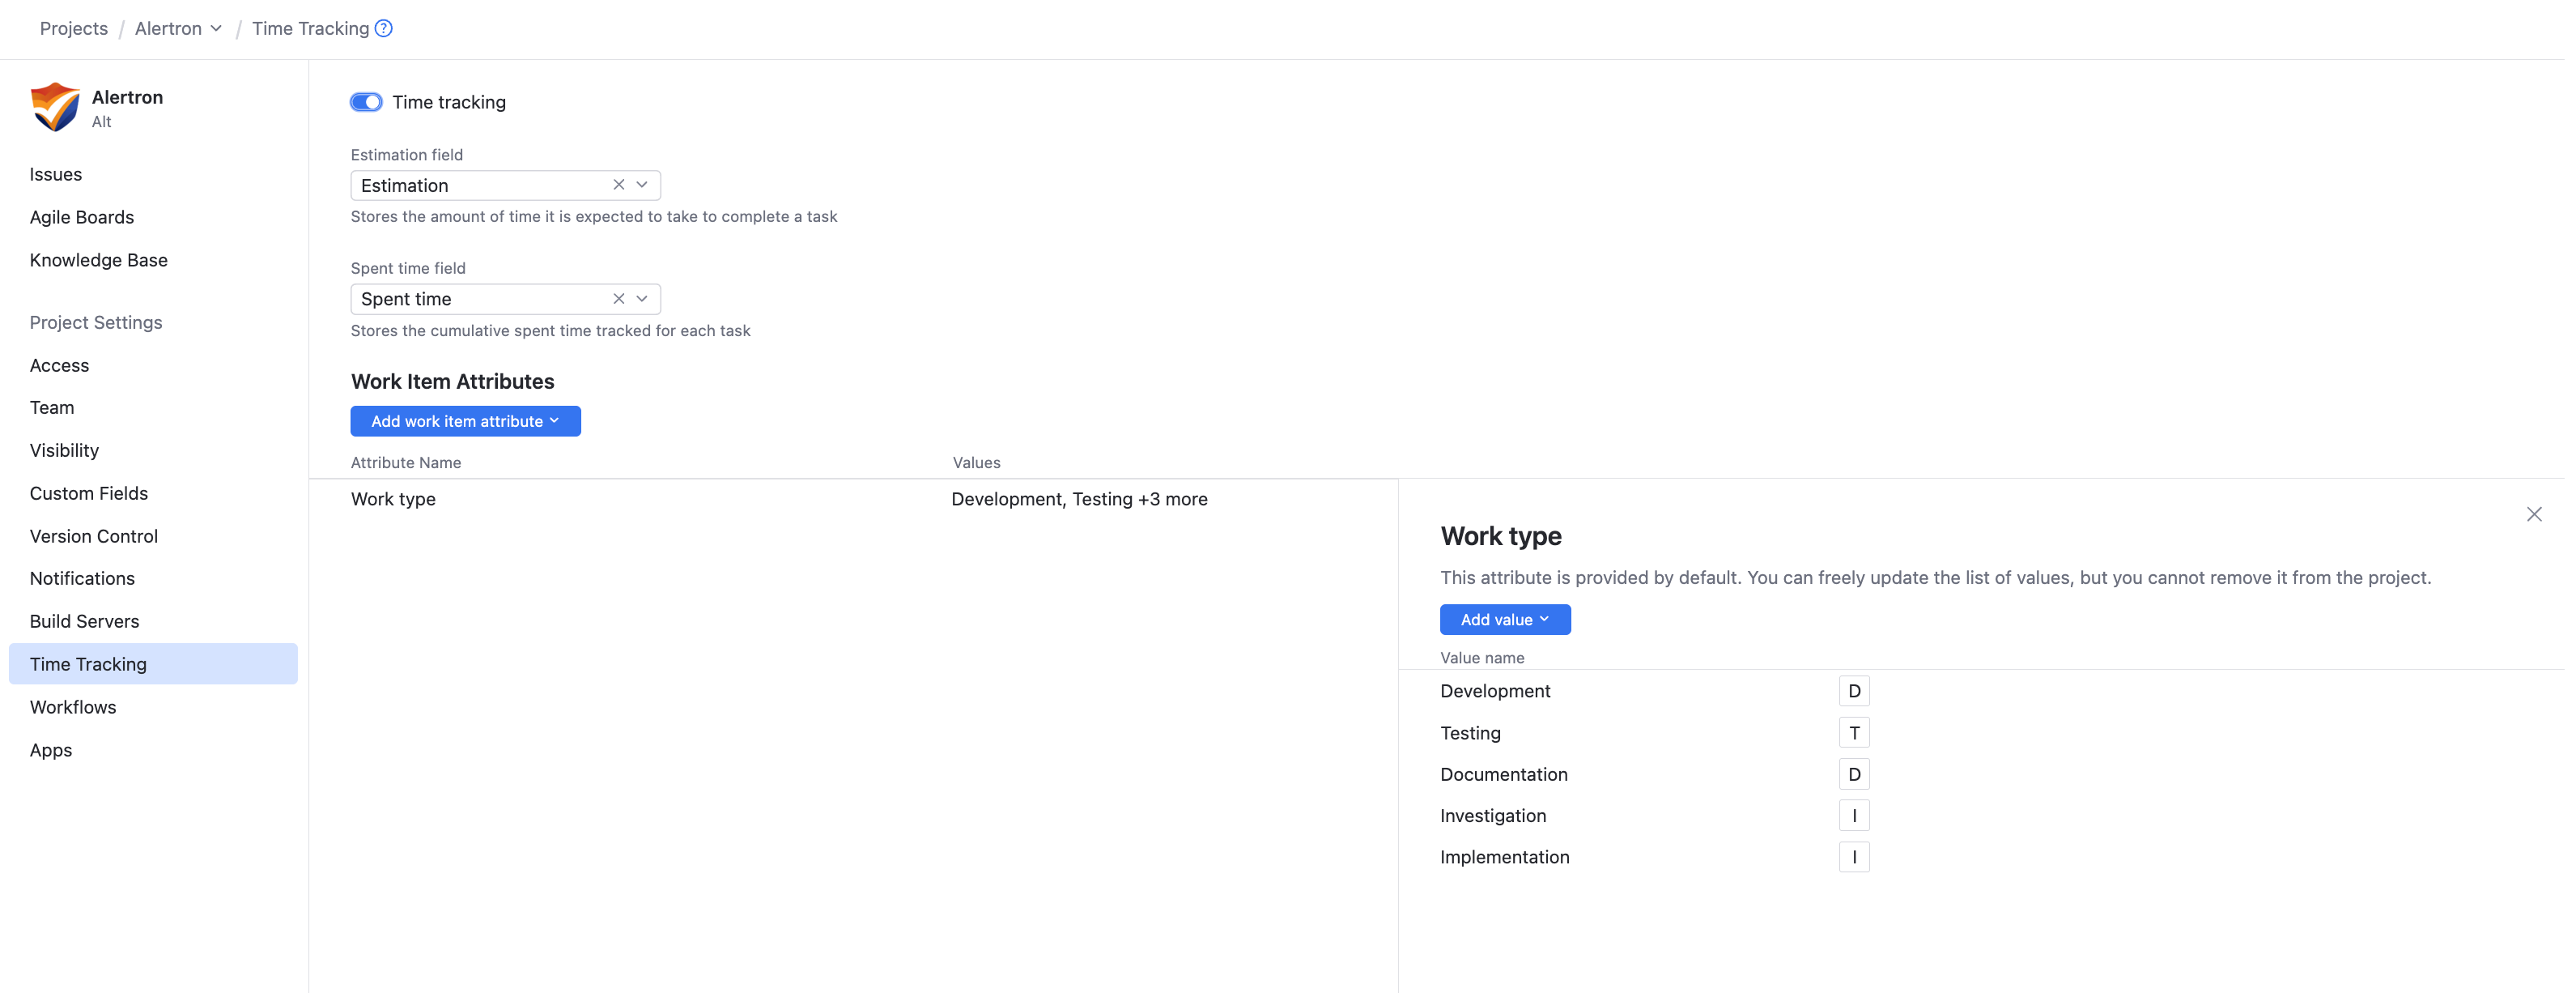
Configure Estimation and Spent Time
With time tracking, you can estimate how much time you expect to spend to resolve each issue. This estimation is stored as a period type.
The amount of time spent that is entered in each work item is also stored as a period type. This field records the total amount of time that is reported for all work items in the issue. You cannot update this value manually — only by adding or editing work items.
The amount that is recorded as spent time is compared to the value that is stored in another period type field that stores estimations. The field that stores the estimation presents this calculation in a progress indicator. The amount of spent time that does not exceed the original estimation is drawn in green. The missing piece of the pie represents the amount of time that is left over. The time left and estimation are displayed in a tooltip when you move the pointer over the progress indicator.

When the spent time exceeds the original estimation, the progress indicator is drawn as a red circle. The tooltip displays the amount of spent time that exceeds the original estimation.

If your project already includes fields for Estimation and Spent Time that use the period field type, YouTrack uses these fields by default for time tracking. Otherwise, YouTrack automatically adds these fields to your project when you edit these settings.
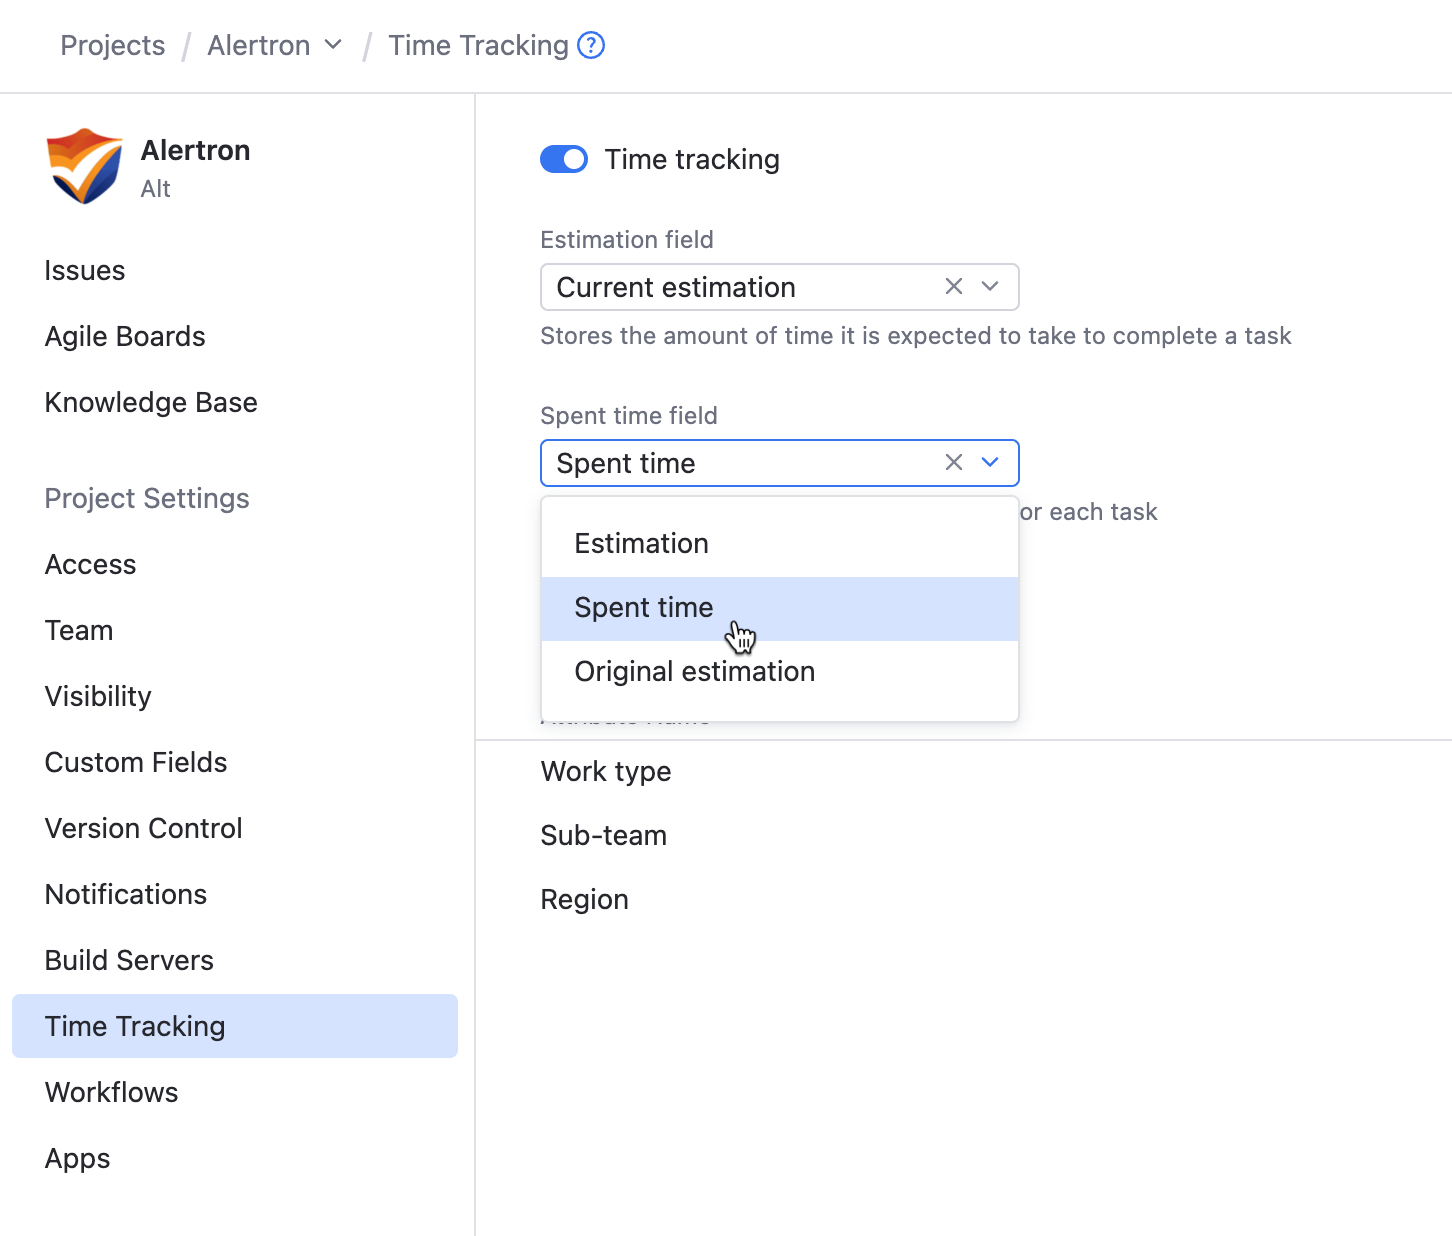
If you need to reconfigure time tracking for an existing project, you can always update these settings on the Time Tracking page.
Customize Work Item Attributes
The next thing you need to decide is what information you want to capture when people report spent time in your project.
YouTrack provides a default Work type attribute that lets you assign a work type to each work item. This is typically used to categorize efforts related to different types of activity, like design, development, testing, documentation, and so on.
By default, this attribute includes values for Development, Documentation, and Testing. If you want to categorize your work differently, you can add or remove values from the set without affecting other projects in the system.
You can also add an unlimited number of custom attributes to work items in your project. You can add and customize attributes that are used in other projects or define categories that are specifically tailored to the time tracking needs for your project team.
The controls for managing these attributes are available from the Time Tracking page in the Project Settings.
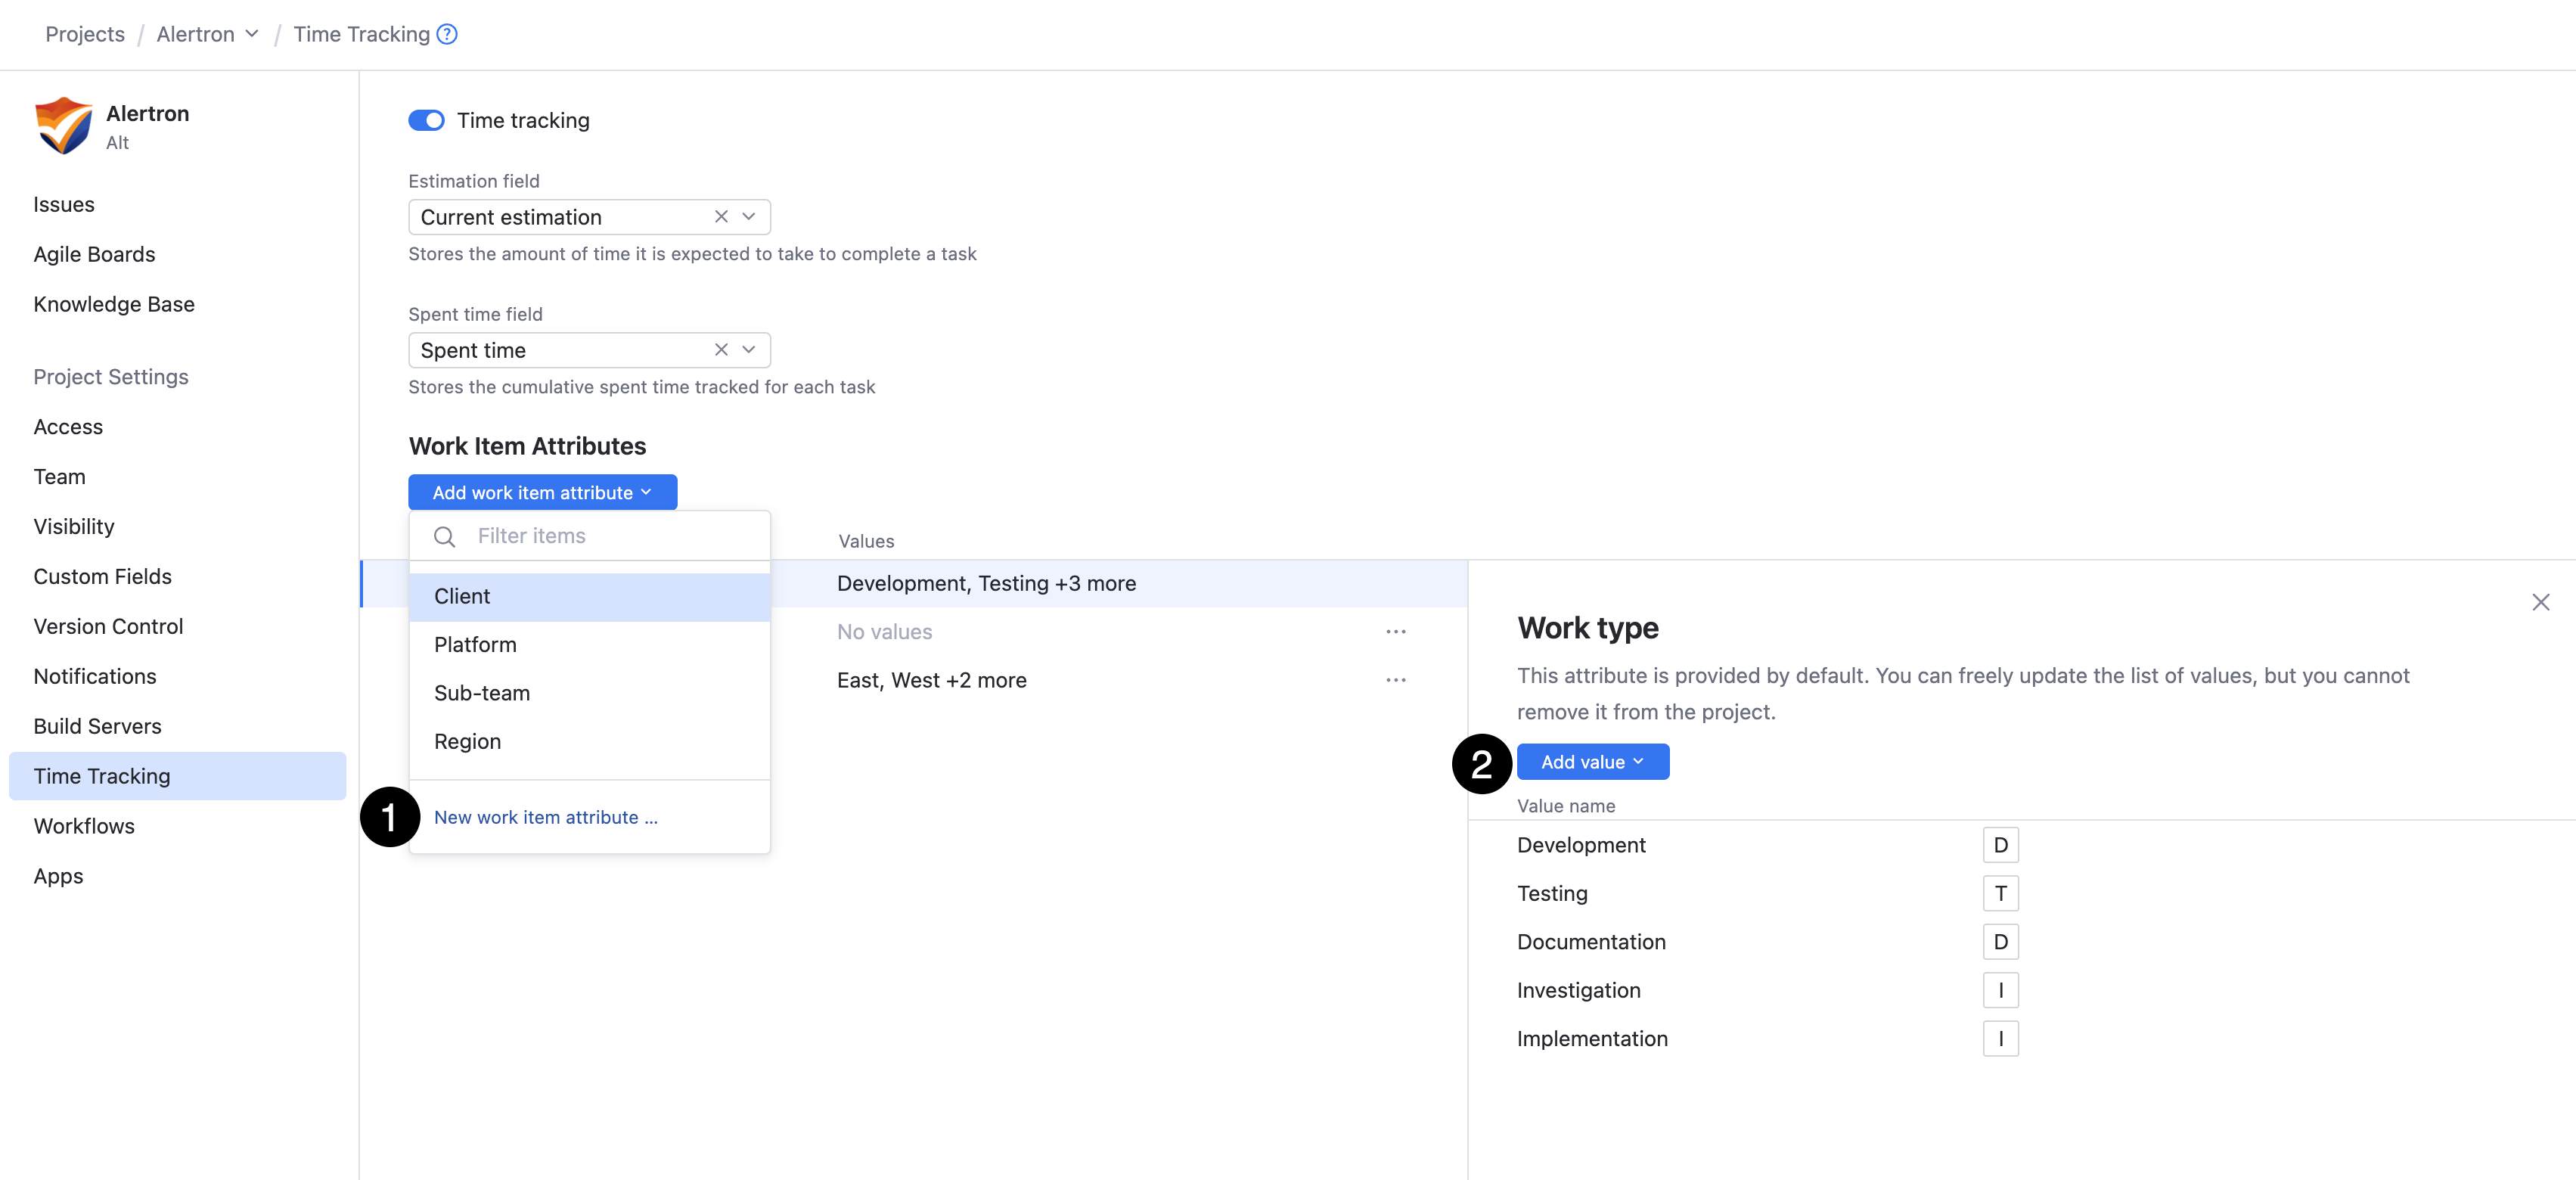
Define custom attributes for your project.
Customize the list of available work types.
An administrator can define work item attributes at the global level on the Time Tracking page under the Administration menu. For more information, see Work Item Attributes.
Log Spent Time
YouTrack associates work items with a specific issue. In other words, you can log multiple work items that represent work related to the same issue. In single issue view, YouTrack shows a list of work items that have been added to an issue in the activity stream. The filter that shows spent time is only visible when time tracking is enabled in the project.
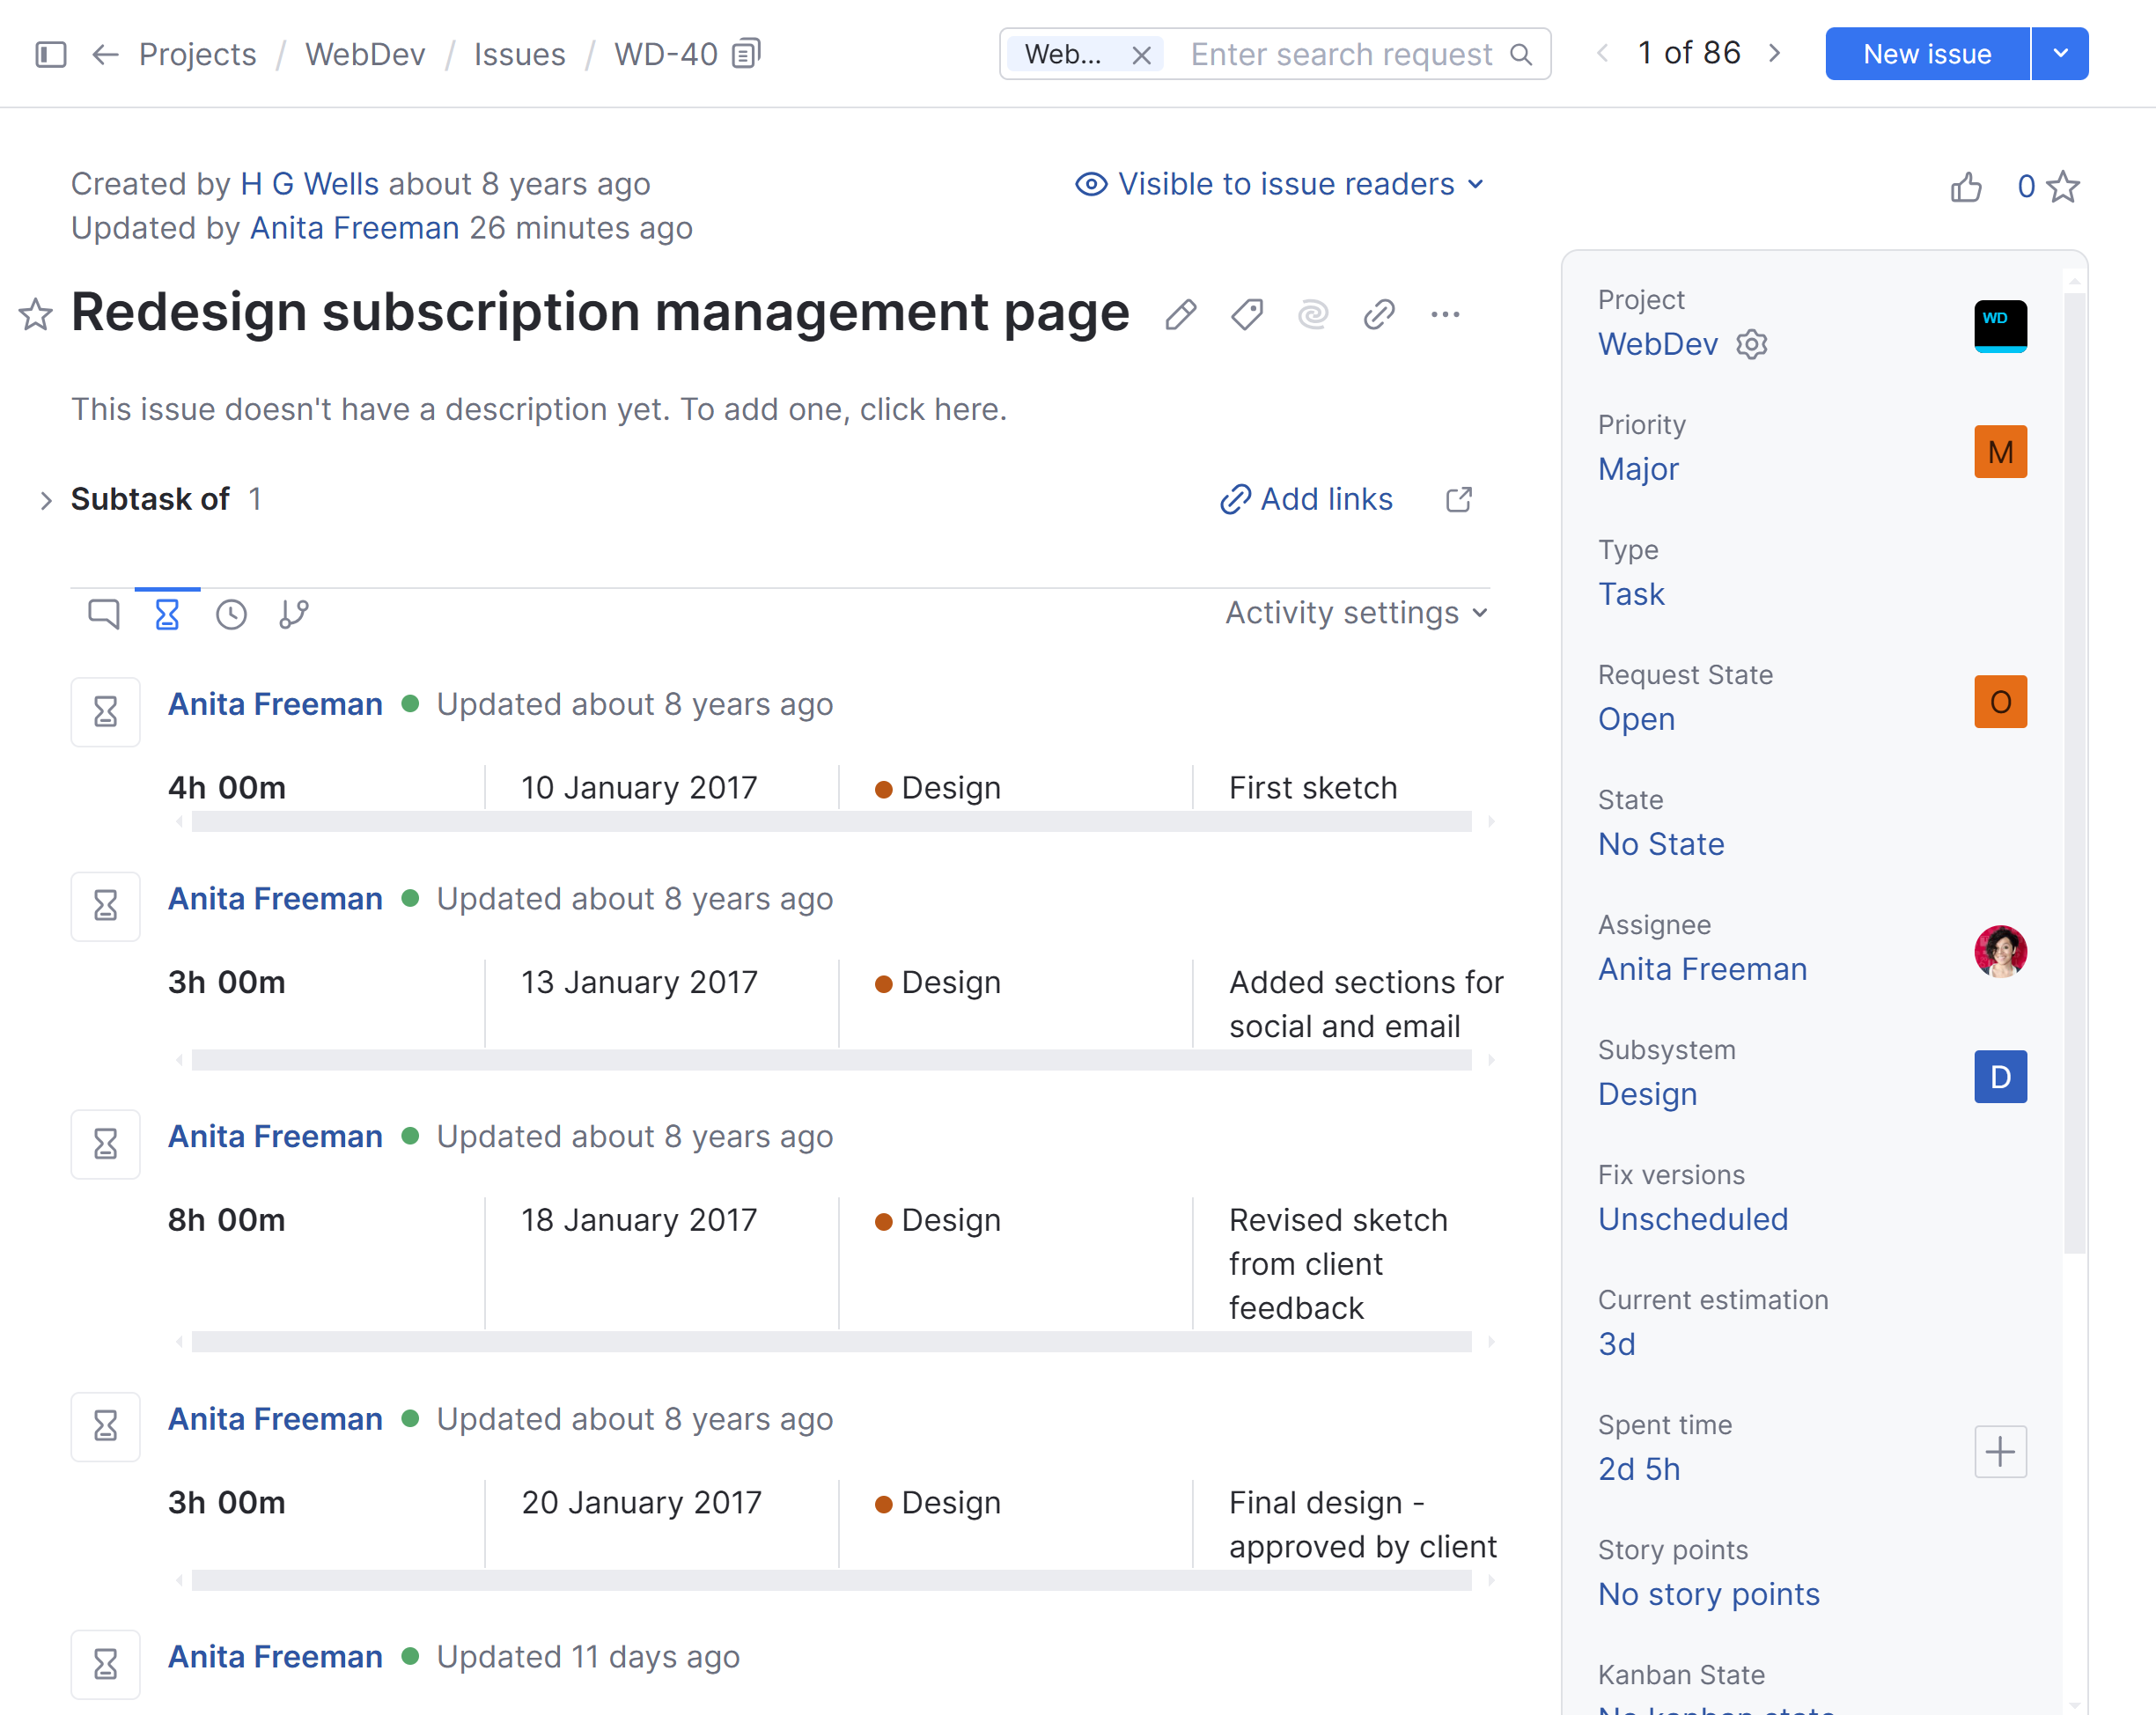
Users can log time spent working on an issue in minutes, hours, days or weeks. These units of time are referenced with abbreviations such as 1m, 1h, 1d, and 1w.
To add a work item to an issue:
From the main navigation menu, select
Issues.
Open the issue in single issue view.
Click the Add spent time link below the input field for comments.
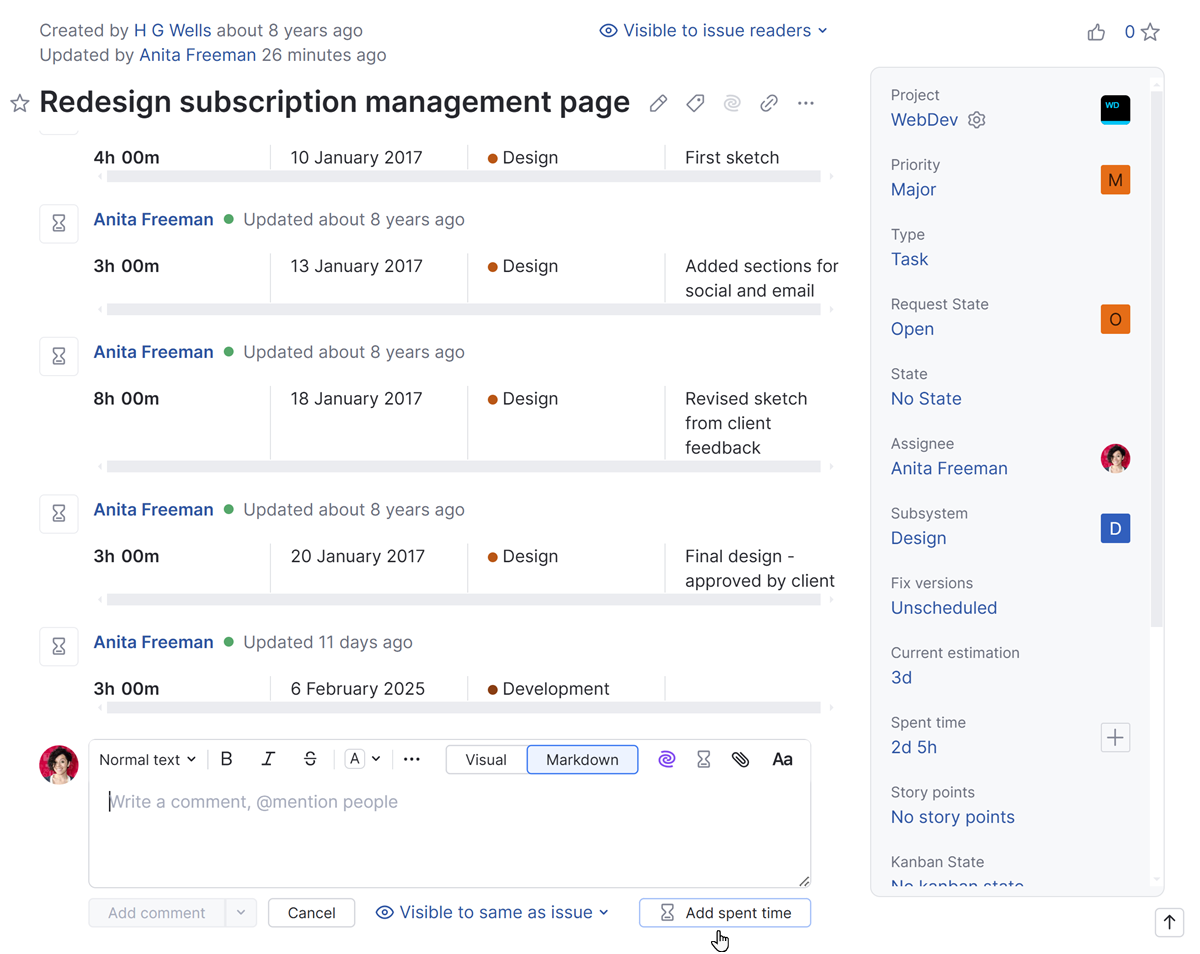
The input field for comments is replaced with the form for recording Spent time.
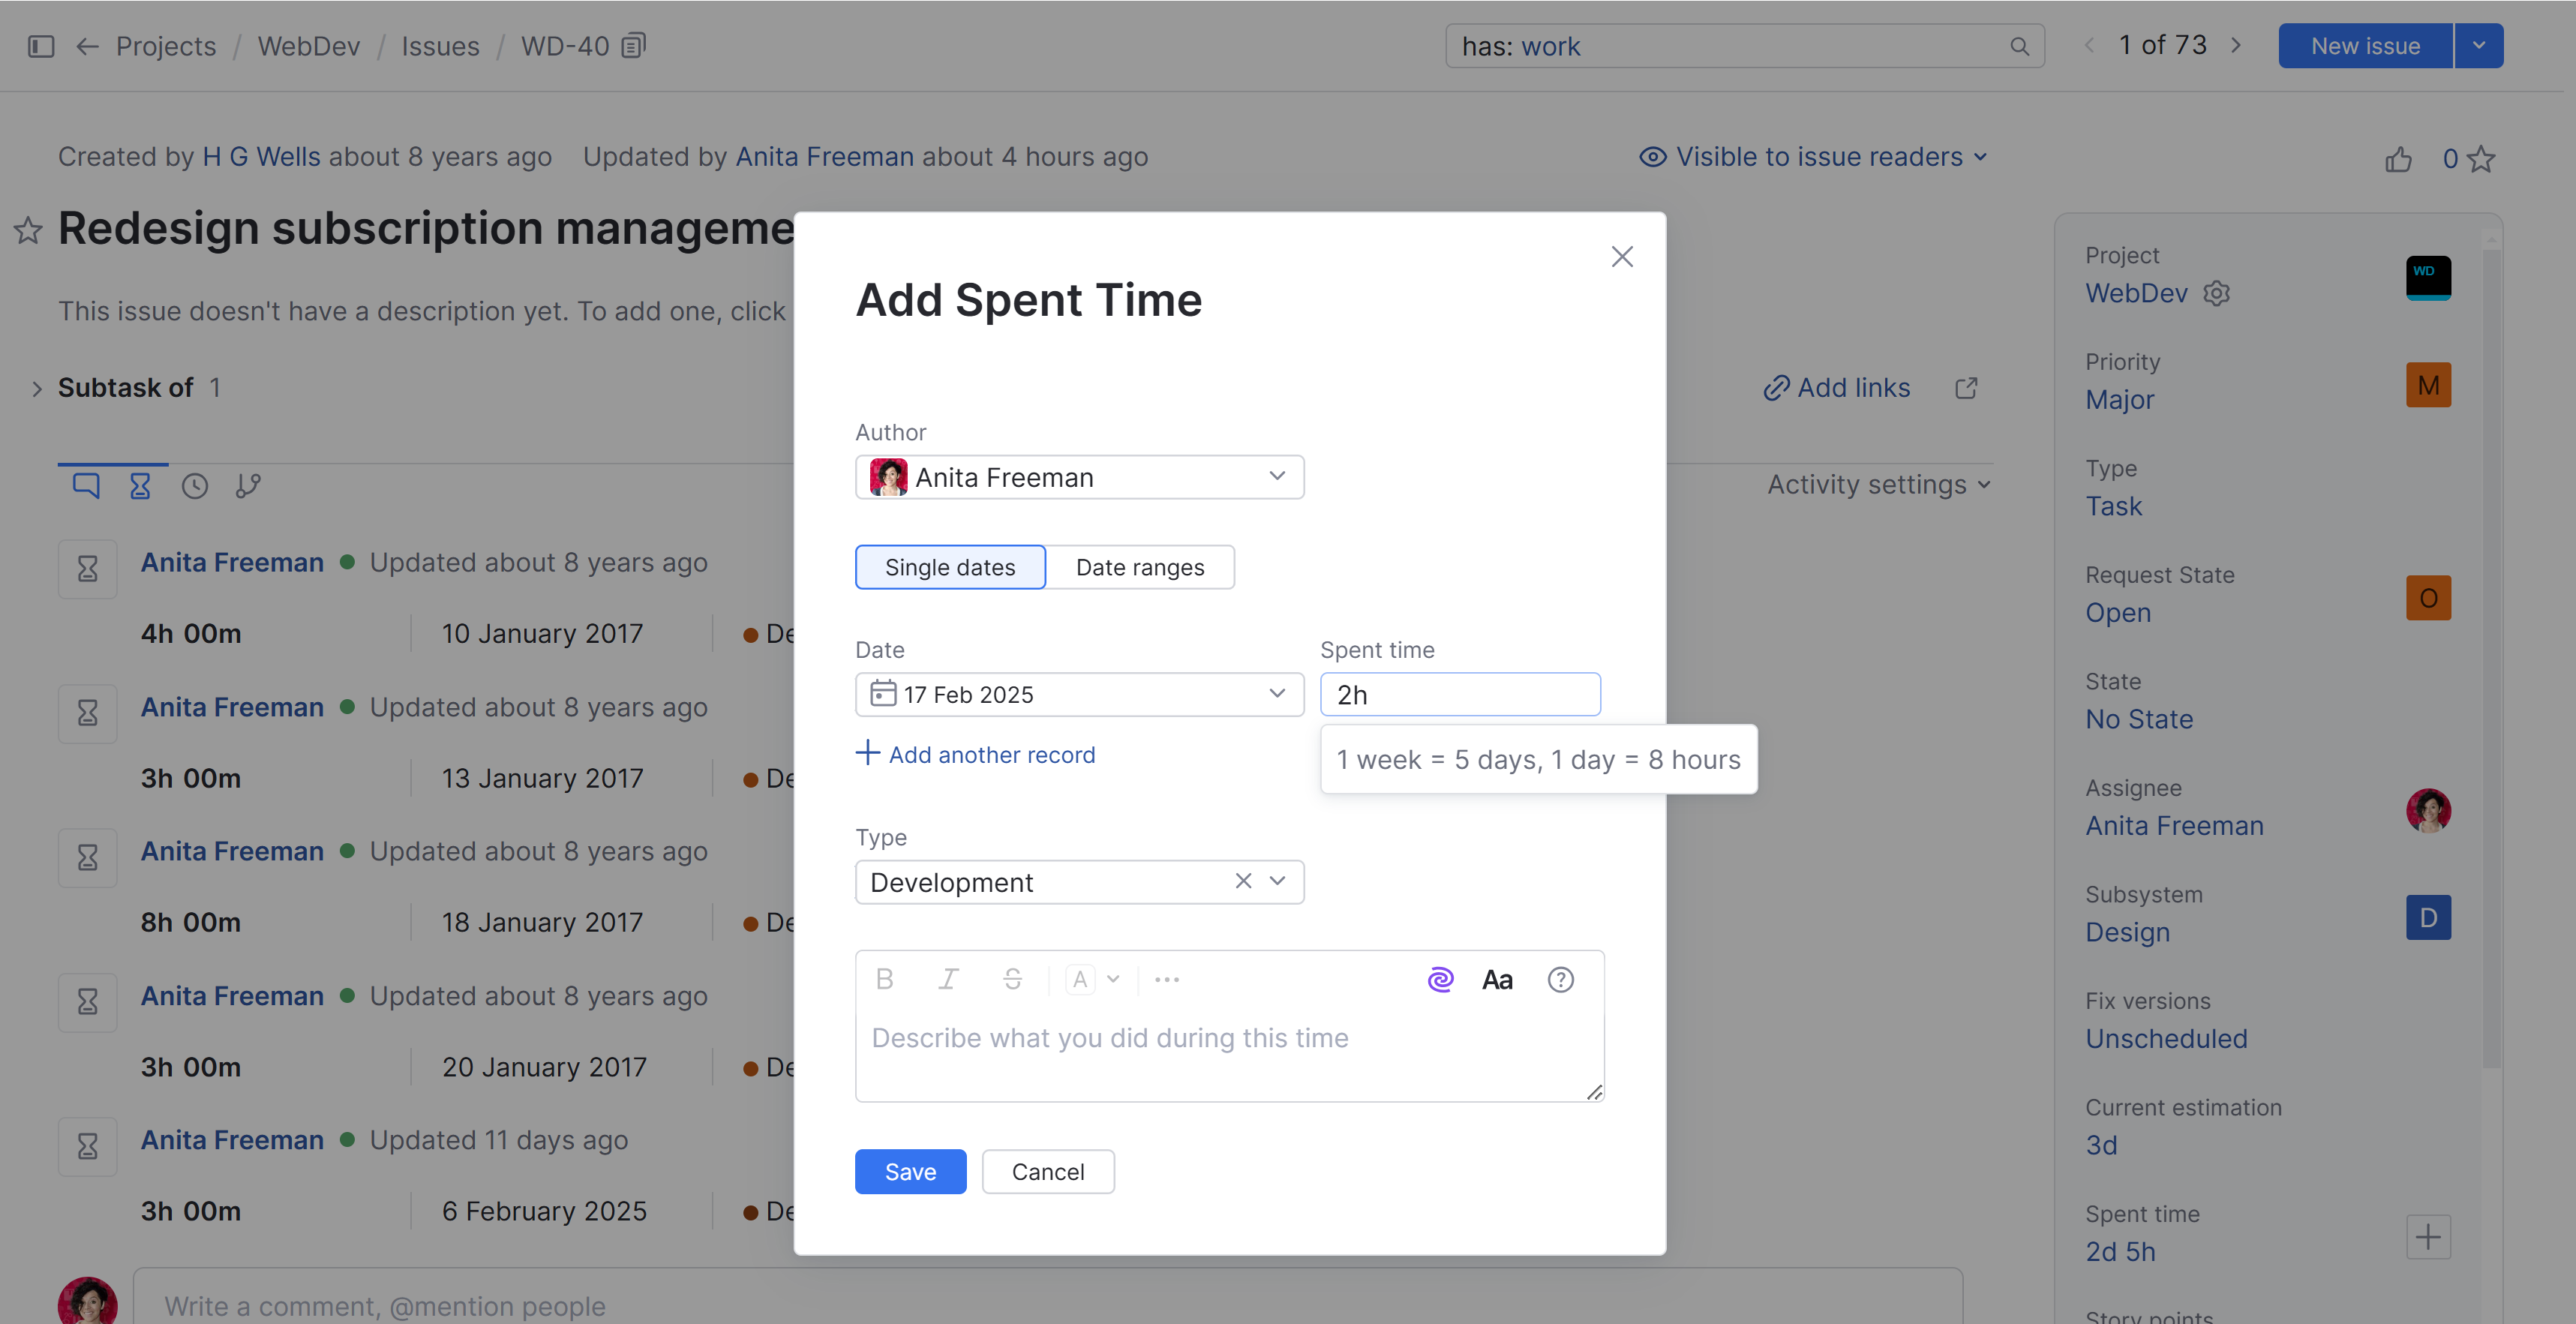
The default values for work author and work date are set to the current user and current date, respectively.
If you have the Create Not Own Work Item permission in the current project, you can set another user as the work author. To change the work author, select another user from the list.
To change the work date, click the date link and select another date from the calendar.
Select an optional work type from the list.
If your project uses additional attributes for categorizing work, you can set the values for them here as well.
Enter the amount of time spent in the format
#w#d#h#m. The durations are calculated automatically. For example, if you enter120m, the duration is set to2hin the work item.Enter an optional comment.
Click the Add spent time button.
The work item is added to the issue.
The spent time is added to the custom field that stores this value.
The progress indicator in the field that is used to estimate the total effort is updated.
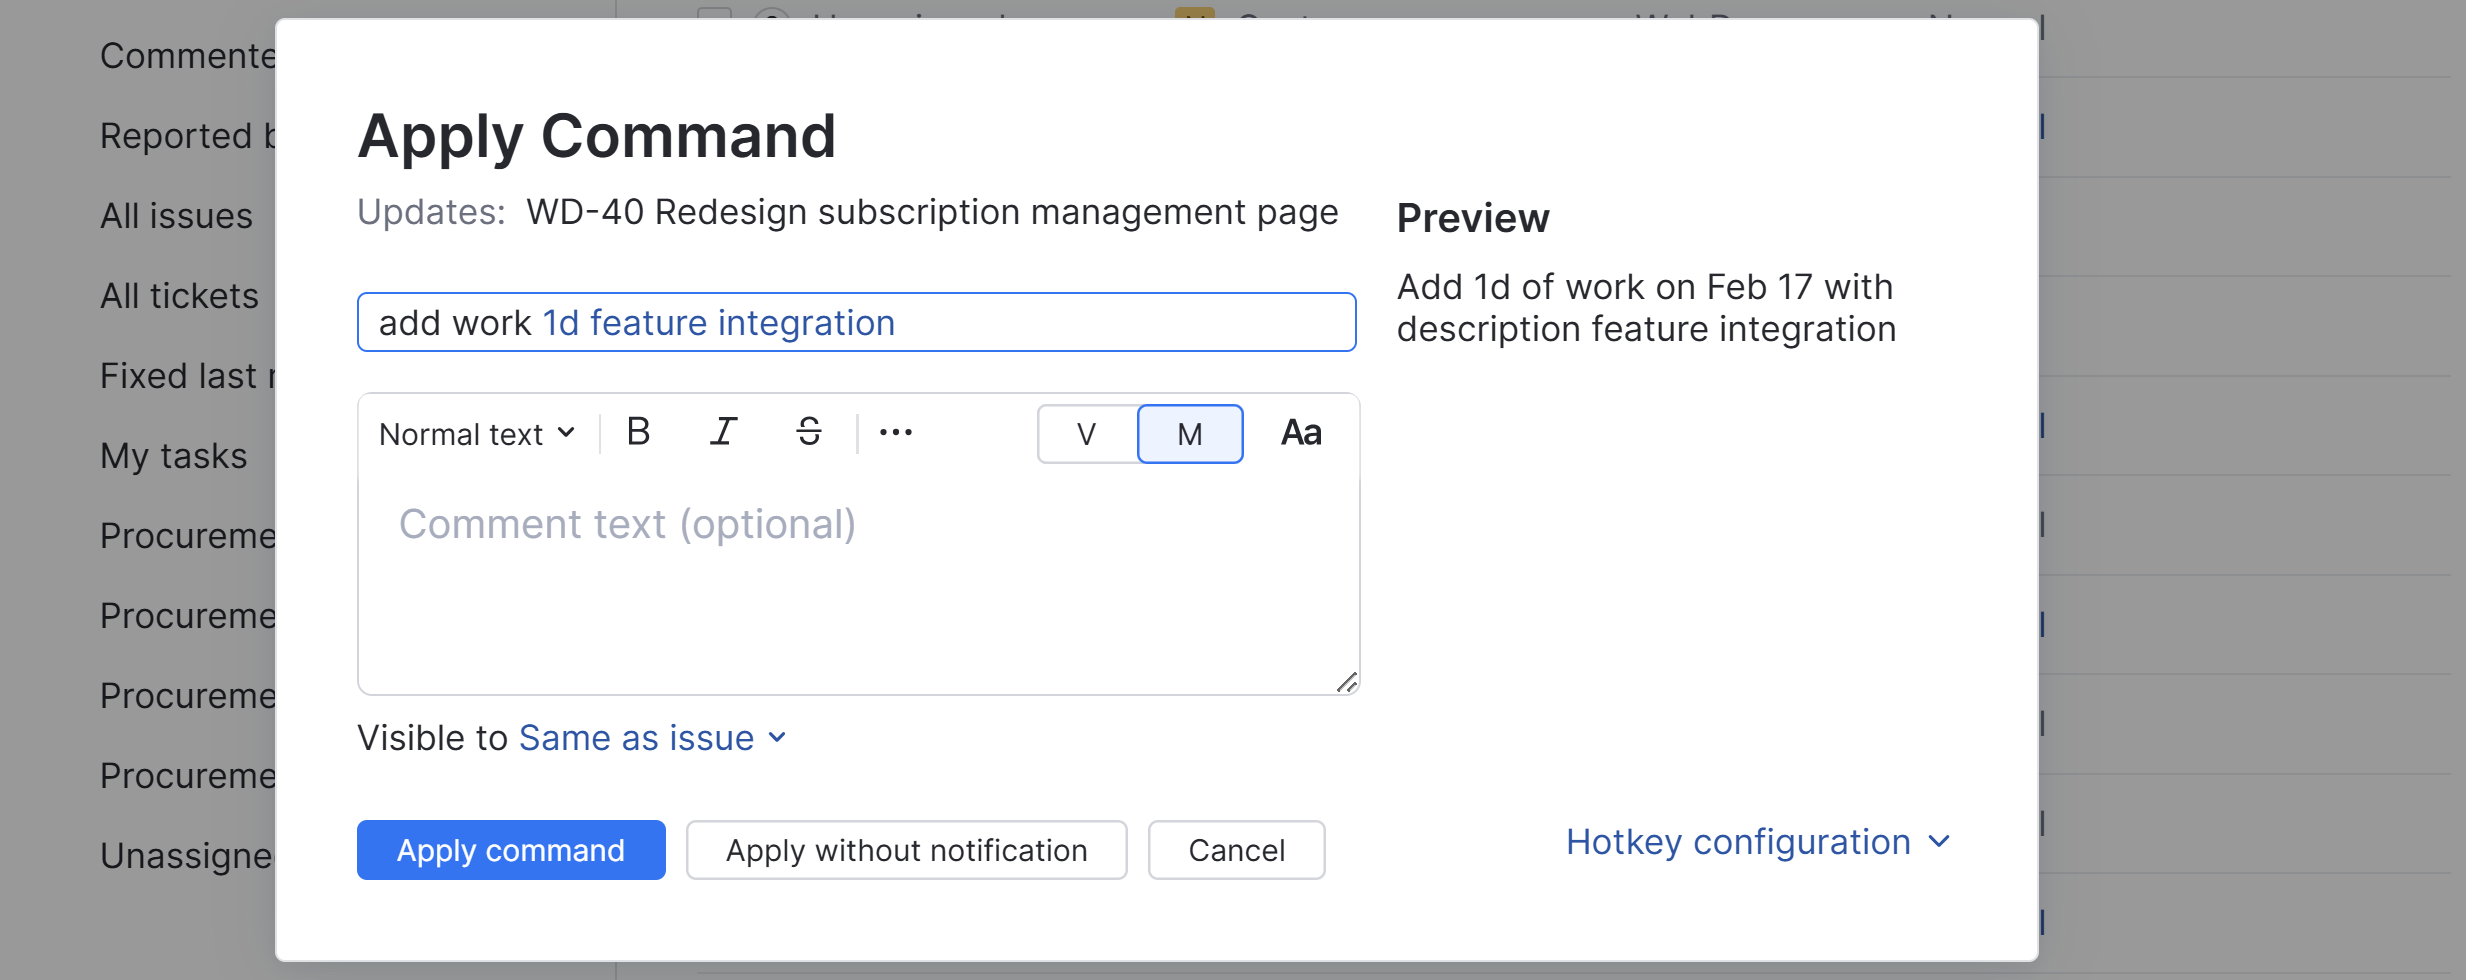
To add a work item with a command, just start typing. For example, if you type add work 1w worked on the feature integration, a work item with the duration of one week and the description "worked on the feature integration" is added to the selected issue.
For issues that are linked as the parent for other issues, YouTrack automatically calculates the spent time as the sum of values that are added to each subtask.
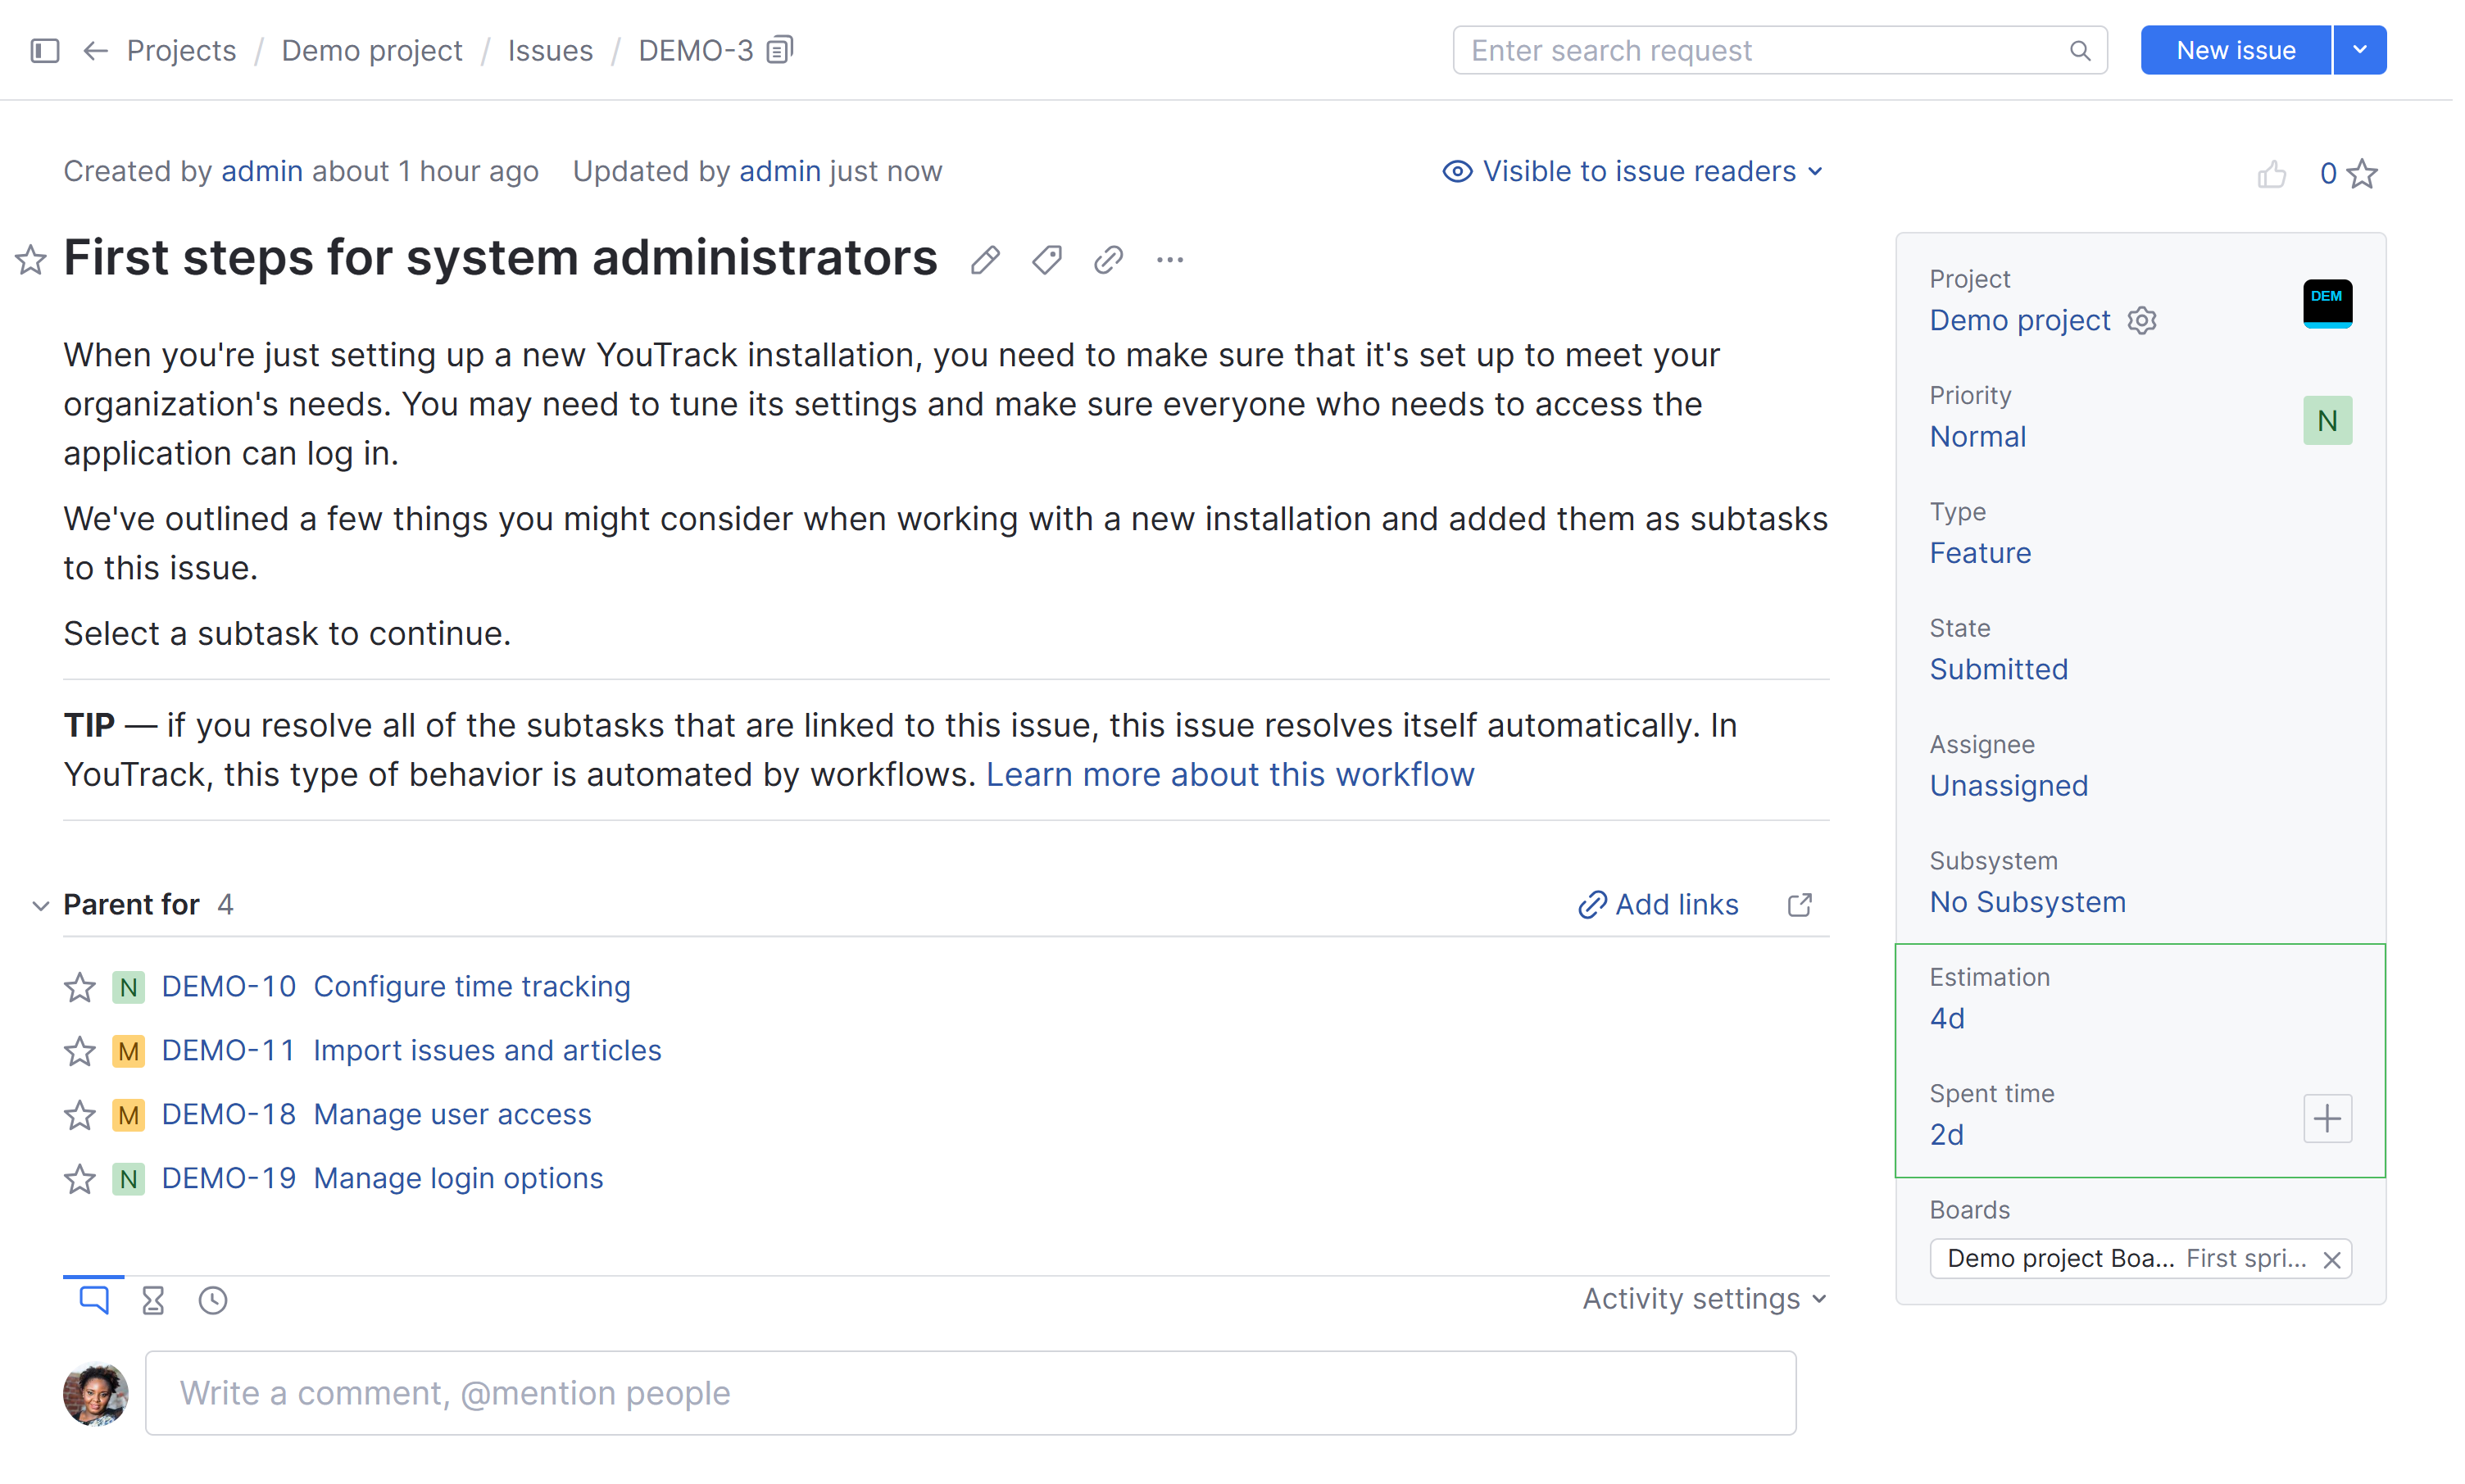
If you add work items to a parent task, the spent time in the parent task includes spent time from work items that are added to the parent task plus the total spent time for each of its subtasks. For this reason, we generally recommend that you avoid adding work items to parent tasks.
Track Estimations and Spent Time
While time spent by different team members can be recorded separately, the value stored in the Spent time field is the total time spent working on the issue, regardless of type.
To view the Estimation and Spent Time fields on the issue list, open Administration in the main navigation and select Custom Fields. Click on the Fields List tab and make sure that the Show in issue list setting is enabled:
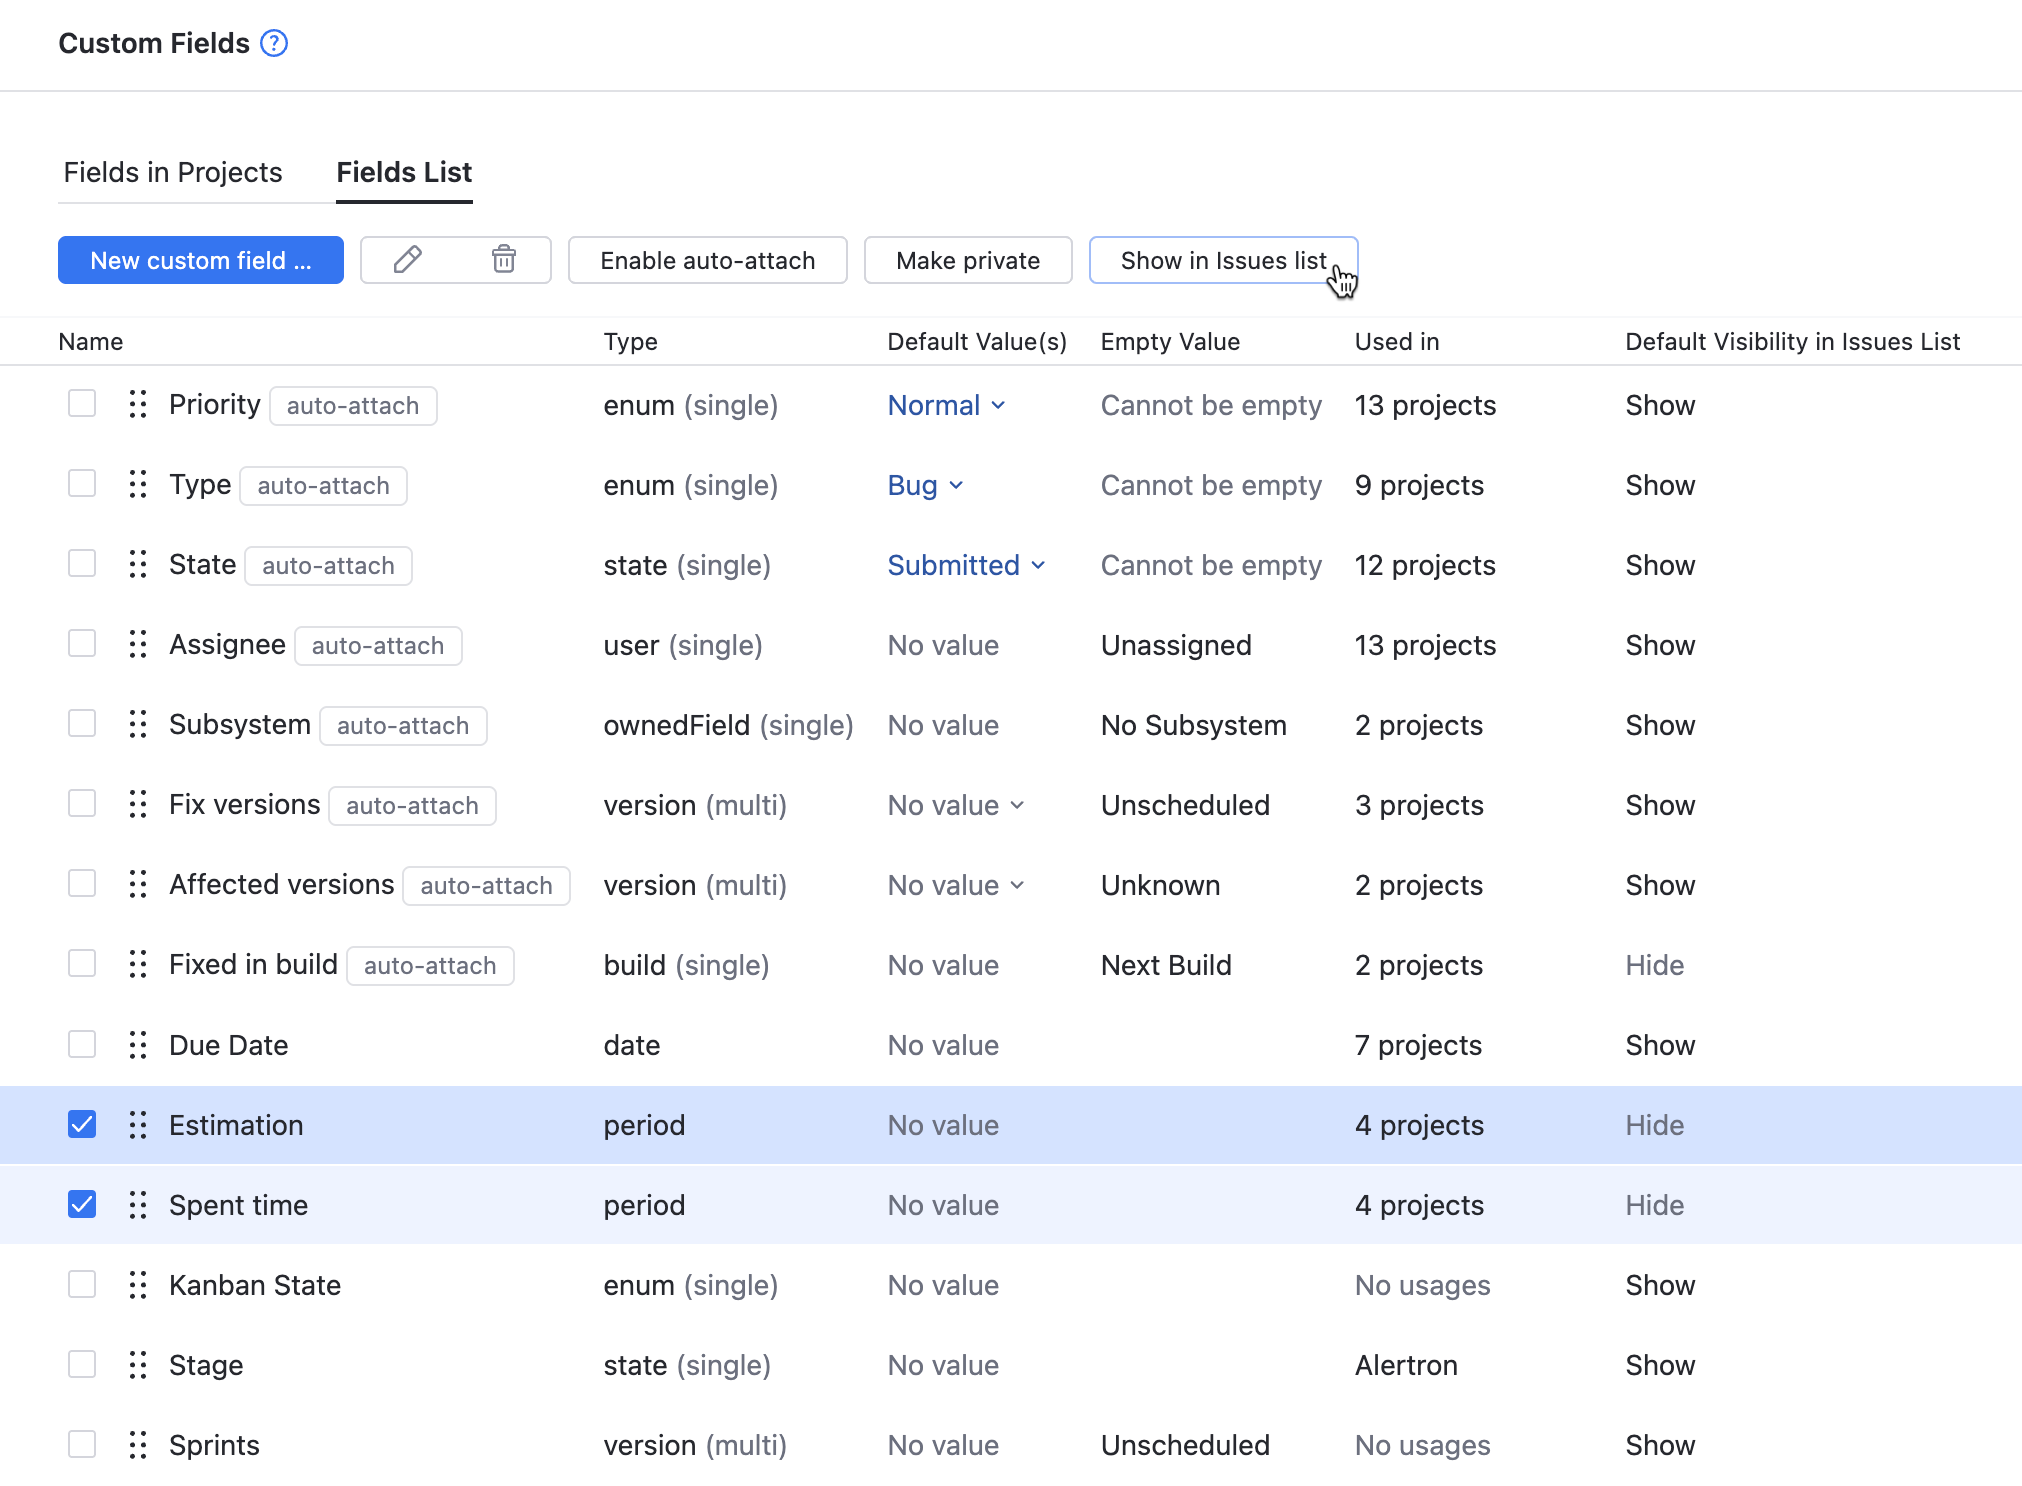
This example below shows the total Spent Time of one week and an Estimation of two weeks. The green part of the progress indicator shows that 50% of the estimated time is already spent.

The values for the Estimation and Spent Time fields are shown for each issue individually. The Estimation and Spent Time for parent tasks are calculated as the sum of the corresponding values for each subtask.
If you add work items to a parent task, the spent time in the parent task includes spent time from work items that are added to the parent task plus the total spent time for each of its subtasks. For this reason, we generally recommend that you avoid adding work items to parent tasks.
If you change the estimation for a parent task, the synchronization between the parent task and its subtasks is broken. To restore the synchronization and calculate the estimation for the parent task automatically, set the estimation value in the parent task to the total estimation for each of its subtasks.
Report Your Efforts
When you need to know how much time was spent on different types of activities, create a Time Report.
To create a report:
From the main navigation menu, select
Reports.
From the
New report menu, select Time report.
Enter a name for the report.
Select one or more projects from the drop-down list.
Select a time period.
To group work items on the report, select a Group by option from the drop-down list.
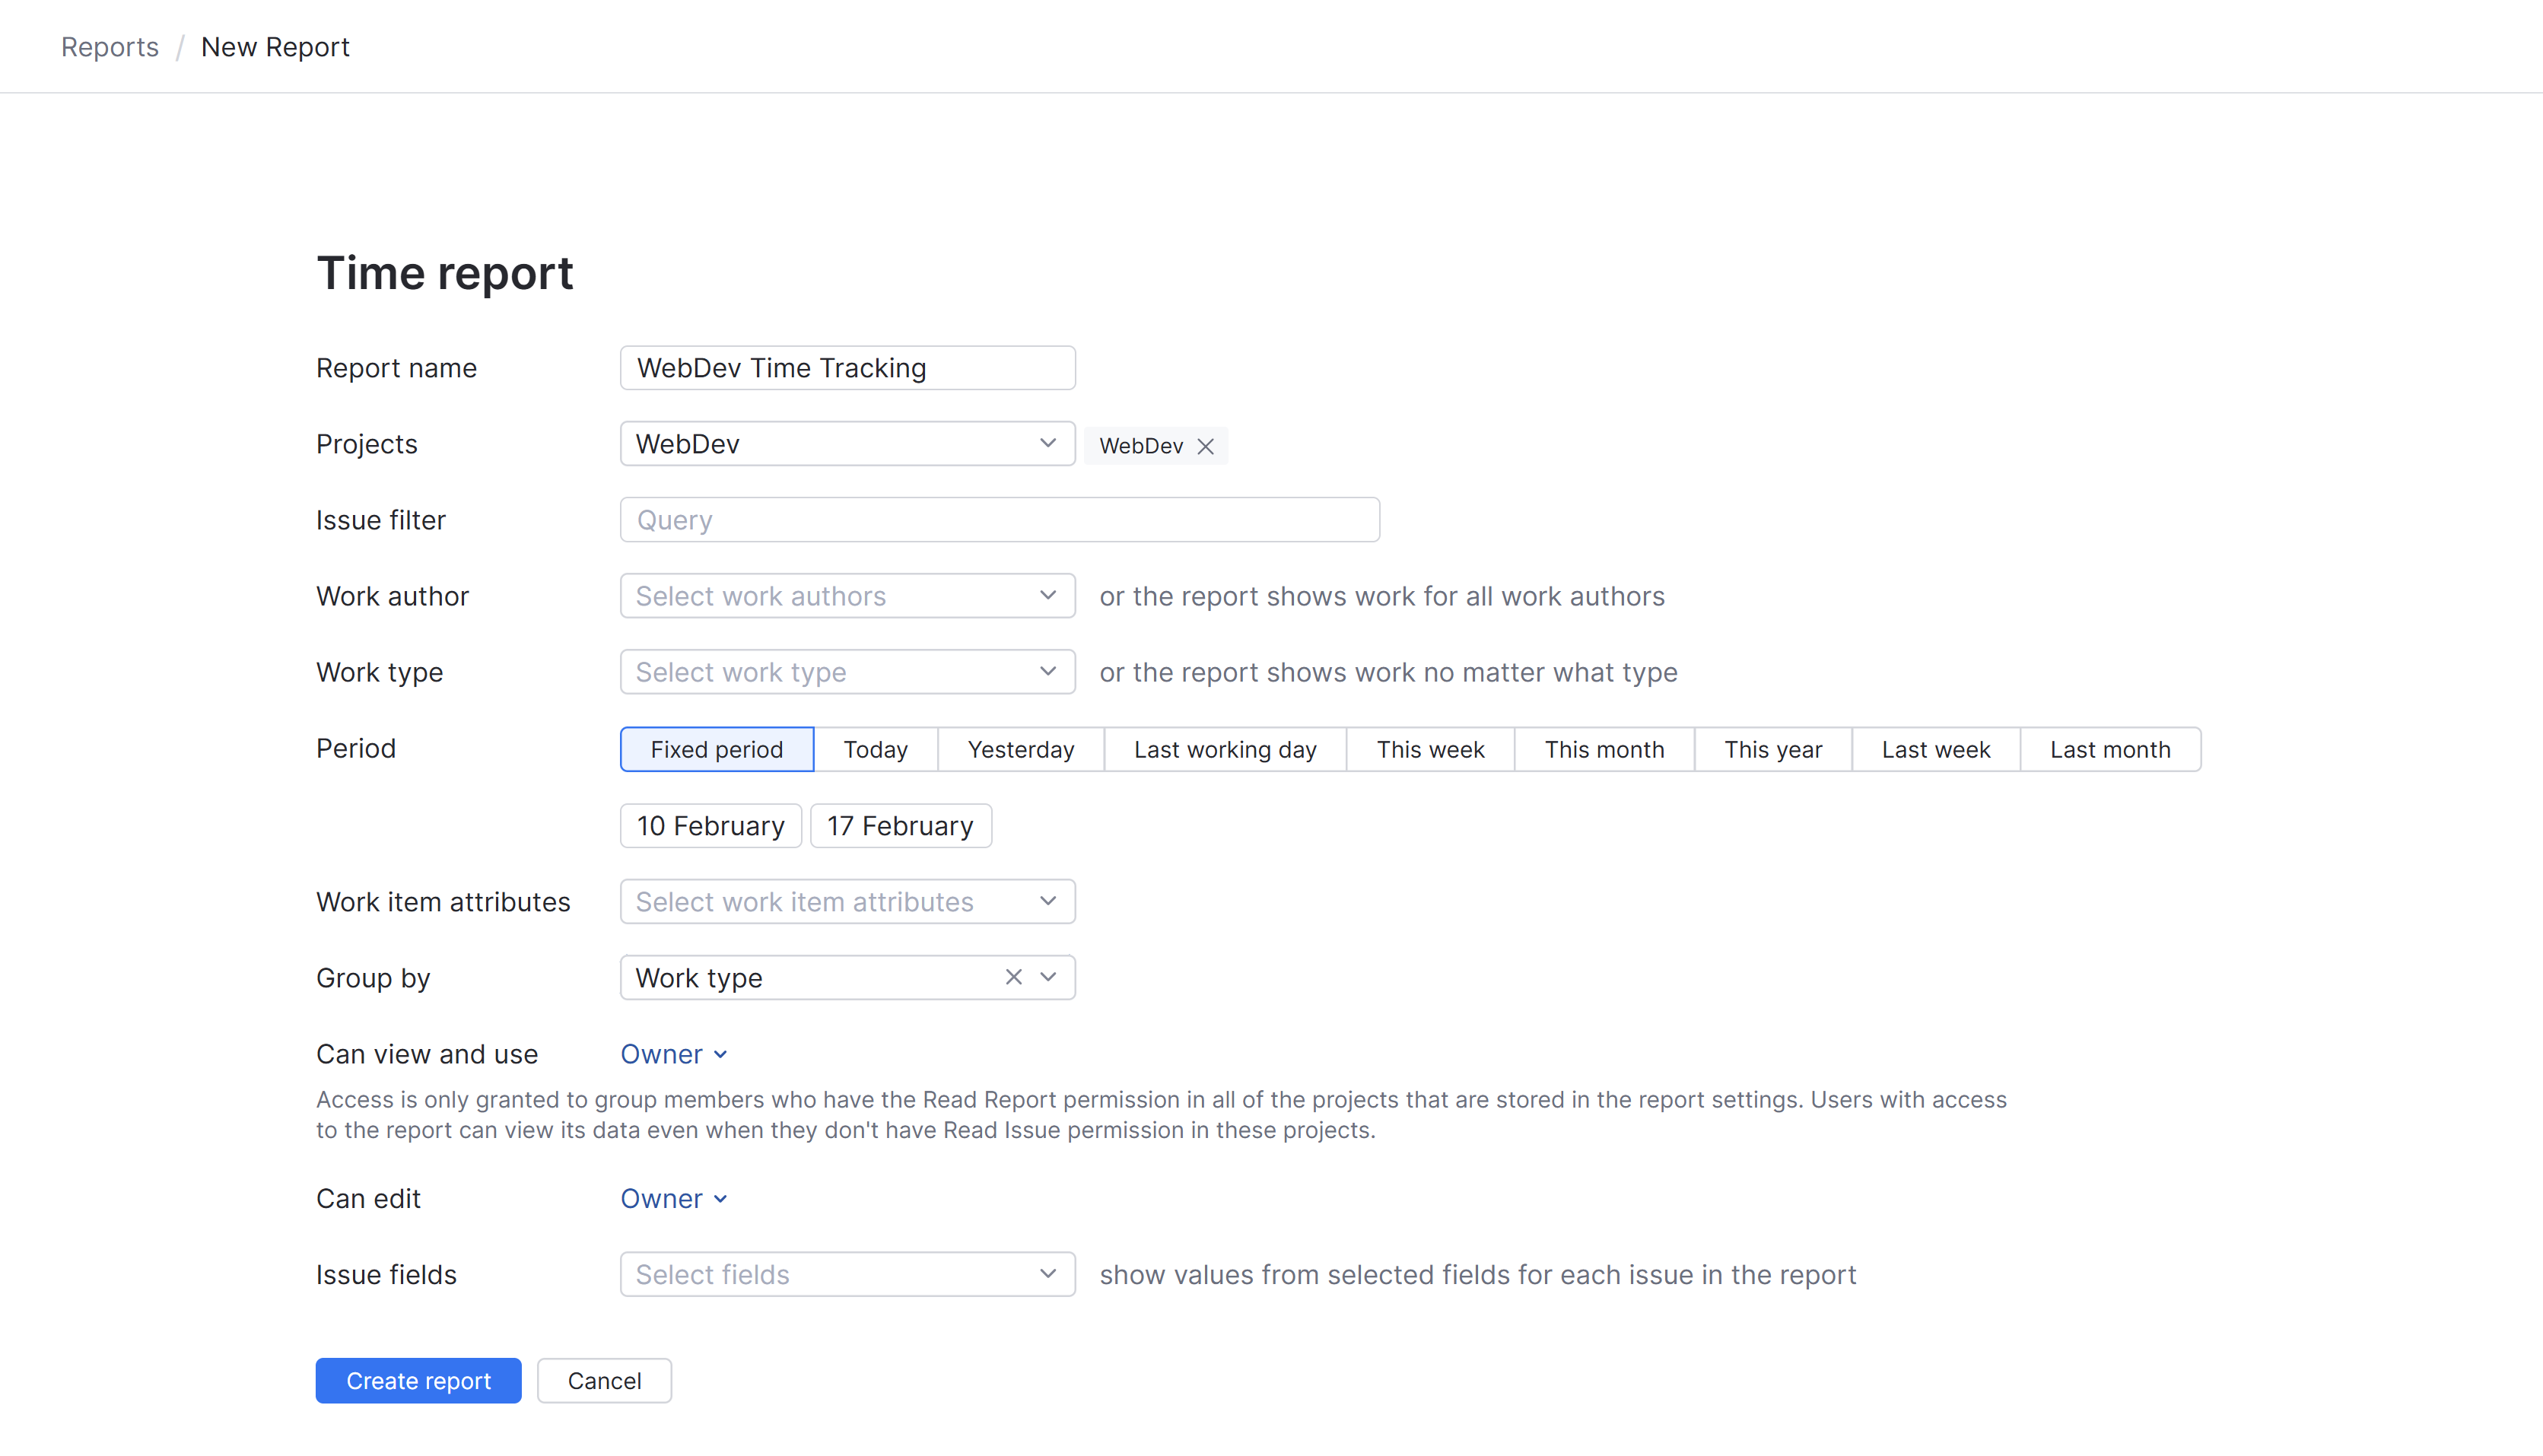
To make the report visible to a specific group, select a group from the Visible to drop-down list.
Click the Create report button
A time report is generated for the selected projects.
The report shows all work items recorded within the specified period.
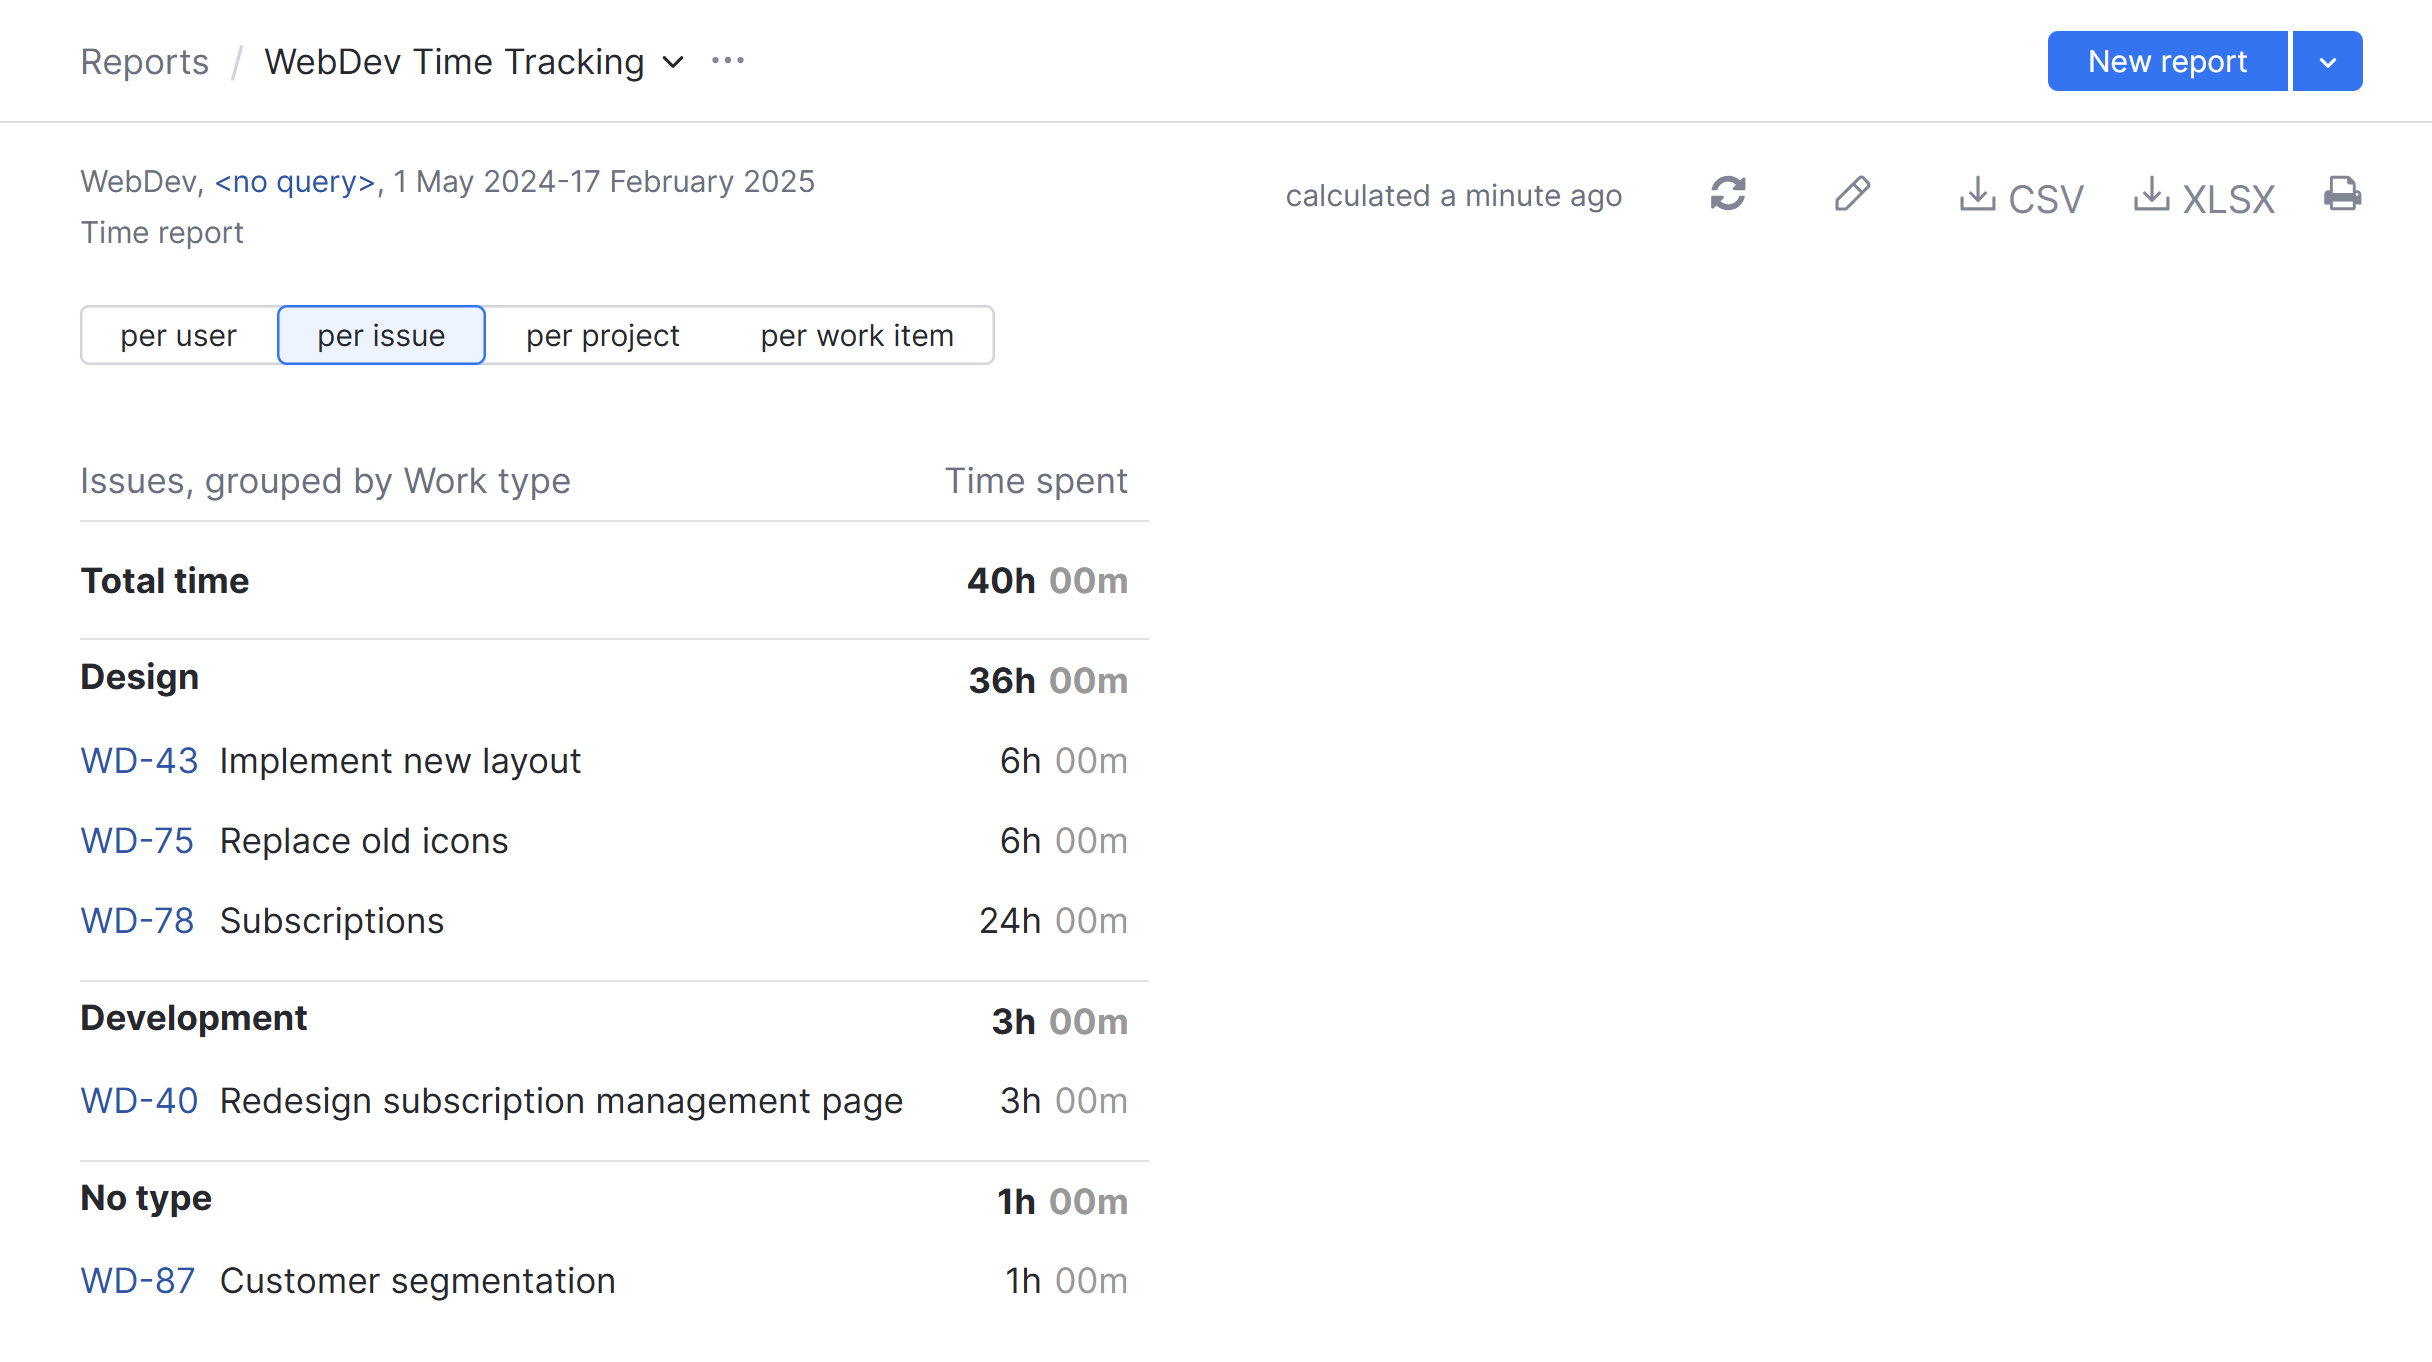
The work items in this example are grouped by work item type.
The default presentation for the report is to show work items per issue (as shown in the example above). To view the time report by user, click the per user button on the report page. If you just created the report, you may need to click Refresh after changing the view settings.
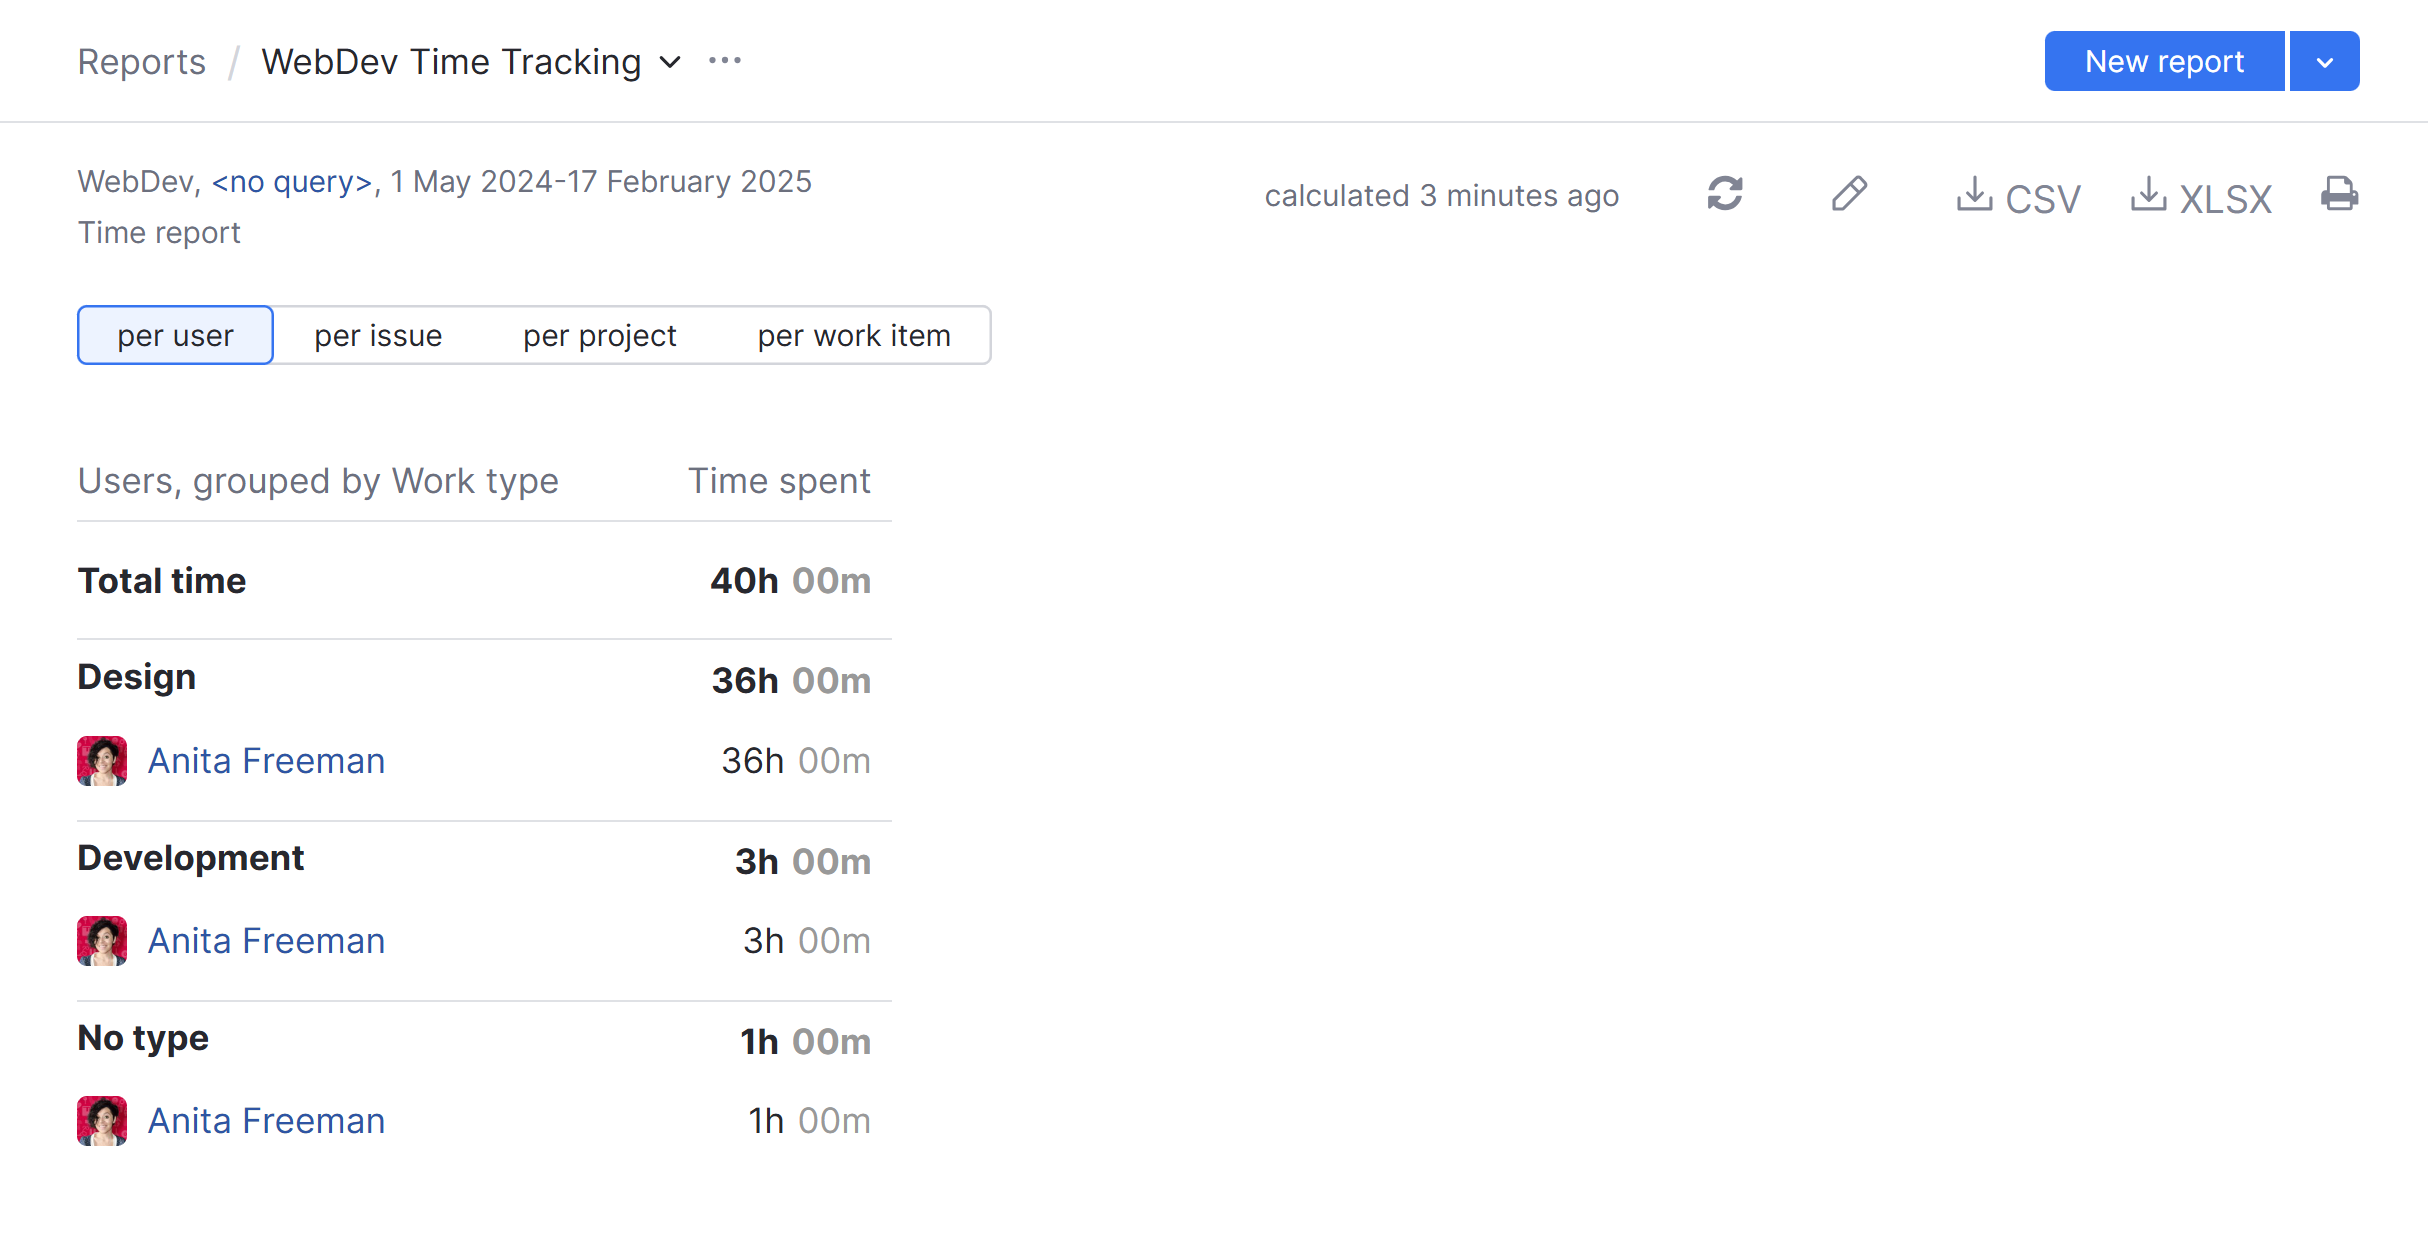
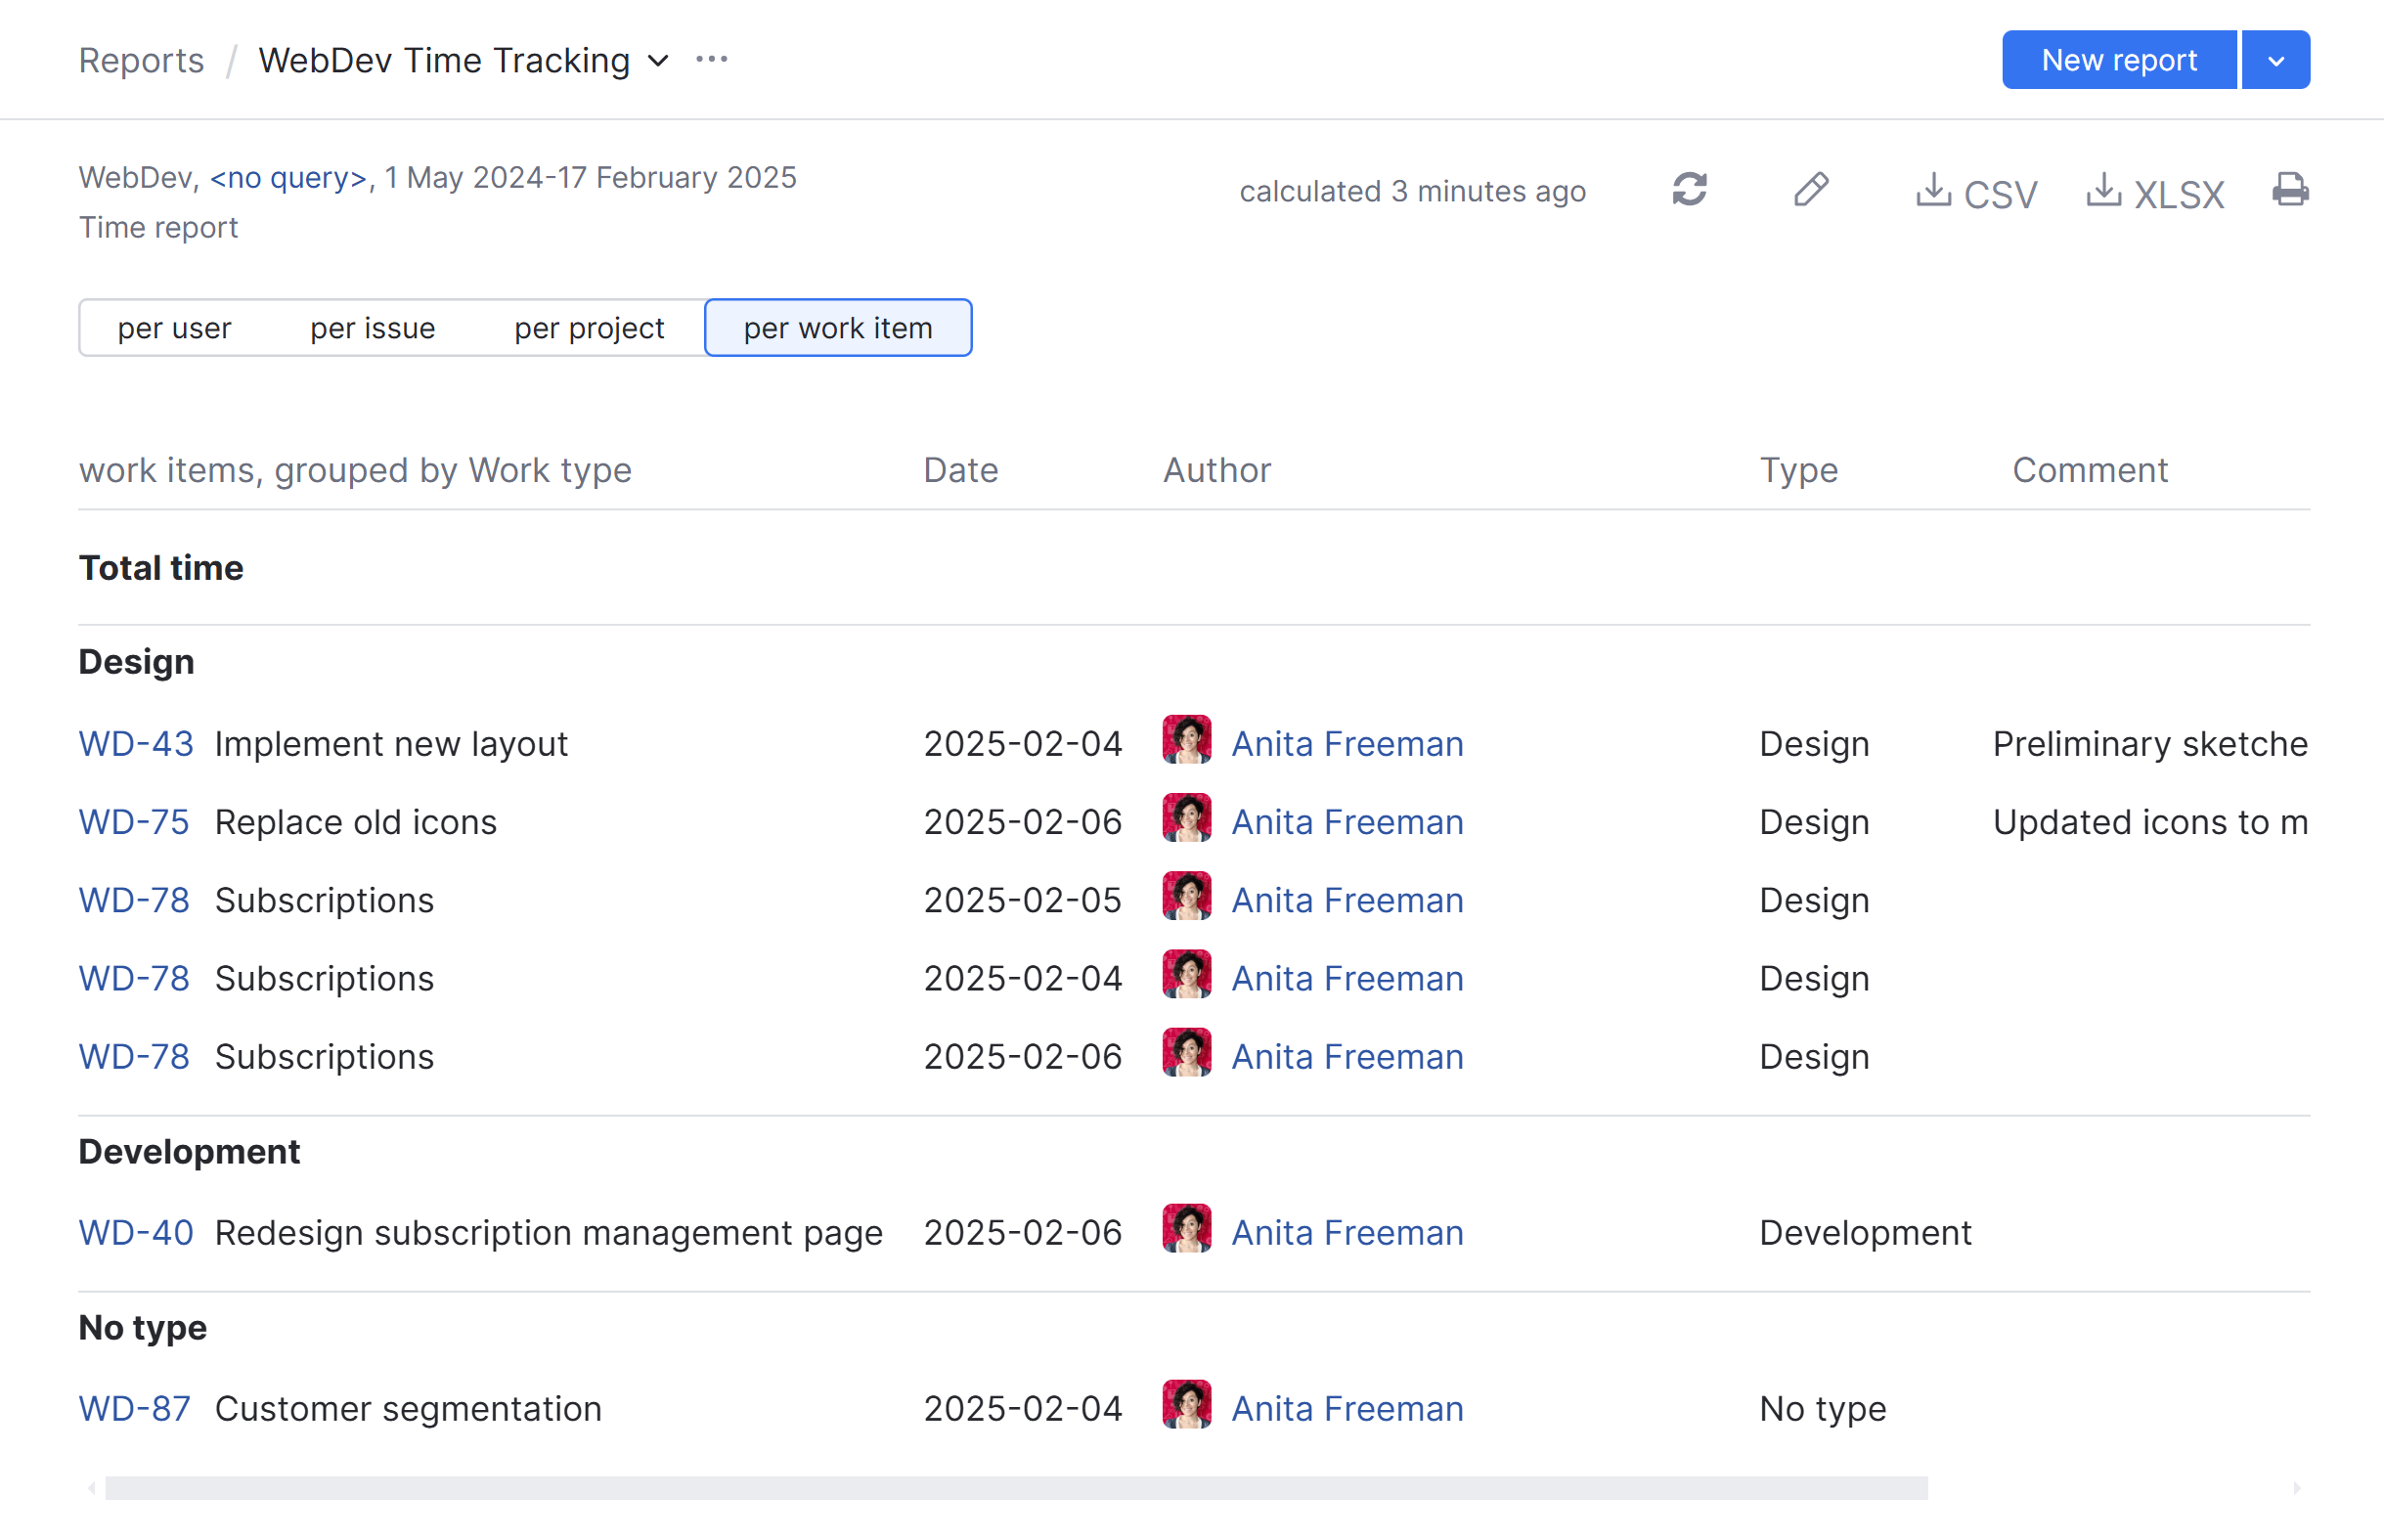
If you switch the display option to per work item, you see a detailed record for each work item, including comments.
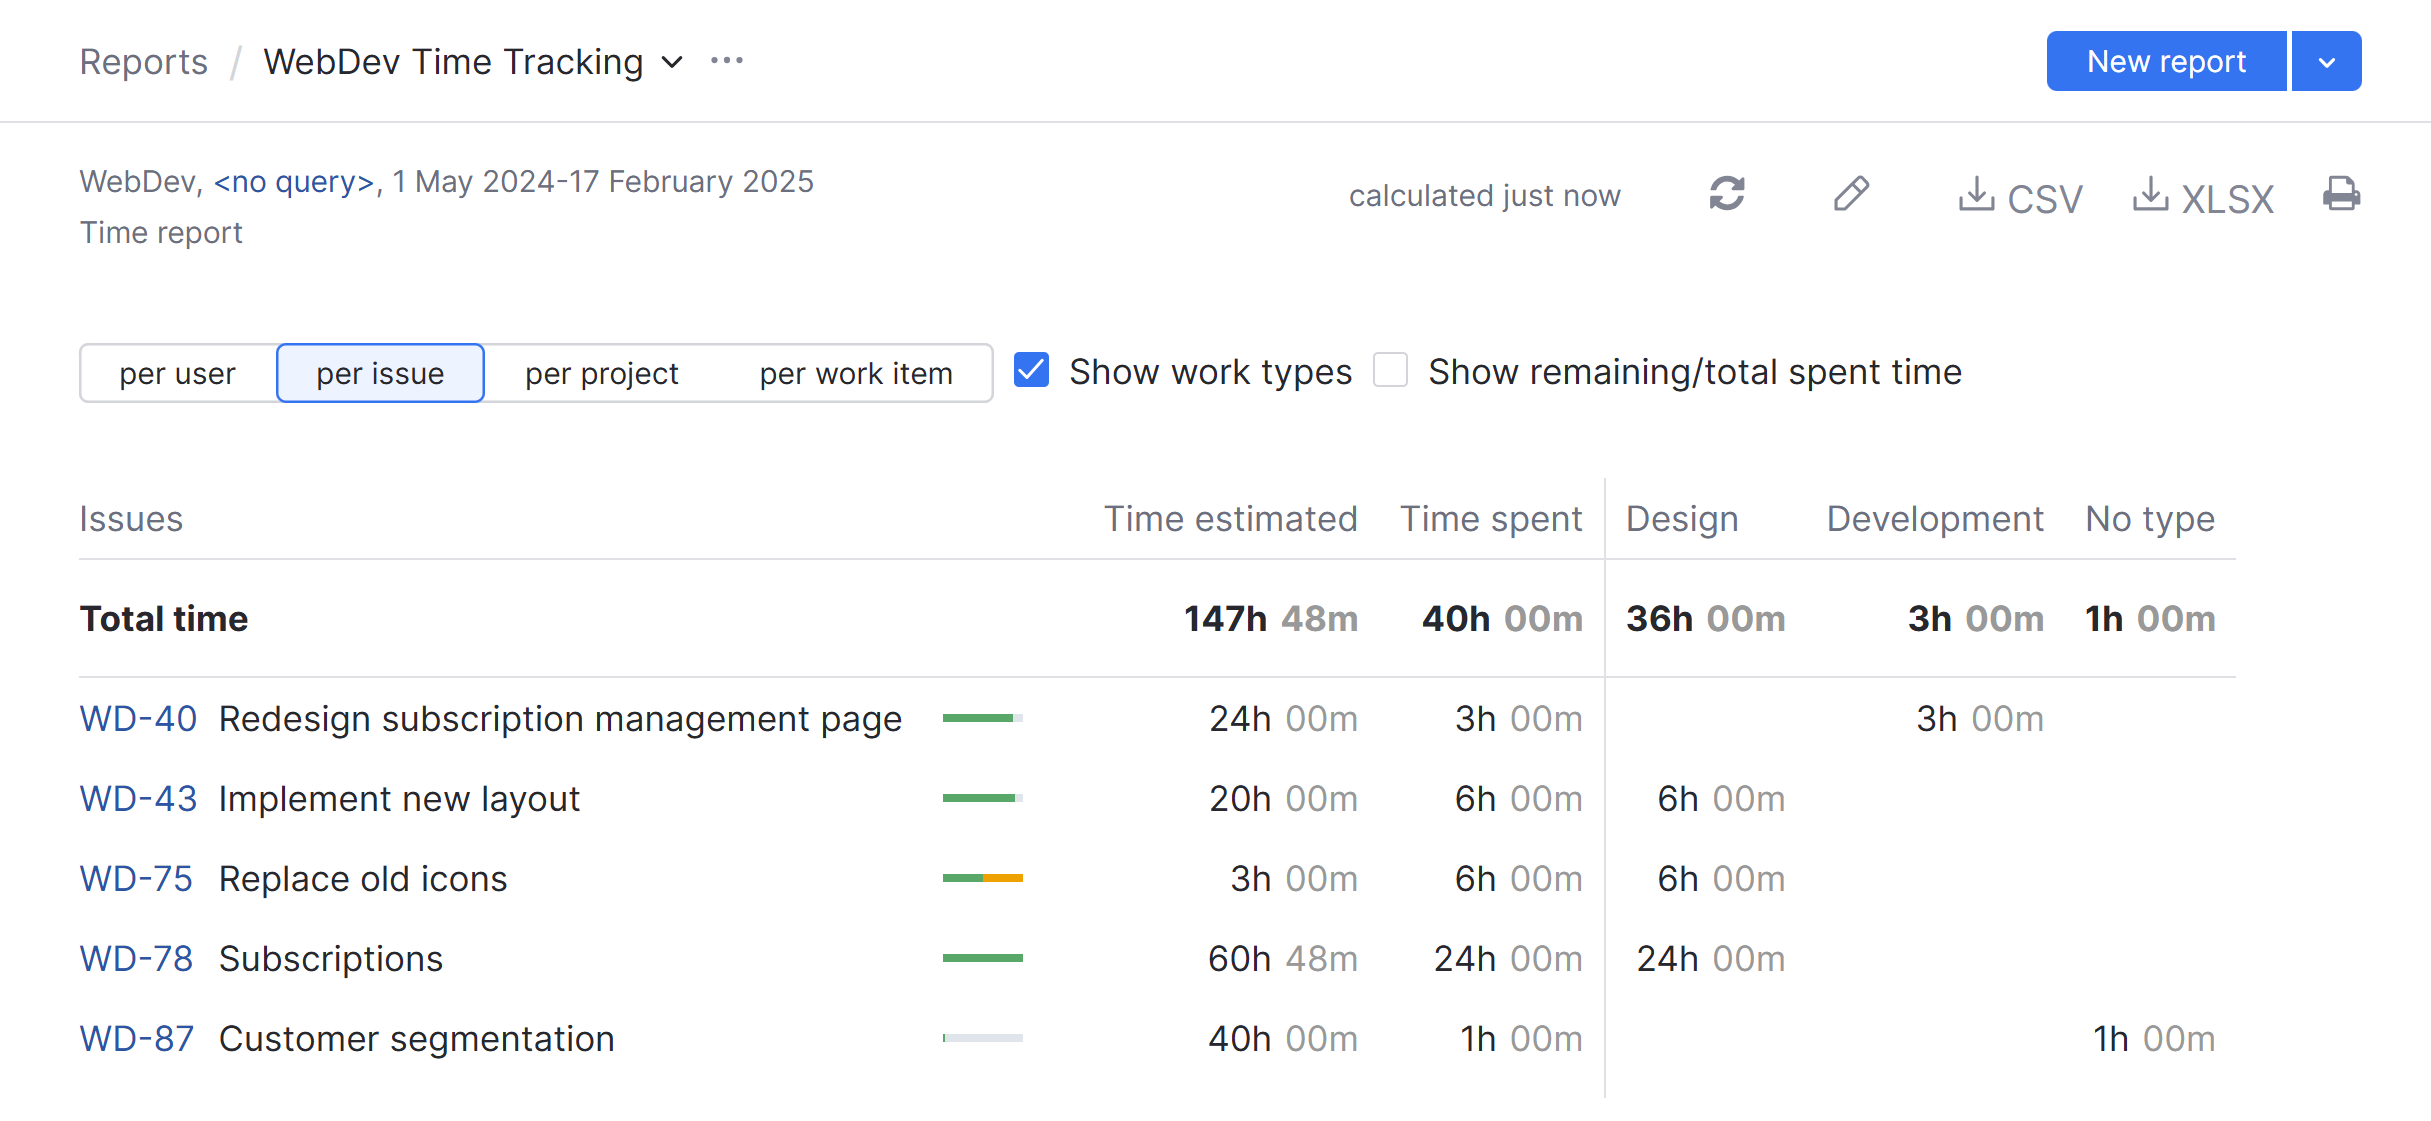
If you remove the grouping by work type, you can still view the total time spent on different types of activities, such as development, testing, documentation, or graphic design. To see the detailed report, enable the Show work types option next to the controls for switching between different views of the report.
To learn more about the settings and display options that are available for this report, see Time Report.
Automate Time Tracking with Workflows
In YouTrack, a workflow is a set of rules that automate a particular task. A rule is basically a script that YouTrack executes. For more details on workflows, please refer to the Workflow Tutorial.
For time management, there are three ready-to-use workflows available in YouTrack:
The In Progress Work Timer workflow automatically logs the time which an issue spends in the In Progress state.
The Stopwatch-style Work Timer workflow lets users add work items automatically when they stop a timer.
The Pomodoro Timer workflow helps you use the Pomodoro technique in your time management.
You can also write your own workflows for advanced time management. If the existing workflows do not reflect your needs, please refer to the Workflow Tutorial.
Track Time on an Agile Board
If you follow an agile development process in your projects, there is a separate tutorial that shows you how to use time management with an agile board in YouTrack.
Integrate with a Time Tracking App
Many third-party time tracking applications support integrations with YouTrack. These apps let you track all your work related activities and not just the time you spend resolving issues.
Some apps only let you pull data from YouTrack so you can record include issue tracking as part of your day-to-day work, but many of them will sync your time tracking data so you can report on your spent time in YouTrack as well.
For a list of applications that support integrations with YouTrack, see Browser Extensions.
