Track Email Feedback
You can use YouTrack to monitor and process feedback. This setup helps you:
Create issues from incoming feedback automatically.
Categorize feedback to separate questions that require a response from spam.
Reassign support requests that are sent to a feedback channel.
Capture suggestions and feature requests that are sent as feedback and migrate them to your development projects.
Ensure that you respond to feedback in a timely manner.
The goal of this setup guide is to create a dedicated project that your marketing managers or public relations team can use to track customer feedback. This setup guide shows you one way to configure YouTrack to process feedback. You can always modify and enhance this configuration to suit your style. At the end of this guide, we provide some alternatives that you can consider.
The purpose of this setup is to categorize feedback and identify the questions that require follow-up. Customers who send feedback expect you to reply directly in the channel that they used to post the feedback. When you see a question that you want to answer, your reply is sent directly to your customer's email inbox.
Process Overview
To configure and use a YouTrack project to process feedback, follow these steps:
Enable Email Notifications in YouTrack
First, make sure that email notifications are enabled and configured correctly on your YouTrack server.
If you are using YouTrack Cloud and haven't changed the default settings, skip this step and continue with Set Up a Feedback Project. Email notifications are enabled and configured by default in your YouTrack Cloud instance.
If you are have changed the default email notification settings in your YouTrack Cloud instance, or are using YouTrack Server edition, verify that email notification is enabled and the connection to an email service is configured.
If you use a Google mail service to send email notifications, use the same email address as your global From address and your help desk notifications. Google does not let you use a substitute email address. If you use an email address as the From address in your project that differs from the address in the global settings, the mail service does not deliver the messages.
You don't have to do anything special here, just follow the basic setup instructions and test the connection to the mail service. For specific instructions, see Email Server Settings.
When email notifications are enabled and configured in YouTrack, you are ready to create and configure your feedback project.
Set Up a Feedback Project
The project that you use to process feedback should be configured differently from a project that is used by a development team for building software. For your marketing or public relations team, you can scale it back.
The configuration of the project is specific to this use case, so we describe it here in some detail.
To create a feedback project:
Click the Projects link in the header, then click the Create Project button.
Enter a name (Feedback), and a description for the project.
Select the project type that you want to use. Any type will work just fine, but if you select a Kanban project, YouTrack automatically creates an agile board that the marketing or public relations team can use to manage issues. This project template also uses fewer default custom fields, which makes it easier to configure.
Click the Create project button.
The project overview page for the new project opens.
In the Administration section of the sidebar, click the Team link.
Use the Add members action to add users and groups to the project team. Users and members of groups who are added to the project team are automatically added to the list of possible users for the Assignee field.
Select the Fields tab and configure the custom fields in the new project:
Configure the custom fields that you want to use in the project. For a feedback project, you can get by with Type, Priority, Assignee, and State. The project administrator can add more custom fields as needed.
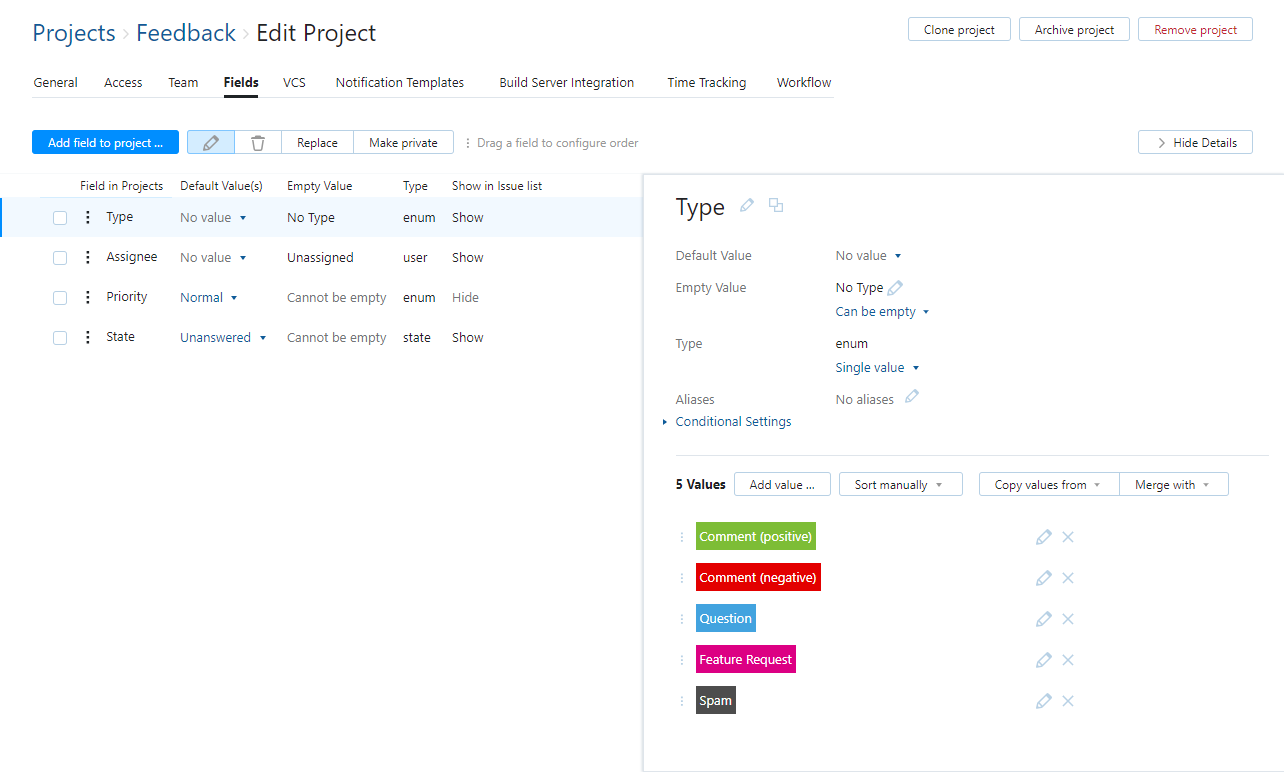
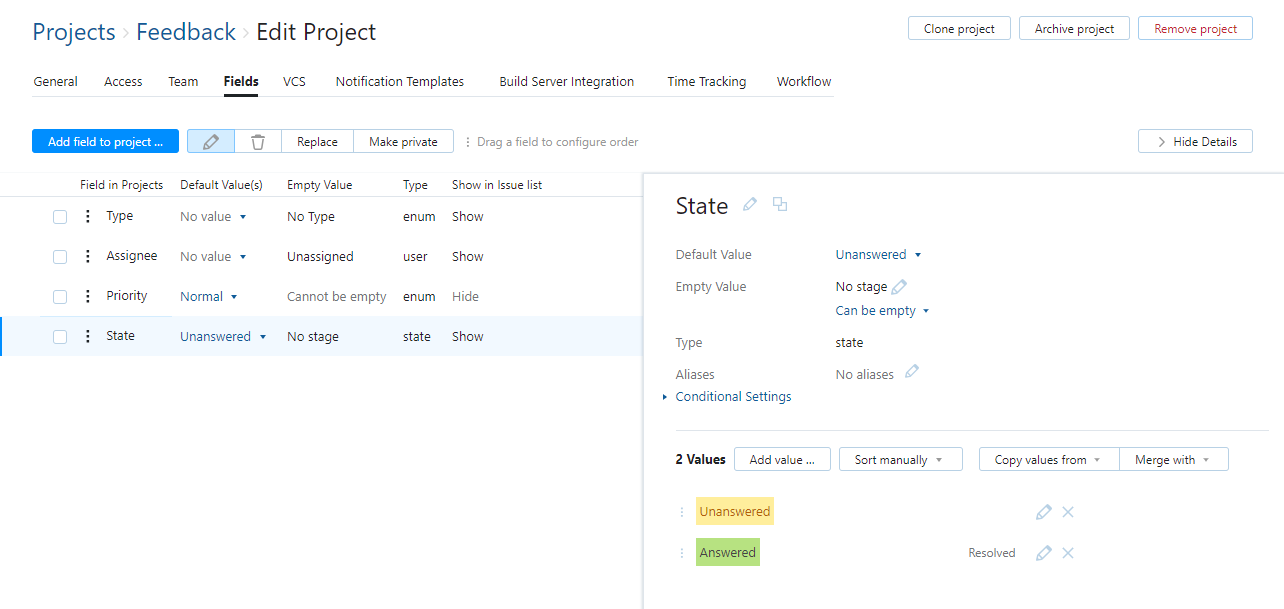
For Priority and Assignee, you can use the default fields and their sets of values. For the Type and State fields, consider customizing these fields to use the following values in the feedback project:
Field
Values
Type
Comment (positive), Comment (negative), Question, Feature Request, Spam
State
Unanswered (default, unresolved), Answered (resolved)
Remove any unrelated default custom fields. When finished, the list of fields in the feedback project should look similar to the fields shown in the following images. These show the customized sets of values for the Type and State fields:
Select the Workflow tab.
Select and detach any unrelated workflows. For example, if you used the Kanban project template, you can detach the Kanban workflow. It's more appropriate for development teams, not marketing managers.
Click the Attach workflows button and select Notify Multiple Unregistered Users from the drop-down list.
The workflow is attached to the project.
The requires setup flag indicates that the workflow uses custom fields that are not used in the project.
Add the missing fields and field values to the project:
Expand the workflow and select the first workflow rule.
Click the Configure project button to add the required fields to the project.
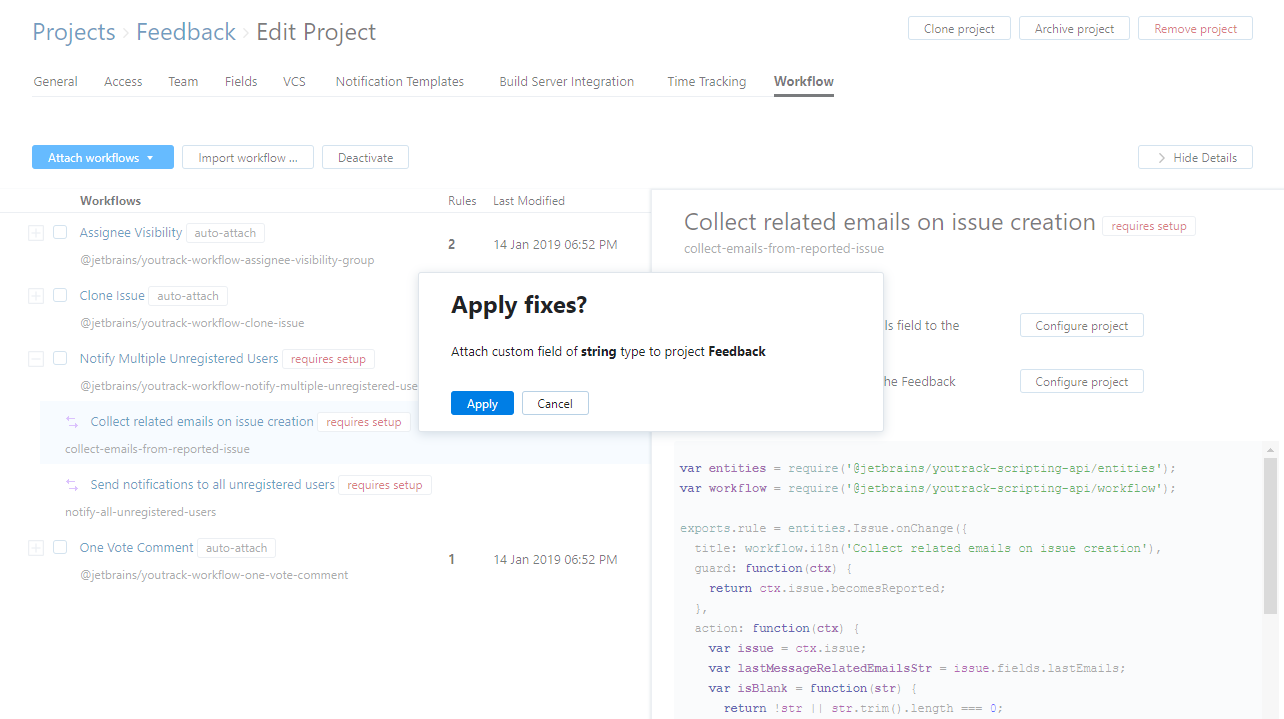
The following custom fields are added to the project:
Custom Field
Description
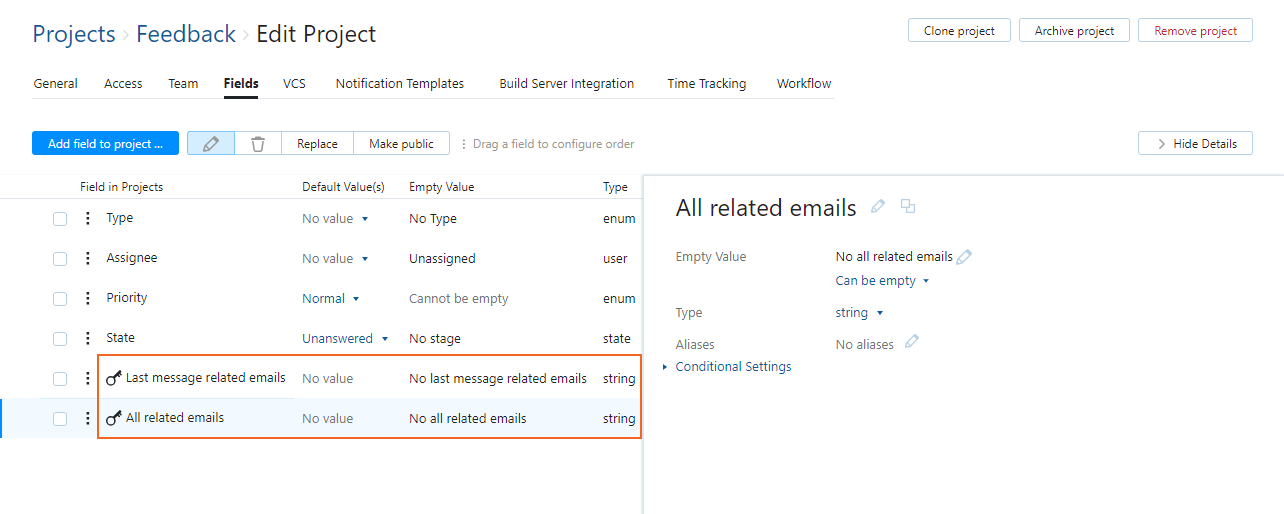
All related emails
Stores the email addresses for all of the participants in the discussion. The workflow uses this list to send email messages to recipients who are not registered users in YouTrack.
Last message related emails
Stores only the email addresses that were included in the most recent message that was processed by the mailbox integration. This field is updated when YouTrack processes an incoming email message. The workflow copies these email addresses to the All related emails field every time an issue is updated. This ensures that recipients who were not included in the most recent email message are not sent notifications.
When finished, switch back to the Fields tab in your feedback project. Check the list of custom fields in the project to verify that all of the required fields are in place.
Configure the Mailbox Integration
Next, configure the mailbox integration for the feedback project. The goal of this setup is to create a mailbox rule that processes incoming email feedback.
Keep in mind that mailbox rules are applied sequentially. Messages that match the filter that is defined in a mailbox rule are processed according to the rule and are not considered for processing in subsequent rules.
This procedure describes the basic settings that are required for this use case. There are some important settings in the Postprocessing section of the mailbox rule dialog that you can use to customize this setup.
To configure the mailbox integration:
Open the page.
Set the Fetching interval. For details, see Set the Schedule for Fetching Email Messages.
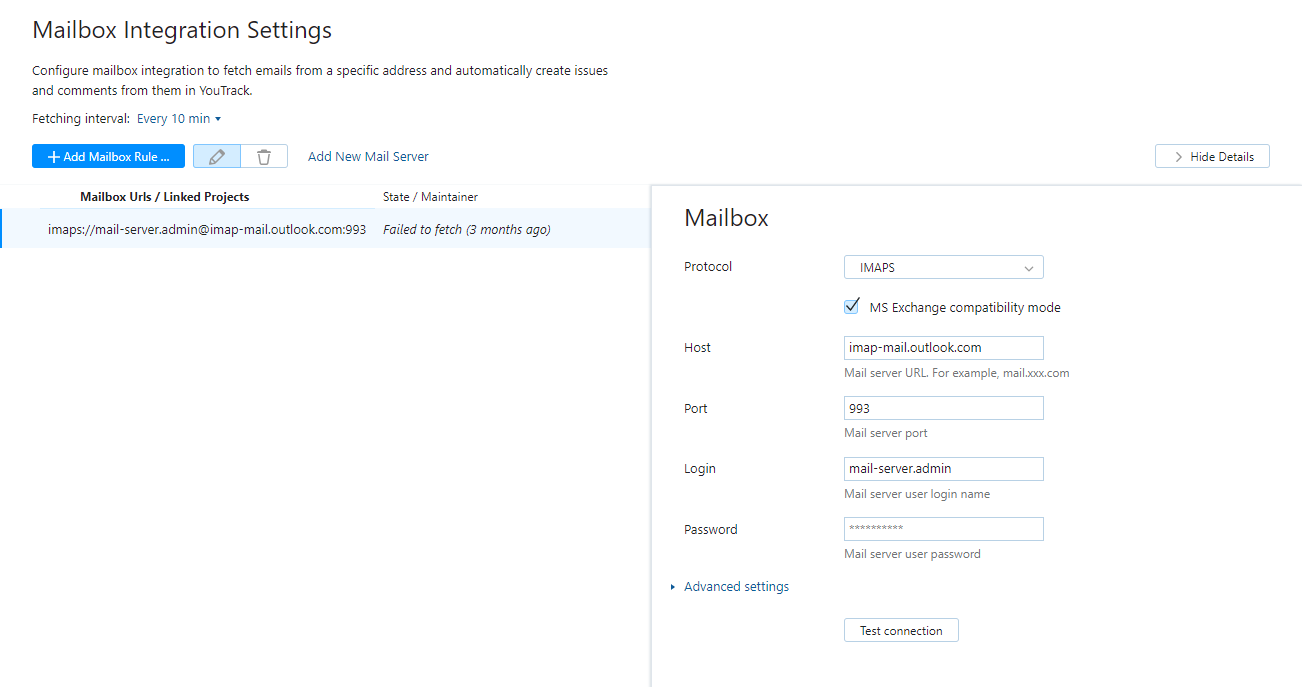
Connect to the external mail service that you use to receive email messages. For details, see Connect to a Mail Service.
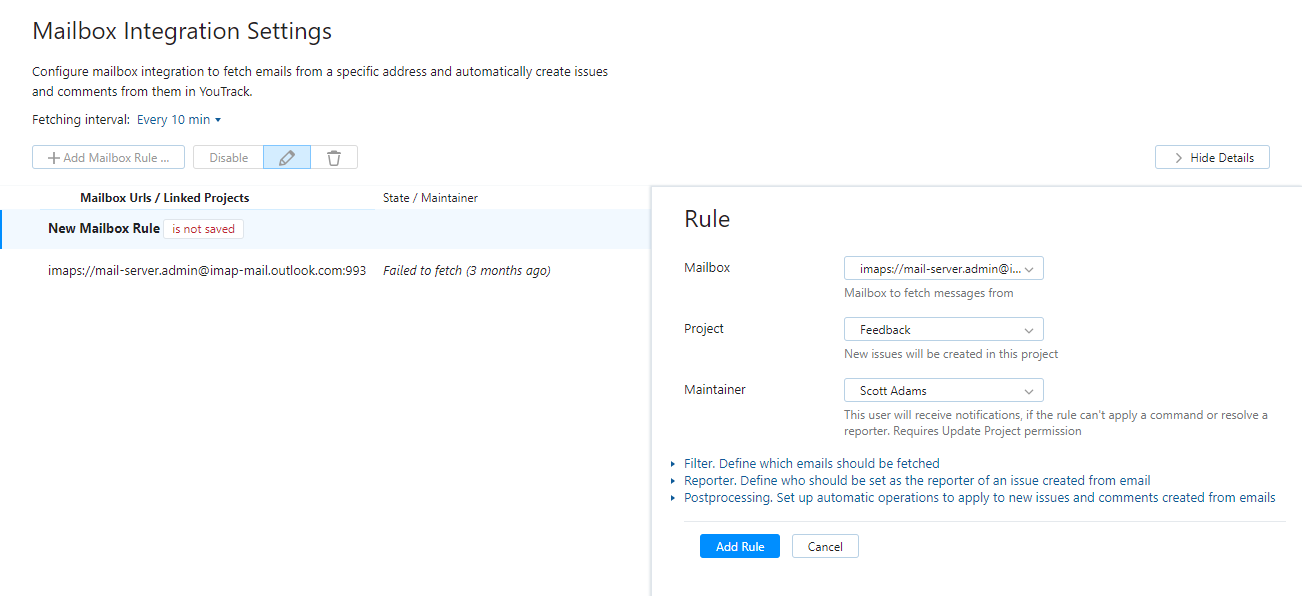
Click the Add Mailbox Rule button and configure the following settings:
Setting
Description
Mailbox
Select the mailbox that you connected to in step 3.
Project
Select the project that you configured to process feedback.
Maintainer
Select the name of the user who is responsible for monitoring the integration with this mailbox.
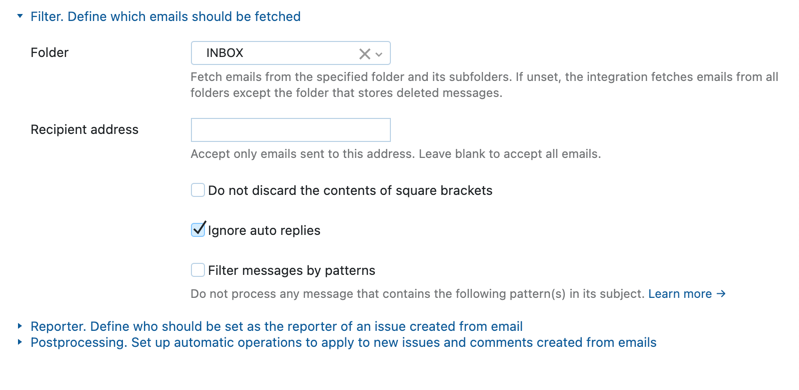
Click to expand the Filter section and enter values for the following settings:
Setting
Description
Folder
Select the folder from which you fetch email messages on the mail service.
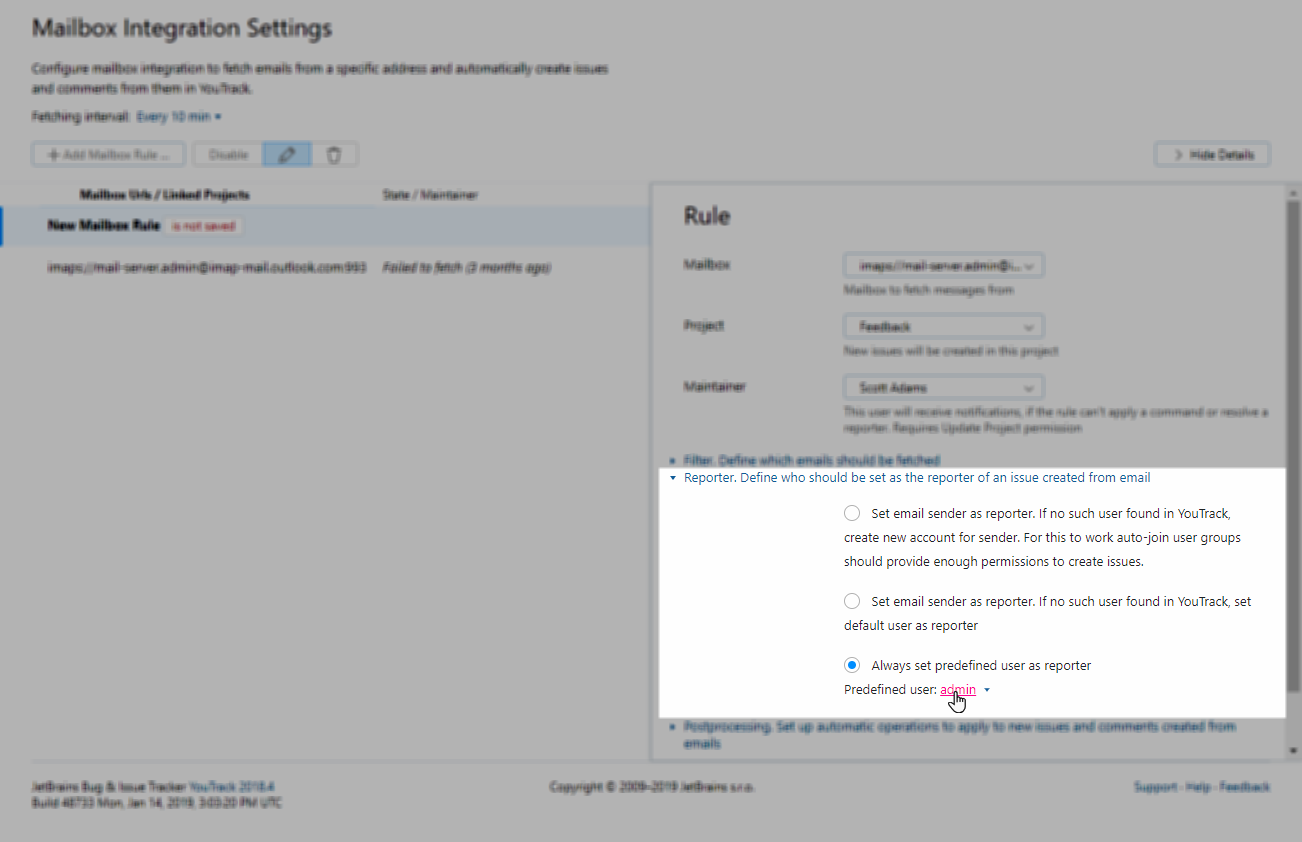
Click to expand the Reporter section of the mailbox rule.
Select the Always set predefined user as reporter option and select the predefined user to set as the reporter for all issues that are created from incoming email messages. This option guarantees that YouTrack does not create a user account for each new customer who sends a support request.
Click to expand the Postprocessing section.
In the Apply command to new issues input field, enter a command to apply to issues that are processed by this rule. Consider using a command that sets the assignee of each issue. For example:
for [user]Click the Add Rule button.
Feedback Processing in Action
Now that you've configured YouTrack for processing feedback, let's see how it works. Here's how YouTrack handles email feedback.
A customer submits a message to the email address that you use to collect and process feedback.
The mailbox integration fetches the email message from the mail service process them according to the defined mailbox rules. YouTrack converts the email message into an issue.
The owner of the feedback project automatically receives notification that a new issue was created in the feedback project.
If you added postprocessing logic to your mailbox rule, the issue can be assigned to a specific user automatically. This even can also trigger notifications that alert the assignee about the new issue.
The project owner or assignee reviews each new issue and performs one of the following actions:
The message includes marketing-related information for an unrelated product or service. The agent classifies the feedback as Spam and marks the issue as Answered. No further action is required.
The customer left positive or negative feedback. The agent assigns the corresponding type to the issue and writes a response as a new comment in the issue. If no additional action is required, the agent marks sets the issue state to Answered.
The customer suggests improvements to your product or requests functionality that is not currently available. The agent classifies the feedback as a Feature Request and writes a response as a new comment in the issue. The agent can then either mark the feedback issue as Answered or move the issue to the project that the development team uses to manage feature requests.
The customer asks a support-related question. The agent classifies the feedback as a Question and reassigns the issue to customer support.
Enhancements
If you managed to get through the basic setup, you might have done enough configuration for one day. Go ahead — get some fresh air. This page will still be here when you're ready for more.
We wrote a few workflow rules that you can use to automate feedback processing. This Feedback Management workflow is not available by default in YouTrack, but you can download it from the custom workflow repository and attach it to your feedback projects.
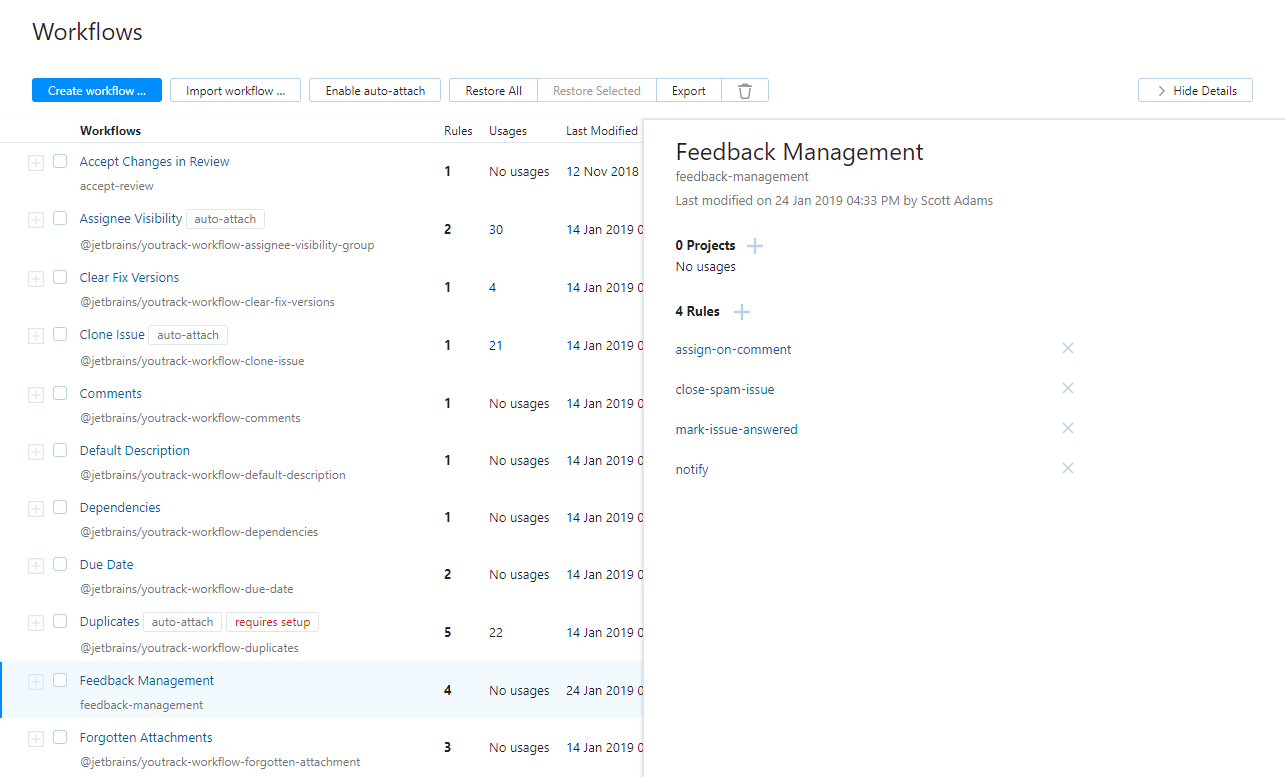
These workflow rules support the following functionality:
Rule | Description |
|---|---|
Mark issue answered | Sets the value of the State field to Answered when a member of the development team adds a comment to the issue. This means that your team can simply add a comment to the issue to resolve it. To use this workflow rule, change the name of the group to match the group that stores users who are members of your feedback team. |
Close spam issue | Sets the value of the State field to Answered when the value of the Type field is set to Spam. This saves your team one click, and lets them close issues with the simple command |
Assign issues on comment | Reassigns an issue to the author of the most recent comment if the author is a member of the development team. This means that a user who adds a comment to an issue takes responsibility for its resolution automatically and does not have to set the assignee manually. To use this workflow rule, change the name of the group to match the group that stores users who are members of your feedback team. |
Notify about unanswered feedback | Sends a notification to all assignees with unanswered issues on a set schedule, ignoring issues that are marked as spam. If the issue is unassigned, notification is sent to the project owner. The message includes a link to each unanswered issue. |
To enable this workflow:
Download the ZIP file from the custom workflow repository on GitHub.
Import the workflow into YouTrack. For instructions, see Import a Workflow.
Open the workflow rules in the built-in workflow editor and edit the rules to match your project configuration. For instructions, see Edit a Workflow.
Attach the workflow to your projects. For instructions, see Manage Workflows for Multiple Projects.