State Machines
The Workflow Constructor supports an editing interface with a set of tools that you can use to build state-machine rules. This interface is distinct from the interface for creating other rule types.
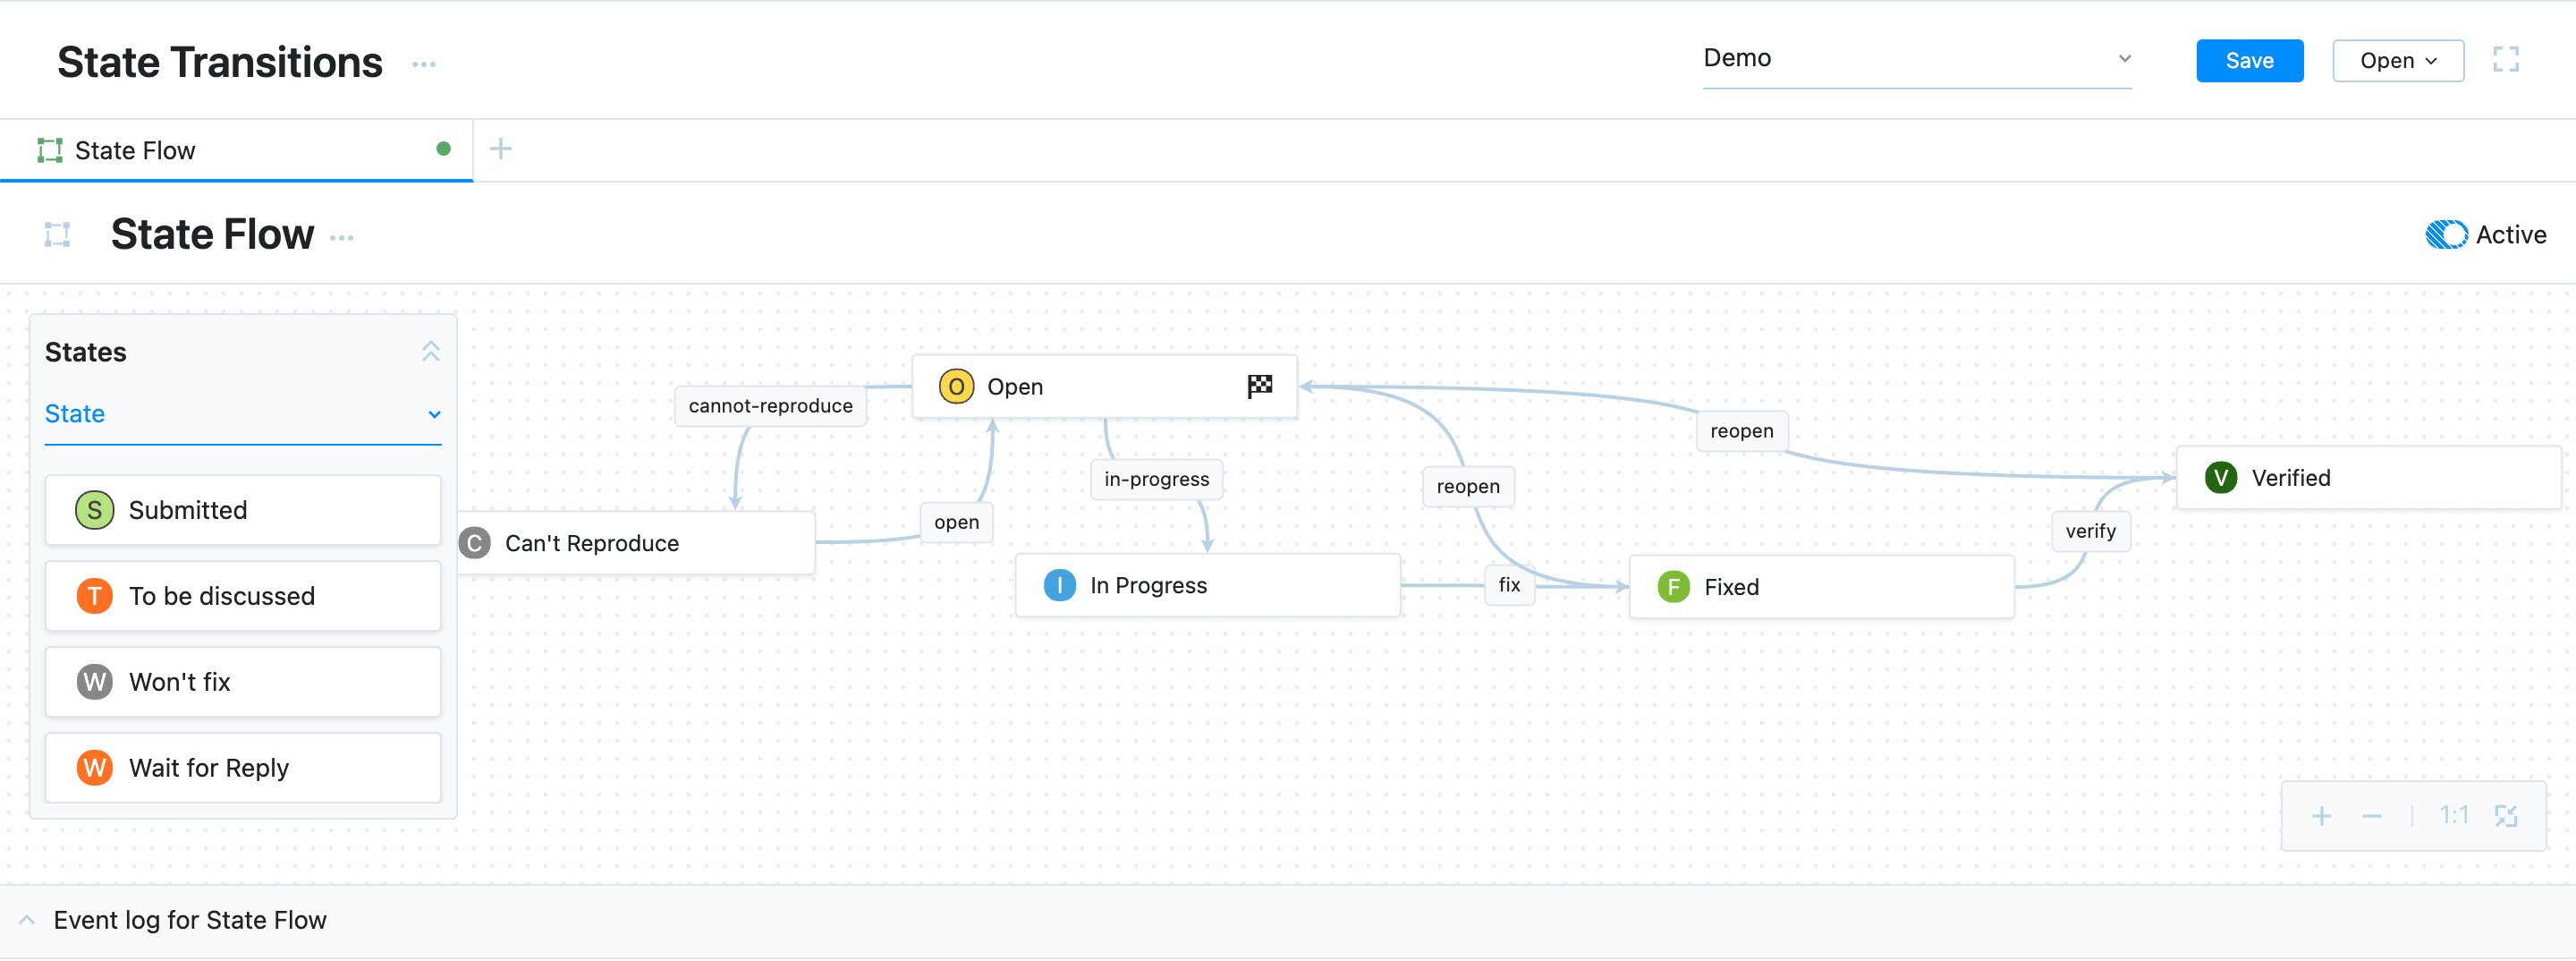
The interface for creating state-machine rules is presented as a free canvas with a set of tools for defining transitions between custom field values.
To access the canvas and create a state-machine rule, set the rule type to State-machine in the rule header.

Editing State-machine Rules
The interface for editing state-machine rules provides a set of controls for defining transitions between states.

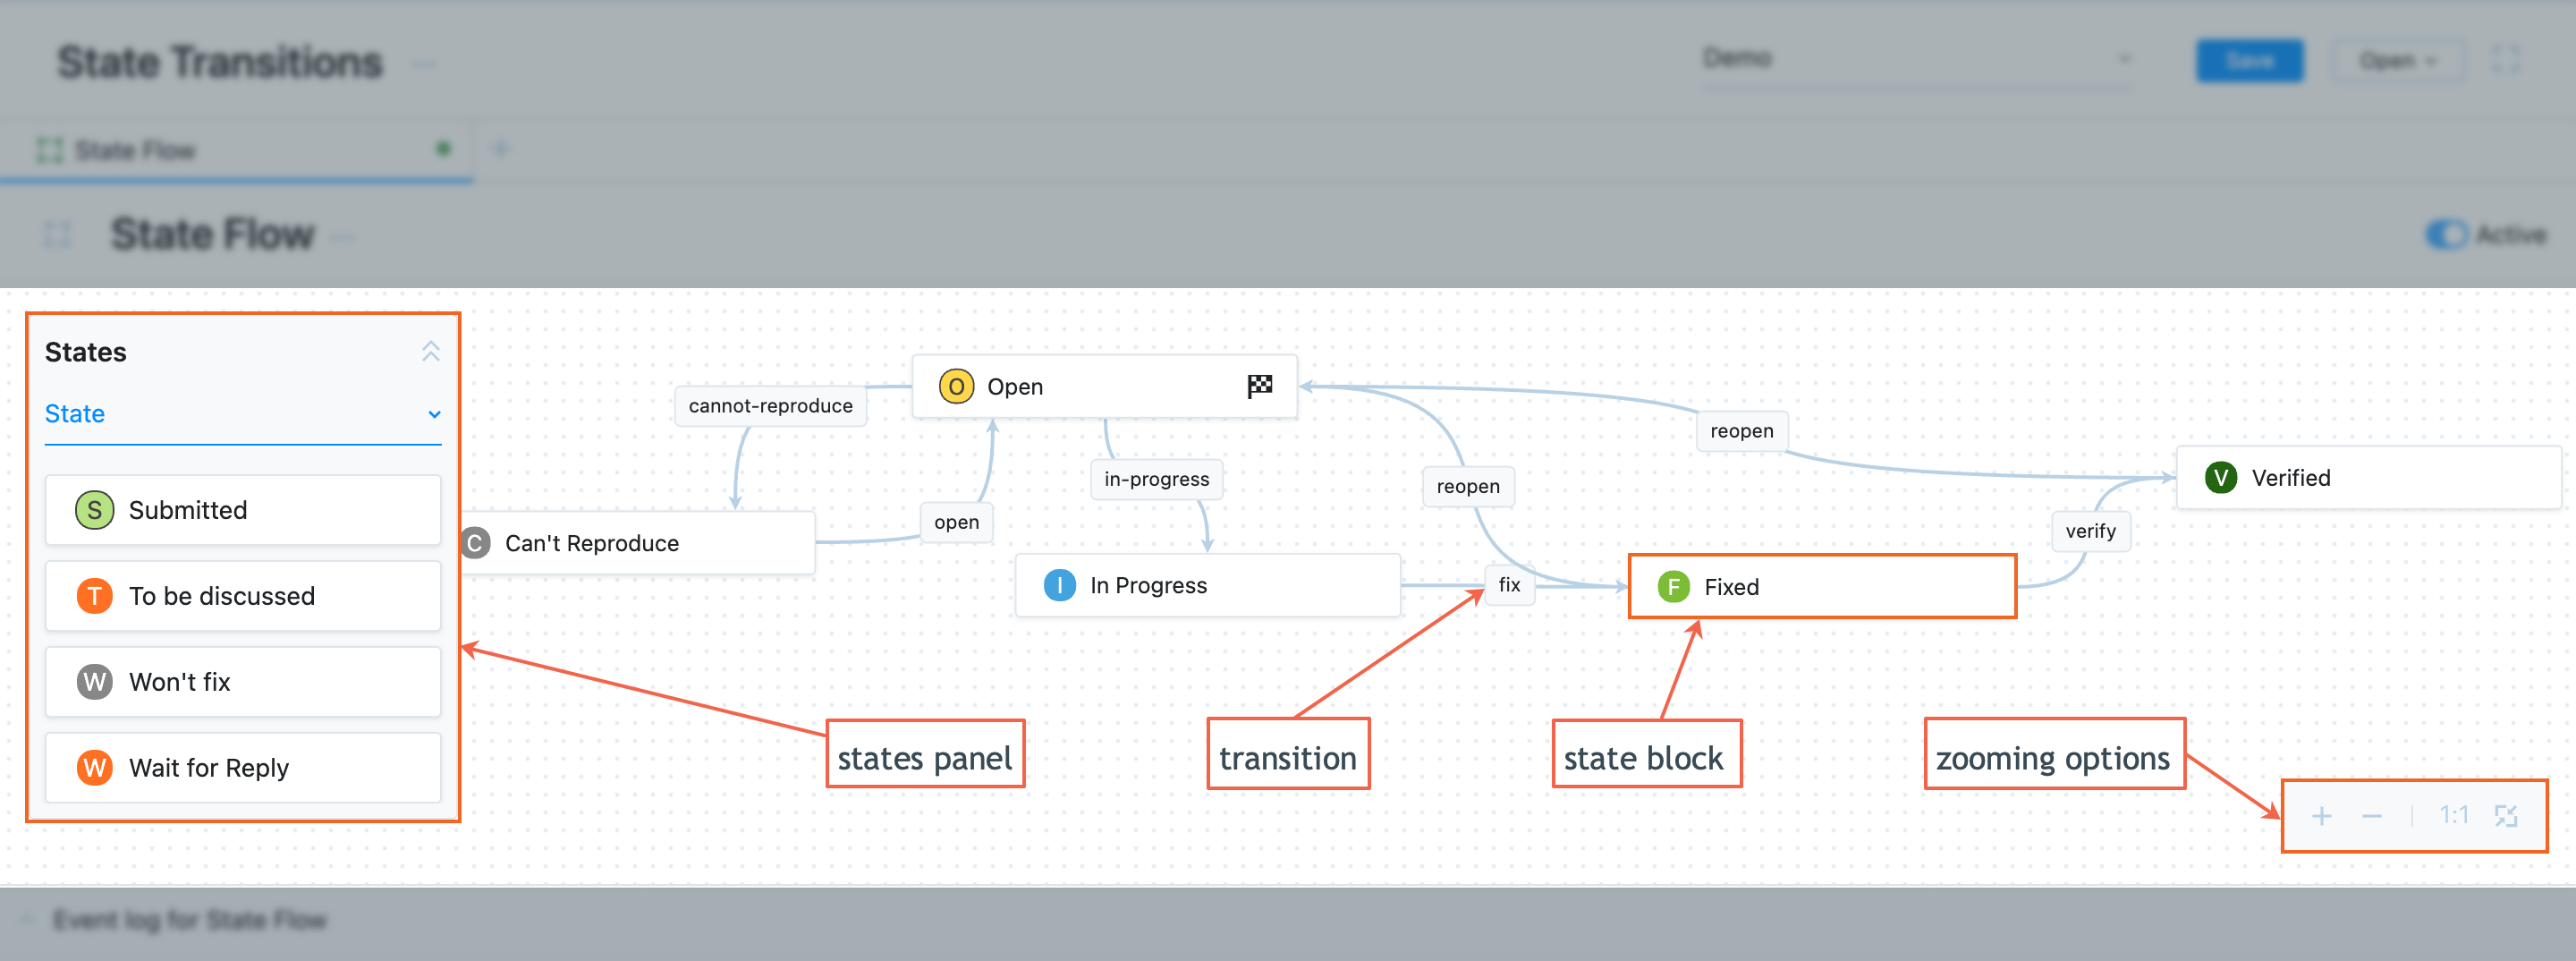
States Panel
This panel displays the list of the custom fields available for creating a state-machine rule. When you select a custom field from the dropdown, the list of its values appears below. You can either drag a value from the list to the canvas or simply click a value to add it to the canvas.
To view the list of available state-type custom fields, select one or more projects where this rule will apply. When you select more than one project, the list of available fields shows those fields added to all selected projects separately from those added to some of them.
You can collapse and expand the panel as you need.
Zoom Options
You can change the scale of your state-machine chart to work on a certain part of it or to have a general overview.
These options come in handy when you have a complex chart with many transitions.
Option | Description |
|---|---|
Zoom in | Zooms in on the chart. |
Zoom out | Zooms out on the chart. |
100% | Shows the chart in its actual size. |
Fit to screen | Rescales the canvas so that the entire chart is visible on the screen. |
State Blocks
When you add states from the States panel to the canvas, they are presented as blocks. You can then move and rearrange the state blocks around the canvas as you like.
When you move the cursor over a state block, the following controls for this block become available:
Control | Description |
|---|---|
Mark as initial | Marks the current state block as the initial state. The initial state is the one that is set to an issue when it's created. |
Remove state | Removes the current state block from the chart. You can add it back again from the States panel. |
Add transition | Starts creating a transition from the current state block. Click this control and then click the target state block to create a transition between these blocks. |
When you move the cursor over a state block, all the transitions starting from the current state block become highlighted.
Transitions
A transition means that you're allowing issues in the target project to be moved from one state to another.
If the state-machine rule for the project doesn't define any transitions between two states, it isn't possible to move an issue directly from one state to the other. In this case, in the main YouTrack interface, you don't see the corresponding option in the dropdown with available state values.
Each transition has a name. The name is used to set this value in a command and is also shown in the list of values for a custom field.
When you move your cursor over a transition name on the chart, the following controls become available:
Control | Description |
|---|---|
Remove transition | Removes the transition. |
Edit transition | Opens a form where you can edit the transition name. |