Enable Time Tracking
When you enable the Time Tracking feature, you can work with the following tools in your project:
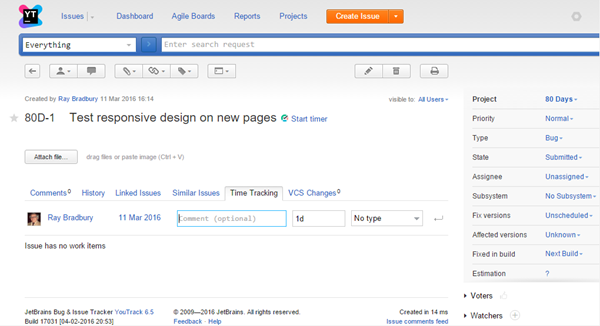
- Your team can add work items to issues.
- YouTrack calculates the time spent and progress for each issue.
- You can create time reports.
Spent Time Calculations
The amount of time spent that is entered in each work item is added to a field that stores a period type.
You choose which field stores this data for each project.
This field records the total amount of time that is reported for all work items in the issue.
You cannot update this value manually — only by adding or editing work items.
Time Left and Overdue Estimations
The amount that is recorded as spent time is compared to the value that is stored in another period type field that stores estimations.
The field that stores the estimation presents this calculation in a progress indicator.
The amount of spent time that does not exceed the original estimation is drawn in green.
The missing piece of the pie represents the amount of time that is left over.
The time left and estimation are displayed in a tooltip when you move the pointer over the progress indicator.

When the spent time exceeds the original estimation, the progress indicator is drawn as a red circle. The tooltip displays the amount of spent time that exceeds the original estimation.

Synchronization Between Tasks and Subtasks
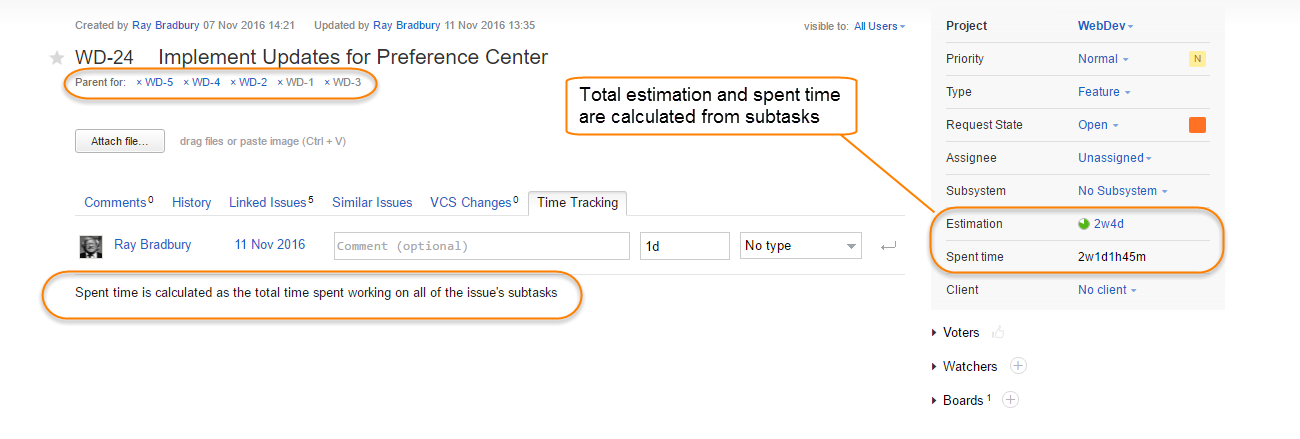
For issues that are linked as the parent for other issues, YouTrack automatically calculates the estimation and spent time as the sum of values that are added to each subtask. This information is displayed on the Time Tracking tab of the parent task.

- If you add work items to a parent task, the spent time in the parent task includes spent time from work items that are added to the parent task plus the total spent time for each of its subtasks. For this reason, we generally recommend that you avoid adding work items to parent tasks.
- If you change the estimation for a parent task, the synchronization between the parent task and its subtasks is broken. To restore the synchronization and calculate the estimation for the parent task automatically, set the estimation value in the parent task to the total estimation for each of of its subtasks.
Set Up Time Tracking
Time tracking is enabled on a per-project basis. When the Time Tracking feature is enabled and configured in your project, the following changes are applied to all issues:
- An Estimation field with a dynamic progress indicator is added.
- A Spent time field, which is not available for manual editing is added.
- The Time Tracking tab, where the project team adds work items to an issue, is visible for each issue in full page view.

To enable time tracking in your project:
- Click the Projects link in the main navigation.
- Select the project where you want to enable time tracking.
- Click the Edit project link.
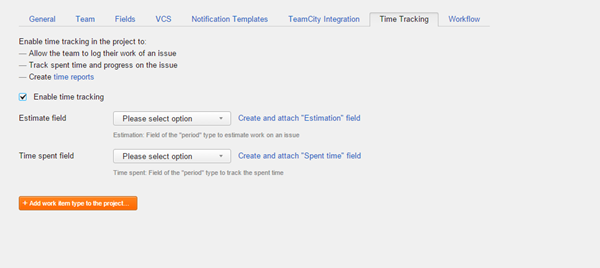
- Select the Time Tracking tab.
- Select the Enable time tracking checkbox.
Additional settings for time tracking configuration are shown.

YouTrack checks for period-type fields with the names Estimation and Spent Time.
- For the Estimate field setting, select an existing field from the drop-down list or click the Create and attach "Estimation" field link.
- For the Time spent field setting, select an existing field from the drop-down list or click the Create and attach "Spent time" field link.
Define Work Item Types
In addition to the default work item types that are pre-defined in YouTrack, an administrator can add work item types at the global level. If the default work item types match the categories of work that you want to track, you can start using time tracking in your project. Otherwise, you can modify the list of work items on a per-project basis.