Configure TLS in the Web-based Configuration Wizard
You can secure connections to YouTrack Server with built-in TLS during installation or upgrade.
This page describes how to configure HTTPS in the web-based Configuration Wizard. To configure HTTPS from the command line, see Configure TLS from the Command Line.
Enable HTTPS during Installation
During a clean installation, you can configure built-in TLS in the web-based Configuration Wizard before starting the YouTrack service.
To enable HTTPS during a clean installation
Prepare a compliant server private key and certificate or a keystore.
Start installation.
When the web-based Configuration Wizard opens, click the Set up link.
In the Server settings page, click the HTTPS tab to enable the TLS settings. The port and the base URL are corrected automatically.
Optionally, enable Redirect from HTTP to HTTPS.
Depending on whether you use a keystore or a private key and certificate, select the relevant option.
Upload the prepared files for the selected option:
Select Keystore to upload a keystore file.
Select Private key and certificate to upload certificate files.
For details about the required values, see TLS Settings.
Complete the remaining steps of the Configuration Wizard to finish the installation and start the YouTrack service.
Upgrade Scenarios with Built-in TLS
When it comes to the upgrade, you have three use cases:
You want to enable the TLS on a server that previously used plain HTTP.
You have a server already configured to use the built-in TLS. You just want to get a newer version of the application.
You have a server already configured to use the built-in TLS. However, you want to use another certificate or a keystore for the server. The reason might be an expiring certificate in the existing database, or, for example, you wish to switch to a production environment and stop using a self-signed existing certificate. Whatever the reason is, you can upload a new certificate or a keystore during the upgrade in the web-based Configuration wizard.
Switch From HTTP to HTTPS During Upgrade
If your previous version used the plain HTTP connection, then the steps to enable and configure the built-in TLS are quite similar to those during the clean installation.
To enable HTTPS during an upgrade:
Stop the currently running YouTrack service.
Prepare a compliant server private key and certificate or a keystore.
Start a newer installation package or a docker image.
On the start page of the Configuration Wizard, click Upgrade.
Select the upgrade source.
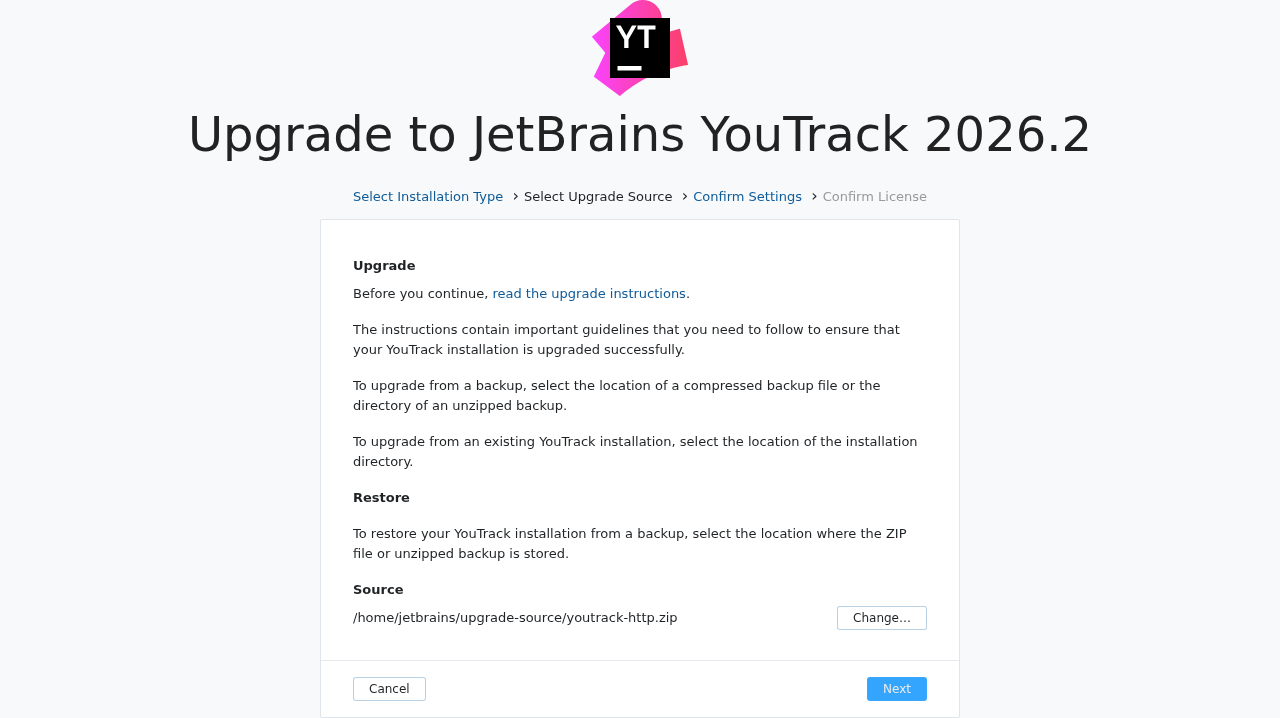
Click HTTPS tab to configure TLS.
Optionally, enable Redirect from HTTP to HTTPS.
Depending on whether you use a keystore or a private key and certificate, select the relevant option.
Upload the prepared keystore or certificate files. For details about the required values, see TLS Settings.
Review other settings, and adjust if required.
When done, click Upgrade to finish upgrading YouTrack service.
Upgrade an Existing Server with Enabled TLS and Valid Certificate
If the built-in TLS was enabled in your previous installation and the server certificate or keystore is still valid, then you can safely reuse them during the upgrade.
To upgrade an existing service with already enabled built-in TLS:
Stop the currently running YouTrack service.
Start a newer installation package or a docker image.
On the start page of the Configuration Wizard, click Upgrade.
Select the upgrade source.
Click HTTPS tab to configure TLS.
Optionally, enable Redirect from HTTP to HTTPS.
If the source database contains the valid server certificate, the option Use existing files is enabled by default. The validity date of the found server certificate is provided next to this option.
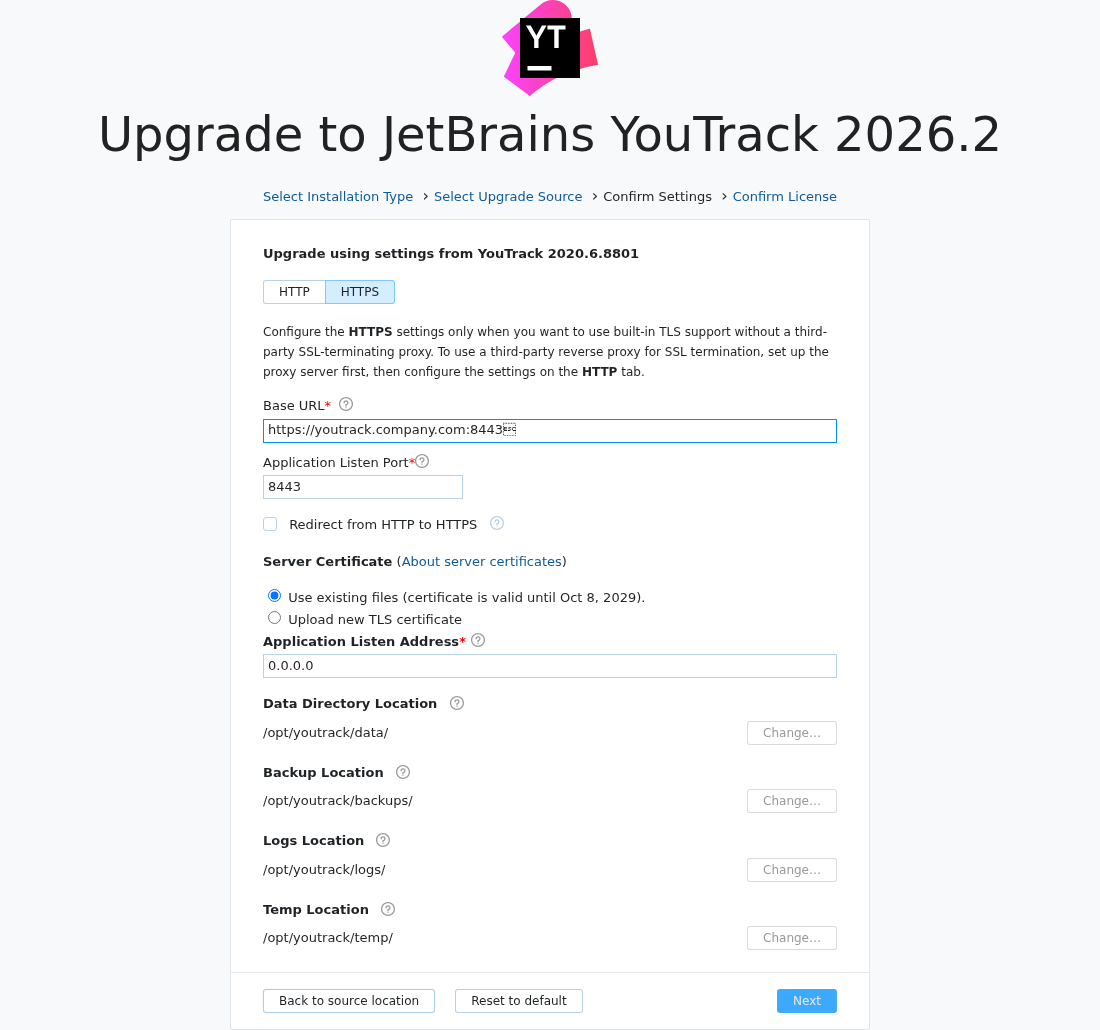
Review other settings, and adjust if required.
When done, click Upgrade to finish upgrading YouTrack service.
Apply a New TLS Certificate or Keystore during Upgrade
If built-in TLS was enabled for your installation but the server certificate or keystore is invalid or expiring, you can upload a new one during upgrade.
To enable HTTPS during upgrade:
Stop the YouTrack service.
Prepare a compliant server private key and certificate or a keystore.
Run a newer installation package or Docker image.
When the Configuration Wizard launches, click the Upgrade link.
Select the upgrade source.
During the Confirm Settings step, switch to the HTTPS configuration.
Optionally, enable the Redirect from HTTP to HTTPS option.
For the Server Certificate setting, select the Upload new TLS certificate option. Depending on whether you use a keystore or a private key and certificate, select the relevant option.
Upload the prepared files for the selected option:
Select Keystore to upload a keystore file.
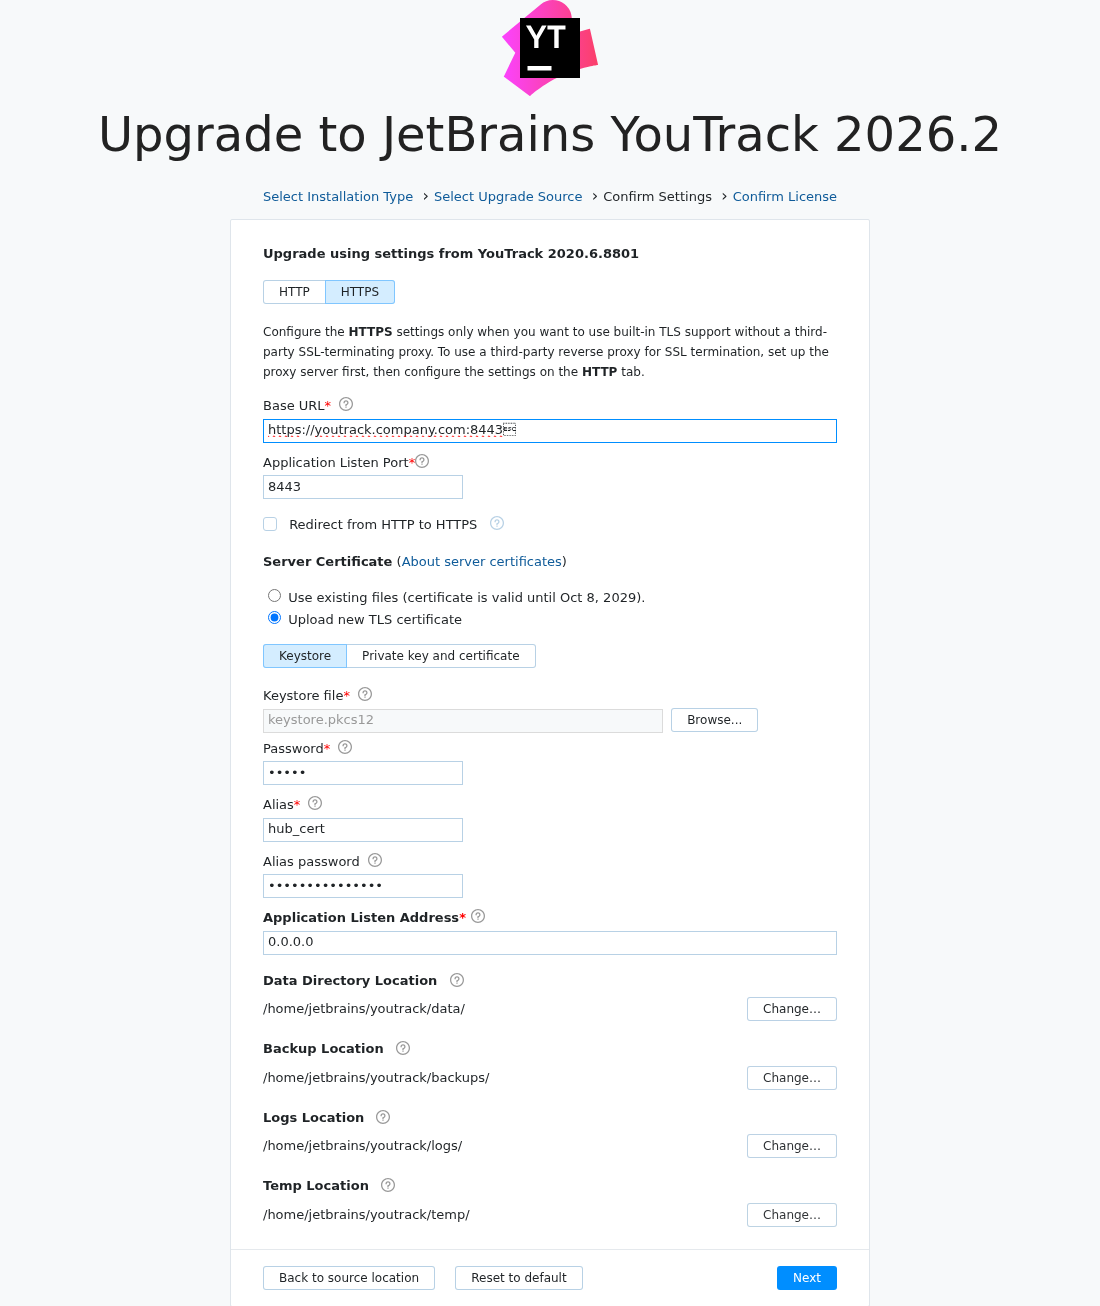
Select Private key and certificate to upload certificate files.
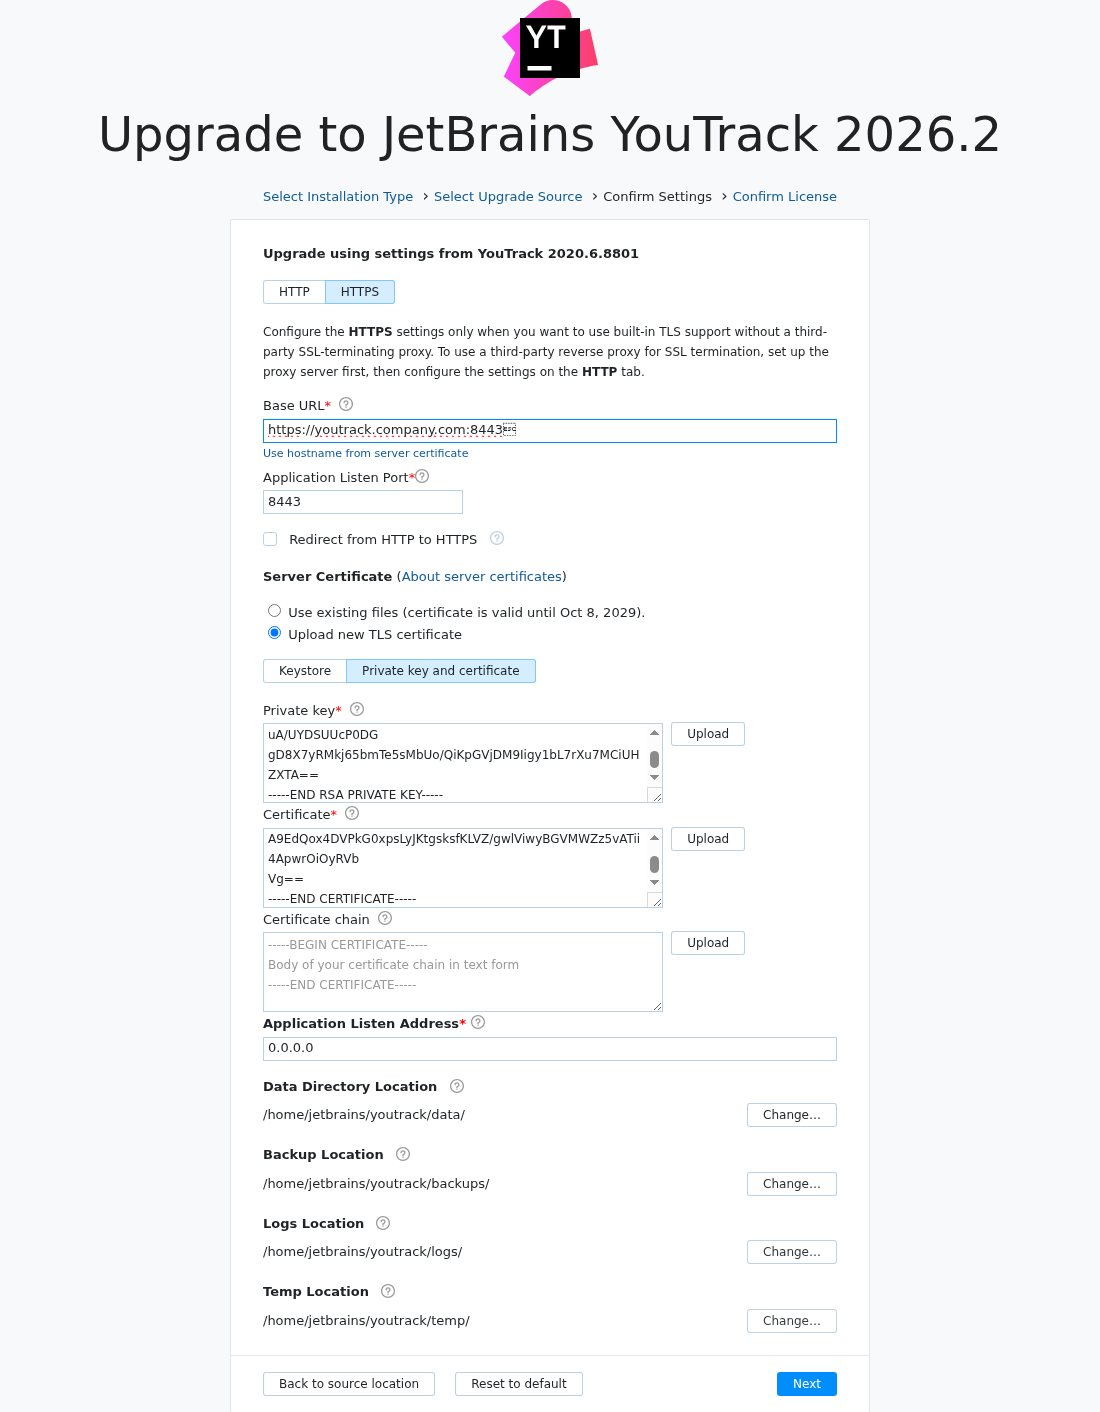
For details about the required values, see TLS Settings.
Review other settings, and adjust if required.
When done, click Upgrade and finish upgrading the YouTrack service.
TLS Settings
The following settings are available when you configure built-in TLS in the web-based Configuration Wizard.
HTTPS Connection Settings
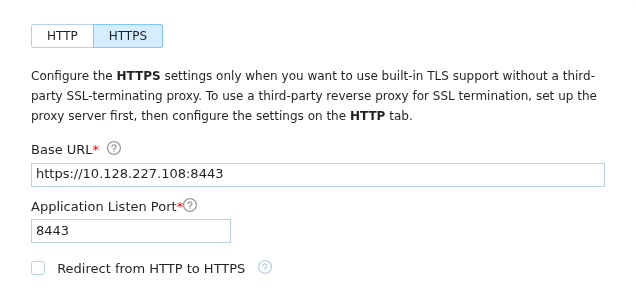
Setting | Description |
|---|---|
Base URL | The web address that users enter to access YouTrack. It includes the HTTPS protocol and the domain name. |
Application Listen Port | The port inside the Docker container where YouTrack listens for incoming HTTPS connections. |
Redirect from HTTP to HTTPS | Enables a non-secure port that redirects all HTTP requests to the secure HTTPS port. |
Server Certificate Settings
Select Keystore to configure TLS with a JKS or PKCS #12 file that contains the server certificate and private key.
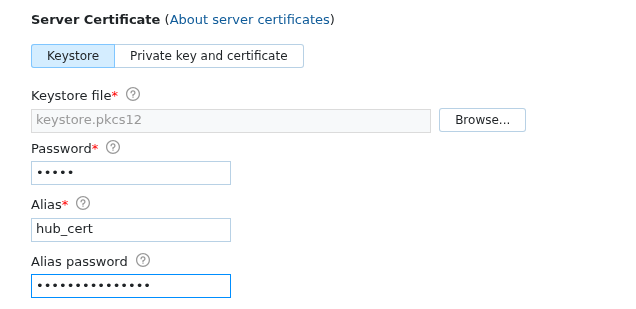
Setting | Description |
|---|---|
Keystore file | The JKS or PKCS #12 file that contains the server certificate and private key. |
Password | The password that protects the keystore file. |
Alias | The alias (known as the "friendly name" for PKCS #12) of the entry in the keystore that contains the server certificate and the private key. If you use a PKCS #12 keystore, and the private key and certificate pair is not marked with a friendly name during generation, enter the sequential number of this pair in the keystore as the Alias. If the keystore contains only one pair of private key and certificate, then enter |
Alias password | The password that was used to encrypt the private key. If the private key is not encrypted, leave the field blank. This field is optional. When left blank, the configuration wizard first checks whether the keystore password is used as the alias password. If this doesn't match, the wizard tries again using an empty value. If neither of these values is a match, an error message informs you that the alias password is incorrect. |
Select Private key and certificate to upload the certificate files separately.
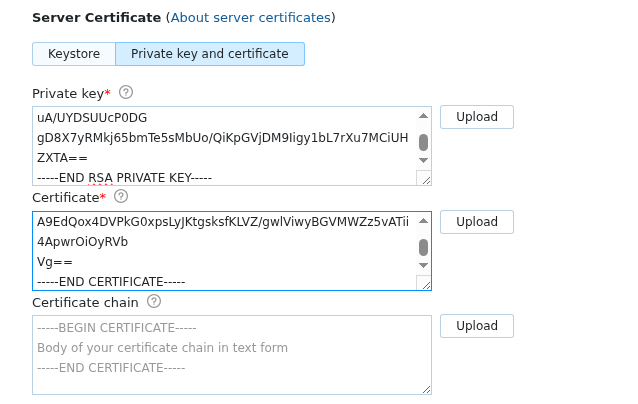
Setting | Description |
|---|---|
Private key | The private key PEM file that secures and verifies connections using your server certificate. |
Certificate | The server certificate PEM file that secures the HTTPS connection to your domain. |
Certificate chain | The chain of intermediate certificates between your server certificate and the root certificate. |
To learn how to generate a private key and certificate, see TLS Server Certificates and Keystores.